 5926373be6
- Updated all packages from ai@6.0.23 to ai@6.0.49
- Added pnpm override to ensure consistent version
- Created changeset for publishing affected packages
1.2 MiB
| title | description | tags | ||||||||
|---|---|---|---|---|---|---|---|---|---|---|
| RAG Agent | Learn how to build a RAG Agent with the AI SDK and Next.js |
|
RAG Agent Guide
In this guide, you will learn how to build a retrieval-augmented generation (RAG) agent.
Before we dive in, let's look at what RAG is, and why we would want to use it.
What is RAG?
RAG stands for retrieval augmented generation. In simple terms, RAG is the process of providing a Large Language Model (LLM) with specific information relevant to the prompt.
Why is RAG important?
While LLMs are powerful, the information they can reason on is restricted to the data they were trained on. This problem becomes apparent when asking an LLM for information outside of their training data, like proprietary data or common knowledge that has occurred after the model’s training cutoff. RAG solves this problem by fetching information relevant to the prompt and then passing that to the model as context.
To illustrate with a basic example, imagine asking the model for your favorite food:
**input**
What is my favorite food?

**generation**
I don't have access to personal information about individuals, including their
favorite foods.
Not surprisingly, the model doesn’t know. But imagine, alongside your prompt, the model received some extra context:
**input**
Respond to the user's prompt using only the provided context.
user prompt: 'What is my favorite food?'
context: user loves chicken nuggets

**generation**
Your favorite food is chicken nuggets!
Just like that, you have augmented the model’s generation by providing relevant information to the query. Assuming the model has the appropriate information, it is now highly likely to return an accurate response to the users query. But how does it retrieve the relevant information? The answer relies on a concept called embedding.
You could fetch any context for your RAG application (eg. Google search). Embeddings and Vector Databases are just a specific retrieval approach to achieve semantic search.Embedding
Embeddings are a way to represent words, phrases, or images as vectors in a high-dimensional space. In this space, similar words are close to each other, and the distance between words can be used to measure their similarity.
In practice, this means that if you embedded the words cat and dog, you would expect them to be plotted close to each other in vector space. The process of calculating the similarity between two vectors is called ‘cosine similarity’ where a value of 1 would indicate high similarity and a value of -1 would indicate high opposition.
As mentioned above, embeddings are a way to represent the semantic meaning of words and phrases. The implication here is that the larger the input to your embedding, the lower quality the embedding will be. So how would you approach embedding content longer than a simple phrase?
Chunking
Chunking refers to the process of breaking down a particular source material into smaller pieces. There are many different approaches to chunking and it’s worth experimenting as the most effective approach can differ by use case. A simple and common approach to chunking (and what you will be using in this guide) is separating written content by sentences.
Once your source material is appropriately chunked, you can embed each one and then store the embedding and the chunk together in a database. Embeddings can be stored in any database that supports vectors. For this tutorial, you will be using Postgres alongside the pgvector plugin.
All Together Now
Combining all of this together, RAG is the process of enabling the model to respond with information outside of it’s training data by embedding a users query, retrieving the relevant source material (chunks) with the highest semantic similarity, and then passing them alongside the initial query as context. Going back to the example where you ask the model for your favorite food, the prompt preparation process would look like this.
By passing the appropriate context and refining the model’s objective, you are able to fully leverage its strengths as a reasoning machine.
Onto the project!
Project Setup
In this project, you will build a agent that will only respond with information that it has within its knowledge base. The agent will be able to both store and retrieve information. This project has many interesting use cases from customer support through to building your own second brain!
This project will use the following stack:
- Next.js 14 (App Router)
- AI SDK
- Vercel AI Gateway
- Drizzle ORM
- Postgres with pgvector
- shadcn-ui and TailwindCSS for styling
Clone Repo
To reduce the scope of this guide, you will be starting with a repository that already has a few things set up for you:
- Drizzle ORM (
lib/db) including an initial migration and a script to migrate (db:migrate) - a basic schema for the
resourcestable (this will be for source material) - a Server Action for creating a
resource
To get started, clone the starter repository with the following command:
<Snippet text={[ 'git clone https://github.com/vercel/ai-sdk-rag-starter', 'cd ai-sdk-rag-starter', ]} />
First things first, run the following command to install the project’s dependencies:
Create Database
You will need a Postgres database to complete this tutorial. If you don't have Postgres setup on your local machine you can:
- Create a free Postgres database with Vercel (recommended - see instructions below); or
- Follow this guide to set it up locally
Setting up Postgres with Vercel
To set up a Postgres instance on your Vercel account:
- Go to Vercel.com and make sure you're logged in
- Navigate to your team homepage
- Click on the Integrations tab
- Click Browse Marketplace
- Look for the Storage option in the sidebar
- Select the Neon option (recommended, but any other PostgreSQL database provider should work)
- Click Install, then click Install again in the top right corner
- On the "Get Started with Neon" page, click Create Database on the right
- Select your region (e.g., Washington, D.C., U.S. East)
- Turn off Auth
- Click Continue
- Name your database (you can use the default name or rename it to something like "RagTutorial")
- Click Create in the bottom right corner
- After seeing "Database created successfully", click Done
- You'll be redirected to your database instance
- In the Quick Start section, click Show secrets
- Copy the full
DATABASE_URLenvironment variable
Migrate Database
Once you have a Postgres database, you need to add the connection string as an environment secret.
Make a copy of the .env.example file and rename it to .env.
Open the new .env file. You should see an item called DATABASE_URL. Copy in your database connection string after the equals sign.
With that set up, you can now run your first database migration. Run the following command:
This will first add the pgvector extension to your database. Then it will create a new table for your resources schema that is defined in lib/db/schema/resources.ts. This schema has four columns: id, content, createdAt, and updatedAt.
Vercel AI Gateway Key
For this guide, you will need a Vercel AI Gateway API key, which gives you access to hundreds of models from different providers with one API key. If you haven't obtained your Vercel AI Gateway API key, you can do so by signing up on the Vercel website.
The AI SDK's Vercel AI Gateway Provider is the default global provider, so you can access models using a simple string in the model configuration. If you prefer to use a specific provider like OpenAI directly, see the [provider management](/docs/ai-sdk-core/provider-management) documentation.Now, open your .env file and add your API Gateway key:
AI_GATEWAY_API_KEY=your-api-key
Replace your-api-key with your actual Vercel AI Gateway API key.
Build
Let’s build a quick task list of what needs to be done:
- Create a table in your database to store embeddings
- Add logic to chunk and create embeddings when creating resources
- Create an agent
- Give the agent tools to query / create resources for it’s knowledge base
Create Embeddings Table
Currently, your application has one table (resources) which has a column (content) for storing content. Remember, each resource (source material) will have to be chunked, embedded, and then stored. Let’s create a table called embeddings to store these chunks.
Create a new file (lib/db/schema/embeddings.ts) and add the following code:
import { nanoid } from '@/lib/utils';
import { index, pgTable, text, varchar, vector } from 'drizzle-orm/pg-core';
import { resources } from './resources';

export const embeddings = pgTable(
  'embeddings',
  {
    id: varchar('id', { length: 191 })
      .primaryKey()
      .$defaultFn(() => nanoid()),
    resourceId: varchar('resource_id', { length: 191 }).references(
      () => resources.id,
      { onDelete: 'cascade' },
    ),
    content: text('content').notNull(),
    embedding: vector('embedding', { dimensions: 1536 }).notNull(),
  },
  table => ({
    embeddingIndex: index('embeddingIndex').using(
      'hnsw',
      table.embedding.op('vector_cosine_ops'),
    ),
  }),
);
This table has four columns:
id- unique identifierresourceId- a foreign key relation to the full source materialcontent- the plain text chunkembedding- the vector representation of the plain text chunk
To perform similarity search, you also need to include an index (HNSW or IVFFlat) on this column for better performance.
To push this change to the database, run the following command:
Add Embedding Logic
Now that you have a table to store embeddings, it’s time to write the logic to create the embeddings.
Create a file with the following command:
Generate Chunks
Remember, to create an embedding, you will start with a piece of source material (unknown length), break it down into smaller chunks, embed each chunk, and then save the chunk to the database. Let’s start by creating a function to break the source material into small chunks.
const generateChunks = (input: string): string[] => {
  return input
    .trim()
    .split('.')
    .filter(i => i !== '');
};
This function will take an input string and split it by periods, filtering out any empty items. This will return an array of strings. It is worth experimenting with different chunking techniques in your projects as the best technique will vary.
Install AI SDK
You will use the AI SDK to create embeddings. This will require two more dependencies, which you can install by running the following command:
This will install the AI SDK and the AI SDK's React hooks.
The AI SDK is designed to be a unified interface to interact with any large language model. This means that you can change model and providers with just one line of code! Learn more about [available providers](/providers) and [building custom providers](/providers/community-providers/custom-providers) in the [providers](/providers) section.Generate Embeddings
Let’s add a function to generate embeddings. Copy the following code into your lib/ai/embedding.ts file.
import { embedMany } from 'ai';

const embeddingModel = 'openai/text-embedding-ada-002';

const generateChunks = (input: string): string[] => {
  return input
    .trim()
    .split('.')
    .filter(i => i !== '');
};

export const generateEmbeddings = async (
  value: string,
): Promise<Array<{ embedding: number[]; content: string }>> => {
  const chunks = generateChunks(value);
  const { embeddings } = await embedMany({
    model: embeddingModel,
    values: chunks,
  });
  return embeddings.map((e, i) => ({ content: chunks[i], embedding: e }));
};
In this code, you first define the model you want to use for the embeddings. In this example, you are using OpenAI’s text-embedding-ada-002 embedding model.
Next, you create an asynchronous function called generateEmbeddings. This function will take in the source material (value) as an input and return a promise of an array of objects, each containing an embedding and content. Within the function, you first generate chunks for the input. Then, you pass those chunks to the embedMany function imported from the AI SDK which will return embeddings of the chunks you passed in. Finally, you map over and return the embeddings in a format that is ready to save in the database.
Update Server Action
Open the file at lib/actions/resources.ts. This file has one function, createResource, which, as the name implies, allows you to create a resource.
'use server';

import {
  NewResourceParams,
  insertResourceSchema,
  resources,
} from '@/lib/db/schema/resources';
import { db } from '../db';

export const createResource = async (input: NewResourceParams) => {
  try {
    const { content } = insertResourceSchema.parse(input);

    const [resource] = await db
      .insert(resources)
      .values({ content })
      .returning();

    return 'Resource successfully created.';
  } catch (e) {
    if (e instanceof Error)
      return e.message.length > 0 ? e.message : 'Error, please try again.';
  }
};
This function is a Server Action, as denoted by the “use server”; directive at the top of the file. This means that it can be called anywhere in your Next.js application. This function will take an input, run it through a Zod schema to ensure it adheres to the correct schema, and then creates a new resource in the database. This is the ideal location to generate and store embeddings of the newly created resources.
Update the file with the following code:
'use server';

import {
  NewResourceParams,
  insertResourceSchema,
  resources,
} from '@/lib/db/schema/resources';
import { db } from '../db';
import { generateEmbeddings } from '../ai/embedding';
import { embeddings as embeddingsTable } from '../db/schema/embeddings';

export const createResource = async (input: NewResourceParams) => {
  try {
    const { content } = insertResourceSchema.parse(input);

    const [resource] = await db
      .insert(resources)
      .values({ content })
      .returning();

    const embeddings = await generateEmbeddings(content);
    await db.insert(embeddingsTable).values(
      embeddings.map(embedding => ({
        resourceId: resource.id,
        ...embedding,
      })),
    );

    return 'Resource successfully created and embedded.';
  } catch (error) {
    return error instanceof Error && error.message.length > 0
      ? error.message
      : 'Error, please try again.';
  }
};
First, you call the generateEmbeddings function created in the previous step, passing in the source material (content). Once you have your embeddings (e) of the source material, you can save them to the database, passing the resourceId alongside each embedding.
Create Root Page
Great! Let's build the frontend. The AI SDK’s useChat hook allows you to easily create a conversational user interface for your agent.
Replace your root page (app/page.tsx) with the following code.
'use client';

import { useChat } from '@ai-sdk/react';
import { useState } from 'react';

export default function Chat() {
  const [input, setInput] = useState('');
  const { messages, sendMessage } = useChat();
  return (
    <div className="flex flex-col w-full max-w-md py-24 mx-auto stretch">
      <div className="space-y-4">
        {messages.map(m => (
          <div key={m.id} className="whitespace-pre-wrap">
            <div>
              <div className="font-bold">{m.role}</div>
              {m.parts.map(part => {
                switch (part.type) {
                  case 'text':
                    return <p>{part.text}</p>;
                }
              })}
            </div>
          </div>
        ))}
      </div>

      <form
        onSubmit={e => {
          e.preventDefault();
          sendMessage({ text: input });
          setInput('');
        }}
      >
        <input
          className="fixed bottom-0 w-full max-w-md p-2 mb-8 border border-gray-300 rounded shadow-xl"
          value={input}
          placeholder="Say something..."
          onChange={e => setInput(e.currentTarget.value)}
        />
      </form>
    </div>
  );
}
The useChat hook enables the streaming of chat messages from your AI provider (you will be using OpenAI via the Vercel AI Gateway), manages the state for chat input, and updates the UI automatically as new messages are received.
Run the following command to start the Next.js dev server:
Head to http://localhost:3000. You should see an empty screen with an input bar floating at the bottom. Try to send a message. The message shows up in the UI for a fraction of a second and then disappears. This is because you haven’t set up the corresponding API route to call the model! By default, useChat will send a POST request to the /api/chat endpoint with the messages as the request body.
You can customize the endpoint in the useChat configuration object
Create API Route
In Next.js, you can create custom request handlers for a given route using Route Handlers. Route Handlers are defined in a route.ts file and can export HTTP methods like GET, POST, PUT, PATCH etc.
Create a file at app/api/chat/route.ts by running the following command:
Open the file and add the following code:
import { convertToModelMessages, streamText, UIMessage } from 'ai';

// Allow streaming responses up to 30 seconds
export const maxDuration = 30;

export async function POST(req: Request) {
  const { messages }: { messages: UIMessage[] } = await req.json();

  const result = streamText({
    model: 'openai/gpt-4o',
    messages: await convertToModelMessages(messages),
  });

  return result.toUIMessageStreamResponse();
}
In this code, you declare and export an asynchronous function called POST. You retrieve the messages from the request body and then pass them to the streamText function imported from the AI SDK, alongside the model you would like to use. Finally, you return the model’s response in UIMessageStreamResponse format.
Head back to the browser and try to send a message again. You should see a response from the model streamed directly in!
Refining your prompt
While you now have a working agent, it isn't doing anything special.
Let’s add system instructions to refine and restrict the model’s behavior. In this case, you want the model to only use information it has retrieved to generate responses. Update your route handler with the following code:
import { convertToModelMessages, streamText, UIMessage } from 'ai';

// Allow streaming responses up to 30 seconds
export const maxDuration = 30;

export async function POST(req: Request) {
  const { messages }: { messages: UIMessage[] } = await req.json();

  const result = streamText({
    model: 'openai/gpt-4o',
    system: `You are a helpful assistant. Check your knowledge base before answering any questions.
    Only respond to questions using information from tool calls.
    if no relevant information is found in the tool calls, respond, "Sorry, I don't know."`,
    messages: await convertToModelMessages(messages),
  });

  return result.toUIMessageStreamResponse();
}
Head back to the browser and try to ask the model what your favorite food is. The model should now respond exactly as you instructed above (“Sorry, I don’t know”) given it doesn’t have any relevant information.
In its current form, your agent is now, well, useless. How do you give the model the ability to add and query information?
Using Tools
A tool is a function that can be called by the model to perform a specific task. You can think of a tool like a program you give to the model that it can run as and when it deems necessary.
Let’s see how you can create a tool to give the model the ability to create, embed and save a resource to your agents’ knowledge base.
Add Resource Tool
Update your route handler with the following code:
import { createResource } from '@/lib/actions/resources';
import { convertToModelMessages, streamText, tool, UIMessage } from 'ai';
import { z } from 'zod';

// Allow streaming responses up to 30 seconds
export const maxDuration = 30;

export async function POST(req: Request) {
  const { messages }: { messages: UIMessage[] } = await req.json();

  const result = streamText({
    model: 'openai/gpt-4o',
    system: `You are a helpful assistant. Check your knowledge base before answering any questions.
    Only respond to questions using information from tool calls.
    if no relevant information is found in the tool calls, respond, "Sorry, I don't know."`,
    messages: await convertToModelMessages(messages),
    tools: {
      addResource: tool({
        description: `add a resource to your knowledge base.
          If the user provides a random piece of knowledge unprompted, use this tool without asking for confirmation.`,
        inputSchema: z.object({
          content: z
            .string()
            .describe('the content or resource to add to the knowledge base'),
        }),
        execute: async ({ content }) => createResource({ content }),
      }),
    },
  });

  return result.toUIMessageStreamResponse();
}
In this code, you define a tool called addResource. This tool has three elements:
- description: description of the tool that will influence when the tool is picked.
- inputSchema: Zod schema that defines the input necessary for the tool to run.
- execute: An asynchronous function that is called with the arguments from the tool call.
In simple terms, on each generation, the model will decide whether it should call the tool. If it deems it should call the tool, it will extract the input and then append a new message to the messages array of type tool-call. The AI SDK will then run the execute function with the parameters provided by the tool-call message.
Head back to the browser and tell the model your favorite food. You should see an empty response in the UI. Did anything happen? Let’s see. Run the following command in a new terminal window.
This will start Drizzle Studio where we can view the rows in our database. You should see a new row in both the embeddings and resources table with your favorite food!
Let’s make a few changes in the UI to communicate to the user when a tool has been called. Head back to your root page (app/page.tsx) and add the following code:
'use client';

import { useChat } from '@ai-sdk/react';
import { useState } from 'react';

export default function Chat() {
  const [input, setInput] = useState('');
  const { messages, sendMessage } = useChat();
  return (
    <div className="flex flex-col w-full max-w-md py-24 mx-auto stretch">
      <div className="space-y-4">
        {messages.map(m => (
          <div key={m.id} className="whitespace-pre-wrap">
            <div>
              <div className="font-bold">{m.role}</div>
              {m.parts.map(part => {
                switch (part.type) {
                  case 'text':
                    return <p>{part.text}</p>;
                  case 'tool-addResource':
                  case 'tool-getInformation':
                    return (
                      <p>
                        call{part.state === 'output-available' ? 'ed' : 'ing'}{' '}
                        tool: {part.type}
                        <pre className="my-4 bg-zinc-100 p-2 rounded-sm">
                          {JSON.stringify(part.input, null, 2)}
                        </pre>
                      </p>
                    );
                }
              })}
            </div>
          </div>
        ))}
      </div>

      <form
        onSubmit={e => {
          e.preventDefault();
          sendMessage({ text: input });
          setInput('');
        }}
      >
        <input
          className="fixed bottom-0 w-full max-w-md p-2 mb-8 border border-gray-300 rounded shadow-xl"
          value={input}
          placeholder="Say something..."
          onChange={e => setInput(e.currentTarget.value)}
        />
      </form>
    </div>
  );
}
With this change, you now conditionally render the tool that has been called directly in the UI. Save the file and head back to browser. Tell the model your favorite movie. You should see which tool is called in place of the model’s typical text response.
Don't worry about the `tool-getInformation` tool case in the switch statement - we'll add that tool in a later section.Improving UX with Multi-Step Calls
It would be nice if the model could summarize the action too. However, technically, once the model calls a tool, it has completed its generation as it ‘generated’ a tool call. How could you achieve this desired behavior?
The AI SDK has a feature called stopWhen which allows stopping conditions when the model generates a tool call. If those stopping conditions haven't been hit, the AI SDK will automatically send tool call results back to the model!
Open your root page (api/chat/route.ts) and add the following key to the streamText configuration object:
import { createResource } from '@/lib/actions/resources';
import {
  convertToModelMessages,
  streamText,
  tool,
  UIMessage,
  stepCountIs,
} from 'ai';
import { z } from 'zod';

// Allow streaming responses up to 30 seconds
export const maxDuration = 30;

export async function POST(req: Request) {
  const { messages }: { messages: UIMessage[] } = await req.json();

  const result = streamText({
    model: 'openai/gpt-4o',
    system: `You are a helpful assistant. Check your knowledge base before answering any questions.
    Only respond to questions using information from tool calls.
    if no relevant information is found in the tool calls, respond, "Sorry, I don't know."`,
    messages: await convertToModelMessages(messages),
    stopWhen: stepCountIs(5),
    tools: {
      addResource: tool({
        description: `add a resource to your knowledge base.
          If the user provides a random piece of knowledge unprompted, use this tool without asking for confirmation.`,
        inputSchema: z.object({
          content: z
            .string()
            .describe('the content or resource to add to the knowledge base'),
        }),
        execute: async ({ content }) => createResource({ content }),
      }),
    },
  });

  return result.toUIMessageStreamResponse();
}
Head back to the browser and tell the model your favorite pizza topping (note: pineapple is not an option). You should see a follow-up response from the model confirming the action.
Retrieve Resource Tool
The model can now add and embed arbitrary information to your knowledge base. However, it still isn’t able to query it. Let’s create a new tool to allow the model to answer questions by finding relevant information in your knowledge base.
To find similar content, you will need to embed the users query, search the database for semantic similarities, then pass those items to the model as context alongside the query. To achieve this, let’s update your embedding logic file (lib/ai/embedding.ts):
import { embed, embedMany } from 'ai';
import { db } from '../db';
import { cosineDistance, desc, gt, sql } from 'drizzle-orm';
import { embeddings } from '../db/schema/embeddings';

const embeddingModel = 'openai/text-embedding-ada-002';

const generateChunks = (input: string): string[] => {
  return input
    .trim()
    .split('.')
    .filter(i => i !== '');
};

export const generateEmbeddings = async (
  value: string,
): Promise<Array<{ embedding: number[]; content: string }>> => {
  const chunks = generateChunks(value);
  const { embeddings } = await embedMany({
    model: embeddingModel,
    values: chunks,
  });
  return embeddings.map((e, i) => ({ content: chunks[i], embedding: e }));
};

export const generateEmbedding = async (value: string): Promise<number[]> => {
  const input = value.replaceAll('\\n', ' ');
  const { embedding } = await embed({
    model: embeddingModel,
    value: input,
  });
  return embedding;
};

export const findRelevantContent = async (userQuery: string) => {
  const userQueryEmbedded = await generateEmbedding(userQuery);
  const similarity = sql<number>`1 - (${cosineDistance(
    embeddings.embedding,
    userQueryEmbedded,
  )})`;
  const similarGuides = await db
    .select({ name: embeddings.content, similarity })
    .from(embeddings)
    .where(gt(similarity, 0.5))
    .orderBy(t => desc(t.similarity))
    .limit(4);
  return similarGuides;
};
In this code, you add two functions:
generateEmbedding: generate a single embedding from an input stringfindRelevantContent: embeds the user’s query, searches the database for similar items, then returns relevant items
With that done, it’s onto the final step: creating the tool.
Go back to your route handler (api/chat/route.ts) and add a new tool called getInformation:
import { createResource } from '@/lib/actions/resources';
import {
  convertToModelMessages,
  streamText,
  tool,
  UIMessage,
  stepCountIs,
} from 'ai';
import { z } from 'zod';
import { findRelevantContent } from '@/lib/ai/embedding';

// Allow streaming responses up to 30 seconds
export const maxDuration = 30;

export async function POST(req: Request) {
  const { messages }: { messages: UIMessage[] } = await req.json();

  const result = streamText({
    model: 'openai/gpt-4o',
    messages: await convertToModelMessages(messages),
    stopWhen: stepCountIs(5),
    system: `You are a helpful assistant. Check your knowledge base before answering any questions.
    Only respond to questions using information from tool calls.
    if no relevant information is found in the tool calls, respond, "Sorry, I don't know."`,
    tools: {
      addResource: tool({
        description: `add a resource to your knowledge base.
          If the user provides a random piece of knowledge unprompted, use this tool without asking for confirmation.`,
        inputSchema: z.object({
          content: z
            .string()
            .describe('the content or resource to add to the knowledge base'),
        }),
        execute: async ({ content }) => createResource({ content }),
      }),
      getInformation: tool({
        description: `get information from your knowledge base to answer questions.`,
        inputSchema: z.object({
          question: z.string().describe('the users question'),
        }),
        execute: async ({ question }) => findRelevantContent(question),
      }),
    },
  });

  return result.toUIMessageStreamResponse();
}
Head back to the browser, refresh the page, and ask for your favorite food. You should see the model call the getInformation tool, and then use the relevant information to formulate a response!
Conclusion
Congratulations, you have successfully built an AI agent that can dynamically add and retrieve information to and from a knowledge base. Throughout this guide, you learned how to create and store embeddings, set up server actions to manage resources, and use tools to extend the capabilities of your agent.
Troubleshooting Migration Error
If you experience an error with the migration, open your migration file (lib/db/migrations/0000_yielding_bloodaxe.sql), cut (copy and remove) the first line, and run it directly on your postgres instance. You should now be able to run the updated migration.
If you're using the Vercel setup above, you can run the command directly by either:
- Going to the Neon console and entering the command there, or
- Going back to the Vercel platform, navigating to the Quick Start section of your database, and finding the PSQL connection command (second tab). This will connect to your instance in the terminal where you can run the command directly.
title: Multi-Modal Agent description: Learn how to build a multi-modal agent that can process images and PDFs with the AI SDK. tags: ['multi-modal', 'agent', 'images', 'pdf', 'vision', 'next']
Multi-Modal Agent
In this guide, you will build a multi-modal agent capable of understanding both images and PDFs.
Multi-modal refers to the ability of the agent to understand and generate responses in multiple formats. In this guide, we'll focus on images and PDFs - two common document types that modern language models can process natively.
For a complete list of providers and their multi-modal capabilities, visit the [providers documentation](/providers/ai-sdk-providers).We'll build this agent using OpenAI's GPT-4o, but the same code works seamlessly with other providers - you can switch between them by changing just one line of code.
Prerequisites
To follow this quickstart, you'll need:
- Node.js 18+ and pnpm installed on your local development machine.
- A Vercel AI Gateway API key.
If you haven't obtained your Vercel AI Gateway API key, you can do so by signing up on the Vercel website.
Create Your Application
Start by creating a new Next.js application. This command will create a new directory named multi-modal-agent and set up a basic Next.js application inside it.
Navigate to the newly created directory:
Install dependencies
Install ai and @ai-sdk/react, the AI SDK package and the AI SDK's React package respectively.
<Tab>
  <Snippet text="bun add ai @ai-sdk/react" dark />
</Tab>
Configure your Vercel AI Gateway API key
Create a .env.local file in your project root and add your Vercel AI Gateway API key. This key authenticates your application with Vercel AI Gateway.
Edit the .env.local file:
AI_GATEWAY_API_KEY=your_api_key_here
Replace your_api_key_here with your actual Vercel AI Gateway API key.
Implementation Plan
To build a multi-modal agent, you will need to:
- Create a Route Handler to handle incoming chat messages and generate responses.
- Wire up the UI to display chat messages, provide a user input, and handle submitting new messages.
- Add the ability to upload images and PDFs and attach them alongside the chat messages.
Create a Route Handler
Create a route handler, app/api/chat/route.ts and add the following code:
import { streamText, convertToModelMessages, type UIMessage } from 'ai';

// Allow streaming responses up to 30 seconds
export const maxDuration = 30;

export async function POST(req: Request) {
  const { messages }: { messages: UIMessage[] } = await req.json();

  const result = streamText({
    model: 'openai/gpt-4o',
    messages: await convertToModelMessages(messages),
  });

  return result.toUIMessageStreamResponse();
}
Let's take a look at what is happening in this code:
- Define an asynchronous
POSTrequest handler and extractmessagesfrom the body of the request. Themessagesvariable contains a history of the conversation between you and the agent and provides the agent with the necessary context to make the next generation. - Convert the UI messages to model messages using
convertToModelMessages, which transforms the UI-focused message format to the format expected by the language model. - Call
streamText, which is imported from theaipackage. This function accepts a configuration object that contains amodelprovider andmessages(converted in step 2). You can pass additional settings to further customize the model's behavior. - The
streamTextfunction returns aStreamTextResult. This result object contains thetoUIMessageStreamResponsefunction which converts the result to a streamed response object. - Finally, return the result to the client to stream the response.
This Route Handler creates a POST request endpoint at /api/chat.
Wire up the UI
Now that you have a Route Handler that can query a large language model (LLM), it's time to setup your frontend. AI SDK UI abstracts the complexity of a chat interface into one hook, useChat.
Update your root page (app/page.tsx) with the following code to show a list of chat messages and provide a user message input:
'use client';

import { useChat } from '@ai-sdk/react';
import { DefaultChatTransport } from 'ai';
import { useState } from 'react';

export default function Chat() {
  const [input, setInput] = useState('');

  const { messages, sendMessage } = useChat({
    transport: new DefaultChatTransport({
      api: '/api/chat',
    }),
  });

  return (
    <div className="flex flex-col w-full max-w-md py-24 mx-auto stretch">
      {messages.map(m => (
        <div key={m.id} className="whitespace-pre-wrap">
          {m.role === 'user' ? 'User: ' : 'AI: '}
          {m.parts.map((part, index) => {
            if (part.type === 'text') {
              return <span key={`${m.id}-text-${index}`}>{part.text}</span>;
            }
            return null;
          })}
        </div>
      ))}

      <form
        onSubmit={async event => {
          event.preventDefault();
          sendMessage({
            role: 'user',
            parts: [{ type: 'text', text: input }],
          });
          setInput('');
        }}
        className="fixed bottom-0 w-full max-w-md mb-8 border border-gray-300 rounded shadow-xl"
      >
        <input
          className="w-full p-2"
          value={input}
          placeholder="Say something..."
          onChange={e => setInput(e.target.value)}
        />
      </form>
    </div>
  );
}
This page utilizes the useChat hook, configured with DefaultChatTransport to specify the API endpoint. The useChat hook provides multiple utility functions and state variables:
messages- the current chat messages (an array of objects withid,role, andpartsproperties).sendMessage- function to send a new message to the AI.- Each message contains a
partsarray that can include text, images, PDFs, and other content types. - Files are converted to data URLs before being sent to maintain compatibility across different environments.
Add File Upload
To make your agent multi-modal, let's add the ability to upload and send both images and PDFs to the model. In v5, files are sent as part of the message's parts array. Files are converted to data URLs using the FileReader API before being sent to the server.
Update your root page (app/page.tsx) with the following code:
'use client';

import { useChat } from '@ai-sdk/react';
import { DefaultChatTransport } from 'ai';
import { useRef, useState } from 'react';
import Image from 'next/image';

async function convertFilesToDataURLs(files: FileList) {
  return Promise.all(
    Array.from(files).map(
      file =>
        new Promise<{
          type: 'file';
          mediaType: string;
          url: string;
        }>((resolve, reject) => {
          const reader = new FileReader();
          reader.onload = () => {
            resolve({
              type: 'file',
              mediaType: file.type,
              url: reader.result as string,
            });
          };
          reader.onerror = reject;
          reader.readAsDataURL(file);
        }),
    ),
  );
}

export default function Chat() {
  const [input, setInput] = useState('');
  const [files, setFiles] = useState<FileList | undefined>(undefined);
  const fileInputRef = useRef<HTMLInputElement>(null);

  const { messages, sendMessage } = useChat({
    transport: new DefaultChatTransport({
      api: '/api/chat',
    }),
  });

  return (
    <div className="flex flex-col w-full max-w-md py-24 mx-auto stretch">
      {messages.map(m => (
        <div key={m.id} className="whitespace-pre-wrap">
          {m.role === 'user' ? 'User: ' : 'AI: '}
          {m.parts.map((part, index) => {
            if (part.type === 'text') {
              return <span key={`${m.id}-text-${index}`}>{part.text}</span>;
            }
            if (part.type === 'file' && part.mediaType?.startsWith('image/')) {
              return (
                <Image
                  key={`${m.id}-image-${index}`}
                  src={part.url}
                  width={500}
                  height={500}
                  alt={`attachment-${index}`}
                />
              );
            }
            if (part.type === 'file' && part.mediaType === 'application/pdf') {
              return (
                <iframe
                  key={`${m.id}-pdf-${index}`}
                  src={part.url}
                  width={500}
                  height={600}
                  title={`pdf-${index}`}
                />
              );
            }
            return null;
          })}
        </div>
      ))}

      <form
        className="fixed bottom-0 w-full max-w-md p-2 mb-8 border border-gray-300 rounded shadow-xl space-y-2"
        onSubmit={async event => {
          event.preventDefault();

          const fileParts =
            files && files.length > 0
              ? await convertFilesToDataURLs(files)
              : [];

          sendMessage({
            role: 'user',
            parts: [{ type: 'text', text: input }, ...fileParts],
          });

          setInput('');
          setFiles(undefined);

          if (fileInputRef.current) {
            fileInputRef.current.value = '';
          }
        }}
      >
        <input
          type="file"
          accept="image/*,application/pdf"
          className=""
          onChange={event => {
            if (event.target.files) {
              setFiles(event.target.files);
            }
          }}
          multiple
          ref={fileInputRef}
        />
        <input
          className="w-full p-2"
          value={input}
          placeholder="Say something..."
          onChange={e => setInput(e.target.value)}
        />
      </form>
    </div>
  );
}
In this code, you:
- Add a helper function
convertFilesToDataURLsto convert file uploads to data URLs. - Create state to hold the input text, files, and a ref to the file input field.
- Configure
useChatwithDefaultChatTransportto specify the API endpoint. - Display messages using the
partsarray structure, rendering text, images, and PDFs appropriately. - Update the
onSubmitfunction to send messages with thesendMessagefunction, including both text and file parts. - Add a file input field to the form, including an
onChangehandler to handle updating the files state.
Running Your Application
With that, you have built everything you need for your multi-modal agent! To start your application, use the command:
Head to your browser and open http://localhost:3000. You should see an input field and a button to upload files.
Try uploading an image or PDF and asking the model questions about it. Watch as the model's response is streamed back to you!
Using Other Providers
With the AI SDK's unified provider interface you can easily switch to other providers that support multi-modal capabilities:
// Using Anthropic
const result = streamText({
  model: 'anthropic/claude-sonnet-4-20250514',
  messages: await convertToModelMessages(messages),
});

// Using Google
const result = streamText({
  model: 'google/gemini-2.5-flash',
  messages: await convertToModelMessages(messages),
});
Install the provider package (@ai-sdk/anthropic or @ai-sdk/google) and update your API keys in .env.local. The rest of your code remains the same.
Where to Next?
You've built a multi-modal AI agent using the AI SDK! Experiment and extend the functionality of this application further by exploring tool calling.
title: Slackbot Agent Guide description: Learn how to use the AI SDK to build an AI Agent in Slack. tags: ['agents', 'chatbot']
Building an AI Agent in Slack with the AI SDK
In this guide, you will learn how to build a Slackbot powered by the AI SDK. The bot will be able to respond to direct messages and mentions in channels using the full context of the thread.
Slack App Setup
Before we start building, you'll need to create and configure a Slack app:
- Go to api.slack.com/apps
- Click "Create New App" and choose "From scratch"
- Give your app a name and select your workspace
- Under "OAuth & Permissions", add the following bot token scopes:
app_mentions:readchat:writeim:historyim:writeassistant:write
- Install the app to your workspace (button under "OAuth Tokens" subsection)
- Copy the Bot User OAuth Token and Signing Secret for the next step
- Under App Home -> Show Tabs -> Chat Tab, check "Allow users to send Slash commands and messages from the chat tab"
Project Setup
This project uses the following stack:
Getting Started
- Clone the repository and check out the
starterbranch
<Snippet text={[ 'git clone https://github.com/vercel-labs/ai-sdk-slackbot.git', 'cd ai-sdk-slackbot', 'git checkout starter', ]} />
- Install dependencies
<Snippet text={['pnpm install']} />
Project Structure
The starter repository already includes:
- Slack utilities (
lib/slack-utils.ts) including functions for validating incoming requests, converting Slack threads to AI SDK compatible message formats, and getting the Slackbot's user ID - General utility functions (
lib/utils.ts) including initial Exa setup - Files to handle the different types of Slack events (
lib/handle-messages.tsandlib/handle-app-mention.ts) - An API endpoint (
POST) for Slack events (api/events.ts)
Event Handler
First, let's take a look at our API route (api/events.ts):
import type { SlackEvent } from '@slack/web-api';
import {
  assistantThreadMessage,
  handleNewAssistantMessage,
} from '../lib/handle-messages';
import { waitUntil } from '@vercel/functions';
import { handleNewAppMention } from '../lib/handle-app-mention';
import { verifyRequest, getBotId } from '../lib/slack-utils';

export async function POST(request: Request) {
  const rawBody = await request.text();
  const payload = JSON.parse(rawBody);
  const requestType = payload.type as 'url_verification' | 'event_callback';

  // See https://api.slack.com/events/url_verification
  if (requestType === 'url_verification') {
    return new Response(payload.challenge, { status: 200 });
  }

  await verifyRequest({ requestType, request, rawBody });

  try {
    const botUserId = await getBotId();

    const event = payload.event as SlackEvent;

    if (event.type === 'app_mention') {
      waitUntil(handleNewAppMention(event, botUserId));
    }

    if (event.type === 'assistant_thread_started') {
      waitUntil(assistantThreadMessage(event));
    }

    if (
      event.type === 'message' &&
      !event.subtype &&
      event.channel_type === 'im' &&
      !event.bot_id &&
      !event.bot_profile &&
      event.bot_id !== botUserId
    ) {
      waitUntil(handleNewAssistantMessage(event, botUserId));
    }

    return new Response('Success!', { status: 200 });
  } catch (error) {
    console.error('Error generating response', error);
    return new Response('Error generating response', { status: 500 });
  }
}
This file defines a POST function that handles incoming requests from Slack. First, you check the request type to see if it's a URL verification request. If it is, you respond with the challenge string provided by Slack. If it's an event callback, you verify the request and then have access to the event data. This is where you can implement your event handling logic.
You then handle three types of events: app_mention, assistant_thread_started, and message:
- For
app_mention, you callhandleNewAppMentionwith the event and the bot user ID. - For
assistant_thread_started, you callassistantThreadMessagewith the event. - For
message, you callhandleNewAssistantMessagewith the event and the bot user ID.
Finally, you respond with a success message to Slack. Note, each handler function is wrapped in a waitUntil function. Let's take a look at what this means and why it's important.
The waitUntil Function
Slack expects a response within 3 seconds to confirm the request is being handled. However, generating AI responses can take longer. If you don't respond to the Slack request within 3 seconds, Slack will send another request, leading to another invocation of your API route, another call to the LLM, and ultimately another response to the user. To solve this, you can use the waitUntil function, which allows you to run your AI logic after the response is sent, without blocking the response itself.
This means, your API endpoint will:
- Immediately respond to Slack (within 3 seconds)
- Continue processing the message asynchronously
- Send the AI response when it's ready
Event Handlers
Let's look at how each event type is currently handled.
App Mentions
When a user mentions your bot in a channel, the app_mention event is triggered. The handleNewAppMention function in handle-app-mention.ts processes these mentions:
- Checks if the message is from a bot to avoid infinite response loops
- Creates a status updater to show the bot is "thinking"
- If the mention is in a thread, it retrieves the thread history
- Calls the LLM with the message content (using the
generateResponsefunction which you will implement in the next section) - Updates the initial "thinking" message with the AI response
Here's the code for the handleNewAppMention function:
import { AppMentionEvent } from '@slack/web-api';
import { client, getThread } from './slack-utils';
import { generateResponse } from './ai';

const updateStatusUtil = async (
  initialStatus: string,
  event: AppMentionEvent,
) => {
  const initialMessage = await client.chat.postMessage({
    channel: event.channel,
    thread_ts: event.thread_ts ?? event.ts,
    text: initialStatus,
  });

  if (!initialMessage || !initialMessage.ts)
    throw new Error('Failed to post initial message');

  const updateMessage = async (status: string) => {
    await client.chat.update({
      channel: event.channel,
      ts: initialMessage.ts as string,
      text: status,
    });
  };
  return updateMessage;
};

export async function handleNewAppMention(
  event: AppMentionEvent,
  botUserId: string,
) {
  console.log('Handling app mention');
  if (event.bot_id || event.bot_id === botUserId || event.bot_profile) {
    console.log('Skipping app mention');
    return;
  }

  const { thread_ts, channel } = event;
  const updateMessage = await updateStatusUtil('is thinking...', event);

  if (thread_ts) {
    const messages = await getThread(channel, thread_ts, botUserId);
    const result = await generateResponse(messages, updateMessage);
    updateMessage(result);
  } else {
    const result = await generateResponse(
      [{ role: 'user', content: event.text }],
      updateMessage,
    );
    updateMessage(result);
  }
}
Now let's see how new assistant threads and messages are handled.
Assistant Thread Messages
When a user starts a thread with your assistant, the assistant_thread_started event is triggered. The assistantThreadMessage function in handle-messages.ts handles this:
- Posts a welcome message to the thread
- Sets up suggested prompts to help users get started
Here's the code for the assistantThreadMessage function:
import type { AssistantThreadStartedEvent } from '@slack/web-api';
import { client } from './slack-utils';

export async function assistantThreadMessage(
  event: AssistantThreadStartedEvent,
) {
  const { channel_id, thread_ts } = event.assistant_thread;
  console.log(`Thread started: ${channel_id} ${thread_ts}`);
  console.log(JSON.stringify(event));

  await client.chat.postMessage({
    channel: channel_id,
    thread_ts: thread_ts,
    text: "Hello, I'm an AI assistant built with the AI SDK by Vercel!",
  });

  await client.assistant.threads.setSuggestedPrompts({
    channel_id: channel_id,
    thread_ts: thread_ts,
    prompts: [
      {
        title: 'Get the weather',
        message: 'What is the current weather in London?',
      },
      {
        title: 'Get the news',
        message: 'What is the latest Premier League news from the BBC?',
      },
    ],
  });
}
Direct Messages
For direct messages to your bot, the message event is triggered and the event is handled by the handleNewAssistantMessage function in handle-messages.ts:
- Verifies the message isn't from a bot
- Updates the status to show the response is being generated
- Retrieves the conversation history
- Calls the LLM with the conversation context
- Posts the LLM's response to the thread
Here's the code for the handleNewAssistantMessage function:
import type { GenericMessageEvent } from '@slack/web-api';
import { client, getThread } from './slack-utils';
import { generateResponse } from './ai';

export async function handleNewAssistantMessage(
  event: GenericMessageEvent,
  botUserId: string,
) {
  if (
    event.bot_id ||
    event.bot_id === botUserId ||
    event.bot_profile ||
    !event.thread_ts
  )
    return;

  const { thread_ts, channel } = event;
  const updateStatus = updateStatusUtil(channel, thread_ts);
  updateStatus('is thinking...');

  const messages = await getThread(channel, thread_ts, botUserId);
  const result = await generateResponse(messages, updateStatus);

  await client.chat.postMessage({
    channel: channel,
    thread_ts: thread_ts,
    text: result,
    unfurl_links: false,
    blocks: [
      {
        type: 'section',
        text: {
          type: 'mrkdwn',
          text: result,
        },
      },
    ],
  });

  updateStatus('');
}
With the event handlers in place, let's now implement the AI logic.
Implementing AI Logic
The core of our application is the generateResponse function in lib/generate-response.ts, which processes messages and generates responses using the AI SDK.
Here's how to implement it:
import { generateText, ModelMessage } from 'ai';
__PROVIDER_IMPORT__;

export const generateResponse = async (
  messages: ModelMessage[],
  updateStatus?: (status: string) => void,
) => {
  const { text } = await generateText({
    model: __MODEL__,
    system: `You are a Slack bot assistant. Keep your responses concise and to the point.
    - Do not tag users.
    - Current date is: ${new Date().toISOString().split('T')[0]}`,
    messages,
  });

  // Convert markdown to Slack mrkdwn format
  return text.replace(/\[(.*?)\]\((.*?)\)/g, '<$2|$1>').replace(/\*\*/g, '*');
};
This basic implementation:
- Uses the AI SDK's
generateTextfunction to call Anthropic'sclaude-sonnet-4.5model - Provides a system prompt to guide the model's behavior
- Formats the response for Slack's markdown format
Enhancing with Tools
The real power of the AI SDK comes from tools that enable your bot to perform actions. Let's add two useful tools:
import { generateText, tool, ModelMessage, stepCountIs } from 'ai';
__PROVIDER_IMPORT__;
import { z } from 'zod';
import { exa } from './utils';
export const generateResponse = async (
messages: ModelMessage[],
updateStatus?: (status: string) => void,
) => {
const { text } = await generateText({
model: __MODEL__,
system: `You are a Slack bot assistant. Keep your responses concise and to the point.
- Do not tag users.
- Current date is: ${new Date().toISOString().split('T')[0]}
- Always include sources in your final response if you use web search.`,
messages,
stopWhen: stepCountIs(10),
tools: {
getWeather: tool({
description: 'Get the current weather at a location',
inputSchema: z.object({
latitude: z.number(),
longitude: z.number(),
city: z.string(),
}),
execute: async ({ latitude, longitude, city }) => {
updateStatus?.(`is getting weather for ${city}...`);
const response = await fetch(
`https://api.open-meteo.com/v1/forecast?latitude=${latitude}&longitude=${longitude}¤t=temperature_2m,weathercode,relativehumidity_2m&timezone=auto`,
);
const weatherData = await response.json();
return {
temperature: weatherData.current.temperature_2m,
weatherCode: weatherData.current.weathercode,
humidity: weatherData.current.relativehumidity_2m,
city,
};
},
}),
searchWeb: tool({
description: 'Use this to search the web for information',
inputSchema: z.object({
query: z.string(),
specificDomain: z
.string()
.nullable()
.describe(
'a domain to search if the user specifies e.g. bbc.com. Should be only the domain name without the protocol',
),
}),
execute: async ({ query, specificDomain }) => {
updateStatus?.(`is searching the web for ${query}...`);
const { results } = await exa.searchAndContents(query, {
livecrawl: 'always',
numResults: 3,
includeDomains: specificDomain ? [specificDomain] : undefined,
});
return {
results: results.map(result => ({
title: result.title,
url: result.url,
snippet: result.text.slice(0, 1000),
})),
};
},
}),
},
});
// Convert markdown to Slack mrkdwn format
return text.replace(/\[(.*?)\]\((.*?)\)/g, '<$2|$1>').replace(/\*\*/g, '*');
};
In this updated implementation:
-
You added two tools:
getWeather: Fetches weather data for a specified locationsearchWeb: Searches the web for information using the Exa API
-
You set
stopWhen: stepCountIs(10)to enable multi-step conversations. This defines the stopping conditions of your agent, when the model generates a tool call. This will automatically send any tool results back to the LLM to trigger additional tool calls or responses as the LLM deems necessary. This turns your LLM call from a one-off operation into a multi-step agentic flow.
How It Works
When a user interacts with your bot:
- The Slack event is received and processed by your API endpoint
- The user's message and the thread history is passed to the
generateResponsefunction - The AI SDK processes the message and may invoke tools as needed
- The response is formatted for Slack and sent back to the user
The tools are automatically invoked based on the user's intent. For example, if a user asks "What's the weather in London?", the AI will:
- Recognize this as a weather query
- Call the
getWeathertool with London's coordinates (inferred by the LLM) - Process the weather data
- Generate a final response, answering the user's question
Deploying the App
- Install the Vercel CLI
<Snippet text={['pnpm install -g vercel']} />
- Deploy the app
<Snippet text={['vercel deploy']} />
- Copy the deployment URL and update the Slack app's Event Subscriptions to point to your Vercel URL
- Go to your project's deployment settings (Your project -> Settings -> Environment Variables) and add your environment variables
SLACK_BOT_TOKEN=your_slack_bot_token
SLACK_SIGNING_SECRET=your_slack_signing_secret
OPENAI_API_KEY=your_openai_api_key
EXA_API_KEY=your_exa_api_key
- Head back to the https://api.slack.com/ and navigate to the "Event Subscriptions" page. Enable events and add your deployment URL.
https://your-vercel-url.vercel.app/api/events
- On the Events Subscription page, subscribe to the following events.
app_mentionassistant_thread_startedmessage:im
Finally, head to Slack and test the app by sending a message to the bot.
Next Steps
You've built a Slack chatbot powered by the AI SDK! Here are some ways you could extend it:
- Add memory for specific users to give the LLM context of previous interactions
- Implement more tools like database queries or knowledge base searches
- Add support for rich message formatting with blocks
- Add analytics to track usage patterns
title: Natural Language Postgres description: Learn how to build a Next.js app that lets you talk to a PostgreSQL database in natural language. tags: ['agents', 'next', 'tools']
Natural Language Postgres Guide
In this guide, you will learn how to build an app that uses AI to interact with a PostgreSQL database using natural language.
The application will:
- Generate SQL queries from a natural language input
- Explain query components in plain English
- Create a chart to visualise query results
You can find a completed version of this project at natural-language-postgres.vercel.app.
Project setup
This project uses the following stack:
- Next.js (App Router)
- AI SDK
- OpenAI
- Zod
- Postgres with Vercel Postgres
- shadcn-ui and TailwindCSS for styling
- Recharts for data visualization
Clone repo
To focus on the AI-powered functionality rather than project setup and configuration we've prepared a starter repository which includes a database schema and a few components.
Clone the starter repository and check out the starter branch:
<Snippet text={[ 'git clone https://github.com/vercel-labs/natural-language-postgres', 'cd natural-language-postgres', 'git checkout starter', ]} />
Project setup and data
Let's set up the project and seed the database with the dataset:
- Install dependencies:
<Snippet text={['pnpm install']} />
- Copy the example environment variables file:
<Snippet text={['cp .env.example .env']} />
- Add your environment variables to
.env:
OPENAI_API_KEY="your_api_key_here"
POSTGRES_URL="..."
POSTGRES_PRISMA_URL="..."
POSTGRES_URL_NO_SSL="..."
POSTGRES_URL_NON_POOLING="..."
POSTGRES_USER="..."
POSTGRES_HOST="..."
POSTGRES_PASSWORD="..."
POSTGRES_DATABASE="..."
- This project uses CB Insights' Unicorn Companies dataset. You can download the dataset by following these instructions:
- Navigate to CB Insights Unicorn Companies
- Enter in your email. You will receive a link to download the dataset.
- Save it as
unicorns.csvin your project root
Setting up Postgres with Vercel
To set up a Postgres instance on your Vercel account:
- Go to Vercel.com and make sure you're logged in
- Navigate to your team homepage
- Click on the Integrations tab
- Click Browse Marketplace
- Look for the Storage option in the sidebar
- Select the Neon option (recommended, but any other PostgreSQL database provider should work)
- Click Install, then click Install again in the top right corner
- On the "Get Started with Neon" page, click Create Database on the right
- Select your region (e.g., Washington, D.C., U.S. East)
- Turn off Auth
- Click Continue
- Name your database (you can use the default name or rename it to something like "NaturalLanguagePostgres")
- Click Create in the bottom right corner
- After seeing "Database created successfully", click Done
- You'll be redirected to your database instance
- In the Quick Start section, click Show secrets
- Copy the full
DATABASE_URLenvironment variable and use it to populate the Postgres environment variables in your.envfile
About the dataset
The Unicorn List dataset contains the following information about unicorn startups (companies with a valuation above $1bn):
- Company name
- Valuation
- Date joined (unicorn status)
- Country
- City
- Industry
- Select investors
This dataset contains over 1000 rows of data over 7 columns, giving us plenty of structured data to analyze. This makes it perfect for exploring various SQL queries that can reveal interesting insights about the unicorn startup ecosystem.
- Now that you have the dataset downloaded and added to your project, you can initialize the database with the following command:
<Snippet text={['pnpm run seed']} />
Note: this step can take a little while. You should see a message indicating the Unicorns table has been created and then that the database has been seeded successfully.
Remember, the dataset should be named `unicorns.csv` and located in root of your project.- Start the development server:
<Snippet text={['pnpm run dev']} />
Your application should now be running at http://localhost:3000.
Project structure
The starter repository already includes everything that you will need, including:
- Database seed script (
lib/seed.ts) - Basic components built with shadcn/ui (
components/) - Function to run SQL queries (
app/actions.ts) - Type definitions for the database schema (
lib/types.ts)
Existing components
The application contains a single page in app/page.tsx that serves as the main interface.
At the top, you'll find a header (header.tsx) displaying the application title and description. Below that is an input field and search button (search.tsx) where you can enter natural language queries.
Initially, the page shows a collection of suggested example queries (suggested-queries.tsx) that you can click to quickly try out the functionality.
When you submit a query:
- The suggested queries section disappears and a loading state appears
- Once complete, a card appears with "TODO - IMPLEMENT ABOVE" (
query-viewer.tsx) which will eventually show your generated SQL - Below that is an empty results area with "No results found" (
results.tsx)
After you implement the core functionality:
- The results section will display data in a table format
- A toggle button will allow switching between table and chart views
- The chart view will visualize your query results
Let's implement the AI-powered functionality to bring it all together.
Building the application
As a reminder, this application will have three main features:
- Generate SQL queries from natural language
- Create a chart from the query results
- Explain SQL queries in plain English
For each of these features, you'll use the AI SDK via Server Actions to interact with OpenAI's GPT-4o and GPT-4o-mini models. Server Actions are a powerful React Server Component feature that allows you to call server-side functions directly from your frontend code.
Let's start with generating a SQL query from natural language.
Generate SQL queries
Providing context
For the model to generate accurate SQL queries, it needs context about your database schema, tables, and relationships. You will communicate this information through a prompt that should include:
- Schema information
- Example data formats
- Available SQL operations
- Best practices for query structure
- Nuanced advice for specific fields
Let's write a prompt that includes all of this information:
You are a SQL (postgres) and data visualization expert. Your job is to help the user write a SQL query to retrieve the data they need. The table schema is as follows:

unicorns (
  id SERIAL PRIMARY KEY,
  company VARCHAR(255) NOT NULL UNIQUE,
  valuation DECIMAL(10, 2) NOT NULL,
  date_joined DATE,
  country VARCHAR(255) NOT NULL,
  city VARCHAR(255) NOT NULL,
  industry VARCHAR(255) NOT NULL,
  select_investors TEXT NOT NULL
);

Only retrieval queries are allowed.

For things like industry, company names and other string fields, use the ILIKE operator and convert both the search term and the field to lowercase using LOWER() function. For example: LOWER(industry) ILIKE LOWER('%search_term%').

Note: select_investors is a comma-separated list of investors. Trim whitespace to ensure you're grouping properly. Note, some fields may be null or have only one value.
When answering questions about a specific field, ensure you are selecting the identifying column (ie. what is Vercel's valuation would select company and valuation').

The industries available are:
- healthcare & life sciences
- consumer & retail
- financial services
- enterprise tech
- insurance
- media & entertainment
- industrials
- health

If the user asks for a category that is not in the list, infer based on the list above.

Note: valuation is in billions of dollars so 10b would be 10.0.
Note: if the user asks for a rate, return it as a decimal. For example, 0.1 would be 10%.

If the user asks for 'over time' data, return by year.

When searching for UK or USA, write out United Kingdom or United States respectively.

EVERY QUERY SHOULD RETURN QUANTITATIVE DATA THAT CAN BE PLOTTED ON A CHART! There should always be at least two columns. If the user asks for a single column, return the column and the count of the column. If the user asks for a rate, return the rate as a decimal. For example, 0.1 would be 10%.
There are several important elements of this prompt:
- Schema description helps the model understand exactly what data fields to work with
- Includes rules for handling queries based on common SQL patterns - for example, always using ILIKE for case-insensitive string matching
- Explains how to handle edge cases in the dataset, like dealing with the comma-separated investors field and ensuring whitespace is properly handled
- Instead of having the model guess at industry categories, it provides the exact list that exists in the data, helping avoid mismatches
- The prompt helps standardize data transformations - like knowing to interpret "10b" as "10.0" billion dollars, or that rates should be decimal values
- Clear rules ensure the query output will be chart-friendly by always including at least two columns of data that can be plotted
This prompt structure provides a strong foundation for query generation, but you should experiment and iterate based on your specific needs and the model you're using.
Create a Server Action
With the prompt done, let's create a Server Action.
Open app/actions.ts. You should see one action already defined (runGeneratedSQLQuery).
Add a new action. This action should be asynchronous and take in one parameter - the natural language query.
/* ...rest of the file... */

export const generateQuery = async (input: string) => {};
In this action, you'll use the generateObject function from the AI SDK which allows you to constrain the model's output to a pre-defined schema. This process, sometimes called structured output, ensures the model returns only the SQL query without any additional prefixes, explanations, or formatting that would require manual parsing.
/* ...other imports... */
import { generateObject } from 'ai';
import { z } from 'zod';

/* ...rest of the file... */

export const generateQuery = async (input: string) => {
  'use server';
  try {
    const result = await generateObject({
      model: 'openai/gpt-4o',
      system: `You are a SQL (postgres) ...`, // SYSTEM PROMPT AS ABOVE - OMITTED FOR BREVITY
      prompt: `Generate the query necessary to retrieve the data the user wants: ${input}`,
      schema: z.object({
        query: z.string(),
      }),
    });
    return result.object.query;
  } catch (e) {
    console.error(e);
    throw new Error('Failed to generate query');
  }
};
Note, you are constraining the output to a single string field called query using zod, a TypeScript schema validation library. This will ensure the model only returns the SQL query itself. The resulting generated query will then be returned.
Update the frontend
With the Server Action in place, you can now update the frontend to call this action when the user submits a natural language query. In the root page (app/page.tsx), you should see a handleSubmit function that is called when the user submits a query.
Import the generateQuery function and call it with the user's input.
/* ...other imports... */
import { runGeneratedSQLQuery, generateQuery } from './actions';

/* ...rest of the file... */

const handleSubmit = async (suggestion?: string) => {
  clearExistingData();

  const question = suggestion ?? inputValue;
  if (inputValue.length === 0 && !suggestion) return;

  if (question.trim()) {
    setSubmitted(true);
  }

  setLoading(true);
  setLoadingStep(1);
  setActiveQuery('');

  try {
    const query = await generateQuery(question);

    if (query === undefined) {
      toast.error('An error occurred. Please try again.');
      setLoading(false);
      return;
    }

    setActiveQuery(query);
    setLoadingStep(2);

    const companies = await runGeneratedSQLQuery(query);
    const columns = companies.length > 0 ? Object.keys(companies[0]) : [];
    setResults(companies);
    setColumns(columns);

    setLoading(false);
  } catch (e) {
    toast.error('An error occurred. Please try again.');
    setLoading(false);
  }
};

/* ...rest of the file... */
Now, when the user submits a natural language query (ie. "how many unicorns are from San Francisco?"), that question will be sent to your newly created Server Action. The Server Action will call the model, passing in your system prompt and the users query, and return the generated SQL query in a structured format. This query is then passed to the runGeneratedSQLQuery action to run the query against your database. The results are then saved in local state and displayed to the user.
Save the file, make sure the dev server is running, and then head to localhost:3000 in your browser. Try submitting a natural language query and see the generated SQL query and results. You should see a SQL query generated and displayed under the input field. You should also see the results of the query displayed in a table below the input field.
Try clicking the SQL query to see the full query if it's too long to display in the input field. You should see a button on the right side of the input field with a question mark icon. Clicking this button currently does nothing, but you'll add the "explain query" functionality to it in the next step.
Explain SQL Queries
Next, let's add the ability to explain SQL queries in plain English. This feature helps users understand how the generated SQL query works by breaking it down into logical sections. As with the SQL query generation, you'll need a prompt to guide the model when explaining queries.
Let's craft a prompt for the explain query functionality:
You are a SQL (postgres) expert. Your job is to explain to the user write a SQL query you wrote to retrieve the data they asked for. The table schema is as follows:
unicorns (
  id SERIAL PRIMARY KEY,
  company VARCHAR(255) NOT NULL UNIQUE,
  valuation DECIMAL(10, 2) NOT NULL,
  date_joined DATE,
  country VARCHAR(255) NOT NULL,
  city VARCHAR(255) NOT NULL,
  industry VARCHAR(255) NOT NULL,
  select_investors TEXT NOT NULL
);

When you explain you must take a section of the query, and then explain it. Each "section" should be unique. So in a query like: "SELECT * FROM unicorns limit 20", the sections could be "SELECT *", "FROM UNICORNS", "LIMIT 20".
If a section doesn't have any explanation, include it, but leave the explanation empty.
Like the prompt for generating SQL queries, you provide the model with the schema of the database. Additionally, you provide an example of what each section of the query might look like. This helps the model understand the structure of the query and how to break it down into logical sections.
Create a Server Action
Add a new Server Action to generate explanations for SQL queries.
This action takes two parameters - the original natural language input and the generated SQL query.
/* ...rest of the file... */

export const explainQuery = async (input: string, sqlQuery: string) => {
  'use server';
  try {
    const result = await generateObject({
      model: 'openai/gpt-4o',
      system: `You are a SQL (postgres) expert. ...`, // SYSTEM PROMPT AS ABOVE - OMITTED FOR BREVITY
      prompt: `Explain the SQL query you generated to retrieve the data the user wanted. Assume the user is not an expert in SQL. Break down the query into steps. Be concise.

      User Query:
      ${input}

      Generated SQL Query:
      ${sqlQuery}`,
    });
    return result.object;
  } catch (e) {
    console.error(e);
    throw new Error('Failed to generate query');
  }
};
This action uses the generateObject function again. However, you haven't defined the schema yet. Let's define it in another file so it can also be used as a type in your components.
Update your lib/types.ts file to include the schema for the explanations:
import { z } from 'zod';

/* ...rest of the file... */

export const explanationSchema = z.object({
  section: z.string(),
  explanation: z.string(),
});

export type QueryExplanation = z.infer<typeof explanationSchema>;
This schema defines the structure of the explanation that the model will generate. Each explanation will have a section and an explanation. The section is the part of the query being explained, and the explanation is the plain English explanation of that section. Go back to your actions.ts file and import and use the explanationSchema:
// other imports
import { explanationSchema } from '@/lib/types';

/* ...rest of the file... */

export const explainQuery = async (input: string, sqlQuery: string) => {
  'use server';
  try {
    const result = await generateObject({
      model: 'openai/gpt-4o',
      system: `You are a SQL (postgres) expert. ...`, // SYSTEM PROMPT AS ABOVE - OMITTED FOR BREVITY
      prompt: `Explain the SQL query you generated to retrieve the data the user wanted. Assume the user is not an expert in SQL. Break down the query into steps. Be concise.

      User Query:
      ${input}

      Generated SQL Query:
      ${sqlQuery}`,
      schema: explanationSchema,
      output: 'array',
    });
    return result.object;
  } catch (e) {
    console.error(e);
    throw new Error('Failed to generate query');
  }
};
Update query viewer
Next, update the query-viewer.tsx component to display these explanations. The handleExplainQuery function is called every time the user clicks the question icon button on the right side of the query. Let's update this function to use the new explainQuery action:
/* ...other imports... */
import { explainQuery } from '@/app/actions';

/* ...rest of the component... */

const handleExplainQuery = async () => {
  setQueryExpanded(true);
  setLoadingExplanation(true);

  const explanations = await explainQuery(inputValue, activeQuery);
  setQueryExplanations(explanations);

  setLoadingExplanation(false);
};

/* ...rest of the component... */
Now when users click the explanation button (the question mark icon), the component will:
- Show a loading state
- Send the active SQL query and the users natural language query to your Server Action
- The model will generate an array of explanations
- The explanations will be set in the component state and rendered in the UI
Submit a new query and then click the explanation button. Hover over different elements of the query. You should see the explanations for each section!
Visualizing query results
Finally, let's render the query results visually in a chart. There are two approaches you could take:
-
Send both the query and data to the model and ask it to return the data in a visualization-ready format. While this provides complete control over the visualization, it requires the model to send back all of the data, which significantly increases latency and costs.
-
Send the query and data to the model and ask it to generate a chart configuration (fixed-size and not many tokens) that maps your data appropriately. This configuration specifies how to visualize the information while delivering the insights from your natural language query. Importantly, this is done without requiring the model return the full dataset.
Since you don't know the SQL query or data shape beforehand, let's use the second approach to dynamically generate chart configurations based on the query results and user intent.
Generate the chart configuration
For this feature, you'll create a Server Action that takes the query results and the user's original natural language query to determine the best visualization approach. Your application is already set up to use shadcn charts (which uses Recharts under the hood) so the model will need to generate:
- Chart type (bar, line, area, or pie)
- Axis mappings
- Visual styling
Let's start by defining the schema for the chart configuration in lib/types.ts:
/* ...rest of the file... */

export const configSchema = z
  .object({
    description: z
      .string()
      .describe(
        'Describe the chart. What is it showing? What is interesting about the way the data is displayed?',
      ),
    takeaway: z.string().describe('What is the main takeaway from the chart?'),
    type: z.enum(['bar', 'line', 'area', 'pie']).describe('Type of chart'),
    title: z.string(),
    xKey: z.string().describe('Key for x-axis or category'),
    yKeys: z
      .array(z.string())
      .describe(
        'Key(s) for y-axis values this is typically the quantitative column',
      ),
    multipleLines: z
      .boolean()
      .describe(
        'For line charts only: whether the chart is comparing groups of data.',
      )
      .optional(),
    measurementColumn: z
      .string()
      .describe(
        'For line charts only: key for quantitative y-axis column to measure against (eg. values, counts etc.)',
      )
      .optional(),
    lineCategories: z
      .array(z.string())
      .describe(
        'For line charts only: Categories used to compare different lines or data series. Each category represents a distinct line in the chart.',
      )
      .optional(),
    colors: z
      .record(
        z.string().describe('Any of the yKeys'),
        z.string().describe('Color value in CSS format (e.g., hex, rgb, hsl)'),
      )
      .describe('Mapping of data keys to color values for chart elements')
      .optional(),
    legend: z.boolean().describe('Whether to show legend'),
  })
  .describe('Chart configuration object');

export type Config = z.infer<typeof configSchema>;
This schema makes extensive use of Zod's .describe() function to give the model extra context about each of the key's you are expecting in the chart configuration. This will help the model understand the purpose of each key and generate more accurate results.
Another important technique to note here is that you are defining description and takeaway fields. Not only are these useful for the user to quickly understand what the chart means and what they should take away from it, but they also force the model to generate a description of the data first, before it attempts to generate configuration attributes like axis and columns. This will help the model generate more accurate and relevant chart configurations.
Create the Server Action
Create a new action in app/actions.ts:
/* ...other imports... */
import { Config, configSchema, explanationsSchema, Result } from '@/lib/types';

/* ...rest of the file... */

export const generateChartConfig = async (
  results: Result[],
  userQuery: string,
) => {
  'use server';

  try {
    const { object: config } = await generateObject({
      model: 'openai/gpt-4o',
      system: 'You are a data visualization expert.',
      prompt: `Given the following data from a SQL query result, generate the chart config that best visualises the data and answers the users query.
      For multiple groups use multi-lines.

      Here is an example complete config:
      export const chartConfig = {
        type: "pie",
        xKey: "month",
        yKeys: ["sales", "profit", "expenses"],
        colors: {
          sales: "#4CAF50",    // Green for sales
          profit: "#2196F3",   // Blue for profit
          expenses: "#F44336"  // Red for expenses
        },
        legend: true
      }

      User Query:
      ${userQuery}

      Data:
      ${JSON.stringify(results, null, 2)}`,
      schema: configSchema,
    });

    // Override with shadcn theme colors
    const colors: Record<string, string> = {};
    config.yKeys.forEach((key, index) => {
      colors[key] = `hsl(var(--chart-${index + 1}))`;
    });

    const updatedConfig = { ...config, colors };
    return { config: updatedConfig };
  } catch (e) {
    console.error(e);
    throw new Error('Failed to generate chart suggestion');
  }
};
Update the chart component
With the action in place, you'll want to trigger it automatically after receiving query results. This ensures the visualization appears almost immediately after data loads.
Update the handleSubmit function in your root page (app/page.tsx) to generate and set the chart configuration after running the query:
/* ...other imports... */
import { getCompanies, generateQuery, generateChartConfig } from './actions';

/* ...rest of the file... */
const handleSubmit = async (suggestion?: string) => {
  clearExistingData();

  const question = suggestion ?? inputValue;
  if (inputValue.length === 0 && !suggestion) return;

  if (question.trim()) {
    setSubmitted(true);
  }

  setLoading(true);
  setLoadingStep(1);
  setActiveQuery('');

  try {
    const query = await generateQuery(question);

    if (query === undefined) {
      toast.error('An error occurred. Please try again.');
      setLoading(false);
      return;
    }

    setActiveQuery(query);
    setLoadingStep(2);

    const companies = await runGeneratedSQLQuery(query);
    const columns = companies.length > 0 ? Object.keys(companies[0]) : [];
    setResults(companies);
    setColumns(columns);

    setLoading(false);

    const { config } = await generateChartConfig(companies, question);
    setChartConfig(config);
  } catch (e) {
    toast.error('An error occurred. Please try again.');
    setLoading(false);
  }
};

/* ...rest of the file... */
Now when users submit queries, the application will:
- Generate and run the SQL query
- Display the table results
- Generate a chart configuration for the results
- Allow toggling between table and chart views
Head back to the browser and test the application with a few queries. You should see the chart visualization appear after the table results.
Next steps
You've built an AI-powered SQL analysis tool that can convert natural language to SQL queries, visualize query results, and explain SQL queries in plain English.
You could, for example, extend the application to use your own data sources or add more advanced features like customizing the chart configuration schema to support more chart types and options. You could also add more complex SQL query generation capabilities.
title: Get started with Computer Use description: Get started with Claude's Computer Use capabilities with the AI SDK tags: ['computer-use', 'tools']
Get started with Computer Use
With the release of Computer Use in Claude 3.5 Sonnet, you can now direct AI models to interact with computers like humans do - moving cursors, clicking buttons, and typing text. This capability enables automation of complex tasks while leveraging Claude's advanced reasoning abilities.
The AI SDK is a powerful TypeScript toolkit for building AI applications with large language models (LLMs) like Anthropic's Claude alongside popular frameworks like React, Next.js, Vue, Svelte, Node.js, and more. In this guide, you will learn how to integrate Computer Use into your AI SDK applications.
Computer Use is currently in beta with some [ limitations ](https://docs.anthropic.com/en/docs/build-with-claude/computer-use#understand-computer-use-limitations). The feature may be error-prone at times. Anthropic recommends starting with low-risk tasks and implementing appropriate safety measures.Computer Use
Anthropic recently released a new version of the Claude 3.5 Sonnet model which is capable of 'Computer Use'. This allows the model to interact with computer interfaces through basic actions like:
- Moving the cursor
- Clicking buttons
- Typing text
- Taking screenshots
- Reading screen content
How It Works
Computer Use enables the model to read and interact with on-screen content through a series of coordinated steps. Here's how the process works:
-
Start with a prompt and tools
Add Anthropic-defined Computer Use tools to your request and provide a task (prompt) for the model. For example: "save an image to your downloads folder."
-
Select the right tool
The model evaluates which computer tools can help accomplish the task. It then sends a formatted
tool_callto use the appropriate tool. -
Execute the action and return results
The AI SDK processes Claude's request by running the selected tool. The results can then be sent back to Claude through a
tool_resultmessage. -
Complete the task through iterations
Claude analyzes each result to determine if more actions are needed. It continues requesting tool use and processing results until it completes your task or requires additional input.
Available Tools
There are three main tools available in the Computer Use API:
- Computer Tool: Enables basic computer control like mouse movement, clicking, and keyboard input
- Text Editor Tool: Provides functionality for viewing and editing text files
- Bash Tool: Allows execution of bash commands
Implementation Considerations
Computer Use tools in the AI SDK are predefined interfaces that require your own implementation of the execution layer. While the SDK provides the type definitions and structure for these tools, you need to:
- Set up a controlled environment for Computer Use execution
- Implement core functionality like mouse control and keyboard input
- Handle screenshot capture and processing
- Set up rules and limits for how Claude can interact with your system
The recommended approach is to start with Anthropic's reference implementation , which provides:
- A containerized environment configured for safe Computer Use
- Ready-to-use (Python) implementations of Computer Use tools
- An agent loop for API interaction and tool execution
- A web interface for monitoring and control
This reference implementation serves as a foundation to understand the requirements before building your own custom solution.
Getting Started with the AI SDK
If you have never used the AI SDK before, start by following the [Getting Started guide](/docs/getting-started). For a working example of Computer Use implementation with Next.js and the AI SDK, check out our [AI SDK Computer Use Template](https://github.com/vercel-labs/ai-sdk-computer-use).First, ensure you have the AI SDK and Anthropic AI SDK provider installed:
You can add Computer Use to your AI SDK applications using provider-defined-client tools. These tools accept various input parameters (like display height and width in the case of the computer tool) and then require that you define an execute function.
Here's how you could set up the Computer Tool with the AI SDK:
import { anthropic } from '@ai-sdk/anthropic';
import { getScreenshot, executeComputerAction } from '@/utils/computer-use';

const computerTool = anthropic.tools.computer_20250124({
  displayWidthPx: 1920,
  displayHeightPx: 1080,
  execute: async ({ action, coordinate, text }) => {
    switch (action) {
      case 'screenshot': {
        return {
          type: 'image',
          data: getScreenshot(),
        };
      }
      default: {
        return executeComputerAction(action, coordinate, text);
      }
    }
  },
  toModelOutput({ output }) {
    return typeof output === 'string'
      ? [{ type: 'text', text: output }]
      : [{ type: 'image', data: output.data, mediaType: 'image/png' }];
  },
});
The computerTool handles two main actions: taking screenshots via getScreenshot() and executing computer actions like mouse movements and clicks through executeComputerAction(). Remember, you have to implement this execution logic (eg. the getScreenshot and executeComputerAction functions) to handle the actual computer interactions. The execute function should handle all low-level interactions with the operating system.
Finally, to send tool results back to the model, use the toModelOutput() function to convert text and image responses into a format the model can process. The AI SDK includes experimental support for these multi-modal tool results when using Anthropic's models.
Using Computer Tools with Text Generation
Once your tool is defined, you can use it with both the generateText and streamText functions.
For one-shot text generation, use generateText:
const result = await generateText({
  model: 'anthropic/claude-sonnet-4-20250514',
  prompt: 'Move the cursor to the center of the screen and take a screenshot',
  tools: { computer: computerTool },
});

console.log(result.text);
For streaming responses, use streamText to receive updates in real-time:
const result = streamText({
  model: 'anthropic/claude-sonnet-4-20250514',
  prompt: 'Open the browser and navigate to vercel.com',
  tools: { computer: computerTool },
});

for await (const chunk of result.textStream) {
  console.log(chunk);
}
Configure Multi-Step (Agentic) Generations
To allow the model to perform multiple steps without user intervention, use the stopWhen parameter. This will automatically send any tool results back to the model to trigger a subsequent generation:
import { stepCountIs } from 'ai';

const stream = streamText({
  model: 'anthropic/claude-sonnet-4-20250514',
  prompt: 'Open the browser and navigate to vercel.com',
  tools: { computer: computerTool },
  stopWhen: stepCountIs(10), // experiment with this value based on your use case
});
Combine Multiple Tools
You can combine multiple tools in a single request to enable more complex workflows. The AI SDK supports all three of Claude's Computer Use tools:
const computerTool = anthropic.tools.computer_20250124({
  ...
});

const bashTool = anthropic.tools.bash_20250124({
  execute: async ({ command, restart }) => execSync(command).toString()
});

const textEditorTool = anthropic.tools.textEditor_20250124({
  execute: async ({
    command,
    path,
    file_text,
    insert_line,
    new_str,
    old_str,
    view_range
  }) => {
    // Handle file operations based on command
    switch(command) {
      return executeTextEditorFunction({
        command,
        path,
        fileText: file_text,
        insertLine: insert_line,
        newStr: new_str,
        oldStr: old_str,
        viewRange: view_range
      });
    }
  }
});


const response = await generateText({
  model: 'anthropic/claude-sonnet-4-20250514',
  prompt: "Create a new file called example.txt, write 'Hello World' to it, and run 'cat example.txt' in the terminal",
  tools: {
    computer: computerTool,
    bash: bashTool,
    str_replace_editor: textEditorTool,
  },
});
Best Practices for Computer Use
To get the best results when using Computer Use:
- Specify simple, well-defined tasks with explicit instructions for each step
- Prompt Claude to verify outcomes through screenshots
- Use keyboard shortcuts when UI elements are difficult to manipulate
- Include example screenshots for repeatable tasks
- Provide explicit tips in system prompts for known tasks
Security Measures
Remember, Computer Use is a beta feature. Please be aware that it poses unique risks that are distinct from standard API features or chat interfaces. These risks are heightened when using Computer Use to interact with the internet. To minimize risks, consider taking precautions such as:
- Use a dedicated virtual machine or container with minimal privileges to prevent direct system attacks or accidents.
- Avoid giving the model access to sensitive data, such as account login information, to prevent information theft.
- Limit internet access to an allowlist of domains to reduce exposure to malicious content.
- Ask a human to confirm decisions that may result in meaningful real-world consequences as well as any tasks requiring affirmative consent, such as accepting cookies, executing financial transactions, or agreeing to terms of service.
title: Get started with Gemini 3 description: Get started with Gemini 3 using the AI SDK. tags: ['getting-started']
Get started with Gemini 3
With the release of Gemini 3, Google's most intelligent model to date, there has never been a better time to start building AI applications that combine state-of-the-art reasoning with multimodal understanding.
The AI SDK is a powerful TypeScript toolkit for building AI applications with large language models (LLMs) like Gemini 3 alongside popular frameworks like React, Next.js, Vue, Svelte, Node.js, and more.
Gemini 3
Gemini 3 represents a significant leap forward in AI capabilities, combining all of Gemini's strengths together to help you bring any idea to life. It delivers:
- State-of-the-art reasoning with unprecedented depth and nuance
- PhD-level performance on complex benchmarks like Humanity's Last Exam (37.5%) and GPQA Diamond (91.9%)
- Leading multimodal understanding with 81% on MMMU-Pro and 87.6% on Video-MMMU
- Best-in-class vibe coding and agentic capabilities
- Superior long-horizon planning for multi-step workflows
Gemini 3 Pro is currently available in preview, offering great performance across all benchmarks.
Getting Started with the AI SDK
The AI SDK is the TypeScript toolkit designed to help developers build AI-powered applications with React, Next.js, Vue, Svelte, Node.js, and more. Integrating LLMs into applications is complicated and heavily dependent on the specific model provider you use.
The AI SDK abstracts away the differences between model providers, eliminates boilerplate code for building chatbots, and allows you to go beyond text output to generate rich, interactive components.
At the center of the AI SDK is AI SDK Core, which provides a unified API to call any LLM. The code snippet below is all you need to call Gemini 3 with the AI SDK:
import { google } from '@ai-sdk/google';
import { generateText } from 'ai';

const { text } = await generateText({
  model: google('gemini-3-pro-preview'),
  prompt: 'Explain the concept of the Hilbert space.',
});
console.log(text);
Enhanced Reasoning with Thinking Mode
Gemini 3 models can use enhanced reasoning through thinking mode, which improves their ability to solve complex problems. You can control the thinking level using the thinkingLevel provider option:
import { google, GoogleGenerativeAIProviderOptions } from '@ai-sdk/google';
import { generateText } from 'ai';

const { text } = await generateText({
  model: google('gemini-3-pro-preview'),
  prompt: 'What is the sum of the first 10 prime numbers?',
  providerOptions: {
    google: {
      thinkingConfig: {
        includeThoughts: true,
        thinkingLevel: 'low',
      },
    } satisfies GoogleGenerativeAIProviderOptions,
  },
});

console.log(text);
The thinkingLevel parameter accepts different values to control the depth of reasoning applied to your prompt:
- Gemini 3 Pro supports:
'low'and'high' - Gemini 3 Flash supports:
'minimal','low','medium', and'high'
Using Tools with the AI SDK
Gemini 3 excels at tool calling with improved reliability and consistency for multi-step workflows. Here's an example of using tool calling with the AI SDK:
import { z } from 'zod';
import { generateText, tool, stepCountIs } from 'ai';
import { google } from '@ai-sdk/google';

const result = await generateText({
  model: google('gemini-3-pro-preview'),
  prompt: 'What is the weather in San Francisco?',
  tools: {
    weather: tool({
      description: 'Get the weather in a location',
      inputSchema: z.object({
        location: z.string().describe('The location to get the weather for'),
      }),
      execute: async ({ location }) => ({
        location,
        temperature: 72 + Math.floor(Math.random() * 21) - 10,
      }),
    }),
  },
  stopWhen: stepCountIs(5), // enables multi-step calling
});

console.log(result.text);

console.log(result.steps);
Using Google Search with Gemini
With search grounding, Gemini can access the latest information using Google search. Here's an example of using Google Search with the AI SDK:
import { google } from '@ai-sdk/google';
import { GoogleGenerativeAIProviderMetadata } from '@ai-sdk/google';
import { generateText } from 'ai';

const { text, sources, providerMetadata } = await generateText({
  model: google('gemini-3-pro-preview'),
  tools: {
    google_search: google.tools.googleSearch({}),
  },
  prompt:
    'List the top 5 San Francisco news from the past week.' +
    'You must include the date of each article.',
});

// access the grounding metadata. Casting to the provider metadata type
// is optional but provides autocomplete and type safety.
const metadata = providerMetadata?.google as
  | GoogleGenerativeAIProviderMetadata
  | undefined;
const groundingMetadata = metadata?.groundingMetadata;
const safetyRatings = metadata?.safetyRatings;

console.log({ text, sources, groundingMetadata, safetyRatings });
Building Interactive Interfaces
AI SDK Core can be paired with AI SDK UI, another powerful component of the AI SDK, to streamline the process of building chat, completion, and assistant interfaces with popular frameworks like Next.js, Nuxt, SvelteKit, and SolidStart.
AI SDK UI provides robust abstractions that simplify the complex tasks of managing chat streams and UI updates on the frontend, enabling you to develop dynamic AI-driven interfaces more efficiently.
With four main hooks — useChat, useCompletion, useObject, and useAssistant — you can incorporate real-time chat capabilities, text completions, streamed JSON, and interactive assistant features into your app.
Let's explore building a chatbot with Next.js, the AI SDK, and Gemini 3 Pro:
In a new Next.js application, first install the AI SDK and the Google Generative AI provider:
Then, create a route handler for the chat endpoint:
import { google } from '@ai-sdk/google';
import { streamText, UIMessage, convertToModelMessages } from 'ai';

export async function POST(req: Request) {
  const { messages }: { messages: UIMessage[] } = await req.json();

  const result = streamText({
    model: google('gemini-3-pro-preview'),
    messages: await convertToModelMessages(messages),
  });

  return result.toUIMessageStreamResponse();
}
Finally, update the root page (app/page.tsx) to use the useChat hook:
'use client';

import { useChat } from '@ai-sdk/react';
import { useState } from 'react';

export default function Chat() {
  const [input, setInput] = useState('');
  const { messages, sendMessage } = useChat();
  return (
    <div className="flex flex-col w-full max-w-md py-24 mx-auto stretch">
      {messages.map(message => (
        <div key={message.id} className="whitespace-pre-wrap">
          {message.role === 'user' ? 'User: ' : 'Gemini: '}
          {message.parts.map((part, i) => {
            switch (part.type) {
              case 'text':
                return <div key={`${message.id}-${i}`}>{part.text}</div>;
            }
          })}
        </div>
      ))}

      <form
        onSubmit={e => {
          e.preventDefault();
          sendMessage({ text: input });
          setInput('');
        }}
      >
        <input
          className="fixed dark:bg-zinc-900 bottom-0 w-full max-w-md p-2 mb-8 border border-zinc-300 dark:border-zinc-800 rounded shadow-xl"
          value={input}
          placeholder="Say something..."
          onChange={e => setInput(e.currentTarget.value)}
        />
      </form>
    </div>
  );
}
The useChat hook on your root page (app/page.tsx) will make a request to your AI provider endpoint (app/api/chat/route.ts) whenever the user submits a message. The messages are then displayed in the chat UI.
Get Started
Ready to dive in? Here's how you can begin:
- Explore the documentation at ai-sdk.dev/docs to understand the capabilities of the AI SDK.
- Check out practical examples at ai-sdk.dev/examples to see the SDK in action.
- Dive deeper with advanced guides on topics like Retrieval-Augmented Generation (RAG) at ai-sdk.dev/docs/guides.
- Use ready-to-deploy AI templates at vercel.com/templates?type=ai.
- Read more about the Google Generative AI provider.
title: Get started with Claude 4 description: Get started with Claude 4 using the AI SDK. tags: ['getting-started']
Get started with Claude 4
With the release of Claude 4, there has never been a better time to start building AI applications, particularly those that require complex reasoning capabilities and advanced intelligence.
The AI SDK is a powerful TypeScript toolkit for building AI applications with large language models (LLMs) like Claude 4 alongside popular frameworks like React, Next.js, Vue, Svelte, Node.js, and more.
Claude 4
Claude 4 is Anthropic's most advanced model family to date, offering exceptional capabilities across reasoning, instruction following, coding, and knowledge tasks. Available in two variants—Sonnet and Opus—Claude 4 delivers state-of-the-art performance with enhanced reliability and control. Claude 4 builds on the extended thinking capabilities introduced in Claude 3.7, allowing for even more sophisticated problem-solving through careful, step-by-step reasoning.
Claude 4 excels at complex reasoning, code generation and analysis, detailed content creation, and agentic capabilities, making it ideal for powering sophisticated AI workflows, customer-facing agents, and applications requiring nuanced understanding and responses. Claude Opus 4 is an excellent coding model, leading on SWE-bench (72.5%) and Terminal-bench (43.2%), with the ability to sustain performance on long-running tasks that require focused effort and thousands of steps. Claude Sonnet 4 significantly improves on Sonnet 3.7, excelling in coding with 72.7% on SWE-bench while balancing performance and efficiency.
Prompt Engineering for Claude 4 Models
Claude 4 models respond well to clear, explicit instructions. The following best practices can help achieve optimal performance:
- Provide explicit instructions: Clearly state what you want the model to do, including specific steps or formats for the response.
- Include context and motivation: Explain why a task is being performed to help the model better understand the underlying goals.
- Avoid negative examples: When providing examples, only demonstrate the behavior you want to see, not what you want to avoid.
Getting Started with the AI SDK
The AI SDK is the TypeScript toolkit designed to help developers build AI-powered applications with React, Next.js, Vue, Svelte, Node.js, and more. Integrating LLMs into applications is complicated and heavily dependent on the specific model provider you use.
The AI SDK abstracts away the differences between model providers, eliminates boilerplate code for building chatbots, and allows you to go beyond text output to generate rich, interactive components.
At the center of the AI SDK is AI SDK Core, which provides a unified API to call any LLM. The code snippet below is all you need to call Claude 4 Sonnet with the AI SDK:
import { anthropic } from '@ai-sdk/anthropic';
import { generateText } from 'ai';

const { text, reasoningText, reasoning } = await generateText({
  model: anthropic('claude-sonnet-4-20250514'),
  prompt: 'How will quantum computing impact cryptography by 2050?',
});
console.log(text);
Reasoning Ability
Claude 4 enhances the extended thinking capabilities first introduced in Claude 3.7 Sonnet—the ability to solve complex problems with careful, step-by-step reasoning. Additionally, both Opus 4 and Sonnet 4 can now use tools during extended thinking, allowing Claude to alternate between reasoning and tool use to improve responses. You can enable extended thinking using the thinking provider option and specifying a thinking budget in tokens. For interleaved thinking (where Claude can think in between tool calls) you'll need to enable a beta feature using the anthropic-beta header:
import { anthropic, AnthropicProviderOptions } from '@ai-sdk/anthropic';
import { generateText } from 'ai';

const { text, reasoningText, reasoning } = await generateText({
  model: anthropic('claude-sonnet-4-20250514'),
  prompt: 'How will quantum computing impact cryptography by 2050?',
  providerOptions: {
    anthropic: {
      thinking: { type: 'enabled', budgetTokens: 15000 },
    } satisfies AnthropicProviderOptions,
  },
  headers: {
    'anthropic-beta': 'interleaved-thinking-2025-05-14',
  },
});

console.log(text); // text response
console.log(reasoningText); // reasoning text
console.log(reasoning); // reasoning details including redacted reasoning
Building Interactive Interfaces
AI SDK Core can be paired with AI SDK UI, another powerful component of the AI SDK, to streamline the process of building chat, completion, and assistant interfaces with popular frameworks like Next.js, Nuxt, SvelteKit, and SolidStart.
AI SDK UI provides robust abstractions that simplify the complex tasks of managing chat streams and UI updates on the frontend, enabling you to develop dynamic AI-driven interfaces more efficiently.
With four main hooks — useChat, useCompletion, useObject, and useAssistant — you can incorporate real-time chat capabilities, text completions, streamed JSON, and interactive assistant features into your app.
Let's explore building a chatbot with Next.js, the AI SDK, and Claude Sonnet 4:
In a new Next.js application, first install the AI SDK and the Anthropic provider:
Then, create a route handler for the chat endpoint:
import { anthropic, AnthropicProviderOptions } from '@ai-sdk/anthropic';
import { streamText, convertToModelMessages, type UIMessage } from 'ai';

export async function POST(req: Request) {
  const { messages }: { messages: UIMessage[] } = await req.json();

  const result = streamText({
    model: anthropic('claude-sonnet-4-20250514'),
    messages: await convertToModelMessages(messages),
    headers: {
      'anthropic-beta': 'interleaved-thinking-2025-05-14',
    },
    providerOptions: {
      anthropic: {
        thinking: { type: 'enabled', budgetTokens: 15000 },
      } satisfies AnthropicProviderOptions,
    },
  });

  return result.toUIMessageStreamResponse({
    sendReasoning: true,
  });
}
Finally, update the root page (app/page.tsx) to use the useChat hook:
'use client';

import { useChat } from '@ai-sdk/react';
import { DefaultChatTransport } from 'ai';
import { useState } from 'react';

export default function Page() {
  const [input, setInput] = useState('');
  const { messages, sendMessage } = useChat({
    transport: new DefaultChatTransport({ api: '/api/chat' }),
  });

  const handleSubmit = (e: React.FormEvent) => {
    e.preventDefault();
    if (input.trim()) {
      sendMessage({ text: input });
      setInput('');
    }
  };

  return (
    <div className="flex flex-col h-screen max-w-2xl mx-auto p-4">
      <div className="flex-1 overflow-y-auto space-y-4 mb-4">
        {messages.map(message => (
          <div
            key={message.id}
            className={`p-3 rounded-lg ${
              message.role === 'user' ? 'bg-blue-50 ml-auto' : 'bg-gray-50'
            }`}
          >
            <p className="font-semibold">
              {message.role === 'user' ? 'You' : 'Claude 4'}
            </p>
            {message.parts.map((part, index) => {
              if (part.type === 'text') {
                return (
                  <div key={index} className="mt-1">
                    {part.text}
                  </div>
                );
              }
              if (part.type === 'reasoning') {
                return (
                  <pre
                    key={index}
                    className="bg-gray-100 p-2 rounded mt-2 text-xs overflow-x-auto"
                  >
                    <details>
                      <summary className="cursor-pointer">
                        View reasoning
                      </summary>
                      {part.text}
                    </details>
                  </pre>
                );
              }
            })}
          </div>
        ))}
      </div>
      <form onSubmit={handleSubmit} className="flex gap-2">
        <input
          name="prompt"
          value={input}
          onChange={e => setInput(e.target.value)}
          className="flex-1 p-2 border rounded focus:outline-none focus:ring-2 focus:ring-blue-500"
          placeholder="Ask Claude 4 something..."
        />
        <button
          type="submit"
          className="bg-blue-500 text-white px-4 py-2 rounded hover:bg-blue-600"
        >
          Send
        </button>
      </form>
    </div>
  );
}
The useChat hook on your root page (app/page.tsx) will make a request to your LLM provider endpoint (app/api/chat/route.ts) whenever the user submits a message. The messages are then displayed in the chat UI.
Claude 4 Model Variants
Claude 4 is available in two variants, each optimized for different use cases:
- Claude Sonnet 4: Balanced performance suitable for most enterprise applications, with significant improvements over Sonnet 3.7.
- Claude Opus 4: Anthropic's most powerful model and the best coding model available. Excels at sustained performance on long-running tasks that require focused effort and thousands of steps, with the ability to work continuously for several hours.
Get Started
Ready to dive in? Here's how you can begin:
- Explore the documentation at ai-sdk.dev/docs to understand the capabilities of the AI SDK.
- Check out practical examples at ai-sdk.dev/examples to see the SDK in action.
- Dive deeper with advanced guides on topics like Retrieval-Augmented Generation (RAG) at ai-sdk.dev/docs/guides.
- Use ready-to-deploy AI templates at vercel.com/templates?type=ai.
title: OpenAI Responses API description: Get started with the OpenAI Responses API using the AI SDK. tags: ['getting-started', 'agents']
Get started with OpenAI Responses API
With the release of OpenAI's responses API, there has never been a better time to start building AI applications, particularly those that require a deeper understanding of the world.
The AI SDK is a powerful TypeScript toolkit for building AI applications with large language models (LLMs) alongside popular frameworks like React, Next.js, Vue, Svelte, Node.js, and more.
OpenAI Responses API
OpenAI recently released the Responses API, a brand new way to build applications on OpenAI's platform. The new API offers a way to persist chat history, a web search tool for grounding LLM responses, file search tool for finding relevant files, and a computer use tool for building agents that can interact with and operate computers. Let's explore how to use the Responses API with the AI SDK.
Getting Started with the AI SDK
The AI SDK is the TypeScript toolkit designed to help developers build AI-powered applications with React, Next.js, Vue, Svelte, Node.js, and more. Integrating LLMs into applications is complicated and heavily dependent on the specific model provider you use.
The AI SDK abstracts away the differences between model providers, eliminates boilerplate code for building chatbots, and allows you to go beyond text output to generate rich, interactive components.
At the center of the AI SDK is AI SDK Core, which provides a unified API to call any LLM. The code snippet below is all you need to call GPT-4o with the new Responses API using the AI SDK:
import { generateText } from 'ai';
import { openai } from '@ai-sdk/openai';

const { text } = await generateText({
  model: openai.responses('gpt-4o'),
  prompt: 'Explain the concept of quantum entanglement.',
});
Generating Structured Data
While text generation can be useful, you might want to generate structured JSON data. For example, you might want to extract information from text, classify data, or generate synthetic data. AI SDK Core provides two functions (generateObject and streamObject) to generate structured data, allowing you to constrain model outputs to a specific schema.
import { generateObject } from 'ai';
import { openai } from '@ai-sdk/openai';
import { z } from 'zod';

const { object } = await generateObject({
  model: openai.responses('gpt-4o'),
  schema: z.object({
    recipe: z.object({
      name: z.string(),
      ingredients: z.array(z.object({ name: z.string(), amount: z.string() })),
      steps: z.array(z.string()),
    }),
  }),
  prompt: 'Generate a lasagna recipe.',
});
This code snippet will generate a type-safe recipe that conforms to the specified zod schema.
Using Tools with the AI SDK
The Responses API supports tool calling out of the box, allowing it to interact with external systems and perform discrete tasks. Here's an example of using tool calling with the AI SDK:
import { generateText, tool } from 'ai';
import { openai } from '@ai-sdk/openai';
import { z } from 'zod';

const { text } = await generateText({
  model: openai.responses('gpt-4o'),
  prompt: 'What is the weather like today in San Francisco?',
  tools: {
    getWeather: tool({
      description: 'Get the weather in a location',
      inputSchema: z.object({
        location: z.string().describe('The location to get the weather for'),
      }),
      execute: async ({ location }) => ({
        location,
        temperature: 72 + Math.floor(Math.random() * 21) - 10,
      }),
    }),
  },
  stopWhen: stepCountIs(5), // enable multi-step 'agentic' LLM calls
});
This example demonstrates how stopWhen transforms a single LLM call into an agent. The stopWhen: stepCountIs(5) parameter allows the model to autonomously call tools, analyze results, and make additional tool calls as needed - turning what would be a simple one-shot completion into an intelligent agent that can chain multiple actions together to complete complex tasks.
Web Search Tool
The Responses API introduces a built-in tool for grounding responses called webSearch. With this tool, the model can access the internet to find relevant information for its responses.
import { openai } from '@ai-sdk/openai';
import { generateText } from 'ai';

const result = await generateText({
  model: openai.responses('gpt-4o-mini'),
  prompt: 'What happened in San Francisco last week?',
  tools: {
    web_search_preview: openai.tools.webSearchPreview(),
  },
});

console.log(result.text);
console.log(result.sources);
The webSearch tool also allows you to specify query-specific metadata that can be used to improve the quality of the search results.
import { generateText } from 'ai';

const result = await generateText({
  model: openai.responses('gpt-4o-mini'),
  prompt: 'What happened in San Francisco last week?',
  tools: {
    web_search_preview: openai.tools.webSearchPreview({
      searchContextSize: 'high',
      userLocation: {
        type: 'approximate',
        city: 'San Francisco',
        region: 'California',
      },
    }),
  },
});

console.log(result.text);
console.log(result.sources);
MCP Tool
The Responses API also supports connecting to Model Context Protocol (MCP) servers. This allows models to call tools exposed by remote MCP servers or service connectors.
import { openai } from '@ai-sdk/openai';
import { generateText } from 'ai';

const result = await generateText({
  model: openai.responses('gpt-5-mini'),
  prompt: 'Search the web for the latest NYC mayoral election results',
  tools: {
    mcp: openai.tools.mcp({
      serverLabel: 'web-search',
      serverUrl: 'https://mcp.exa.ai/mcp',
      serverDescription: 'A web-search API for AI agents',
    }),
  },
});

console.log(result.text);
For more details on configuring the MCP tool, including authentication, tool filtering, and connector support, see the OpenAI provider documentation.
Using Persistence
With the Responses API, you can persist chat history with OpenAI across requests. This allows you to send just the user's last message and OpenAI can access the entire chat history.
There are two options available to use persistence:
With previousResponseId
import { openai } from '@ai-sdk/openai';
import { generateText } from 'ai';

const result1 = await generateText({
  model: openai.responses('gpt-4o-mini'),
  prompt: 'Invent a new holiday and describe its traditions.',
});

const result2 = await generateText({
  model: openai.responses('gpt-4o-mini'),
  prompt: 'Summarize in 2 sentences',
  providerOptions: {
    openai: {
      previousResponseId: result1.providerMetadata?.openai.responseId as string,
    },
  },
});
With Conversations
You can use the Conversation API to create a conversation.
Once you have created a conversation, you can continue it:
import { openai } from '@ai-sdk/openai';
import { generateText } from 'ai';

const result = await generateText({
  model: openai.responses('gpt-4o-mini'),
  prompt: 'Summarize in 2 sentences',
  providerOptions: {
    openai: {
      // The Conversation ID created via the OpenAI API to continue
      conversation: 'conv_123',
    },
  },
});
Migrating from Completions API
Migrating from the OpenAI Completions API (via the AI SDK) to the new Responses API is simple. To migrate, simply change your provider instance from openai(modelId) to openai.responses(modelId):
import { generateText } from 'ai';
import { openai } from '@ai-sdk/openai';

// Completions API
const { text } = await generateText({
  model: openai('gpt-4o'),
  prompt: 'Explain the concept of quantum entanglement.',
});

// Responses API
const { text } = await generateText({
  model: openai.responses('gpt-4o'),
  prompt: 'Explain the concept of quantum entanglement.',
});
When using the Responses API, provider specific options that were previously specified on the model provider instance have now moved to the providerOptions object:
import { generateText } from 'ai';
import { openai } from '@ai-sdk/openai';

// Completions API
const { text } = await generateText({
  model: openai('gpt-4o'),
  prompt: 'Explain the concept of quantum entanglement.',
  providerOptions: {
    openai: {
      parallelToolCalls: false,
    },
  },
});

// Responses API
const { text } = await generateText({
  model: openai.responses('gpt-4o'),
  prompt: 'Explain the concept of quantum entanglement.',
  providerOptions: {
    openai: {
      parallelToolCalls: false,
    },
  },
});
Get Started
Ready to get started? Here's how you can dive in:
- Explore the documentation at ai-sdk.dev/docs to understand the full capabilities of the AI SDK.
- Check out practical examples at ai-sdk.dev/examples to see the SDK in action and get inspired for your own projects.
- Dive deeper with advanced guides on topics like Retrieval-Augmented Generation (RAG) and multi-modal chat at ai-sdk.dev/docs/guides.
- Check out ready-to-deploy AI templates at vercel.com/templates?type=ai.
title: Google Gemini Image Generation description: Generate and edit images with Google Gemini 2.5 Flash Image using the AI SDK. tags: ['image-generation', 'google', 'gemini']
Generate and Edit Images with Google Gemini 2.5 Flash
This guide will show you how to generate and edit images with the AI SDK and Google's latest multimodal language model Gemini 2.5 Flash Image.
Generating Images
As Gemini 2.5 Flash Image is a language model with multimodal capabilities, you can use the generateText or streamText functions (not generateImage) to create images. The model determines which modality to respond in based on your prompt and configuration. Here's how to create your first image:
import { generateText } from 'ai';
import fs from 'node:fs';
import 'dotenv/config';

async function generateImage() {
  const result = await generateText({
    model: 'google/gemini-2.5-flash-image',
    prompt:
      'Create a picture of a nano banana dish in a fancy restaurant with a Gemini theme',
  });

  // Save generated images
  for (const file of result.files) {
    if (file.mediaType.startsWith('image/')) {
      const timestamp = Date.now();
      const fileName = `generated-${timestamp}.png`;

      fs.mkdirSync('output', { recursive: true });
      await fs.promises.writeFile(`output/${fileName}`, file.uint8Array);

      console.log(`Generated and saved image: output/${fileName}`);
    }
  }
}

generateImage().catch(console.error);
Here are some key points to remember:
- Generated images are returned in the
result.filesarray - Images are returned as
Uint8Arraydata - The model leverages Gemini's world knowledge, so detailed prompts yield better results
Editing Images
Gemini 2.5 Flash Image excels at editing existing images with natural language instructions. You can add elements, modify styles, or transform images while maintaining their core characteristics:
import { generateText } from 'ai';
import fs from 'node:fs';
import 'dotenv/config';

async function editImage() {
  const editResult = await generateText({
    model: 'google/gemini-2.5-flash-image',
    prompt: [
      {
        role: 'user',
        content: [
          {
            type: 'text',
            text: 'Add a small wizard hat to this cat. Keep everything else the same.',
          },
          {
            type: 'image',
            // image: DataContent (string | Uint8Array | ArrayBuffer | Buffer) or URL
            image: new URL(
              'https://raw.githubusercontent.com/vercel/ai/refs/heads/main/examples/ai-functions/data/comic-cat.png',
            ),
            mediaType: 'image/jpeg',
          },
        ],
      },
    ],
  });

  // Save the edited image
  const timestamp = Date.now();
  fs.mkdirSync('output', { recursive: true });

  for (const file of editResult.files) {
    if (file.mediaType.startsWith('image/')) {
      await fs.promises.writeFile(
        `output/edited-${timestamp}.png`,
        file.uint8Array,
      );
      console.log(`Saved edited image: output/edited-${timestamp}.png`);
    }
  }
}

editImage().catch(console.error);
What's Next?
You've learned how to generate new images from text prompts and edit existing images using natural language instructions with Google's Gemini 2.5 Flash Image model.
For more advanced techniques, integration patterns, and practical examples, check out our Cookbook where you'll find comprehensive guides for building sophisticated AI-powered applications.
title: Get started with Claude 3.7 Sonnet description: Get started with Claude 3.7 Sonnet using the AI SDK. tags: ['getting-started']
Get started with Claude 3.7 Sonnet
With the release of Claude 3.7 Sonnet, there has never been a better time to start building AI applications, particularly those that require complex reasoning capabilities.
The AI SDK is a powerful TypeScript toolkit for building AI applications with large language models (LLMs) like Claude 3.7 Sonnet alongside popular frameworks like React, Next.js, Vue, Svelte, Node.js, and more.
Claude 3.7 Sonnet
Claude 3.7 Sonnet is Anthropic's most intelligent model to date and the first Claude model to offer extended thinking—the ability to solve complex problems with careful, step-by-step reasoning. With Claude 3.7 Sonnet, you can balance speed and quality by choosing between standard thinking for near-instant responses or extended thinking or advanced reasoning. Claude 3.7 Sonnet is state-of-the-art for coding, and delivers advancements in computer use, agentic capabilities, complex reasoning, and content generation. With frontier performance and more control over speed, Claude 3.7 Sonnet is a great choice for powering AI agents, especially customer-facing agents, and complex AI workflows.
Getting Started with the AI SDK
The AI SDK is the TypeScript toolkit designed to help developers build AI-powered applications with React, Next.js, Vue, Svelte, Node.js, and more. Integrating LLMs into applications is complicated and heavily dependent on the specific model provider you use.
The AI SDK abstracts away the differences between model providers, eliminates boilerplate code for building chatbots, and allows you to go beyond text output to generate rich, interactive components.
At the center of the AI SDK is AI SDK Core, which provides a unified API to call any LLM. The code snippet below is all you need to call Claude 3.7 Sonnet with the AI SDK:
import { anthropic } from '@ai-sdk/anthropic';
import { generateText } from 'ai';

const { text, reasoningText, reasoning } = await generateText({
  model: anthropic('claude-3-7-sonnet-20250219'),
  prompt: 'How many people will live in the world in 2040?',
});
console.log(text); // text response
The unified interface also means that you can easily switch between providers by changing just two lines of code. For example, to use Claude 3.7 Sonnet via Amazon Bedrock:
import { bedrock } from '@ai-sdk/amazon-bedrock';
import { generateText } from 'ai';

const { reasoning, text } = await generateText({
  model: bedrock('anthropic.claude-3-7-sonnet-20250219-v1:0'),
  prompt: 'How many people will live in the world in 2040?',
});
Reasoning Ability
Claude 3.7 Sonnet introduces a new extended thinking—the ability to solve complex problems with careful, step-by-step reasoning. You can enable it using the thinking provider option and specifying a thinking budget in tokens:
import { anthropic, AnthropicProviderOptions } from '@ai-sdk/anthropic';
import { generateText } from 'ai';

const { text, reasoningText, reasoning } = await generateText({
  model: anthropic('claude-3-7-sonnet-20250219'),
  prompt: 'How many people will live in the world in 2040?',
  providerOptions: {
    anthropic: {
      thinking: { type: 'enabled', budgetTokens: 12000 },
    } satisfies AnthropicProviderOptions,
  },
});

console.log(reasoningText); // reasoning text
console.log(reasoning); // reasoning details including redacted reasoning
console.log(text); // text response
Building Interactive Interfaces
AI SDK Core can be paired with AI SDK UI, another powerful component of the AI SDK, to streamline the process of building chat, completion, and assistant interfaces with popular frameworks like Next.js, Nuxt, and SvelteKit.
AI SDK UI provides robust abstractions that simplify the complex tasks of managing chat streams and UI updates on the frontend, enabling you to develop dynamic AI-driven interfaces more efficiently.
With four main hooks — useChat, useCompletion, and useObject — you can incorporate real-time chat capabilities, text completions, streamed JSON, and interactive assistant features into your app.
Let's explore building a chatbot with Next.js, the AI SDK, and Claude 3.7 Sonnet:
In a new Next.js application, first install the AI SDK and the Anthropic provider:
Then, create a route handler for the chat endpoint:
import { anthropic, AnthropicProviderOptions } from '@ai-sdk/anthropic';
import { streamText, convertToModelMessages, type UIMessage } from 'ai';

export async function POST(req: Request) {
  const { messages }: { messages: UIMessage[] } = await req.json();

  const result = streamText({
    model: anthropic('claude-3-7-sonnet-20250219'),
    messages: await convertToModelMessages(messages),
    providerOptions: {
      anthropic: {
        thinking: { type: 'enabled', budgetTokens: 12000 },
      } satisfies AnthropicProviderOptions,
    },
  });

  return result.toUIMessageStreamResponse({
    sendReasoning: true,
  });
}
Finally, update the root page (app/page.tsx) to use the useChat hook:
'use client';

import { useChat } from '@ai-sdk/react';
import { DefaultChatTransport } from 'ai';
import { useState } from 'react';

export default function Page() {
  const [input, setInput] = useState('');
  const { messages, sendMessage } = useChat({
    transport: new DefaultChatTransport({ api: '/api/chat' }),
  });

  const handleSubmit = (e: React.FormEvent) => {
    e.preventDefault();
    if (input.trim()) {
      sendMessage({ text: input });
      setInput('');
    }
  };

  return (
    <>
      {messages.map(message => (
        <div key={message.id}>
          {message.role === 'user' ? 'User: ' : 'AI: '}
          {message.parts.map((part, index) => {
            // text parts:
            if (part.type === 'text') {
              return <div key={index}>{part.text}</div>;
            }
            // reasoning parts:
            if (part.type === 'reasoning') {
              return <pre key={index}>{part.text}</pre>;
            }
          })}
        </div>
      ))}
      <form onSubmit={handleSubmit}>
        <input
          name="prompt"
          value={input}
          onChange={e => setInput(e.target.value)}
        />
        <button type="submit">Send</button>
      </form>
    </>
  );
}
The useChat hook on your root page (app/page.tsx) will make a request to your LLM provider endpoint (app/api/chat/route.ts) whenever the user submits a message. The messages are then displayed in the chat UI.
Get Started
Ready to dive in? Here's how you can begin:
- Explore the documentation at ai-sdk.dev/docs to understand the capabilities of the AI SDK.
- Check out practical examples at ai-sdk.dev/examples to see the SDK in action.
- Dive deeper with advanced guides on topics like Retrieval-Augmented Generation (RAG) at ai-sdk.dev/docs/guides.
- Use ready-to-deploy AI templates at vercel.com/templates?type=ai.
Claude 3.7 Sonnet opens new opportunities for reasoning-intensive AI applications. Start building today and leverage the power of advanced reasoning in your AI projects.
title: Get started with Llama 3.1 description: Get started with Llama 3.1 using the AI SDK. tags: ['getting-started']
Get started with Llama 3.1
The current generation of Llama models is 3.3. Please note that while this guide focuses on Llama 3.1, the newer Llama 3.3 models are now available and may offer improved capabilities. The concepts and integration techniques described here remain applicable, though you may want to use the latest generation models for optimal performance.With the release of Llama 3.1, there has never been a better time to start building AI applications.
The AI SDK is a powerful TypeScript toolkit for building AI application with large language models (LLMs) like Llama 3.1 alongside popular frameworks like React, Next.js, Vue, Svelte, Node.js, and more
Llama 3.1
The release of Meta's Llama 3.1 is an important moment in AI development. As the first state-of-the-art open weight AI model, Llama 3.1 is helping accelerate developers building AI apps. Available in 8B, 70B, and 405B sizes, these instruction-tuned models work well for tasks like dialogue generation, translation, reasoning, and code generation.
Benchmarks
Llama 3.1 surpasses most available open-source chat models on common industry benchmarks and even outperforms some closed-source models, offering superior performance in language nuances, contextual understanding, and complex multi-step tasks. The models' refined post-training processes significantly improve response alignment, reduce false refusal rates, and enhance answer diversity, making Llama 3.1 a powerful and accessible tool for building generative AI applications.
 Source: Meta AI - Llama 3.1 Model Card
Choosing Model Size
Llama 3.1 includes a new 405B parameter model, becoming the largest open-source model available today. This model is designed to handle the most complex and demanding tasks.
When choosing between the different sizes of Llama 3.1 models (405B, 70B, 8B), consider the trade-off between performance and computational requirements. The 405B model offers the highest accuracy and capability for complex tasks but requires significant computational resources. The 70B model provides a good balance of performance and efficiency for most applications, while the 8B model is suitable for simpler tasks or resource-constrained environments where speed and lower computational overhead are priorities.
Getting Started with the AI SDK
The AI SDK is the TypeScript toolkit designed to help developers build AI-powered applications with React, Next.js, Vue, Svelte, Node.js, and more. Integrating LLMs into applications is complicated and heavily dependent on the specific model provider you use.
The AI SDK abstracts away the differences between model providers, eliminates boilerplate code for building chatbots, and allows you to go beyond text output to generate rich, interactive components.
At the center of the AI SDK is AI SDK Core, which provides a unified API to call any LLM. The code snippet below is all you need to call Llama 3.1 (using DeepInfra) with the AI SDK:
import { deepinfra } from '@ai-sdk/deepinfra';
import { generateText } from 'ai';

const { text } = await generateText({
  model: deepinfra('meta-llama/Meta-Llama-3.1-405B-Instruct'),
  prompt: 'What is love?',
});
AI SDK Core abstracts away the differences between model providers, allowing you to focus on building great applications. Prefer to use Amazon Bedrock? The unified interface also means that you can easily switch between models by changing just two lines of code.
import { generateText } from 'ai';
import { bedrock } from '@ai-sdk/amazon-bedrock';

const { text } = await generateText({
  model: bedrock('meta.llama3-1-405b-instruct-v1'),
  prompt: 'What is love?',
});
Streaming the Response
To stream the model's response as it's being generated, update your code snippet to use the streamText function.
import { streamText } from 'ai';
import { deepinfra } from '@ai-sdk/deepinfra';

const { textStream } = streamText({
  model: deepinfra('meta-llama/Meta-Llama-3.1-405B-Instruct'),
  prompt: 'What is love?',
});
Generating Structured Data
While text generation can be useful, you might want to generate structured JSON data. For example, you might want to extract information from text, classify data, or generate synthetic data. AI SDK Core provides two functions (generateObject and streamObject) to generate structured data, allowing you to constrain model outputs to a specific schema.
import { generateObject } from 'ai';
import { deepinfra } from '@ai-sdk/deepinfra';
import { z } from 'zod';

const { object } = await generateObject({
  model: deepinfra('meta-llama/Meta-Llama-3.1-70B-Instruct'),
  schema: z.object({
    recipe: z.object({
      name: z.string(),
      ingredients: z.array(z.object({ name: z.string(), amount: z.string() })),
      steps: z.array(z.string()),
    }),
  }),
  prompt: 'Generate a lasagna recipe.',
});
This code snippet will generate a type-safe recipe that conforms to the specified zod schema.
Tools
While LLMs have incredible generation capabilities, they struggle with discrete tasks (e.g. mathematics) and interacting with the outside world (e.g. getting the weather). The solution: tools, which are like programs that you provide to the model, which it can choose to call as necessary.
Using Tools with the AI SDK
The AI SDK supports tool usage across several of its functions, including generateText and streamUI. By passing one or more tools to the tools parameter, you can extend the capabilities of LLMs, allowing them to perform discrete tasks and interact with external systems.
Here's an example of how you can use a tool with the AI SDK and Llama 3.1:
import { generateText, tool } from 'ai';
import { deepinfra } from '@ai-sdk/deepinfra';
import { z } from 'zod';

const { text } = await generateText({
  model: deepinfra('meta-llama/Meta-Llama-3.1-70B-Instruct'),
  prompt: 'What is the weather like today?',
  tools: {
    getWeather: tool({
      description: 'Get the weather in a location',
      inputSchema: z.object({
        location: z.string().describe('The location to get the weather for'),
      }),
      execute: async ({ location }) => ({
        location,
        temperature: 72 + Math.floor(Math.random() * 21) - 10,
      }),
    }),
  },
});
In this example, the getWeather tool allows the model to fetch real-time weather data, enhancing its ability to provide accurate and up-to-date information.
Agents
Agents take your AI applications a step further by allowing models to execute multiple steps (i.e. tools) in a non-deterministic way, making decisions based on context and user input.
Agents use LLMs to choose the next step in a problem-solving process. They can reason at each step and make decisions based on the evolving context.
Implementing Agents with the AI SDK
The AI SDK supports agent implementation through the maxSteps parameter. This allows the model to make multiple decisions and tool calls in a single interaction.
Here's an example of an agent that solves math problems:
import { generateText, tool } from 'ai';
import { deepinfra } from '@ai-sdk/deepinfra';
import * as mathjs from 'mathjs';
import { z } from 'zod';

const problem =
  'Calculate the profit for a day if revenue is $5000 and expenses are $3500.';

const { text: answer } = await generateText({
  model: deepinfra('meta-llama/Meta-Llama-3.1-70B-Instruct'),
  system:
    'You are solving math problems. Reason step by step. Use the calculator when necessary.',
  prompt: problem,
  tools: {
    calculate: tool({
      description: 'A tool for evaluating mathematical expressions.',
      inputSchema: z.object({ expression: z.string() }),
      execute: async ({ expression }) => mathjs.evaluate(expression),
    }),
  },
  maxSteps: 5,
});
In this example, the agent can use the calculator tool multiple times if needed, reasoning through the problem step by step.
Building Interactive Interfaces
AI SDK Core can be paired with AI SDK UI, another powerful component of the AI SDK, to streamline the process of building chat, completion, and assistant interfaces with popular frameworks like Next.js, Nuxt, and SvelteKit.
AI SDK UI provides robust abstractions that simplify the complex tasks of managing chat streams and UI updates on the frontend, enabling you to develop dynamic AI-driven interfaces more efficiently.
With four main hooks — useChat, useCompletion, and useObject — you can incorporate real-time chat capabilities, text completions, streamed JSON, and interactive assistant features into your app.
Let's explore building a chatbot with Next.js, the AI SDK, and Llama 3.1 (via DeepInfra):
import { deepinfra } from '@ai-sdk/deepinfra';
import { convertToModelMessages, streamText } from 'ai';

// Allow streaming responses up to 30 seconds
export const maxDuration = 30;

export async function POST(req: Request) {
  const { messages } = await req.json();

  const result = streamText({
    model: deepinfra('meta-llama/Meta-Llama-3.1-70B-Instruct'),
    messages: await convertToModelMessages(messages),
  });

  return result.toUIMessageStreamResponse();
}
'use client';

import { useChat } from '@ai-sdk/react';

export default function Page() {
  const { messages, input, handleInputChange, handleSubmit } = useChat();

  return (
    <>
      {messages.map(message => (
        <div key={message.id}>
          {message.role === 'user' ? 'User: ' : 'AI: '}
          {message.content}
        </div>
      ))}
      <form onSubmit={handleSubmit}>
        <input name="prompt" value={input} onChange={handleInputChange} />
        <button type="submit">Submit</button>
      </form>
    </>
  );
}
The useChat hook on your root page (app/page.tsx) will make a request to your AI provider endpoint (app/api/chat/route.ts) whenever the user submits a message. The messages are then streamed back in real-time and displayed in the chat UI.
This enables a seamless chat experience where the user can see the AI response as soon as it is available, without having to wait for the entire response to be received.
Going Beyond Text
The AI SDK's React Server Components (RSC) API enables you to create rich, interactive interfaces that go beyond simple text generation. With the streamUI function, you can dynamically stream React components from the server to the client.
Let's dive into how you can leverage tools with AI SDK RSC to build a generative user interface with Next.js (App Router).
First, create a Server Action.
'use server';

import { streamUI } from '@ai-sdk/rsc';
import { deepinfra } from '@ai-sdk/deepinfra';
import { z } from 'zod';

export async function streamComponent() {
  const result = await streamUI({
    model: deepinfra('meta-llama/Meta-Llama-3.1-70B-Instruct'),
    prompt: 'Get the weather for San Francisco',
    text: ({ content }) => <div>{content}</div>,
    tools: {
      getWeather: {
        description: 'Get the weather for a location',
        inputSchema: z.object({ location: z.string() }),
        generate: async function* ({ location }) {
          yield <div>loading...</div>;
          const weather = '25c'; // await getWeather(location);
          return (
            <div>
              the weather in {location} is {weather}.
            </div>
          );
        },
      },
    },
  });
  return result.value;
}
In this example, if the model decides to use the getWeather tool, it will first yield a div while fetching the weather data, then return a weather component with the fetched data (note: static data in this example). This allows for a more dynamic and responsive UI that can adapt based on the AI's decisions and external data.
On the frontend, you can call this Server Action like any other asynchronous function in your application. In this case, the function returns a regular React component.
'use client';

import { useState } from 'react';
import { streamComponent } from './actions';

export default function Page() {
  const [component, setComponent] = useState<React.ReactNode>();

  return (
    <div>
      <form
        onSubmit={async e => {
          e.preventDefault();
          setComponent(await streamComponent());
        }}
      >
        <button>Stream Component</button>
      </form>
      <div>{component}</div>
    </div>
  );
}
To see AI SDK RSC in action, check out our open-source Next.js Gemini Chatbot.
Migrate from OpenAI
One of the key advantages of the AI SDK is its unified API, which makes it incredibly easy to switch between different AI models and providers. This flexibility is particularly useful when you want to migrate from one model to another, such as moving from OpenAI's GPT models to Meta's Llama models hosted on DeepInfra.
Here's how simple the migration process can be:
OpenAI Example:
import { generateText } from 'ai';
import { openai } from '@ai-sdk/openai';

const { text } = await generateText({
  model: openai('gpt-4.1'),
  prompt: 'What is love?',
});
Llama on DeepInfra Example:
import { generateText } from 'ai';
import { deepinfra } from '@ai-sdk/deepinfra';

const { text } = await generateText({
  model: deepinfra('meta-llama/Meta-Llama-3.1-70B-Instruct'),
  prompt: 'What is love?',
});
Thanks to the unified API, the core structure of the code remains the same. The main differences are:
- Creating a DeepInfra client
- Changing the model name from
openai("gpt-4.1")todeepinfra("meta-llama/Meta-Llama-3.1-70B-Instruct").
With just these few changes, you've migrated from using OpenAI's GPT-4-Turbo to Meta's Llama 3.1 hosted on DeepInfra. The generateText function and its usage remain identical, showcasing the power of the AI SDK's unified API.
This feature allows you to easily experiment with different models, compare their performance, and choose the best one for your specific use case without having to rewrite large portions of your codebase.
Prompt Engineering and Fine-tuning
While the Llama 3.1 family of models are powerful out-of-the-box, their performance can be enhanced through effective prompt engineering and fine-tuning techniques.
Prompt Engineering
Prompt engineering is the practice of crafting input prompts to elicit desired outputs from language models. It involves structuring and phrasing prompts in ways that guide the model towards producing more accurate, relevant, and coherent responses.
For more information on prompt engineering techniques (specific to Llama models), check out these resources:
Fine-tuning
Fine-tuning involves further training a pre-trained model on a specific dataset or task to customize its performance for particular use cases. This process allows you to adapt Llama 3.1 to your specific domain or application, potentially improving its accuracy and relevance for your needs.
To learn more about fine-tuning Llama models, check out these resources:
- Official Fine-tuning Llama Guide
- Fine-tuning and Inference with Llama 3
- Fine-tuning Models with Fireworks AI
- Fine-tuning Llama with Modal
Conclusion
The AI SDK offers a powerful and flexible way to integrate cutting-edge AI models like Llama 3.1 into your applications. With AI SDK Core, you can seamlessly switch between different AI models and providers by changing just two lines of code. This flexibility allows for quick experimentation and adaptation, reducing the time required to change models from days to minutes.
The AI SDK ensures that your application remains clean and modular, accelerating development and future-proofing against the rapidly evolving landscape.
Ready to get started? Here's how you can dive in:
- Explore the documentation at ai-sdk.dev/docs to understand the full capabilities of the AI SDK.
- Check out practical examples at ai-sdk.dev/examples to see the SDK in action and get inspired for your own projects.
- Dive deeper with advanced guides on topics like Retrieval-Augmented Generation (RAG) and multi-modal chat at ai-sdk.dev/docs/guides.
- Check out ready-to-deploy AI templates at vercel.com/templates?type=ai.
title: Get started with GPT-5 description: Get started with GPT-5 using the AI SDK. tags: ['getting-started']
Get started with OpenAI GPT-5
With the release of OpenAI's GPT-5 model, there has never been a better time to start building AI applications with advanced capabilities like verbosity control, web search, and native multi-modal understanding.
The AI SDK is a powerful TypeScript toolkit for building AI applications with large language models (LLMs) like OpenAI GPT-5 alongside popular frameworks like React, Next.js, Vue, Svelte, Node.js, and more.
OpenAI GPT-5
OpenAI's GPT-5 represents their latest advancement in language models, offering powerful new features including verbosity control for tailored response lengths, integrated web search capabilities, reasoning summaries for transparency, and native support for text, images, audio, and PDFs. The model is available in three variants: gpt-5, gpt-5-mini for faster, more cost-effective processing, and gpt-5-nano for ultra-efficient operations.
Prompt Engineering for GPT-5
Here are the key strategies for effective prompting:
Core Principles
- Be precise and unambiguous: Avoid contradictory or ambiguous instructions. GPT-5 performs best with clear, explicit guidance.
- Use structured prompts: Leverage XML-like tags to organize different sections of your instructions for better clarity.
- Natural language works best: While being precise, write prompts as you would explain to a skilled colleague.
Prompting Techniques
1. Agentic Workflow Control
- Adjust the
reasoningEffortparameter to calibrate model autonomy - Set clear stop conditions and define explicit tool call budgets
- Provide guidance on exploration depth and persistence
// Example with reasoning effort control
const result = await generateText({
  model: openai('gpt-5'),
  prompt: 'Analyze this complex dataset and provide insights.',
  providerOptions: {
    openai: {
      reasoningEffort: 'high', // Increases autonomous exploration
    },
  },
});
2. Structured Prompt Format Use XML-like tags to organize your prompts:
<context_gathering>
Goal: Extract key performance metrics from the report
Method: Focus on quantitative data and year-over-year comparisons
Early stop criteria: Stop after finding 5 key metrics
</context_gathering>

<task>
Analyze the attached financial report and identify the most important metrics.
</task>
3. Tool Calling Best Practices
- Use tool preambles to provide clear upfront plans
- Define safe vs. unsafe actions for different tools
- Create structured updates about tool call progress
4. Verbosity Control
- Use the
textVerbosityparameter to control response length programmatically - Override with natural language when needed for specific contexts
- Balance between conciseness and completeness
5. Optimization Workflow
- Start with a clear, simple prompt
- Test and identify areas of ambiguity or confusion
- Iteratively refine by removing contradictions
- Consider using OpenAI's Prompt Optimizer tool for complex prompts
- Document successful patterns for reuse
Getting Started with the AI SDK
The AI SDK is the TypeScript toolkit designed to help developers build AI-powered applications with React, Next.js, Vue, Svelte, Node.js, and more. Integrating LLMs into applications is complicated and heavily dependent on the specific model provider you use.
The AI SDK abstracts away the differences between model providers, eliminates boilerplate code for building chatbots, and allows you to go beyond text output to generate rich, interactive components.
At the center of the AI SDK is AI SDK Core, which provides a unified API to call any LLM. The code snippet below is all you need to call OpenAI GPT-5 with the AI SDK:
import { generateText } from 'ai';
import { openai } from '@ai-sdk/openai';

const { text } = await generateText({
  model: openai('gpt-5'),
  prompt: 'Explain the concept of quantum entanglement.',
});
Generating Structured Data
While text generation can be useful, you might want to generate structured JSON data. For example, you might want to extract information from text, classify data, or generate synthetic data. AI SDK Core provides two functions (generateObject and streamObject) to generate structured data, allowing you to constrain model outputs to a specific schema.
import { generateObject } from 'ai';
import { openai } from '@ai-sdk/openai';
import { z } from 'zod';

const { object } = await generateObject({
  model: openai('gpt-5'),
  schema: z.object({
    recipe: z.object({
      name: z.string(),
      ingredients: z.array(z.object({ name: z.string(), amount: z.string() })),
      steps: z.array(z.string()),
    }),
  }),
  prompt: 'Generate a lasagna recipe.',
});
This code snippet will generate a type-safe recipe that conforms to the specified zod schema.
Verbosity Control
One of GPT-5's new features is verbosity control, allowing you to adjust response length without modifying your prompt:
import { generateText } from 'ai';
import { openai } from '@ai-sdk/openai';

// Concise response
const { text: conciseText } = await generateText({
  model: openai('gpt-5'),
  prompt: 'Explain quantum computing.',
  providerOptions: {
    openai: {
      textVerbosity: 'low', // Produces terse, minimal responses
    },
  },
});

// Detailed response
const { text: detailedText } = await generateText({
  model: openai('gpt-5'),
  prompt: 'Explain quantum computing.',
  providerOptions: {
    openai: {
      textVerbosity: 'high', // Produces comprehensive, detailed responses
    },
  },
});
Web Search
GPT-5 can access real-time information through the integrated web search tool:
import { generateText } from 'ai';
import { openai } from '@ai-sdk/openai';

const result = await generateText({
  model: openai('gpt-5'),
  prompt: 'What are the latest developments in AI this week?',
  tools: {
    web_search: openai.tools.webSearch({
      searchContextSize: 'high',
    }),
  },
});

// Access URL sources
const sources = result.sources;
Reasoning Summaries
For transparency into GPT-5's thought process, enable reasoning summaries:
import { openai } from '@ai-sdk/openai';
import { streamText } from 'ai';

const result = streamText({
  model: openai.responses('gpt-5'),
  prompt:
    'Solve this logic puzzle: If all roses are flowers and some flowers fade quickly, do all roses fade quickly?',
  providerOptions: {
    openai: {
      reasoningSummary: 'detailed', // 'auto' for condensed or 'detailed' for comprehensive
    },
  },
});

// Stream reasoning and text separately
for await (const part of result.fullStream) {
  if (part.type === 'reasoning') {
    console.log(part.textDelta);
  } else if (part.type === 'text-delta') {
    process.stdout.write(part.textDelta);
  }
}
Using Tools with the AI SDK
GPT-5 supports tool calling out of the box, allowing it to interact with external systems and perform discrete tasks. Here's an example of using tool calling with the AI SDK:
import { generateText, tool } from 'ai';
import { openai } from '@ai-sdk/openai';
import { z } from 'zod';

const { toolResults } = await generateText({
  model: openai('gpt-5'),
  prompt: 'What is the weather like today in San Francisco?',
  tools: {
    getWeather: tool({
      description: 'Get the weather in a location',
      inputSchema: z.object({
        location: z.string().describe('The location to get the weather for'),
      }),
      execute: async ({ location }) => ({
        location,
        temperature: 72 + Math.floor(Math.random() * 21) - 10,
      }),
    }),
  },
});
Building Interactive Interfaces
AI SDK Core can be paired with AI SDK UI, another powerful component of the AI SDK, to streamline the process of building chat, completion, and assistant interfaces with popular frameworks like Next.js, Nuxt, and SvelteKit.
AI SDK UI provides robust abstractions that simplify the complex tasks of managing chat streams and UI updates on the frontend, enabling you to develop dynamic AI-driven interfaces more efficiently.
With four main hooks — useChat, useCompletion, and useObject — you can incorporate real-time chat capabilities, text completions, streamed JSON, and interactive assistant features into your app.
Let's explore building a chatbot with Next.js, the AI SDK, and OpenAI GPT-5:
In a new Next.js application, first install the AI SDK and the OpenAI provider:
Then, create a route handler for the chat endpoint:
import { openai } from '@ai-sdk/openai';
import { convertToModelMessages, streamText, UIMessage } from 'ai';

// Allow responses up to 30 seconds
export const maxDuration = 30;

export async function POST(req: Request) {
  const { messages }: { messages: UIMessage[] } = await req.json();

  const result = streamText({
    model: openai('gpt-5'),
    messages: await convertToModelMessages(messages),
  });

  return result.toUIMessageStreamResponse();
}
Finally, update the root page (app/page.tsx) to use the useChat hook:
'use client';

import { useChat } from '@ai-sdk/react';
import { useState } from 'react';

export default function Page() {
  const [input, setInput] = useState('');
  const { messages, sendMessage } = useChat({});

  return (
    <>
      {messages.map(message => (
        <div key={message.id}>
          {message.role === 'user' ? 'User: ' : 'AI: '}
          {message.parts.map((part, index) => {
            if (part.type === 'text') {
              return <span key={index}>{part.text}</span>;
            }
            return null;
          })}
        </div>
      ))}
      <form
        onSubmit={e => {
          e.preventDefault();
          if (input.trim()) {
            sendMessage({ text: input });
            setInput('');
          }
        }}
      >
        <input
          name="prompt"
          value={input}
          onChange={e => setInput(e.target.value)}
        />
        <button type="submit">Submit</button>
      </form>
    </>
  );
}
The useChat hook on your root page (app/page.tsx) will make a request to your AI provider endpoint (app/api/chat/route.ts) whenever the user submits a message. The messages are then displayed in the chat UI.
Get Started
Ready to get started? Here's how you can dive in:
- Explore the documentation at ai-sdk.dev/docs to understand the full capabilities of the AI SDK.
- Check out practical examples at ai-sdk.dev/cookbook to see the SDK in action and get inspired for your own projects.
- Dive deeper with advanced guides on topics like Retrieval-Augmented Generation (RAG) and multi-modal chat at ai-sdk.dev/cookbook/guides.
- Check out ready-to-deploy AI templates at vercel.com/templates?type=ai.
title: Get started with OpenAI o1 description: Get started with OpenAI o1 using the AI SDK. tags: ['getting-started', 'reasoning']
Get started with OpenAI o1
With the release of OpenAI's o1 series models, there has never been a better time to start building AI applications, particularly those that require complex reasoning capabilities.
The AI SDK is a powerful TypeScript toolkit for building AI applications with large language models (LLMs) like OpenAI o1 alongside popular frameworks like React, Next.js, Vue, Svelte, Node.js, and more.
OpenAI o1
OpenAI released a series of AI models designed to spend more time thinking before responding. They can reason through complex tasks and solve harder problems than previous models in science, coding, and math. These models, named the o1 series, are trained with reinforcement learning and can "think before they answer". As a result, they are able to produce a long internal chain of thought before responding to a prompt.
The main reasoning model available in the API is:
- o1: Designed to reason about hard problems using broad general knowledge about the world.
| Model | Streaming | Tools | Object Generation | Reasoning Effort |
|---|---|---|---|---|
| o1 |
Benchmarks
OpenAI o1 models excel in scientific reasoning, with impressive performance across various domains:
- Ranking in the 89th percentile on competitive programming questions (Codeforces)
- Placing among the top 500 students in the US in a qualifier for the USA Math Olympiad (AIME)
- Exceeding human PhD-level accuracy on a benchmark of physics, biology, and chemistry problems (GPQA)
Prompt Engineering for o1 Models
The o1 models perform best with straightforward prompts. Some prompt engineering techniques, like few-shot prompting or instructing the model to "think step by step," may not enhance performance and can sometimes hinder it. Here are some best practices:
- Keep prompts simple and direct: The models excel at understanding and responding to brief, clear instructions without the need for extensive guidance.
- Avoid chain-of-thought prompts: Since these models perform reasoning internally, prompting them to "think step by step" or "explain your reasoning" is unnecessary.
- Use delimiters for clarity: Use delimiters like triple quotation marks, XML tags, or section titles to clearly indicate distinct parts of the input, helping the model interpret different sections appropriately.
- Limit additional context in retrieval-augmented generation (RAG): When providing additional context or documents, include only the most relevant information to prevent the model from overcomplicating its response.
Getting Started with the AI SDK
The AI SDK is the TypeScript toolkit designed to help developers build AI-powered applications with React, Next.js, Vue, Svelte, Node.js, and more. Integrating LLMs into applications is complicated and heavily dependent on the specific model provider you use.
The AI SDK abstracts away the differences between model providers, eliminates boilerplate code for building chatbots, and allows you to go beyond text output to generate rich, interactive components.
At the center of the AI SDK is AI SDK Core, which provides a unified API to call any LLM. The code snippet below is all you need to call OpenAI o1 with the AI SDK:
import { generateText } from 'ai';
import { openai } from '@ai-sdk/openai';

const { text } = await generateText({
  model: openai('o1'),
  prompt: 'Explain the concept of quantum entanglement.',
});
AI SDK Core abstracts away the differences between model providers, allowing you to focus on building great applications. The unified interface also means that you can easily switch between models by changing just one line of code.
import { generateText } from 'ai';
import { openai } from '@ai-sdk/openai';

const { text } = await generateText({
  model: openai('o1'),
  prompt: 'Explain the concept of quantum entanglement.',
});
Refining Reasoning Effort
You can control the amount of reasoning effort expended by o1 through the reasoningEffort parameter.
This parameter can be set to 'low', 'medium', or 'high' to adjust how much time and computation the model spends on internal reasoning before producing a response.
import { generateText } from 'ai';
import { openai } from '@ai-sdk/openai';

// Reduce reasoning effort for faster responses
const { text } = await generateText({
  model: openai('o1'),
  prompt: 'Explain quantum entanglement briefly.',
  providerOptions: {
    openai: { reasoningEffort: 'low' },
  },
});
Generating Structured Data
While text generation can be useful, you might want to generate structured JSON data. For example, you might want to extract information from text, classify data, or generate synthetic data. AI SDK Core provides two functions (generateObject and streamObject) to generate structured data, allowing you to constrain model outputs to a specific schema.
import { generateObject } from 'ai';
import { openai } from '@ai-sdk/openai';
import { z } from 'zod';

const { object } = await generateObject({
  model: openai('o1'),
  schema: z.object({
    recipe: z.object({
      name: z.string(),
      ingredients: z.array(z.object({ name: z.string(), amount: z.string() })),
      steps: z.array(z.string()),
    }),
  }),
  prompt: 'Generate a lasagna recipe.',
});
This code snippet will generate a type-safe recipe that conforms to the specified zod schema.
Structured object generation is supported with o1.
Tools
While LLMs have incredible generation capabilities, they struggle with discrete tasks (e.g. mathematics) and interacting with the outside world (e.g. getting the weather). The solution: tools, which are like programs that you provide to the model, which it can choose to call as necessary.
Using Tools with the AI SDK
The AI SDK supports tool usage across several of its functions, like generateText and streamText. By passing one or more tools to the tools parameter, you can extend the capabilities of LLMs, allowing them to perform discrete tasks and interact with external systems.
Here's an example of how you can use a tool with the AI SDK and o1:
import { generateText, tool } from 'ai';
import { openai } from '@ai-sdk/openai';
import { z } from 'zod';

const { text } = await generateText({
  model: openai('o1'),
  prompt: 'What is the weather like today?',
  tools: {
    getWeather: tool({
      description: 'Get the weather in a location',
      inputSchema: z.object({
        location: z.string().describe('The location to get the weather for'),
      }),
      execute: async ({ location }) => ({
        location,
        temperature: 72 + Math.floor(Math.random() * 21) - 10,
      }),
    }),
  },
});
In this example, the getWeather tool allows the model to fetch real-time weather data (simulated for simplicity), enhancing its ability to provide accurate and up-to-date information.
Tools are compatible with o1.
Building Interactive Interfaces
AI SDK Core can be paired with AI SDK UI, another powerful component of the AI SDK, to streamline the process of building chat, completion, and assistant interfaces with popular frameworks like Next.js, Nuxt, and SvelteKit.
AI SDK UI provides robust abstractions that simplify the complex tasks of managing chat streams and UI updates on the frontend, enabling you to develop dynamic AI-driven interfaces more efficiently.
With four main hooks — useChat, useCompletion, and useObject — you can incorporate real-time chat capabilities, text completions, streamed JSON, and interactive assistant features into your app.
Let's explore building a chatbot with Next.js, the AI SDK, and OpenAI o1:
import { openai } from '@ai-sdk/openai';
import { convertToModelMessages, streamText, UIMessage } from 'ai';

// Allow responses up to 5 minutes
export const maxDuration = 300;

export async function POST(req: Request) {
  const { messages }: { messages: UIMessage[] } = await req.json();

  const result = streamText({
    model: openai('o1'),
    messages: await convertToModelMessages(messages),
  });

  return result.toUIMessageStreamResponse();
}
'use client';

import { useChat } from '@ai-sdk/react';

export default function Page() {
  const { messages, input, handleInputChange, handleSubmit, error } = useChat();

  return (
    <>
      {messages.map(message => (
        <div key={message.id}>
          {message.role === 'user' ? 'User: ' : 'AI: '}
          {message.content}
        </div>
      ))}
      <form onSubmit={handleSubmit}>
        <input name="prompt" value={input} onChange={handleInputChange} />
        <button type="submit">Submit</button>
      </form>
    </>
  );
}
The useChat hook on your root page (app/page.tsx) will make a request to your AI provider endpoint (app/api/chat/route.ts) whenever the user submits a message. The messages are then displayed in the chat UI.
Get Started
Ready to get started? Here's how you can dive in:
- Explore the documentation at ai-sdk.dev/docs to understand the full capabilities of the AI SDK.
- Check out our support for the o1 series of reasoning models in the OpenAI Provider.
- Check out practical examples at ai-sdk.dev/examples to see the SDK in action and get inspired for your own projects.
- Dive deeper with advanced guides on topics like Retrieval-Augmented Generation (RAG) and multi-modal chat at ai-sdk.dev/docs/guides.
- Check out ready-to-deploy AI templates at vercel.com/templates?type=ai.
title: Get started with OpenAI o3-mini description: Get started with OpenAI o3-mini using the AI SDK. tags: ['getting-started', 'reasoning']
Get started with OpenAI o3-mini
With the release of OpenAI's o3-mini model, there has never been a better time to start building AI applications, particularly those that require complex STEM reasoning capabilities.
The AI SDK is a powerful TypeScript toolkit for building AI applications with large language models (LLMs) like OpenAI o3-mini alongside popular frameworks like React, Next.js, Vue, Svelte, Node.js, and more.
OpenAI o3-mini
OpenAI recently released a new AI model optimized for STEM reasoning that excels in science, math, and coding tasks. o3-mini matches o1's performance in these domains while delivering faster responses and lower costs. The model supports tool calling, structured outputs, and system messages, making it a great option for a wide range of applications.
o3-mini offers three reasoning effort levels:
- [Low]: Optimized for speed while maintaining solid reasoning capabilities
- [Medium]: Balanced approach matching o1's performance levels
- [High]: Enhanced reasoning power exceeding o1 in many STEM domains
| Model | Streaming | Tool Calling | Structured Output | Reasoning Effort | Image Input |
|---|---|---|---|---|---|
| o3-mini |
Benchmarks
OpenAI o3-mini demonstrates impressive performance across technical domains:
- 87.3% accuracy on AIME competition math questions
- 79.7% accuracy on PhD-level science questions (GPQA Diamond)
- 2130 Elo rating on competitive programming (Codeforces)
- 49.3% accuracy on verified software engineering tasks (SWE-bench)
These benchmark results are using high reasoning effort setting.
Prompt Engineering for o3-mini
The o3-mini model performs best with straightforward prompts. Some prompt engineering techniques, like few-shot prompting or instructing the model to "think step by step," may not enhance performance and can sometimes hinder it. Here are some best practices:
- Keep prompts simple and direct: The model excels at understanding and responding to brief, clear instructions without the need for extensive guidance.
- Avoid chain-of-thought prompts: Since the model performs reasoning internally, prompting it to "think step by step" or "explain your reasoning" is unnecessary.
- Use delimiters for clarity: Use delimiters like triple quotation marks, XML tags, or section titles to clearly indicate distinct parts of the input.
Getting Started with the AI SDK
The AI SDK is the TypeScript toolkit designed to help developers build AI-powered applications with React, Next.js, Vue, Svelte, Node.js, and more. Integrating LLMs into applications is complicated and heavily dependent on the specific model provider you use.
The AI SDK abstracts away the differences between model providers, eliminates boilerplate code for building chatbots, and allows you to go beyond text output to generate rich, interactive components.
At the center of the AI SDK is AI SDK Core, which provides a unified API to call any LLM. The code snippet below is all you need to call OpenAI o3-mini with the AI SDK:
import { generateText } from 'ai';
import { openai } from '@ai-sdk/openai';

const { text } = await generateText({
  model: openai('o3-mini'),
  prompt: 'Explain the concept of quantum entanglement.',
});
Refining Reasoning Effort
You can control the amount of reasoning effort expended by o3-mini through the reasoningEffort parameter.
This parameter can be set to low, medium, or high to adjust how much time and computation the model spends on internal reasoning before producing a response.
import { generateText } from 'ai';
import { openai } from '@ai-sdk/openai';

// Reduce reasoning effort for faster responses
const { text } = await generateText({
  model: openai('o3-mini'),
  prompt: 'Explain quantum entanglement briefly.',
  providerOptions: {
    openai: { reasoningEffort: 'low' },
  },
});
Generating Structured Data
While text generation can be useful, you might want to generate structured JSON data. For example, you might want to extract information from text, classify data, or generate synthetic data. AI SDK Core provides two functions (generateObject and streamObject) to generate structured data, allowing you to constrain model outputs to a specific schema.
import { generateObject } from 'ai';
import { openai } from '@ai-sdk/openai';
import { z } from 'zod';

const { object } = await generateObject({
  model: openai('o3-mini'),
  schema: z.object({
    recipe: z.object({
      name: z.string(),
      ingredients: z.array(z.object({ name: z.string(), amount: z.string() })),
      steps: z.array(z.string()),
    }),
  }),
  prompt: 'Generate a lasagna recipe.',
});
This code snippet will generate a type-safe recipe that conforms to the specified zod schema.
Using Tools with the AI SDK
o3-mini supports tool calling out of the box, allowing it to interact with external systems and perform discrete tasks. Here's an example of using tool calling with the AI SDK:
import { generateText, tool } from 'ai';
import { openai } from '@ai-sdk/openai';
import { z } from 'zod';

const { text } = await generateText({
  model: openai('o3-mini'),
  prompt: 'What is the weather like today in San Francisco?',
  tools: {
    getWeather: tool({
      description: 'Get the weather in a location',
      inputSchema: z.object({
        location: z.string().describe('The location to get the weather for'),
      }),
      execute: async ({ location }) => ({
        location,
        temperature: 72 + Math.floor(Math.random() * 21) - 10,
      }),
    }),
  },
});
In this example, the getWeather tool allows the model to fetch real-time weather data (simulated for simplicity), enhancing its ability to provide accurate and up-to-date information.
Building Interactive Interfaces
AI SDK Core can be paired with AI SDK UI, another powerful component of the AI SDK, to streamline the process of building chat, completion, and assistant interfaces with popular frameworks like Next.js, Nuxt, and SvelteKit.
AI SDK UI provides robust abstractions that simplify the complex tasks of managing chat streams and UI updates on the frontend, enabling you to develop dynamic AI-driven interfaces more efficiently.
With four main hooks — useChat, useCompletion, and useObject — you can incorporate real-time chat capabilities, text completions, streamed JSON, and interactive assistant features into your app.
Let's explore building a chatbot with Next.js, the AI SDK, and OpenAI o3-mini:
In a new Next.js application, first install the AI SDK and the DeepSeek provider:
Then, create a route handler for the chat endpoint:
import { openai } from '@ai-sdk/openai';
import { convertToModelMessages, streamText, UIMessage } from 'ai';

// Allow responses up to 5 minutes
export const maxDuration = 300;

export async function POST(req: Request) {
  const { messages }: { messages: UIMessage[] } = await req.json();

  const result = streamText({
    model: openai('o3-mini'),
    messages: await convertToModelMessages(messages),
  });

  return result.toUIMessageStreamResponse();
}
Finally, update the root page (app/page.tsx) to use the useChat hook:
'use client';

import { useChat } from '@ai-sdk/react';

export default function Page() {
  const { messages, input, handleInputChange, handleSubmit, error } = useChat();

  return (
    <>
      {messages.map(message => (
        <div key={message.id}>
          {message.role === 'user' ? 'User: ' : 'AI: '}
          {message.content}
        </div>
      ))}
      <form onSubmit={handleSubmit}>
        <input name="prompt" value={input} onChange={handleInputChange} />
        <button type="submit">Submit</button>
      </form>
    </>
  );
}
The useChat hook on your root page (app/page.tsx) will make a request to your AI provider endpoint (app/api/chat/route.ts) whenever the user submits a message. The messages are then displayed in the chat UI.
Get Started
Ready to get started? Here's how you can dive in:
- Explore the documentation at ai-sdk.dev/docs to understand the full capabilities of the AI SDK.
- Check out our support for o3-mini in the OpenAI Provider.
- Check out practical examples at ai-sdk.dev/examples to see the SDK in action and get inspired for your own projects.
- Dive deeper with advanced guides on topics like Retrieval-Augmented Generation (RAG) and multi-modal chat at ai-sdk.dev/docs/guides.
- Check out ready-to-deploy AI templates at vercel.com/templates?type=ai.
title: Get started with DeepSeek R1 description: Get started with DeepSeek R1 using the AI SDK. tags: ['getting-started', 'reasoning']
Get started with DeepSeek R1
With the release of DeepSeek R1, there has never been a better time to start building AI applications, particularly those that require complex reasoning capabilities.
The AI SDK is a powerful TypeScript toolkit for building AI applications with large language models (LLMs) like DeepSeek R1 alongside popular frameworks like React, Next.js, Vue, Svelte, Node.js, and more.
DeepSeek R1
DeepSeek R1 is a series of advanced AI models designed to tackle complex reasoning tasks in science, coding, and mathematics. These models are optimized to "think before they answer," producing detailed internal chains of thought that aid in solving challenging problems.
The series includes two primary variants:
- DeepSeek R1-Zero: Trained exclusively with reinforcement learning (RL) without any supervised fine-tuning. It exhibits advanced reasoning capabilities but may struggle with readability and formatting.
- DeepSeek R1: Combines reinforcement learning with cold-start data and supervised fine-tuning to improve both reasoning performance and the readability of outputs.
Benchmarks
DeepSeek R1 models excel in reasoning tasks, delivering competitive performance across key benchmarks:
- AIME 2024 (Pass@1): 79.8%
- MATH-500 (Pass@1): 97.3%
- Codeforces (Percentile): Top 4% (96.3%)
- GPQA Diamond (Pass@1): 71.5%
Prompt Engineering for DeepSeek R1 Models
DeepSeek R1 models excel with structured and straightforward prompts. The following best practices can help achieve optimal performance:
- Use a structured format: Leverage the model’s preferred output structure with
<think>tags for reasoning and<answer>tags for the final result. - Prefer zero-shot prompts: Avoid few-shot prompting as it can degrade performance; instead, directly state the problem clearly.
- Specify output expectations: Guide the model by defining desired formats, such as markdown for readability or XML-like tags for clarity.
Getting Started with the AI SDK
The AI SDK is the TypeScript toolkit designed to help developers build AI-powered applications with React, Next.js, Vue, Svelte, Node.js, and more. Integrating LLMs into applications is complicated and heavily dependent on the specific model provider you use.
The AI SDK abstracts away the differences between model providers, eliminates boilerplate code for building chatbots, and allows you to go beyond text output to generate rich, interactive components.
At the center of the AI SDK is AI SDK Core, which provides a unified API to call any LLM. The code snippet below is all you need to call DeepSeek R1 with the AI SDK:
import { deepseek } from '@ai-sdk/deepseek';
import { generateText } from 'ai';

const { reasoningText, text } = await generateText({
  model: deepseek('deepseek-reasoner'),
  prompt: 'Explain quantum entanglement.',
});
The unified interface also means that you can easily switch between providers by changing just two lines of code. For example, to use DeepSeek R1 via Fireworks:
import { fireworks } from '@ai-sdk/fireworks';
import {
  generateText,
  wrapLanguageModel,
  extractReasoningMiddleware,
} from 'ai';

// middleware to extract reasoning tokens
const enhancedModel = wrapLanguageModel({
  model: fireworks('accounts/fireworks/models/deepseek-r1'),
  middleware: extractReasoningMiddleware({ tagName: 'think' }),
});

const { reasoningText, text } = await generateText({
  model: enhancedModel,
  prompt: 'Explain quantum entanglement.',
});
Or to use Groq's deepseek-r1-distill-llama-70b model:
import { groq } from '@ai-sdk/groq';
import {
  generateText,
  wrapLanguageModel,
  extractReasoningMiddleware,
} from 'ai';

// middleware to extract reasoning tokens
const enhancedModel = wrapLanguageModel({
  model: groq('deepseek-r1-distill-llama-70b'),
  middleware: extractReasoningMiddleware({ tagName: 'think' }),
});

const { reasoningText, text } = await generateText({
  model: enhancedModel,
  prompt: 'Explain quantum entanglement.',
});
When using DeepSeek-R1 series models with third-party providers like Together AI, we recommend using the startWithReasoning
option in the extractReasoningMiddleware function, as they tend to bypass thinking patterns.
Model Provider Comparison
You can use DeepSeek R1 with the AI SDK through various providers. Here's a comparison of the providers that support DeepSeek R1:
| Provider | Model ID | Reasoning Tokens |
|---|---|---|
| DeepSeek | deepseek-reasoner |
|
| Fireworks | accounts/fireworks/models/deepseek-r1 |
Requires Middleware |
| Groq | deepseek-r1-distill-llama-70b |
Requires Middleware |
| Azure | DeepSeek-R1 |
Requires Middleware |
| Together AI | deepseek-ai/DeepSeek-R1 |
Requires Middleware |
| FriendliAI | deepseek-r1 |
Requires Middleware |
| LangDB | deepseek/deepseek-reasoner |
Requires Middleware |
Building Interactive Interfaces
AI SDK Core can be paired with AI SDK UI, another powerful component of the AI SDK, to streamline the process of building chat, completion, and assistant interfaces with popular frameworks like Next.js, Nuxt, and SvelteKit.
AI SDK UI provides robust abstractions that simplify the complex tasks of managing chat streams and UI updates on the frontend, enabling you to develop dynamic AI-driven interfaces more efficiently.
With four main hooks — useChat, useCompletion, and useObject — you can incorporate real-time chat capabilities, text completions, streamed JSON, and interactive assistant features into your app.
Let's explore building a chatbot with Next.js, the AI SDK, and DeepSeek R1:
In a new Next.js application, first install the AI SDK and the DeepSeek provider:
Then, create a route handler for the chat endpoint:
import { deepseek } from '@ai-sdk/deepseek';
import { convertToModelMessages, streamText, UIMessage } from 'ai';

export async function POST(req: Request) {
  const { messages }: { messages: UIMessage[] } = await req.json();

  const result = streamText({
    model: deepseek('deepseek-reasoner'),
    messages: await convertToModelMessages(messages),
  });

  return result.toUIMessageStreamResponse({
    sendReasoning: true,
  });
}
Finally, update the root page (app/page.tsx) to use the useChat hook:
'use client';

import { useChat } from '@ai-sdk/react';
import { useState } from 'react';

export default function Page() {
  const [input, setInput] = useState('');
  const { messages, sendMessage } = useChat();

  const handleSubmit = (e: React.FormEvent<HTMLFormElement>) => {
    e.preventDefault();
    if (input.trim()) {
      sendMessage({ text: input });
      setInput('');
    }
  };

  return (
    <>
      {messages.map(message => (
        <div key={message.id}>
          {message.role === 'user' ? 'User: ' : 'AI: '}
          {message.parts.map((part, index) => {
            if (part.type === 'reasoning') {
              return <pre key={index}>{part.text}</pre>;
            }
            if (part.type === 'text') {
              return <span key={index}>{part.text}</span>;
            }
            return null;
          })}
        </div>
      ))}
      <form onSubmit={handleSubmit}>
        <input
          name="prompt"
          value={input}
          onChange={e => setInput(e.target.value)}
        />
        <button type="submit">Submit</button>
      </form>
    </>
  );
}
The useChat hook on your root page (app/page.tsx) will make a request to your AI provider endpoint (app/api/chat/route.ts) whenever the user submits a message. The messages are then displayed in the chat UI.
Limitations
While DeepSeek R1 models are powerful, they have certain limitations:
- No tool-calling support: DeepSeek R1 cannot directly interact with APIs or external tools.
- No object generation support: DeepSeek R1 does not support structured object generation. However, you can combine it with models that support structured object generation (like gpt-4o-mini) to generate objects. See the structured object generation with a reasoning model recipe for more information.
Get Started
Ready to dive in? Here's how you can begin:
- Explore the documentation at ai-sdk.dev/docs to understand the capabilities of the AI SDK.
- Check out practical examples at ai-sdk.dev/examples to see the SDK in action.
- Dive deeper with advanced guides on topics like Retrieval-Augmented Generation (RAG) at ai-sdk.dev/docs/guides.
- Use ready-to-deploy AI templates at vercel.com/templates?type=ai.
DeepSeek R1 opens new opportunities for reasoning-intensive AI applications. Start building today and leverage the power of advanced reasoning in your AI projects.
title: Get started with DeepSeek V3.2 description: Get started with DeepSeek V3.2 using the AI SDK. tags: ['getting-started', 'agents']
Get started with DeepSeek V3.2
With the release of DeepSeek V3.2, there has never been a better time to start building AI applications that require advanced reasoning and agentic capabilities.
The AI SDK is a powerful TypeScript toolkit for building AI applications with large language models (LLMs) like DeepSeek V3.2 alongside popular frameworks like React, Next.js, Vue, Svelte, Node.js, and more.
DeepSeek V3.2
DeepSeek V3.2 is a frontier model that harmonizes high computational efficiency with superior reasoning and agent performance. It introduces several key technical breakthroughs that enable it to perform comparably to GPT-5 while remaining open-source.
The series includes two primary variants:
- DeepSeek V3.2: The official successor to V3.2-Exp. A balanced model optimized for both reasoning and inference efficiency, delivering GPT-5 level performance.
- DeepSeek V3.2-Speciale: A high-compute variant with maxed-out reasoning capabilities that rivals Gemini-3.0-Pro. Achieves gold-medal performance in IMO 2025, CMO 2025, ICPC World Finals 2025, and IOI 2025. As of release, it does not support tool-use.
Benchmarks
DeepSeek V3.2 models excel in both reasoning and agentic tasks, delivering competitive performance across key benchmarks:
Reasoning Capabilities
- AIME 2025 (Pass@1): 96.0% (Speciale)
- HMMT 2025 (Pass@1): 99.2% (Speciale)
- HLE (Pass@1): 30.6%
- Codeforces (Rating): 2701 (Speciale)
Agentic Capabilities
- SWE Verified (Resolved): 73.1%
- Terminal Bench 2.0 (Acc): 46.4%
- τ2 Bench (Pass@1): 80.3%
- Tool Decathlon (Pass@1): 35.2%
Model Options
When using DeepSeek V3.2 with the AI SDK, you have two model options:
| Model Alias | Model Version | Description |
|---|---|---|
deepseek-chat |
DeepSeek-V3.2 (Non-thinking Mode) | Standard chat model |
deepseek-reasoner |
DeepSeek-V3.2 (Thinking Mode) | Enhanced reasoning for complex problem-solving |
Getting Started with the AI SDK
The AI SDK is the TypeScript toolkit designed to help developers build AI-powered applications with React, Next.js, Vue, Svelte, Node.js, and more. Integrating LLMs into applications is complicated and heavily dependent on the specific model provider you use.
The AI SDK abstracts away the differences between model providers, eliminates boilerplate code for building agents, and allows you to go beyond text output to generate rich, interactive components.
At the center of the AI SDK is AI SDK Core, which provides a unified API to call any LLM. The code snippet below is all you need to call DeepSeek V3.2 with the AI SDK:
import { deepseek } from '@ai-sdk/deepseek';
import { generateText } from 'ai';

const { text } = await generateText({
  model: deepseek('deepseek-chat'),
  prompt: 'Explain the concept of sparse attention in transformers.',
});
Building Interactive Interfaces
AI SDK Core can be paired with AI SDK UI, another powerful component of the AI SDK, to streamline the process of building chat, completion, and assistant interfaces with popular frameworks like Next.js, Nuxt, and SvelteKit.
AI SDK UI provides robust abstractions that simplify the complex tasks of managing chat streams and UI updates on the frontend, enabling you to develop dynamic AI-driven interfaces more efficiently.
With three main hooks — useChat, useCompletion, and useObject — you can incorporate real-time chat capabilities, text completions, streamed JSON, and interactive assistant features into your app.
Let's explore building an agent with Next.js, the AI SDK, and DeepSeek V3.2:
In a new Next.js application, first install the AI SDK and the DeepSeek provider:
Then, create a route handler for the chat endpoint:
import { deepseek } from '@ai-sdk/deepseek';
import { convertToModelMessages, streamText, UIMessage } from 'ai';

export async function POST(req: Request) {
  const { messages }: { messages: UIMessage[] } = await req.json();

  const result = streamText({
    model: deepseek('deepseek-reasoner'),
    messages: await convertToModelMessages(messages),
  });

  return result.toUIMessageStreamResponse({ sendReasoning: true });
}
Finally, update the root page (app/page.tsx) to use the useChat hook:
'use client';

import { useChat } from '@ai-sdk/react';
import { useState } from 'react';

export default function Page() {
  const [input, setInput] = useState('');
  const { messages, sendMessage } = useChat();

  const handleSubmit = (e: React.FormEvent<HTMLFormElement>) => {
    e.preventDefault();
    if (input.trim()) {
      sendMessage({ text: input });
      setInput('');
    }
  };

  return (
    <>
      {messages.map(message => (
        <div key={message.id}>
          {message.role === 'user' ? 'User: ' : 'AI: '}
          {message.parts.map((part, index) => {
            if (part.type === 'text' || part.type === 'reasoning') {
              return <div key={index}>{part.text}</div>;
            }
            return null;
          })}
        </div>
      ))}
      <form onSubmit={handleSubmit}>
        <input
          name="prompt"
          value={input}
          onChange={e => setInput(e.target.value)}
        />
        <button type="submit">Submit</button>
      </form>
    </>
  );
}
The useChat hook on your root page (app/page.tsx) will make a request to your AI provider endpoint (app/api/chat/route.ts) whenever the user submits a message. The messages are then displayed in the chat UI.
Enhance Your Agent with Tools
One of the key strengths of DeepSeek V3.2 is its agentic capabilities. You can extend your agent's functionality by adding tools that allow the model to perform specific actions or retrieve information.
Update Your Route Handler
Let's add a weather tool to your agent. Update your route handler at app/api/chat/route.ts:
import { deepseek } from '@ai-sdk/deepseek';
import {
  convertToModelMessages,
  stepCountIs,
  streamText,
  tool,
  UIMessage,
} from 'ai';
import { z } from 'zod';

export async function POST(req: Request) {
  const { messages }: { messages: UIMessage[] } = await req.json();

  const result = streamText({
    model: deepseek('deepseek-reasoner'),
    messages: await convertToModelMessages(messages),
    tools: {
      weather: tool({
        description: 'Get the weather in a location',
        inputSchema: z.object({
          location: z.string().describe('The location to get the weather for'),
        }),
        execute: async ({ location }) => ({
          location,
          temperature: 72,
          unit: 'fahrenheit',
        }),
      }),
    },
    stopWhen: stepCountIs(5),
  });

  return result.toUIMessageStreamResponse({ sendReasoning: true });
}
This adds a weather tool that the model can call when needed. The stopWhen: stepCountIs(5) parameter allows the agent to continue executing for multiple steps (up to 5), enabling it to use tools and reason iteratively before stopping. Learn more about loop control to customize when and how your agent stops execution.
Get Started
Ready to dive in? Here's how you can begin:
- Explore the documentation at ai-sdk.dev/docs to understand the capabilities of the AI SDK.
- Check out practical examples at ai-sdk.dev/examples to see the SDK in action.
- Dive deeper with advanced guides on topics like Retrieval-Augmented Generation (RAG) at ai-sdk.dev/docs/guides.
- Use ready-to-deploy AI templates at vercel.com/templates?type=ai.
title: Guides description: Learn how to build AI applications with the AI SDK
Guides
These use-case specific guides are intended to help you build real applications with the AI SDK.
<IndexCards cards={[ { title: 'RAG Agent', description: 'Learn how to build a RAG Agent with the AI SDK and Next.js.', href: '/cookbook/guides/rag-chatbot', }, { title: 'Multi-Modal Agent', description: 'Learn how to build a multi-modal agent that can process images and PDFs with the AI SDK.', href: '/cookbook/guides/multi-modal-chatbot', }, { title: 'Slackbot Agent', description: 'Learn how to use the AI SDK to build an AI Agent in Slack.', href: '/cookbook/guides/slackbot', }, { title: 'Natural Language Postgres (SQL Agent)', description: 'Learn how to build a Next.js app that lets you talk to a PostgreSQL database in natural language.', href: '/cookbook/guides/natural-language-postgres', }, { title: 'Get started with Computer Use', description: "Get started with Claude's Computer Use capabilities with the AI SDK.", href: '/cookbook/guides/computer-use', }, { title: 'Get started with Gemini 2.5', description: 'Get started with Gemini 2.5 using the AI SDK.', href: '/cookbook/guides/gemini-2-5', }, { title: 'Get started with Claude 4', description: 'Get started with Claude 4 using the AI SDK.', href: '/cookbook/guides/claude-4', }, { title: 'OpenAI Responses API', description: 'Get started with the OpenAI Responses API using the AI SDK.', href: '/cookbook/guides/openai-responses', }, { title: 'Get started with Claude 3.7 Sonnet', description: 'Get started with Claude 3.7 Sonnet using the AI SDK.', href: '/cookbook/guides/sonnet-3-7', }, { title: 'Get started with Llama 3.1', description: 'Get started with Llama 3.1 using the AI SDK.', href: '/cookbook/guides/llama-3_1', }, { title: 'Get started with GPT-5', description: 'Get started with GPT-5 using the AI SDK.', href: '/cookbook/guides/gpt-5', }, { title: 'Get started with OpenAI o1', description: 'Get started with OpenAI o1 using the AI SDK.', href: '/cookbook/guides/o1', }, { title: 'Get started with OpenAI o3-mini', description: 'Get started with OpenAI o3-mini using the AI SDK.', href: '/cookbook/guides/o3', }, { title: 'Get started with DeepSeek R1', description: 'Get started with DeepSeek R1 using the AI SDK.', href: '/cookbook/guides/r1', }, ]} />
title: Node.js HTTP Server description: Learn how to use the AI SDK in a Node.js HTTP server tags: ['api servers', 'streaming']
Node.js HTTP Server
You can use the AI SDK in a Node.js HTTP server to generate text and stream it to the client.
Examples
The examples start a simple HTTP server that listens on port 8080. You can e.g. test it using curl:
curl -X POST http://localhost:8080
Full example: github.com/vercel/ai/examples/node-http-server
UI Message Stream
You can use the pipeUIMessageStreamToResponse method to pipe the stream data to the server response.
import { streamText } from 'ai';
import { createServer } from 'http';

createServer(async (req, res) => {
  const result = streamText({
    model: 'openai/gpt-4o',
    prompt: 'Invent a new holiday and describe its traditions.',
  });

  result.pipeUIMessageStreamToResponse(res);
}).listen(8080);
Sending Custom Data
createUIMessageStream and pipeUIMessageStreamToResponse can be used to send custom data to the client.
import {
  createUIMessageStream,
  pipeUIMessageStreamToResponse,
  streamText,
} from 'ai';
import { createServer } from 'http';

createServer(async (req, res) => {
  switch (req.url) {
    case '/stream-data': {
      const stream = createUIMessageStream({
        execute: ({ writer }) => {
          // write some custom data
          writer.write({ type: 'start' });

          writer.write({
            type: 'data-custom',
            data: {
              custom: 'Hello, world!',
            },
          });

          const result = streamText({
            model: 'openai/gpt-4o',
            prompt: 'Invent a new holiday and describe its traditions.',
          });

          writer.merge(
            result.toUIMessageStream({
              sendStart: false,
              onError: error => {
                // Error messages are masked by default for security reasons.
                // If you want to expose the error message to the client, you can do so here:
                return error instanceof Error ? error.message : String(error);
              },
            }),
          );
        },
      });

      pipeUIMessageStreamToResponse({ stream, response: res });

      break;
    }
  }
}).listen(8080);
Text Stream
You can send a text stream to the client using pipeTextStreamToResponse.
import { streamText } from 'ai';
import { createServer } from 'http';

createServer(async (req, res) => {
  const result = streamText({
    model: 'openai/gpt-4o',
    prompt: 'Invent a new holiday and describe its traditions.',
  });

  result.pipeTextStreamToResponse(res);
}).listen(8080);
Troubleshooting
- Streaming not working when proxied
title: Express description: Learn how to use the AI SDK in an Express server tags: ['api servers', 'streaming']
Express
You can use the AI SDK in an Express server to generate and stream text and objects to the client.
Examples
The examples start a simple HTTP server that listens on port 8080. You can e.g. test it using curl:
curl -X POST http://localhost:8080
Full example: github.com/vercel/ai/examples/express
UI Message Stream
You can use the pipeUIMessageStreamToResponse method to pipe the stream data to the server response.
import { streamText } from 'ai';
import express, { Request, Response } from 'express';

const app = express();

app.post('/', async (req: Request, res: Response) => {
  const result = streamText({
    model: 'openai/gpt-4o',
    prompt: 'Invent a new holiday and describe its traditions.',
  });

  result.pipeUIMessageStreamToResponse(res);
});

app.listen(8080, () => {
  console.log(`Example app listening on port ${8080}`);
});
Sending Custom Data
pipeUIMessageStreamToResponse can be used to send custom data to the client.
import {
  createUIMessageStream,
  pipeUIMessageStreamToResponse,
  streamText,
} from 'ai';
import express, { Request, Response } from 'express';

const app = express();

app.post('/custom-data-parts', async (req: Request, res: Response) => {
  pipeUIMessageStreamToResponse({
    response: res,
    stream: createUIMessageStream({
      execute: async ({ writer }) => {
        writer.write({ type: 'start' });

        writer.write({
          type: 'data-custom',
          data: {
            custom: 'Hello, world!',
          },
        });

        const result = streamText({
          model: 'openai/gpt-4o',
          prompt: 'Invent a new holiday and describe its traditions.',
        });

        writer.merge(result.toUIMessageStream({ sendStart: false }));
      },
    }),
  });
});

app.listen(8080, () => {
  console.log(`Example app listening on port ${8080}`);
});
Text Stream
You can send a text stream to the client using pipeTextStreamToResponse.
import { streamText } from 'ai';
import express, { Request, Response } from 'express';

const app = express();

app.post('/', async (req: Request, res: Response) => {
  const result = streamText({
    model: 'openai/gpt-4o',
    prompt: 'Invent a new holiday and describe its traditions.',
  });

  result.pipeTextStreamToResponse(res);
});

app.listen(8080, () => {
  console.log(`Example app listening on port ${8080}`);
});
Troubleshooting
- Streaming not working when proxied
title: Hono description: Example of using the AI SDK in a Hono server. tags: ['api servers', 'streaming']
Hono
You can use the AI SDK in a Hono server to generate and stream text and objects to the client.
Examples
The examples start a simple HTTP server that listens on port 8080. You can e.g. test it using curl:
curl -X POST http://localhost:8080
Full example: github.com/vercel/ai/examples/hono
UI Message Stream
You can use the toUIMessageStreamResponse method to create a properly formatted streaming response.
import { serve } from '@hono/node-server';
import { streamText } from 'ai';
import { Hono } from 'hono';

const app = new Hono();

app.post('/', async c => {
  const result = streamText({
    model: 'openai/gpt-4o',
    prompt: 'Invent a new holiday and describe its traditions.',
  });
  return result.toUIMessageStreamResponse();
});

serve({ fetch: app.fetch, port: 8080 });
Text Stream
You can use the toTextStreamResponse method to return a text stream response.
import { serve } from '@hono/node-server';
import { streamText } from 'ai';
import { Hono } from 'hono';

const app = new Hono();

app.post('/text', async c => {
  const result = streamText({
    model: 'openai/gpt-4o',
    prompt: 'Write a short poem about coding.',
  });
  return result.toTextStreamResponse();
});

serve({ fetch: app.fetch, port: 8080 });
Sending Custom Data
You can use createUIMessageStream and createUIMessageStreamResponse to send custom data to the client.
import { serve } from '@hono/node-server';
import {
  createUIMessageStream,
  createUIMessageStreamResponse,
  streamText,
} from 'ai';
import { Hono } from 'hono';

const app = new Hono();

app.post('/stream-data', async c => {
  // immediately start streaming the response
  const stream = createUIMessageStream({
    execute: ({ writer }) => {
      writer.write({ type: 'start' });

      writer.write({
        type: 'data-custom',
        data: {
          custom: 'Hello, world!',
        },
      });

      const result = streamText({
        model: 'openai/gpt-4o',
        prompt: 'Invent a new holiday and describe its traditions.',
      });

      writer.merge(
        result.toUIMessageStream({
          sendStart: false,
          onError: error => {
            // Error messages are masked by default for security reasons.
            // If you want to expose the error message to the client, you can do so here:
            return error instanceof Error ? error.message : String(error);
          },
        }),
      );
    },
  });
  return createUIMessageStreamResponse({ stream });
});

serve({ fetch: app.fetch, port: 8080 });
Troubleshooting
- Streaming not working when proxied
title: Fastify description: Learn how to use the AI SDK in a Fastify server tags: ['api servers', 'streaming']
Fastify
You can use the AI SDK in a Fastify server to generate and stream text and objects to the client.
Examples
The examples start a simple HTTP server that listens on port 8080. You can e.g. test it using curl:
curl -X POST http://localhost:8080
Full example: github.com/vercel/ai/examples/fastify
Data Stream
You can use the toDataStream method to get a data stream from the result and then pipe it to the response.
import { streamText } from 'ai';
import Fastify from 'fastify';

const fastify = Fastify({ logger: true });

fastify.post('/', async function (request, reply) {
  const result = streamText({
    model: 'openai/gpt-4o',
    prompt: 'Invent a new holiday and describe its traditions.',
  });

  // Mark the response as a v1 data stream:
  reply.header('X-Vercel-AI-Data-Stream', 'v1');
  reply.header('Content-Type', 'text/plain; charset=utf-8');

  return reply.send(result.toDataStream({ data }));
});

fastify.listen({ port: 8080 });
Sending Custom Data
createDataStream can be used to send custom data to the client.
import { createDataStream, streamText } from 'ai';
import Fastify from 'fastify';

const fastify = Fastify({ logger: true });

fastify.post('/stream-data', async function (request, reply) {
  // immediately start streaming the response
  const dataStream = createDataStream({
    execute: async dataStreamWriter => {
      dataStreamWriter.writeData('initialized call');

      const result = streamText({
        model: 'openai/gpt-4o',
        prompt: 'Invent a new holiday and describe its traditions.',
      });

      result.mergeIntoDataStream(dataStreamWriter);
    },
    onError: error => {
      // Error messages are masked by default for security reasons.
      // If you want to expose the error message to the client, you can do so here:
      return error instanceof Error ? error.message : String(error);
    },
  });

  // Mark the response as a v1 data stream:
  reply.header('X-Vercel-AI-Data-Stream', 'v1');
  reply.header('Content-Type', 'text/plain; charset=utf-8');

  return reply.send(dataStream);
});

fastify.listen({ port: 8080 });
Text Stream
You can use the textStream property to get a text stream from the result and then pipe it to the response.
import { streamText } from 'ai';
import Fastify from 'fastify';

const fastify = Fastify({ logger: true });

fastify.post('/', async function (request, reply) {
  const result = streamText({
    model: 'openai/gpt-4o',
    prompt: 'Invent a new holiday and describe its traditions.',
  });

  reply.header('Content-Type', 'text/plain; charset=utf-8');

  return reply.send(result.textStream);
});

fastify.listen({ port: 8080 });
Troubleshooting
- Streaming not working when proxied
title: Nest.js description: Learn how to use the AI SDK in a Nest.js server tags: ['api servers', 'streaming']
Nest.js
You can use the AI SDK in a Nest.js server to generate and stream text and objects to the client.
Examples
The examples show how to implement a Nest.js controller that uses the AI SDK to stream text and objects to the client.
Full example: github.com/vercel/ai/examples/nest
UI Message Stream
You can use the pipeUIMessageStreamToResponse method to pipe the stream data to the server response.
import { Controller, Post, Res } from '@nestjs/common';
import { streamText } from 'ai';
import { Response } from 'express';

@Controller()
export class AppController {
  @Post('/')
  async root(@Res() res: Response) {
    const result = streamText({
      model: 'openai/gpt-4o',
      prompt: 'Invent a new holiday and describe its traditions.',
    });

    result.pipeUIMessageStreamToResponse(res);
  }
}
Sending Custom Data
createUIMessageStream and pipeUIMessageStreamToResponse can be used to send custom data to the client.
import { Controller, Post, Res } from '@nestjs/common';
import {
  createUIMessageStream,
  streamText,
  pipeUIMessageStreamToResponse,
} from 'ai';
import { Response } from 'express';

@Controller()
export class AppController {
  @Post('/stream-data')
  async streamData(@Res() response: Response) {
    const stream = createUIMessageStream({
      execute: ({ writer }) => {
        // write some data
        writer.write({ type: 'start' });

        writer.write({
          type: 'data-custom',
          data: {
            custom: 'Hello, world!',
          },
        });

        const result = streamText({
          model: 'openai/gpt-4o',
          prompt: 'Invent a new holiday and describe its traditions.',
        });
        writer.merge(
          result.toUIMessageStream({
            sendStart: false,
            onError: error => {
              // Error messages are masked by default for security reasons.
              // If you want to expose the error message to the client, you can do so here:
              return error instanceof Error ? error.message : String(error);
            },
          }),
        );
      },
    });
    pipeUIMessageStreamToResponse({ stream, response });
  }
}
Text Stream
You can use the pipeTextStreamToResponse method to get a text stream from the result and then pipe it to the response.
import { Controller, Post, Res } from '@nestjs/common';
import { streamText } from 'ai';
import { Response } from 'express';

@Controller()
export class AppController {
  @Post()
  async example(@Res() res: Response) {
    const result = streamText({
      model: 'openai/gpt-4o',
      prompt: 'Invent a new holiday and describe its traditions.',
    });

    result.pipeTextStreamToResponse(res);
  }
}
Troubleshooting
- Streaming not working when proxied
title: AI SDK by Vercel description: The AI SDK is the TypeScript toolkit for building AI applications and agents with React, Next.js, Vue, Svelte, Node.js, and more.
AI SDK
The AI SDK is the TypeScript toolkit designed to help developers build AI-powered applications and agents with React, Next.js, Vue, Svelte, Node.js, and more.
Why use the AI SDK?
Integrating large language models (LLMs) into applications is complicated and heavily dependent on the specific model provider you use.
The AI SDK standardizes integrating artificial intelligence (AI) models across supported providers. This enables developers to focus on building great AI applications, not waste time on technical details.
For example, here’s how you can generate text with various models using the AI SDK:
The AI SDK has two main libraries:
- AI SDK Core: A unified API for generating text, structured objects, tool calls, and building agents with LLMs.
- AI SDK UI: A set of framework-agnostic hooks for quickly building chat and generative user interface.
Model Providers
The AI SDK supports multiple model providers.
Templates
We've built some templates that include AI SDK integrations for different use cases, providers, and frameworks. You can use these templates to get started with your AI-powered application.
Starter Kits
Feature Exploration
Frameworks
Generative UI
Security
Join our Community
If you have questions about anything related to the AI SDK, you're always welcome to ask our community on the Vercel Community.
llms.txt (for Cursor, Windsurf, Copilot, Claude etc.)
You can access the entire AI SDK documentation in Markdown format at ai-sdk.dev/llms.txt. This can be used to ask any LLM (assuming it has a big enough context window) questions about the AI SDK based on the most up-to-date documentation.
Example Usage
For instance, to prompt an LLM with questions about the AI SDK:
- Copy the documentation contents from ai-sdk.dev/llms.txt
- Use the following prompt format:
Documentation:
{paste documentation here}
---
Based on the above documentation, answer the following:
{your question}
title: Overview description: Learn how to build agents with the AI SDK.
Agents
Agents are large language models (LLMs) that use tools in a loop to accomplish tasks.
These components work together:
- LLMs process input and decide the next action
- Tools extend capabilities beyond text generation (reading files, calling APIs, writing to databases)
- Loop orchestrates execution through:
- Context management - Maintaining conversation history and deciding what the model sees (input) at each step
- Stopping conditions - Determining when the loop (task) is complete
ToolLoopAgent Class
The ToolLoopAgent class handles these three components. Here's an agent that uses multiple tools in a loop to accomplish a task:
import { ToolLoopAgent, stepCountIs, tool } from 'ai';
__PROVIDER_IMPORT__;
import { z } from 'zod';

const weatherAgent = new ToolLoopAgent({
  model: __MODEL__,
  tools: {
    weather: tool({
      description: 'Get the weather in a location (in Fahrenheit)',
      inputSchema: z.object({
        location: z.string().describe('The location to get the weather for'),
      }),
      execute: async ({ location }) => ({
        location,
        temperature: 72 + Math.floor(Math.random() * 21) - 10,
      }),
    }),
    convertFahrenheitToCelsius: tool({
      description: 'Convert temperature from Fahrenheit to Celsius',
      inputSchema: z.object({
        temperature: z.number().describe('Temperature in Fahrenheit'),
      }),
      execute: async ({ temperature }) => {
        const celsius = Math.round((temperature - 32) * (5 / 9));
        return { celsius };
      },
    }),
  },
  // Agent's default behavior is to stop after a maximum of 20 steps
  // stopWhen: stepCountIs(20),
});

const result = await weatherAgent.generate({
  prompt: 'What is the weather in San Francisco in celsius?',
});

console.log(result.text); // agent's final answer
console.log(result.steps); // steps taken by the agent
The agent automatically:
- Calls the
weathertool to get the temperature in Fahrenheit - Calls
convertFahrenheitToCelsiusto convert it - Generates a final text response with the result
The Agent class handles the loop, context management, and stopping conditions.
Why Use the Agent Class?
The Agent class is the recommended approach for building agents with the AI SDK because it:
- Reduces boilerplate - Manages loops and message arrays
- Improves reusability - Define once, use throughout your application
- Simplifies maintenance - Single place to update agent configuration
For most use cases, start with the Agent class. Use core functions (generateText, streamText) when you need explicit control over each step for complex structured workflows.
Structured Workflows
Agents are flexible and powerful, but non-deterministic. When you need reliable, repeatable outcomes with explicit control flow, use core functions with structured workflow patterns combining:
- Conditional statements for explicit branching
- Standard functions for reusable logic
- Error handling for robustness
- Explicit control flow for predictability
Explore workflow patterns to learn more about building structured, reliable systems.
Next Steps
- Building Agents - Guide to creating agents with the Agent class
- Workflow Patterns - Structured patterns using core functions for complex workflows
- Loop Control - Execution control with stopWhen and prepareStep
title: Building Agents description: Complete guide to creating agents with the Agent class.
Building Agents
The Agent class provides a structured way to encapsulate LLM configuration, tools, and behavior into reusable components. It handles the agent loop for you, allowing the LLM to call tools multiple times in sequence to accomplish complex tasks. Define agents once and use them across your application.
Why Use the ToolLoopAgent Class?
When building AI applications, you often need to:
- Reuse configurations - Same model settings, tools, and prompts across different parts of your application
- Maintain consistency - Ensure the same behavior and capabilities throughout your codebase
- Simplify API routes - Reduce boilerplate in your endpoints
- Type safety - Get full TypeScript support for your agent's tools and outputs
The ToolLoopAgent class provides a single place to define your agent's behavior.
Creating an Agent
Define an agent by instantiating the ToolLoopAgent class with your desired configuration:
import { ToolLoopAgent } from 'ai';
__PROVIDER_IMPORT__;

const myAgent = new ToolLoopAgent({
  model: __MODEL__,
  instructions: 'You are a helpful assistant.',
  tools: {
    // Your tools here
  },
});
Configuration Options
The Agent class accepts all the same settings as generateText and streamText. Configure:
Model and System Instructions
import { ToolLoopAgent } from 'ai';
__PROVIDER_IMPORT__;

const agent = new ToolLoopAgent({
  model: __MODEL__,
  instructions: 'You are an expert software engineer.',
});
Tools
Provide tools that the agent can use to accomplish tasks:
import { ToolLoopAgent, tool } from 'ai';
__PROVIDER_IMPORT__;
import { z } from 'zod';

const codeAgent = new ToolLoopAgent({
  model: __MODEL__,
  tools: {
    runCode: tool({
      description: 'Execute Python code',
      inputSchema: z.object({
        code: z.string(),
      }),
      execute: async ({ code }) => {
        // Execute code and return result
        return { output: 'Code executed successfully' };
      },
    }),
  },
});
Loop Control
By default, agents run for 20 steps (stopWhen: stepCountIs(20)). In each step, the model either generates text or calls a tool. If it generates text, the agent completes. If it calls a tool, the AI SDK executes that tool.
To let agents call multiple tools in sequence, configure stopWhen to allow more steps. After each tool execution, the agent triggers a new generation where the model can call another tool or generate text:
import { ToolLoopAgent, stepCountIs } from 'ai';
__PROVIDER_IMPORT__;

const agent = new ToolLoopAgent({
  model: __MODEL__,
  stopWhen: stepCountIs(20), // Allow up to 20 steps
});
Each step represents one generation (which results in either text or a tool call). The loop continues until:
- A finish reasoning other than tool-calls is returned, or
- A tool that is invoked does not have an execute function, or
- A tool call needs approval, or
- A stop condition is met
You can combine multiple conditions:
import { ToolLoopAgent, stepCountIs } from 'ai';
__PROVIDER_IMPORT__;

const agent = new ToolLoopAgent({
  model: __MODEL__,
  stopWhen: [
    stepCountIs(20), // Maximum 20 steps
    yourCustomCondition(), // Custom logic for when to stop
  ],
});
Learn more about loop control and stop conditions.
Tool Choice
Control how the agent uses tools:
import { ToolLoopAgent } from 'ai';
__PROVIDER_IMPORT__;

const agent = new ToolLoopAgent({
  model: __MODEL__,
  tools: {
    // your tools here
  },
  toolChoice: 'required', // Force tool use
  // or toolChoice: 'none' to disable tools
  // or toolChoice: 'auto' (default) to let the model decide
});
You can also force the use of a specific tool:
import { ToolLoopAgent } from 'ai';
__PROVIDER_IMPORT__;

const agent = new ToolLoopAgent({
  model: __MODEL__,
  tools: {
    weather: weatherTool,
    cityAttractions: attractionsTool,
  },
  toolChoice: {
    type: 'tool',
    toolName: 'weather', // Force the weather tool to be used
  },
});
Structured Output
Define structured output schemas:
import { ToolLoopAgent, Output, stepCountIs } from 'ai';
__PROVIDER_IMPORT__;
import { z } from 'zod';

const analysisAgent = new ToolLoopAgent({
  model: __MODEL__,
  output: Output.object({
    schema: z.object({
      sentiment: z.enum(['positive', 'neutral', 'negative']),
      summary: z.string(),
      keyPoints: z.array(z.string()),
    }),
  }),
  stopWhen: stepCountIs(10),
});

const { output } = await analysisAgent.generate({
  prompt: 'Analyze customer feedback from the last quarter',
});
Define Agent Behavior with System Instructions
System instructions define your agent's behavior, personality, and constraints. They set the context for all interactions and guide how the agent responds to user queries and uses tools.
Basic System Instructions
Set the agent's role and expertise:
const agent = new ToolLoopAgent({
  model: __MODEL__,
  instructions:
    'You are an expert data analyst. You provide clear insights from complex data.',
});
Detailed Behavioral Instructions
Provide specific guidelines for agent behavior:
const codeReviewAgent = new ToolLoopAgent({
  model: __MODEL__,
  instructions: `You are a senior software engineer conducting code reviews.

  Your approach:
  - Focus on security vulnerabilities first
  - Identify performance bottlenecks
  - Suggest improvements for readability and maintainability
  - Be constructive and educational in your feedback
  - Always explain why something is an issue and how to fix it`,
});
Constrain Agent Behavior
Set boundaries and ensure consistent behavior:
const customerSupportAgent = new ToolLoopAgent({
  model: __MODEL__,
  instructions: `You are a customer support specialist for an e-commerce platform.

  Rules:
  - Never make promises about refunds without checking the policy
  - Always be empathetic and professional
  - If you don't know something, say so and offer to escalate
  - Keep responses concise and actionable
  - Never share internal company information`,
  tools: {
    checkOrderStatus,
    lookupPolicy,
    createTicket,
  },
});
Tool Usage Instructions
Guide how the agent should use available tools:
const researchAgent = new ToolLoopAgent({
  model: __MODEL__,
  instructions: `You are a research assistant with access to search and document tools.

  When researching:
  1. Always start with a broad search to understand the topic
  2. Use document analysis for detailed information
  3. Cross-reference multiple sources before drawing conclusions
  4. Cite your sources when presenting information
  5. If information conflicts, present both viewpoints`,
  tools: {
    webSearch,
    analyzeDocument,
    extractQuotes,
  },
});
Format and Style Instructions
Control the output format and communication style:
const technicalWriterAgent = new ToolLoopAgent({
  model: __MODEL__,
  instructions: `You are a technical documentation writer.

  Writing style:
  - Use clear, simple language
  - Avoid jargon unless necessary
  - Structure information with headers and bullet points
  - Include code examples where relevant
  - Write in second person ("you" instead of "the user")

  Always format responses in Markdown.`,
});
Using an Agent
Once defined, you can use your agent in three ways:
Generate Text
Use generate() for one-time text generation:
const result = await myAgent.generate({
  prompt: 'What is the weather like?',
});

console.log(result.text);
Stream Text
Use stream() for streaming responses:
const stream = myAgent.stream({
  prompt: 'Tell me a story',
});

for await (const chunk of stream.textStream) {
  console.log(chunk);
}
Respond to UI Messages
Use createAgentUIStreamResponse() to create API responses for client applications:
// In your API route (e.g., app/api/chat/route.ts)
import { createAgentUIStreamResponse } from 'ai';

export async function POST(request: Request) {
  const { messages } = await request.json();

  return createAgentUIStreamResponse({
    agent: myAgent,
    messages,
  });
}
End-to-end Type Safety
You can infer types for your agent's UIMessages:
import { ToolLoopAgent, InferAgentUIMessage } from 'ai';

const myAgent = new ToolLoopAgent({
  // ... configuration
});

// Infer the UIMessage type for UI components or persistence
export type MyAgentUIMessage = InferAgentUIMessage<typeof myAgent>;
Use this type in your client components with useChat:
'use client';

import { useChat } from '@ai-sdk/react';
import type { MyAgentUIMessage } from '@/agent/my-agent';

export function Chat() {
  const { messages } = useChat<MyAgentUIMessage>();
  // Full type safety for your messages and tools
}
Next Steps
Now that you understand building agents, you can:
- Explore workflow patterns for structured patterns using core functions
- Learn about loop control for advanced execution control
- See manual loop examples for custom workflow implementations
title: Workflow Patterns description: Learn workflow patterns for building reliable agents with the AI SDK.
Workflow Patterns
Combine the building blocks from the overview with these patterns to add structure and reliability to your agents:
- Sequential Processing - Steps executed in order
- Parallel Processing - Independent tasks run simultaneously
- Evaluation/Feedback Loops - Results checked and improved iteratively
- Orchestration - Coordinating multiple components
- Routing - Directing work based on context
Choose Your Approach
Consider these key factors:
- Flexibility vs Control - How much freedom does the LLM need vs how tightly you must constrain its actions?
- Error Tolerance - What are the consequences of mistakes in your use case?
- Cost Considerations - More complex systems typically mean more LLM calls and higher costs
- Maintenance - Simpler architectures are easier to debug and modify
Start with the simplest approach that meets your needs. Add complexity only when required by:
- Breaking down tasks into clear steps
- Adding tools for specific capabilities
- Implementing feedback loops for quality control
- Introducing multiple agents for complex workflows
Let's look at examples of these patterns in action.
Patterns with Examples
These patterns, adapted from Anthropic's guide on building effective agents, serve as building blocks you can combine to create comprehensive workflows. Each pattern addresses specific aspects of task execution. Combine them thoughtfully to build reliable solutions for complex problems.
Sequential Processing (Chains)
The simplest workflow pattern executes steps in a predefined order. Each step's output becomes input for the next step, creating a clear chain of operations. Use this pattern for tasks with well-defined sequences, like content generation pipelines or data transformation processes.
import { generateText, generateObject } from 'ai';
__PROVIDER_IMPORT__;
import { z } from 'zod';

async function generateMarketingCopy(input: string) {
  const model = __MODEL__;

  // First step: Generate marketing copy
  const { text: copy } = await generateText({
    model,
    prompt: `Write persuasive marketing copy for: ${input}. Focus on benefits and emotional appeal.`,
  });

  // Perform quality check on copy
  const { object: qualityMetrics } = await generateObject({
    model,
    schema: z.object({
      hasCallToAction: z.boolean(),
      emotionalAppeal: z.number().min(1).max(10),
      clarity: z.number().min(1).max(10),
    }),
    prompt: `Evaluate this marketing copy for:
    1. Presence of call to action (true/false)
    2. Emotional appeal (1-10)
    3. Clarity (1-10)

    Copy to evaluate: ${copy}`,
  });

  // If quality check fails, regenerate with more specific instructions
  if (
    !qualityMetrics.hasCallToAction ||
    qualityMetrics.emotionalAppeal < 7 ||
    qualityMetrics.clarity < 7
  ) {
    const { text: improvedCopy } = await generateText({
      model,
      prompt: `Rewrite this marketing copy with:
      ${!qualityMetrics.hasCallToAction ? '- A clear call to action' : ''}
      ${qualityMetrics.emotionalAppeal < 7 ? '- Stronger emotional appeal' : ''}
      ${qualityMetrics.clarity < 7 ? '- Improved clarity and directness' : ''}

      Original copy: ${copy}`,
    });
    return { copy: improvedCopy, qualityMetrics };
  }

  return { copy, qualityMetrics };
}
Routing
This pattern lets the model decide which path to take through a workflow based on context and intermediate results. The model acts as an intelligent router, directing the flow of execution between different branches of your workflow. Use this when handling varied inputs that require different processing approaches. In the example below, the first LLM call's results determine the second call's model size and system prompt.
import { generateObject, generateText } from 'ai';
__PROVIDER_IMPORT__;
import { z } from 'zod';

async function handleCustomerQuery(query: string) {
  const model = __MODEL__;

  // First step: Classify the query type
  const { object: classification } = await generateObject({
    model,
    schema: z.object({
      reasoning: z.string(),
      type: z.enum(['general', 'refund', 'technical']),
      complexity: z.enum(['simple', 'complex']),
    }),
    prompt: `Classify this customer query:
    ${query}

    Determine:
    1. Query type (general, refund, or technical)
    2. Complexity (simple or complex)
    3. Brief reasoning for classification`,
  });

  // Route based on classification
  // Set model and system prompt based on query type and complexity
  const { text: response } = await generateText({
    model:
      classification.complexity === 'simple'
        ? 'openai/gpt-4o-mini'
        : 'openai/o4-mini',
    system: {
      general:
        'You are an expert customer service agent handling general inquiries.',
      refund:
        'You are a customer service agent specializing in refund requests. Follow company policy and collect necessary information.',
      technical:
        'You are a technical support specialist with deep product knowledge. Focus on clear step-by-step troubleshooting.',
    }[classification.type],
    prompt: query,
  });

  return { response, classification };
}
Parallel Processing
Break down tasks into independent subtasks that execute simultaneously. This pattern uses parallel execution to improve efficiency while maintaining the benefits of structured workflows. For example, analyze multiple documents or process different aspects of a single input concurrently (like code review).
import { generateText, generateObject } from 'ai';
__PROVIDER_IMPORT__;
import { z } from 'zod';

// Example: Parallel code review with multiple specialized reviewers
async function parallelCodeReview(code: string) {
  const model = __MODEL__;

  // Run parallel reviews
  const [securityReview, performanceReview, maintainabilityReview] =
    await Promise.all([
      generateObject({
        model,
        system:
          'You are an expert in code security. Focus on identifying security vulnerabilities, injection risks, and authentication issues.',
        schema: z.object({
          vulnerabilities: z.array(z.string()),
          riskLevel: z.enum(['low', 'medium', 'high']),
          suggestions: z.array(z.string()),
        }),
        prompt: `Review this code:
      ${code}`,
      }),

      generateObject({
        model,
        system:
          'You are an expert in code performance. Focus on identifying performance bottlenecks, memory leaks, and optimization opportunities.',
        schema: z.object({
          issues: z.array(z.string()),
          impact: z.enum(['low', 'medium', 'high']),
          optimizations: z.array(z.string()),
        }),
        prompt: `Review this code:
      ${code}`,
      }),

      generateObject({
        model,
        system:
          'You are an expert in code quality. Focus on code structure, readability, and adherence to best practices.',
        schema: z.object({
          concerns: z.array(z.string()),
          qualityScore: z.number().min(1).max(10),
          recommendations: z.array(z.string()),
        }),
        prompt: `Review this code:
      ${code}`,
      }),
    ]);

  const reviews = [
    { ...securityReview.object, type: 'security' },
    { ...performanceReview.object, type: 'performance' },
    { ...maintainabilityReview.object, type: 'maintainability' },
  ];

  // Aggregate results using another model instance
  const { text: summary } = await generateText({
    model,
    system: 'You are a technical lead summarizing multiple code reviews.',
    prompt: `Synthesize these code review results into a concise summary with key actions:
    ${JSON.stringify(reviews, null, 2)}`,
  });

  return { reviews, summary };
}
Orchestrator-Worker
A primary model (orchestrator) coordinates the execution of specialized workers. Each worker optimizes for a specific subtask, while the orchestrator maintains overall context and ensures coherent results. This pattern excels at complex tasks requiring different types of expertise or processing.
import { generateObject } from 'ai';
__PROVIDER_IMPORT__;
import { z } from 'zod';

async function implementFeature(featureRequest: string) {
  // Orchestrator: Plan the implementation
  const { object: implementationPlan } = await generateObject({
    model: __MODEL__,
    schema: z.object({
      files: z.array(
        z.object({
          purpose: z.string(),
          filePath: z.string(),
          changeType: z.enum(['create', 'modify', 'delete']),
        }),
      ),
      estimatedComplexity: z.enum(['low', 'medium', 'high']),
    }),
    system:
      'You are a senior software architect planning feature implementations.',
    prompt: `Analyze this feature request and create an implementation plan:
    ${featureRequest}`,
  });

  // Workers: Execute the planned changes
  const fileChanges = await Promise.all(
    implementationPlan.files.map(async file => {
      // Each worker is specialized for the type of change
      const workerSystemPrompt = {
        create:
          'You are an expert at implementing new files following best practices and project patterns.',
        modify:
          'You are an expert at modifying existing code while maintaining consistency and avoiding regressions.',
        delete:
          'You are an expert at safely removing code while ensuring no breaking changes.',
      }[file.changeType];

      const { object: change } = await generateObject({
        model: __MODEL__,
        schema: z.object({
          explanation: z.string(),
          code: z.string(),
        }),
        system: workerSystemPrompt,
        prompt: `Implement the changes for ${file.filePath} to support:
        ${file.purpose}

        Consider the overall feature context:
        ${featureRequest}`,
      });

      return {
        file,
        implementation: change,
      };
    }),
  );

  return {
    plan: implementationPlan,
    changes: fileChanges,
  };
}
Evaluator-Optimizer
Add quality control to workflows with dedicated evaluation steps that assess intermediate results. Based on the evaluation, the workflow proceeds, retries with adjusted parameters, or takes corrective action. This creates robust workflows capable of self-improvement and error recovery.
import { generateText, generateObject } from 'ai';
__PROVIDER_IMPORT__;
import { z } from 'zod';

async function translateWithFeedback(text: string, targetLanguage: string) {
  let currentTranslation = '';
  let iterations = 0;
  const MAX_ITERATIONS = 3;

  // Initial translation
  const { text: translation } = await generateText({
    model: __MODEL__,
    system: 'You are an expert literary translator.',
    prompt: `Translate this text to ${targetLanguage}, preserving tone and cultural nuances:
    ${text}`,
  });

  currentTranslation = translation;

  // Evaluation-optimization loop
  while (iterations < MAX_ITERATIONS) {
    // Evaluate current translation
    const { object: evaluation } = await generateObject({
      model: __MODEL__,
      schema: z.object({
        qualityScore: z.number().min(1).max(10),
        preservesTone: z.boolean(),
        preservesNuance: z.boolean(),
        culturallyAccurate: z.boolean(),
        specificIssues: z.array(z.string()),
        improvementSuggestions: z.array(z.string()),
      }),
      system: 'You are an expert in evaluating literary translations.',
      prompt: `Evaluate this translation:

      Original: ${text}
      Translation: ${currentTranslation}

      Consider:
      1. Overall quality
      2. Preservation of tone
      3. Preservation of nuance
      4. Cultural accuracy`,
    });

    // Check if quality meets threshold
    if (
      evaluation.qualityScore >= 8 &&
      evaluation.preservesTone &&
      evaluation.preservesNuance &&
      evaluation.culturallyAccurate
    ) {
      break;
    }

    // Generate improved translation based on feedback
    const { text: improvedTranslation } = await generateText({
      model: __MODEL__,
      system: 'You are an expert literary translator.',
      prompt: `Improve this translation based on the following feedback:
      ${evaluation.specificIssues.join('\n')}
      ${evaluation.improvementSuggestions.join('\n')}

      Original: ${text}
      Current Translation: ${currentTranslation}`,
    });

    currentTranslation = improvedTranslation;
    iterations++;
  }

  return {
    finalTranslation: currentTranslation,
    iterationsRequired: iterations,
  };
}
title: Loop Control description: Control agent execution with built-in loop management using stopWhen and prepareStep
Loop Control
You can control both the execution flow and the settings at each step of the agent loop. The loop continues until:
- A finish reasoning other than tool-calls is returned, or
- A tool that is invoked does not have an execute function, or
- A tool call needs approval, or
- A stop condition is met
The AI SDK provides built-in loop control through two parameters: stopWhen for defining stopping conditions and prepareStep for modifying settings (model, tools, messages, and more) between steps.
Stop Conditions
The stopWhen parameter controls when to stop execution when there are tool results in the last step. By default, agents stop after 20 steps using stepCountIs(20).
When you provide stopWhen, the agent continues executing after tool calls until a stopping condition is met. When the condition is an array, execution stops when any of the conditions are met.
Use Built-in Conditions
The AI SDK provides several built-in stopping conditions:
import { ToolLoopAgent, stepCountIs } from 'ai';
__PROVIDER_IMPORT__;

const agent = new ToolLoopAgent({
  model: __MODEL__,
  tools: {
    // your tools
  },
  stopWhen: stepCountIs(20), // Default state: stop after 20 steps maximum
});

const result = await agent.generate({
  prompt: 'Analyze this dataset and create a summary report',
});
Combine Multiple Conditions
Combine multiple stopping conditions. The loop stops when it meets any condition:
import { ToolLoopAgent, stepCountIs, hasToolCall } from 'ai';
__PROVIDER_IMPORT__;

const agent = new ToolLoopAgent({
  model: __MODEL__,
  tools: {
    // your tools
  },
  stopWhen: [
    stepCountIs(20), // Maximum 20 steps
    hasToolCall('someTool'), // Stop after calling 'someTool'
  ],
});

const result = await agent.generate({
  prompt: 'Research and analyze the topic',
});
Create Custom Conditions
Build custom stopping conditions for specific requirements:
import { ToolLoopAgent, StopCondition, ToolSet } from 'ai';
__PROVIDER_IMPORT__;

const tools = {
  // your tools
} satisfies ToolSet;

const hasAnswer: StopCondition<typeof tools> = ({ steps }) => {
  // Stop when the model generates text containing "ANSWER:"
  return steps.some(step => step.text?.includes('ANSWER:')) ?? false;
};

const agent = new ToolLoopAgent({
  model: __MODEL__,
  tools,
  stopWhen: hasAnswer,
});

const result = await agent.generate({
  prompt: 'Find the answer and respond with "ANSWER: [your answer]"',
});
Custom conditions receive step information across all steps:
const budgetExceeded: StopCondition<typeof tools> = ({ steps }) => {
  const totalUsage = steps.reduce(
    (acc, step) => ({
      inputTokens: acc.inputTokens + (step.usage?.inputTokens ?? 0),
      outputTokens: acc.outputTokens + (step.usage?.outputTokens ?? 0),
    }),
    { inputTokens: 0, outputTokens: 0 },
  );

  const costEstimate =
    (totalUsage.inputTokens * 0.01 + totalUsage.outputTokens * 0.03) / 1000;
  return costEstimate > 0.5; // Stop if cost exceeds $0.50
};
Prepare Step
The prepareStep callback runs before each step in the loop and defaults to the initial settings if you don't return any changes. Use it to modify settings, manage context, or implement dynamic behavior based on execution history.
Dynamic Model Selection
Switch models based on step requirements:
import { ToolLoopAgent } from 'ai';
__PROVIDER_IMPORT__;

const agent = new ToolLoopAgent({
  model: 'openai/gpt-4o-mini', // Default model
  tools: {
    // your tools
  },
  prepareStep: async ({ stepNumber, messages }) => {
    // Use a stronger model for complex reasoning after initial steps
    if (stepNumber > 2 && messages.length > 10) {
      return {
        model: __MODEL__,
      };
    }
    // Continue with default settings
    return {};
  },
});

const result = await agent.generate({
  prompt: '...',
});
Context Management
Manage growing conversation history in long-running loops:
import { ToolLoopAgent } from 'ai';
__PROVIDER_IMPORT__;

const agent = new ToolLoopAgent({
  model: __MODEL__,
  tools: {
    // your tools
  },
  prepareStep: async ({ messages }) => {
    // Keep only recent messages to stay within context limits
    if (messages.length > 20) {
      return {
        messages: [
          messages[0], // Keep system instructions
          ...messages.slice(-10), // Keep last 10 messages
        ],
      };
    }
    return {};
  },
});

const result = await agent.generate({
  prompt: '...',
});
Tool Selection
Control which tools are available at each step:
import { ToolLoopAgent } from 'ai';
__PROVIDER_IMPORT__;

const agent = new ToolLoopAgent({
  model: __MODEL__,
  tools: {
    search: searchTool,
    analyze: analyzeTool,
    summarize: summarizeTool,
  },
  prepareStep: async ({ stepNumber, steps }) => {
    // Search phase (steps 0-2)
    if (stepNumber <= 2) {
      return {
        activeTools: ['search'],
        toolChoice: 'required',
      };
    }

    // Analysis phase (steps 3-5)
    if (stepNumber <= 5) {
      return {
        activeTools: ['analyze'],
      };
    }

    // Summary phase (step 6+)
    return {
      activeTools: ['summarize'],
      toolChoice: 'required',
    };
  },
});

const result = await agent.generate({
  prompt: '...',
});
You can also force a specific tool to be used:
prepareStep: async ({ stepNumber }) => {
  if (stepNumber === 0) {
    // Force the search tool to be used first
    return {
      toolChoice: { type: 'tool', toolName: 'search' },
    };
  }

  if (stepNumber === 5) {
    // Force the summarize tool after analysis
    return {
      toolChoice: { type: 'tool', toolName: 'summarize' },
    };
  }

  return {};
};
Message Modification
Transform messages before sending them to the model:
import { ToolLoopAgent } from 'ai';
__PROVIDER_IMPORT__;

const agent = new ToolLoopAgent({
  model: __MODEL__,
  tools: {
    // your tools
  },
  prepareStep: async ({ messages, stepNumber }) => {
    // Summarize tool results to reduce token usage
    const processedMessages = messages.map(msg => {
      if (msg.role === 'tool' && msg.content.length > 1000) {
        return {
          ...msg,
          content: summarizeToolResult(msg.content),
        };
      }
      return msg;
    });

    return { messages: processedMessages };
  },
});

const result = await agent.generate({
  prompt: '...',
});
Access Step Information
Both stopWhen and prepareStep receive detailed information about the current execution:
prepareStep: async ({
  model, // Current model configuration
  stepNumber, // Current step number (0-indexed)
  steps, // All previous steps with their results
  messages, // Messages to be sent to the model
}) => {
  // Access previous tool calls and results
  const previousToolCalls = steps.flatMap(step => step.toolCalls);
  const previousResults = steps.flatMap(step => step.toolResults);

  // Make decisions based on execution history
  if (previousToolCalls.some(call => call.toolName === 'dataAnalysis')) {
    return {
      toolChoice: { type: 'tool', toolName: 'reportGenerator' },
    };
  }

  return {};
},
Forced Tool Calling
You can force the agent to always use tools by combining toolChoice: 'required' with a done tool that has no execute function. This pattern ensures the agent uses tools for every step and stops only when it explicitly signals completion.
import { ToolLoopAgent, tool } from 'ai';
import { z } from 'zod';
__PROVIDER_IMPORT__;

const agent = new ToolLoopAgent({
  model: __MODEL__,
  tools: {
    search: searchTool,
    analyze: analyzeTool,
    done: tool({
      description: 'Signal that you have finished your work',
      inputSchema: z.object({
        answer: z.string().describe('The final answer'),
      }),
      // No execute function - stops the agent when called
    }),
  },
  toolChoice: 'required', // Force tool calls at every step
});

const result = await agent.generate({
  prompt: 'Research and analyze this topic, then provide your answer.',
});

// extract answer from done tool call
const toolCall = result.staticToolCalls[0]; // tool call from final step
if (toolCall?.toolName === 'done') {
  console.log(toolCall.input.answer);
}
Key aspects of this pattern:
toolChoice: 'required': Forces the model to call a tool at every step instead of generating text directly. This ensures the agent follows a structured workflow.donetool withoutexecute: A tool that has noexecutefunction acts as a termination signal. When the agent calls this tool, the loop stops because there's no function to execute.- Accessing results: The final answer is available in
result.staticToolCalls, which contains tool calls that weren't executed.
This pattern is useful when you want the agent to always use specific tools for operations (like code execution or data retrieval) rather than attempting to answer directly.
Manual Loop Control
For scenarios requiring complete control over the agent loop, you can use AI SDK Core functions (generateText and streamText) to implement your own loop management instead of using stopWhen and prepareStep. This approach provides maximum flexibility for complex workflows.
Implementing a Manual Loop
Build your own agent loop when you need full control over execution:
import { generateText, ModelMessage } from 'ai';
__PROVIDER_IMPORT__;

const messages: ModelMessage[] = [{ role: 'user', content: '...' }];

let step = 0;
const maxSteps = 10;

while (step < maxSteps) {
  const result = await generateText({
    model: __MODEL__,
    messages,
    tools: {
      // your tools here
    },
  });

  messages.push(...result.response.messages);

  if (result.text) {
    break; // Stop when model generates text
  }

  step++;
}
This manual approach gives you complete control over:
- Message history management
- Step-by-step decision making
- Custom stopping conditions
- Dynamic tool and model selection
- Error handling and recovery
Learn more about manual agent loops in the cookbook.
title: Configuring Call Options description: Pass type-safe runtime inputs to dynamically configure agent behavior.
Configuring Call Options
Call options allow you to pass type-safe structured inputs to your agent. Use them to dynamically modify any agent setting based on the specific request.
Why Use Call Options?
When you need agent behavior to change based on runtime context:
- Add dynamic context - Inject retrieved documents, user preferences, or session data into prompts
- Select models dynamically - Choose faster or more capable models based on request complexity
- Configure tools per request - Pass user location to search tools or adjust tool behavior
- Customize provider options - Set reasoning effort, temperature, or other provider-specific settings
Without call options, you'd need to create multiple agents or handle configuration logic outside the agent.
How It Works
Define call options in three steps:
- Define the schema - Specify what inputs you accept using
callOptionsSchema - Configure with
prepareCall- Use those inputs to modify agent settings - Pass options at runtime - Provide the options when calling
generate()orstream()
Basic Example
Add user context to your agent's prompt at runtime:
import { ToolLoopAgent } from 'ai';
__PROVIDER_IMPORT__;
import { z } from 'zod';

const supportAgent = new ToolLoopAgent({
  model: __MODEL__,
  callOptionsSchema: z.object({
    userId: z.string(),
    accountType: z.enum(['free', 'pro', 'enterprise']),
  }),
  instructions: 'You are a helpful customer support agent.',
  prepareCall: ({ options, ...settings }) => ({
    ...settings,
    instructions:
      settings.instructions +
      `\nUser context:
- Account type: ${options.accountType}
- User ID: ${options.userId}

Adjust your response based on the user's account level.`,
  }),
});

// Call the agent with specific user context
const result = await supportAgent.generate({
  prompt: 'How do I upgrade my account?',
  options: {
    userId: 'user_123',
    accountType: 'free',
  },
});
The options parameter is now required and type-checked. If you don't provide it or pass incorrect types, TypeScript will error.
Modifying Agent Settings
Use prepareCall to modify any agent setting. Return only the settings you want to change.
Dynamic Model Selection
Choose models based on request characteristics:
import { ToolLoopAgent } from 'ai';
__PROVIDER_IMPORT__;
import { z } from 'zod';

const agent = new ToolLoopAgent({
  model: __MODEL__, // Default model
  callOptionsSchema: z.object({
    complexity: z.enum(['simple', 'complex']),
  }),
  prepareCall: ({ options, ...settings }) => ({
    ...settings,
    model:
      options.complexity === 'simple' ? 'openai/gpt-4o-mini' : 'openai/o1-mini',
  }),
});

// Use faster model for simple queries
await agent.generate({
  prompt: 'What is 2+2?',
  options: { complexity: 'simple' },
});

// Use more capable model for complex reasoning
await agent.generate({
  prompt: 'Explain quantum entanglement',
  options: { complexity: 'complex' },
});
Dynamic Tool Configuration
Configure tools based on runtime context:
import { openai } from '@ai-sdk/openai';
import { ToolLoopAgent } from 'ai';
__PROVIDER_IMPORT__;
import { z } from 'zod';

const newsAgent = new ToolLoopAgent({
  model: __MODEL__,
  callOptionsSchema: z.object({
    userCity: z.string().optional(),
    userRegion: z.string().optional(),
  }),
  tools: {
    web_search: openai.tools.webSearch(),
  },
  prepareCall: ({ options, ...settings }) => ({
    ...settings,
    tools: {
      web_search: openai.tools.webSearch({
        searchContextSize: 'low',
        userLocation: {
          type: 'approximate',
          city: options.userCity,
          region: options.userRegion,
          country: 'US',
        },
      }),
    },
  }),
});

await newsAgent.generate({
  prompt: 'What are the top local news stories?',
  options: {
    userCity: 'San Francisco',
    userRegion: 'California',
  },
});
Provider-Specific Options
Configure provider settings dynamically:
import { openai, OpenAIProviderOptions } from '@ai-sdk/openai';
import { ToolLoopAgent } from 'ai';
import { z } from 'zod';

const agent = new ToolLoopAgent({
  model: 'openai/o3',
  callOptionsSchema: z.object({
    taskDifficulty: z.enum(['low', 'medium', 'high']),
  }),
  prepareCall: ({ options, ...settings }) => ({
    ...settings,
    providerOptions: {
      openai: {
        reasoningEffort: options.taskDifficulty,
      } satisfies OpenAIProviderOptions,
    },
  }),
});

await agent.generate({
  prompt: 'Analyze this complex scenario...',
  options: { taskDifficulty: 'high' },
});
Advanced Patterns
Retrieval Augmented Generation (RAG)
Fetch relevant context and inject it into your prompt:
import { ToolLoopAgent } from 'ai';
__PROVIDER_IMPORT__;
import { z } from 'zod';

const ragAgent = new ToolLoopAgent({
  model: __MODEL__,
  callOptionsSchema: z.object({
    query: z.string(),
  }),
  prepareCall: async ({ options, ...settings }) => {
    // Fetch relevant documents (this can be async)
    const documents = await vectorSearch(options.query);

    return {
      ...settings,
      instructions: `Answer questions using the following context:

${documents.map(doc => doc.content).join('\n\n')}`,
    };
  },
});

await ragAgent.generate({
  prompt: 'What is our refund policy?',
  options: { query: 'refund policy' },
});
The prepareCall function can be async, enabling you to fetch data before configuring the agent.
Combining Multiple Modifications
Modify multiple settings together:
import { ToolLoopAgent } from 'ai';
__PROVIDER_IMPORT__;
import { z } from 'zod';

const agent = new ToolLoopAgent({
  model: __MODEL__,
  callOptionsSchema: z.object({
    userRole: z.enum(['admin', 'user']),
    urgency: z.enum(['low', 'high']),
  }),
  tools: {
    readDatabase: readDatabaseTool,
    writeDatabase: writeDatabaseTool,
  },
  prepareCall: ({ options, ...settings }) => ({
    ...settings,
    // Upgrade model for urgent requests
    model: options.urgency === 'high' ? __MODEL__ : settings.model,
    // Limit tools based on user role
    activeTools:
      options.userRole === 'admin'
        ? ['readDatabase', 'writeDatabase']
        : ['readDatabase'],
    // Adjust instructions
    instructions: `You are a ${options.userRole} assistant.
${options.userRole === 'admin' ? 'You have full database access.' : 'You have read-only access.'}`,
  }),
});

await agent.generate({
  prompt: 'Update the user record',
  options: {
    userRole: 'admin',
    urgency: 'high',
  },
});
Using with createAgentUIStreamResponse
Pass call options through API routes to your agent:
import { createAgentUIStreamResponse } from 'ai';
import { myAgent } from '@/ai/agents/my-agent';

export async function POST(request: Request) {
  const { messages, userId, accountType } = await request.json();

  return createAgentUIStreamResponse({
    agent: myAgent,
    messages,
    options: {
      userId,
      accountType,
    },
  });
}
Next Steps
- Learn about loop control for execution management
- Explore workflow patterns for complex multi-step processes
title: Agents description: An overview of building agents with the AI SDK.
Agents
The following section show you how to build agents with the AI SDK - systems where large language models (LLMs) use tools in a loop to accomplish tasks.
<IndexCards cards={[ { title: 'Overview', description: 'Learn what agents are and why to use the Agent class.', href: '/docs/agents/overview', }, { title: 'Building Agents', description: 'Complete guide to creating agents with the Agent class.', href: '/docs/agents/building-agents', }, { title: 'Workflow Patterns', description: 'Structured patterns using core functions for complex workflows.', href: '/docs/agents/workflows', }, { title: 'Loop Control', description: 'Advanced execution control with stopWhen and prepareStep.', href: '/docs/agents/loop-control', }, { title: 'Configuring Call Options', description: 'Pass type-safe runtime inputs to dynamically configure agent behavior.', href: '/docs/agents/configuring-call-options', }, ]} />
title: Overview description: An overview of AI SDK Core.
AI SDK Core
Large Language Models (LLMs) are advanced programs that can understand, create, and engage with human language on a large scale. They are trained on vast amounts of written material to recognize patterns in language and predict what might come next in a given piece of text.
AI SDK Core simplifies working with LLMs by offering a standardized way of integrating them into your app - so you can focus on building great AI applications for your users, not waste time on technical details.
For example, here’s how you can generate text with various models using the AI SDK:
AI SDK Core Functions
AI SDK Core has various functions designed for text generation, structured data generation, and tool usage. These functions take a standardized approach to setting up prompts and settings, making it easier to work with different models.
generateText: Generates text and tool calls. This function is ideal for non-interactive use cases such as automation tasks where you need to write text (e.g. drafting email or summarizing web pages) and for agents that use tools.streamText: Stream text and tool calls. You can use thestreamTextfunction for interactive use cases such as chat bots and content streaming.generateObject: Generates a typed, structured object that matches a Zod schema. You can use this function to force the language model to return structured data, e.g. for information extraction, synthetic data generation, or classification tasks.streamObject: Stream a structured object that matches a Zod schema. You can use this function to stream generated UIs.
API Reference
Please check out the AI SDK Core API Reference for more details on each function.
title: Generating Text description: Learn how to generate text with the AI SDK.
Generating and Streaming Text
Large language models (LLMs) can generate text in response to a prompt, which can contain instructions and information to process. For example, you can ask a model to come up with a recipe, draft an email, or summarize a document.
The AI SDK Core provides two functions to generate text and stream it from LLMs:
generateText: Generates text for a given prompt and model.streamText: Streams text from a given prompt and model.
Advanced LLM features such as tool calling and structured data generation are built on top of text generation.
generateText
You can generate text using the generateText function. This function is ideal for non-interactive use cases where you need to write text (e.g. drafting email or summarizing web pages) and for agents that use tools.
import { generateText } from 'ai';
__PROVIDER_IMPORT__;

const { text } = await generateText({
  model: __MODEL__,
  prompt: 'Write a vegetarian lasagna recipe for 4 people.',
});
You can use more advanced prompts to generate text with more complex instructions and content:
import { generateText } from 'ai';
__PROVIDER_IMPORT__;

const { text } = await generateText({
  model: __MODEL__,
  system:
    'You are a professional writer. ' +
    'You write simple, clear, and concise content.',
  prompt: `Summarize the following article in 3-5 sentences: ${article}`,
});
The result object of generateText contains several promises that resolve when all required data is available:
result.content: The content that was generated in the last step.result.text: The generated text.result.reasoning: The full reasoning that the model has generated in the last step.result.reasoningText: The reasoning text of the model (only available for some models).result.files: The files that were generated in the last step.result.sources: Sources that have been used as references in the last step (only available for some models).result.toolCalls: The tool calls that were made in the last step.result.toolResults: The results of the tool calls from the last step.result.finishReason: The reason the model finished generating text.result.rawFinishReason: The raw reason why the generation finished (from the provider).result.usage: The usage of the model during the final step of text generation.result.totalUsage: The total usage across all steps (for multi-step generations).result.warnings: Warnings from the model provider (e.g. unsupported settings).result.request: Additional request information.result.response: Additional response information, including response messages and body.result.providerMetadata: Additional provider-specific metadata.result.steps: Details for all steps, useful for getting information about intermediate steps.result.output: The generated structured output using theoutputspecification.
Accessing response headers & body
Sometimes you need access to the full response from the model provider, e.g. to access some provider-specific headers or body content.
You can access the raw response headers and body using the response property:
import { generateText } from 'ai';

const result = await generateText({
  // ...
});

console.log(JSON.stringify(result.response.headers, null, 2));
console.log(JSON.stringify(result.response.body, null, 2));
onFinish callback
When using generateText, you can provide an onFinish callback that is triggered after the last step is finished (
API Reference
).
It contains the text, usage information, finish reason, messages, steps, total usage, and more:
import { generateText } from 'ai';
__PROVIDER_IMPORT__;

const result = await generateText({
  model: __MODEL__,
  prompt: 'Invent a new holiday and describe its traditions.',
  onFinish({ text, finishReason, usage, response, steps, totalUsage }) {
    // your own logic, e.g. for saving the chat history or recording usage

    const messages = response.messages; // messages that were generated
  },
});
streamText
Depending on your model and prompt, it can take a large language model (LLM) up to a minute to finish generating its response. This delay can be unacceptable for interactive use cases such as chatbots or real-time applications, where users expect immediate responses.
AI SDK Core provides the streamText function which simplifies streaming text from LLMs:
import { streamText } from 'ai';
__PROVIDER_IMPORT__;

const result = streamText({
  model: __MODEL__,
  prompt: 'Invent a new holiday and describe its traditions.',
});

// example: use textStream as an async iterable
for await (const textPart of result.textStream) {
  console.log(textPart);
}
You can use streamText on its own or in combination with AI SDK
UI and AI SDK
RSC.
The result object contains several helper functions to make the integration into AI SDK UI easier:
result.toUIMessageStreamResponse(): Creates a UI Message stream HTTP response (with tool calls etc.) that can be used in a Next.js App Router API route.result.pipeUIMessageStreamToResponse(): Writes UI Message stream delta output to a Node.js response-like object.result.toTextStreamResponse(): Creates a simple text stream HTTP response.result.pipeTextStreamToResponse(): Writes text delta output to a Node.js response-like object.
It also provides several promises that resolve when the stream is finished:
result.content: The content that was generated in the last step.result.text: The generated text.result.reasoning: The full reasoning that the model has generated.result.reasoningText: The reasoning text of the model (only available for some models).result.files: Files that have been generated by the model in the last step.result.sources: Sources that have been used as references in the last step (only available for some models).result.toolCalls: The tool calls that have been executed in the last step.result.toolResults: The tool results that have been generated in the last step.result.finishReason: The reason the model finished generating text.result.rawFinishReason: The raw reason why the generation finished (from the provider).result.usage: The usage of the model during the final step of text generation.result.totalUsage: The total usage across all steps (for multi-step generations).result.warnings: Warnings from the model provider (e.g. unsupported settings).result.steps: Details for all steps, useful for getting information about intermediate steps.result.request: Additional request information from the last step.result.response: Additional response information from the last step.result.providerMetadata: Additional provider-specific metadata from the last step.
onError callback
streamText immediately starts streaming to enable sending data without waiting for the model.
Errors become part of the stream and are not thrown to prevent e.g. servers from crashing.
To log errors, you can provide an onError callback that is triggered when an error occurs.
import { streamText } from 'ai';
__PROVIDER_IMPORT__;

const result = streamText({
  model: __MODEL__,
  prompt: 'Invent a new holiday and describe its traditions.',
  onError({ error }) {
    console.error(error); // your error logging logic here
  },
});
onChunk callback
When using streamText, you can provide an onChunk callback that is triggered for each chunk of the stream.
It receives the following chunk types:
textreasoningsourcetool-calltool-input-starttool-input-deltatool-resultraw
import { streamText } from 'ai';
__PROVIDER_IMPORT__;

const result = streamText({
  model: __MODEL__,
  prompt: 'Invent a new holiday and describe its traditions.',
  onChunk({ chunk }) {
    // implement your own logic here, e.g.:
    if (chunk.type === 'text') {
      console.log(chunk.text);
    }
  },
});
onFinish callback
When using streamText, you can provide an onFinish callback that is triggered when the stream is finished (
API Reference
).
It contains the text, usage information, finish reason, messages, steps, total usage, and more:
import { streamText } from 'ai';
__PROVIDER_IMPORT__;

const result = streamText({
  model: __MODEL__,
  prompt: 'Invent a new holiday and describe its traditions.',
  onFinish({ text, finishReason, usage, response, steps, totalUsage }) {
    // your own logic, e.g. for saving the chat history or recording usage

    const messages = response.messages; // messages that were generated
  },
});
fullStream property
You can read a stream with all events using the fullStream property.
This can be useful if you want to implement your own UI or handle the stream in a different way.
Here is an example of how to use the fullStream property:
import { streamText } from 'ai';
__PROVIDER_IMPORT__;
import { z } from 'zod';

const result = streamText({
  model: __MODEL__,
  tools: {
    cityAttractions: {
      inputSchema: z.object({ city: z.string() }),
      execute: async ({ city }) => ({
        attractions: ['attraction1', 'attraction2', 'attraction3'],
      }),
    },
  },
  prompt: 'What are some San Francisco tourist attractions?',
});

for await (const part of result.fullStream) {
  switch (part.type) {
    case 'start': {
      // handle start of stream
      break;
    }
    case 'start-step': {
      // handle start of step
      break;
    }
    case 'text-start': {
      // handle text start
      break;
    }
    case 'text-delta': {
      // handle text delta here
      break;
    }
    case 'text-end': {
      // handle text end
      break;
    }
    case 'reasoning-start': {
      // handle reasoning start
      break;
    }
    case 'reasoning-delta': {
      // handle reasoning delta here
      break;
    }
    case 'reasoning-end': {
      // handle reasoning end
      break;
    }
    case 'source': {
      // handle source here
      break;
    }
    case 'file': {
      // handle file here
      break;
    }
    case 'tool-call': {
      switch (part.toolName) {
        case 'cityAttractions': {
          // handle tool call here
          break;
        }
      }
      break;
    }
    case 'tool-input-start': {
      // handle tool input start
      break;
    }
    case 'tool-input-delta': {
      // handle tool input delta
      break;
    }
    case 'tool-input-end': {
      // handle tool input end
      break;
    }
    case 'tool-result': {
      switch (part.toolName) {
        case 'cityAttractions': {
          // handle tool result here
          break;
        }
      }
      break;
    }
    case 'tool-error': {
      // handle tool error
      break;
    }
    case 'finish-step': {
      // handle finish step
      break;
    }
    case 'finish': {
      // handle finish here
      break;
    }
    case 'error': {
      // handle error here
      break;
    }
    case 'raw': {
      // handle raw value
      break;
    }
  }
}
Stream transformation
You can use the experimental_transform option to transform the stream.
This is useful for e.g. filtering, changing, or smoothing the text stream.
The transformations are applied before the callbacks are invoked and the promises are resolved.
If you e.g. have a transformation that changes all text to uppercase, the onFinish callback will receive the transformed text.
Smoothing streams
The AI SDK Core provides a smoothStream function that
can be used to smooth out text and reasoning streaming.
import { smoothStream, streamText } from 'ai';

const result = streamText({
  model,
  prompt,
  experimental_transform: smoothStream(),
});
Custom transformations
You can also implement your own custom transformations. The transformation function receives the tools that are available to the model, and returns a function that is used to transform the stream. Tools can either be generic or limited to the tools that you are using.
Here is an example of how to implement a custom transformation that converts all text to uppercase:
const upperCaseTransform =
  <TOOLS extends ToolSet>() =>
  (options: { tools: TOOLS; stopStream: () => void }) =>
    new TransformStream<TextStreamPart<TOOLS>, TextStreamPart<TOOLS>>({
      transform(chunk, controller) {
        controller.enqueue(
          // for text chunks, convert the text to uppercase:
          chunk.type === 'text'
            ? { ...chunk, text: chunk.text.toUpperCase() }
            : chunk,
        );
      },
    });
You can also stop the stream using the stopStream function.
This is e.g. useful if you want to stop the stream when model guardrails are violated, e.g. by generating inappropriate content.
When you invoke stopStream, it is important to simulate the step-finish and finish events to guarantee that a well-formed stream is returned
and all callbacks are invoked.
const stopWordTransform =
  <TOOLS extends ToolSet>() =>
  ({ stopStream }: { stopStream: () => void }) =>
    new TransformStream<TextStreamPart<TOOLS>, TextStreamPart<TOOLS>>({
      // note: this is a simplified transformation for testing;
      // in a real-world version more there would need to be
      // stream buffering and scanning to correctly emit prior text
      // and to detect all STOP occurrences.
      transform(chunk, controller) {
        if (chunk.type !== 'text') {
          controller.enqueue(chunk);
          return;
        }

        if (chunk.text.includes('STOP')) {
          // stop the stream
          stopStream();

          // simulate the finish-step event
          controller.enqueue({
            type: 'finish-step',
            finishReason: 'stop',
            logprobs: undefined,
            usage: {
              completionTokens: NaN,
              promptTokens: NaN,
              totalTokens: NaN,
            },
            request: {},
            response: {
              id: 'response-id',
              modelId: 'mock-model-id',
              timestamp: new Date(0),
            },
            warnings: [],
            isContinued: false,
          });

          // simulate the finish event
          controller.enqueue({
            type: 'finish',
            finishReason: 'stop',
            logprobs: undefined,
            usage: {
              completionTokens: NaN,
              promptTokens: NaN,
              totalTokens: NaN,
            },
            response: {
              id: 'response-id',
              modelId: 'mock-model-id',
              timestamp: new Date(0),
            },
          });

          return;
        }

        controller.enqueue(chunk);
      },
    });
Multiple transformations
You can also provide multiple transformations. They are applied in the order they are provided.
const result = streamText({
  model,
  prompt,
  experimental_transform: [firstTransform, secondTransform],
});
Sources
Some providers such as Perplexity and Google Generative AI include sources in the response.
Currently sources are limited to web pages that ground the response.
You can access them using the sources property of the result.
Each url source contains the following properties:
id: The ID of the source.url: The URL of the source.title: The optional title of the source.providerMetadata: Provider metadata for the source.
When you use generateText, you can access the sources using the sources property:
const result = await generateText({
  model: 'google/gemini-2.5-flash',
  tools: {
    google_search: google.tools.googleSearch({}),
  },
  prompt: 'List the top 5 San Francisco news from the past week.',
});

for (const source of result.sources) {
  if (source.sourceType === 'url') {
    console.log('ID:', source.id);
    console.log('Title:', source.title);
    console.log('URL:', source.url);
    console.log('Provider metadata:', source.providerMetadata);
    console.log();
  }
}
When you use streamText, you can access the sources using the fullStream property:
const result = streamText({
  model: 'google/gemini-2.5-flash',
  tools: {
    google_search: google.tools.googleSearch({}),
  },
  prompt: 'List the top 5 San Francisco news from the past week.',
});

for await (const part of result.fullStream) {
  if (part.type === 'source' && part.sourceType === 'url') {
    console.log('ID:', part.id);
    console.log('Title:', part.title);
    console.log('URL:', part.url);
    console.log('Provider metadata:', part.providerMetadata);
    console.log();
  }
}
The sources are also available in the result.sources promise.
Examples
You can see generateText and streamText in action using various frameworks in the following examples:
generateText
<ExampleLinks examples={[ { title: 'Learn to generate text in Node.js', link: '/examples/node/generating-text/generate-text', }, { title: 'Learn to generate text in Next.js with Route Handlers (AI SDK UI)', link: '/examples/next-pages/basics/generating-text', }, { title: 'Learn to generate text in Next.js with Server Actions (AI SDK RSC)', link: '/examples/next-app/basics/generating-text', }, ]} />
streamText
<ExampleLinks examples={[ { title: 'Learn to stream text in Node.js', link: '/examples/node/generating-text/stream-text', }, { title: 'Learn to stream text in Next.js with Route Handlers (AI SDK UI)', link: '/examples/next-pages/basics/streaming-text-generation', }, { title: 'Learn to stream text in Next.js with Server Actions (AI SDK RSC)', link: '/examples/next-app/basics/streaming-text-generation', }, ]} />
title: Generating Structured Data description: Learn how to generate structured data with the AI SDK.
Generating Structured Data
While text generation can be useful, your use case will likely call for generating structured data. For example, you might want to extract information from text, classify data, or generate synthetic data.
Many language models are capable of generating structured data, often defined as using "JSON modes" or "tools". However, you need to manually provide schemas and then validate the generated data as LLMs can produce incorrect or incomplete structured data.
The AI SDK standardises structured object generation across model providers
using the output property on generateText
and streamText.
You can use Zod schemas, Valibot, or JSON schemas to specify the shape of the data that you want,
and the AI model will generate data that conforms to that structure.
Generating Structured Outputs
Use generateText with Output.object() to generate structured data from a prompt.
The schema is also used to validate the generated data, ensuring type safety and correctness.
import { generateText, Output } from 'ai';
__PROVIDER_IMPORT__;
import { z } from 'zod';

const { output } = await generateText({
  model: __MODEL__,
  output: Output.object({
    schema: z.object({
      recipe: z.object({
        name: z.string(),
        ingredients: z.array(
          z.object({ name: z.string(), amount: z.string() }),
        ),
        steps: z.array(z.string()),
      }),
    }),
  }),
  prompt: 'Generate a lasagna recipe.',
});
Accessing response headers & body
Sometimes you need access to the full response from the model provider, e.g. to access some provider-specific headers or body content.
You can access the raw response headers and body using the response property:
import { generateText, Output } from 'ai';

const result = await generateText({
  // ...
  output: Output.object({ schema }),
});

console.log(JSON.stringify(result.response.headers, null, 2));
console.log(JSON.stringify(result.response.body, null, 2));
Stream Structured Outputs
Given the added complexity of returning structured data, model response time can be unacceptable for your interactive use case.
With streamText and output, you can stream the model's structured response as it is generated.
import { streamText, Output } from 'ai';
__PROVIDER_IMPORT__;
import { z } from 'zod';

const { partialOutputStream } = streamText({
  model: __MODEL__,
  output: Output.object({
    schema: z.object({
      recipe: z.object({
        name: z.string(),
        ingredients: z.array(
          z.object({ name: z.string(), amount: z.string() }),
        ),
        steps: z.array(z.string()),
      }),
    }),
  }),
  prompt: 'Generate a lasagna recipe.',
});

// use partialOutputStream as an async iterable
for await (const partialObject of partialOutputStream) {
  console.log(partialObject);
}
You can consume the structured output on the client with the useObject hook.
Error Handling in Streams
streamText starts streaming immediately. When errors occur during streaming, they become part of the stream rather than thrown exceptions (to prevent stream crashes).
To handle errors, provide an onError callback:
import { streamText, Output } from 'ai';

const result = streamText({
  // ...
  output: Output.object({ schema }),
  onError({ error }) {
    console.error(error); // log to your error tracking service
  },
});
For non-streaming error handling with generateText, see the Error Handling section below.
Output Types
The AI SDK supports multiple ways of specifying the expected structure of generated data via the Output object. You can select from various strategies for structured/text generation and validation.
Output.text()
Use Output.text() to generate plain text from a model. This option doesn't enforce any schema on the result: you simply receive the model's text as a string. This is the default behavior when no output is specified.
import { generateText, Output } from 'ai';

const { output } = await generateText({
  // ...
  output: Output.text(),
  prompt: 'Tell me a joke.',
});
// output will be a string (the joke)
Output.object()
Use Output.object({ schema }) to generate a structured object based on a schema (for example, a Zod schema). The output is type-validated to ensure the returned result matches the schema.
import { generateText, Output } from 'ai';
import { z } from 'zod';

const { output } = await generateText({
  // ...
  output: Output.object({
    schema: z.object({
      name: z.string(),
      age: z.number().nullable(),
      labels: z.array(z.string()),
    }),
  }),
  prompt: 'Generate information for a test user.',
});
// output will be an object matching the schema above
Output.array()
Use Output.array({ element }) to specify that you expect an array of typed objects from the model, where each element should conform to a schema (defined in the element property).
import { generateText, Output } from 'ai';
import { z } from 'zod';

const { output } = await generateText({
  // ...
  output: Output.array({
    element: z.object({
      location: z.string(),
      temperature: z.number(),
      condition: z.string(),
    }),
  }),
  prompt: 'List the weather for San Francisco and Paris.',
});
// output will be an array of objects like:
// [
//   { location: 'San Francisco', temperature: 70, condition: 'Sunny' },
//   { location: 'Paris', temperature: 65, condition: 'Cloudy' },
// ]
When streaming arrays with streamText, you can use elementStream to receive each completed element as it is generated:
import { streamText, Output } from 'ai';
import { z } from 'zod';

const { elementStream } = streamText({
  // ...
  output: Output.array({
    element: z.object({
      name: z.string(),
      class: z.string(),
      description: z.string(),
    }),
  }),
  prompt: 'Generate 3 hero descriptions for a fantasy role playing game.',
});

for await (const hero of elementStream) {
  console.log(hero); // Each hero is complete and validated
}
Output.choice()
Use Output.choice({ options }) when you expect the model to choose from a specific set of string options, such as for classification or fixed-enum answers.
import { generateText, Output } from 'ai';

const { output } = await generateText({
  // ...
  output: Output.choice({
    options: ['sunny', 'rainy', 'snowy'],
  }),
  prompt: 'Is the weather sunny, rainy, or snowy today?',
});
// output will be one of: 'sunny', 'rainy', or 'snowy'
You can provide any set of string options, and the output will always be a single string value that matches one of the specified options. The AI SDK validates that the result matches one of your options, and will throw if the model returns something invalid.
This is especially useful for making classification-style generations or forcing valid values for API compatibility.
Output.json()
Use Output.json() when you want to generate and parse unstructured JSON values from the model, without enforcing a specific schema. This is useful if you want to capture arbitrary objects, flexible structures, or when you want to rely on the model's natural output rather than rigid validation.
import { generateText, Output } from 'ai';
const { output } = await generateText({
// ...
output: Output.json(),
prompt:
'For each city, return the current temperature and weather condition as a JSON object.',
});
// output could be any valid JSON, for example:
// {
// "San Francisco": { "temperature": 70, "condition": "Sunny" },
// "Paris": { "temperature": 65, "condition": "Cloudy" }
// }
With Output.json, the AI SDK only checks that the response is valid JSON; it doesn't validate the structure or types of the values. If you need schema validation, use the .object or .array outputs instead.
For more advanced validation or different structures, see the Output API reference.
Generating Structured Outputs with Tools
One of the key advantages of using structured output with generateText and streamText is the ability to combine it with tool calling.
import { generateText, Output, tool, stepCountIs } from 'ai';
__PROVIDER_IMPORT__;
import { z } from 'zod';
const { output } = await generateText({
model: __MODEL__,
tools: {
weather: tool({
description: 'Get the weather for a location',
inputSchema: z.object({ location: z.string() }),
execute: async ({ location }) => {
// fetch weather data
return { temperature: 72, condition: 'sunny' };
},
}),
},
output: Output.object({
schema: z.object({
summary: z.string(),
recommendation: z.string(),
}),
}),
stopWhen: stepCountIs(5),
prompt: 'What should I wear in San Francisco today?',
});
Property Descriptions
You can add .describe("...") to individual schema properties to give the model hints about what each property is for. This helps improve the quality and accuracy of generated structured data:
import { generateText, Output } from 'ai';
__PROVIDER_IMPORT__;
import { z } from 'zod';
const { output } = await generateText({
model: __MODEL__,
output: Output.object({
schema: z.object({
name: z.string().describe('The name of the recipe'),
ingredients: z
.array(
z.object({
name: z.string(),
amount: z
.string()
.describe('The amount of the ingredient (grams or ml)'),
}),
)
.describe('List of ingredients with amounts'),
steps: z.array(z.string()).describe('Step-by-step cooking instructions'),
}),
}),
prompt: 'Generate a lasagna recipe.',
});
Property descriptions are particularly useful for:
- Clarifying ambiguous property names
- Specifying expected formats or conventions
- Providing context for complex nested structures
Output Name and Description
You can optionally specify a name and description for the output. These are used by some providers for additional LLM guidance, e.g. via tool or schema name.
import { generateText, Output } from 'ai';
__PROVIDER_IMPORT__;
import { z } from 'zod';
const { output } = await generateText({
model: __MODEL__,
output: Output.object({
name: 'Recipe',
description: 'A recipe for a dish.',
schema: z.object({
name: z.string(),
ingredients: z.array(z.object({ name: z.string(), amount: z.string() })),
steps: z.array(z.string()),
}),
}),
prompt: 'Generate a lasagna recipe.',
});
This works with all output types that support structured generation:
Output.object({ name, description, schema })Output.array({ name, description, element })Output.choice({ name, description, options })Output.json({ name, description })
Accessing Reasoning
You can access the reasoning used by the language model to generate the object via the reasoning property on the result. This property contains a string with the model's thought process, if available.
import { generateText, Output } from 'ai';
__PROVIDER_IMPORT__;
import { z } from 'zod';
const result = await generateText({
model: __MODEL__, // must be a reasoning model
output: Output.object({
schema: z.object({
recipe: z.object({
name: z.string(),
ingredients: z.array(
z.object({
name: z.string(),
amount: z.string(),
}),
),
steps: z.array(z.string()),
}),
}),
}),
prompt: 'Generate a lasagna recipe.',
});
console.log(result.reasoning);
Error Handling
When generateText with structured output cannot generate a valid object, it throws a AI_NoObjectGeneratedError.
This error occurs when the AI provider fails to generate a parsable object that conforms to the schema. It can arise due to the following reasons:
- The model failed to generate a response.
- The model generated a response that could not be parsed.
- The model generated a response that could not be validated against the schema.
The error preserves the following information to help you log the issue:
text: The text that was generated by the model. This can be the raw text or the tool call text, depending on the object generation mode.response: Metadata about the language model response, including response id, timestamp, and model.usage: Request token usage.cause: The cause of the error (e.g. a JSON parsing error). You can use this for more detailed error handling.
import { generateText, Output, NoObjectGeneratedError } from 'ai';
try {
await generateText({
model,
output: Output.object({ schema }),
prompt,
});
} catch (error) {
if (NoObjectGeneratedError.isInstance(error)) {
console.log('NoObjectGeneratedError');
console.log('Cause:', error.cause);
console.log('Text:', error.text);
console.log('Response:', error.response);
console.log('Usage:', error.usage);
}
}
generateObject and streamObject (Legacy)
`generateObject` and `streamObject` are deprecated. Use `generateText` and `streamText` with the `output` property instead. The legacy functions will be removed in a future major version.The generateObject and streamObject functions are the legacy way to generate structured data. They work similarly to generateText and streamText with Output.object(), but as standalone functions.
generateObject
import { generateObject } from 'ai';
__PROVIDER_IMPORT__;
import { z } from 'zod';
const { object } = await generateObject({
model: __MODEL__,
schema: z.object({
recipe: z.object({
name: z.string(),
ingredients: z.array(z.object({ name: z.string(), amount: z.string() })),
steps: z.array(z.string()),
}),
}),
prompt: 'Generate a lasagna recipe.',
});
streamObject
import { streamObject } from 'ai';
__PROVIDER_IMPORT__;
import { z } from 'zod';
const { partialObjectStream } = streamObject({
model: __MODEL__,
schema: z.object({
recipe: z.object({
name: z.string(),
ingredients: z.array(z.object({ name: z.string(), amount: z.string() })),
steps: z.array(z.string()),
}),
}),
prompt: 'Generate a lasagna recipe.',
});
for await (const partialObject of partialObjectStream) {
console.log(partialObject);
}
Schema Name and Description (Legacy)
You can optionally specify a name and description for the schema. These are used by some providers for additional LLM guidance, e.g. via tool or schema name.
import { generateObject } from 'ai';
__PROVIDER_IMPORT__;
import { z } from 'zod';
const { object } = await generateObject({
model: __MODEL__,
schemaName: 'Recipe',
schemaDescription: 'A recipe for a dish.',
schema: z.object({
name: z.string(),
ingredients: z.array(z.object({ name: z.string(), amount: z.string() })),
steps: z.array(z.string()),
}),
prompt: 'Generate a lasagna recipe.',
});
Output Strategy (Legacy)
The legacy functions support different output strategies via the output parameter:
Array
Generate an array of objects. The schema specifies the shape of an array element.
import { streamObject } from 'ai';
__PROVIDER_IMPORT__;
import { z } from 'zod';
const { elementStream } = streamObject({
model: __MODEL__,
output: 'array',
schema: z.object({
name: z.string(),
class: z
.string()
.describe('Character class, e.g. warrior, mage, or thief.'),
description: z.string(),
}),
prompt: 'Generate 3 hero descriptions for a fantasy role playing game.',
});
for await (const hero of elementStream) {
console.log(hero);
}
Enum
Generate a specific enum value for classification tasks.
import { generateObject } from 'ai';
__PROVIDER_IMPORT__;
const { object } = await generateObject({
model: __MODEL__,
output: 'enum',
enum: ['action', 'comedy', 'drama', 'horror', 'sci-fi'],
prompt:
'Classify the genre of this movie plot: ' +
'"A group of astronauts travel through a wormhole in search of a ' +
'new habitable planet for humanity."',
});
No Schema
Generate unstructured JSON without a schema.
import { generateObject } from 'ai';
__PROVIDER_IMPORT__;
const { object } = await generateObject({
model: __MODEL__,
output: 'no-schema',
prompt: 'Generate a lasagna recipe.',
});
Repairing Invalid JSON (Legacy)
The `repairText` function is experimental and may change in the future.Sometimes the model will generate invalid or malformed JSON.
You can use the repairText function to attempt to repair the JSON.
import { generateObject } from 'ai';
const { object } = await generateObject({
model,
schema,
prompt,
experimental_repairText: async ({ text, error }) => {
// example: add a closing brace to the text
return text + '}';
},
});
More Examples
You can see generateObject and streamObject in action using various frameworks in the following examples:
generateObject
<ExampleLinks examples={[ { title: 'Learn to generate objects in Node.js', link: '/examples/node/generating-structured-data/generate-object', }, { title: 'Learn to generate objects in Next.js with Route Handlers (AI SDK UI)', link: '/examples/next-pages/basics/generating-object', }, { title: 'Learn to generate objects in Next.js with Server Actions (AI SDK RSC)', link: '/examples/next-app/basics/generating-object', }, ]} />
streamText with Output
<ExampleLinks examples={[ { title: 'Learn to stream objects in Node.js', link: '/examples/node/streaming-structured-data/stream-object', }, { title: 'Learn to stream objects in Next.js with Route Handlers (AI SDK UI)', link: '/examples/next-pages/basics/streaming-object-generation', }, { title: 'Learn to stream objects in Next.js with Server Actions (AI SDK RSC)', link: '/examples/next-app/basics/streaming-object-generation', }, ]} />
title: Tool Calling description: Learn about tool calling and multi-step calls (using stopWhen) with AI SDK Core.
Tool Calling
As covered under Foundations, tools are objects that can be called by the model to perform a specific task. AI SDK Core tools contain several core elements:
description: An optional description of the tool that can influence when the tool is picked.inputSchema: A Zod schema or a JSON schema that defines the input parameters. The schema is consumed by the LLM, and also used to validate the LLM tool calls.execute: An optional async function that is called with the inputs from the tool call. It produces a value of typeRESULT(generic type). It is optional because you might want to forward tool calls to the client or to a queue instead of executing them in the same process.strict: (optional, boolean) Enables strict tool calling when supported by the provider
The tools parameter of generateText and streamText is an object that has the tool names as keys and the tools as values:
import { z } from 'zod';
import { generateText, tool, stepCountIs } from 'ai';
__PROVIDER_IMPORT__;
const result = await generateText({
model: __MODEL__,
tools: {
weather: tool({
description: 'Get the weather in a location',
inputSchema: z.object({
location: z.string().describe('The location to get the weather for'),
}),
execute: async ({ location }) => ({
location,
temperature: 72 + Math.floor(Math.random() * 21) - 10,
}),
}),
},
stopWhen: stepCountIs(5),
prompt: 'What is the weather in San Francisco?',
});
Tool calling is not restricted to only text generation. You can also use it to render user interfaces (Generative UI).
Strict Mode
When enabled, language model providers that support strict tool calling will only generate tool calls that are valid according to your defined inputSchema.
This increases the reliability of tool calling.
However, not all schemas may be supported in strict mode, and what is supported depends on the specific provider.
By default, strict mode is disabled. You can enable it per-tool by setting strict: true:
tool({
description: 'Get the weather in a location',
inputSchema: z.object({
location: z.string(),
}),
strict: true, // Enable strict validation for this tool
execute: async ({ location }) => ({
// ...
}),
});
Input Examples
You can specify example inputs for your tools to help guide the model on how input data should be structured. When supported by providers, input examples can help when JSON schema itself does not fully specify the intended usage or when there are optional values.
tool({
description: 'Get the weather in a location',
inputSchema: z.object({
location: z.string().describe('The location to get the weather for'),
}),
inputExamples: [
{ input: { location: 'San Francisco' } },
{ input: { location: 'London' } },
],
execute: async ({ location }) => {
// ...
},
});
Tool Execution Approval
By default, tools with an execute function run automatically as the model calls them. You can require approval before execution by setting needsApproval:
import { tool } from 'ai';
import { z } from 'zod';
const runCommand = tool({
description: 'Run a shell command',
inputSchema: z.object({
command: z.string().describe('The shell command to execute'),
}),
needsApproval: true,
execute: async ({ command }) => {
// your command execution logic here
},
});
This is useful for tools that perform sensitive operations like executing commands, processing payments, modifying data, and more potentially dangerous actions.
How It Works
When a tool requires approval, generateText and streamText don't pause execution. Instead, they complete and return tool-approval-request parts in the result content. This means the approval flow requires two calls to the model: the first returns the approval request, and the second (after receiving the approval response) either executes the tool or informs the model that approval was denied.
Here's the complete flow:
- Call
generateTextwith a tool that hasneedsApproval: true - Model generates a tool call
generateTextreturns withtool-approval-requestparts inresult.content- Your app requests an approval and collects the user's decision
- Add a
tool-approval-responseto the messages array - Call
generateTextagain with the updated messages - If approved, the tool runs and returns a result. If denied, the model sees the denial and responds accordingly.
Handling Approval Requests
After calling generateText or streamText, check result.content for tool-approval-request parts:
import { type ModelMessage, generateText } from 'ai';
const messages: ModelMessage[] = [
{ role: 'user', content: 'Remove the most recent file' },
];
const result = await generateText({
model: __MODEL__,
tools: { runCommand },
messages,
});
messages.push(...result.response.messages);
for (const part of result.content) {
if (part.type === 'tool-approval-request') {
console.log(part.approvalId); // Unique ID for this approval request
console.log(part.toolCall); // Contains toolName, input, etc.
}
}
To respond, create a tool-approval-response and add it to your messages:
import { type ToolApprovalResponse } from 'ai';
const approvals: ToolApprovalResponse[] = [];
for (const part of result.content) {
if (part.type === 'tool-approval-request') {
const response: ToolApprovalResponse = {
type: 'tool-approval-response',
approvalId: part.approvalId,
approved: true, // or false to deny
reason: 'User confirmed the command', // Optional context for the model
};
approvals.push(response);
}
}
// add approvals to messages
messages.push({ role: 'tool', content: approvals });
Then call generateText again with the updated messages. If approved, the tool executes. If denied, the model receives the denial and can respond accordingly.
Dynamic Approval
You can make approval decisions based on tool input by providing an async function:
const paymentTool = tool({
description: 'Process a payment',
inputSchema: z.object({
amount: z.number(),
recipient: z.string(),
}),
needsApproval: async ({ amount }) => amount > 1000,
execute: async ({ amount, recipient }) => {
return await processPayment(amount, recipient);
},
});
In this example, only transactions over $1000 require approval. Smaller transactions execute automatically.
Tool Execution Approval with useChat
When using useChat, the approval flow is handled through UI state. See Chatbot Tool Usage for details on handling approvals in your UI with addToolApprovalResponse.
Multi-Step Calls (using stopWhen)
With the stopWhen setting, you can enable multi-step calls in generateText and streamText. When stopWhen is set and the model generates a tool call, the AI SDK will trigger a new generation passing in the tool result until there are no further tool calls or the stopping condition is met.
By default, when you use generateText or streamText, it triggers a single generation. This works well for many use cases where you can rely on the model's training data to generate a response. However, when you provide tools, the model now has the choice to either generate a normal text response, or generate a tool call. If the model generates a tool call, its generation is complete and that step is finished.
You may want the model to generate text after the tool has been executed, either to summarize the tool results in the context of the users query. In many cases, you may also want the model to use multiple tools in a single response. This is where multi-step calls come in.
You can think of multi-step calls in a similar way to a conversation with a human. When you ask a question, if the person does not have the requisite knowledge in their common knowledge (a model's training data), the person may need to look up information (use a tool) before they can provide you with an answer. In the same way, the model may need to call a tool to get the information it needs to answer your question where each generation (tool call or text generation) is a step.
Example
In the following example, there are two steps:
- Step 1
- The prompt
'What is the weather in San Francisco?'is sent to the model. - The model generates a tool call.
- The tool call is executed.
- The prompt
- Step 2
- The tool result is sent to the model.
- The model generates a response considering the tool result.
import { z } from 'zod';
import { generateText, tool, stepCountIs } from 'ai';
__PROVIDER_IMPORT__;
const { text, steps } = await generateText({
model: __MODEL__,
tools: {
weather: tool({
description: 'Get the weather in a location',
inputSchema: z.object({
location: z.string().describe('The location to get the weather for'),
}),
execute: async ({ location }) => ({
location,
temperature: 72 + Math.floor(Math.random() * 21) - 10,
}),
}),
},
stopWhen: stepCountIs(5), // stop after a maximum of 5 steps if tools were called
prompt: 'What is the weather in San Francisco?',
});
You can use streamText in a similar way.
Steps
To access intermediate tool calls and results, you can use the steps property in the result object
or the streamText onFinish callback.
It contains all the text, tool calls, tool results, and more from each step.
Example: Extract tool results from all steps
import { generateText } from 'ai';
__PROVIDER_IMPORT__;
const { steps } = await generateText({
model: __MODEL__,
stopWhen: stepCountIs(10),
// ...
});
// extract all tool calls from the steps:
const allToolCalls = steps.flatMap(step => step.toolCalls);
onStepFinish callback
When using generateText or streamText, you can provide an onStepFinish callback that
is triggered when a step is finished,
i.e. all text deltas, tool calls, and tool results for the step are available.
When you have multiple steps, the callback is triggered for each step.
import { generateText } from 'ai';
const result = await generateText({
// ...
onStepFinish({ text, toolCalls, toolResults, finishReason, usage }) {
// your own logic, e.g. for saving the chat history or recording usage
},
});
prepareStep callback
The prepareStep callback is called before a step is started.
It is called with the following parameters:
model: The model that was passed intogenerateText.stopWhen: The stopping condition that was passed intogenerateText.stepNumber: The number of the step that is being executed.steps: The steps that have been executed so far.messages: The messages that will be sent to the model for the current step.experimental_context: The context passed via theexperimental_contextsetting (experimental).
You can use it to provide different settings for a step, including modifying the input messages.
import { generateText } from 'ai';
const result = await generateText({
// ...
prepareStep: async ({ model, stepNumber, steps, messages }) => {
if (stepNumber === 0) {
return {
// use a different model for this step:
model: modelForThisParticularStep,
// force a tool choice for this step:
toolChoice: { type: 'tool', toolName: 'tool1' },
// limit the tools that are available for this step:
activeTools: ['tool1'],
};
}
// when nothing is returned, the default settings are used
},
});
Message Modification for Longer Agentic Loops
In longer agentic loops, you can use the messages parameter to modify the input messages for each step. This is particularly useful for prompt compression:
prepareStep: async ({ stepNumber, steps, messages }) => {
// Compress conversation history for longer loops
if (messages.length > 20) {
return {
messages: messages.slice(-10),
};
}
return {};
},
Provider Options for Step Configuration
You can use providerOptions in prepareStep to pass provider-specific configuration for each step. This is useful for features like Anthropic's code execution container persistence:
import { forwardAnthropicContainerIdFromLastStep } from '@ai-sdk/anthropic';
// Propagate container ID from previous step for code execution continuity
prepareStep: forwardAnthropicContainerIdFromLastStep,
Response Messages
Adding the generated assistant and tool messages to your conversation history is a common task, especially if you are using multi-step tool calls.
Both generateText and streamText have a response.messages property that you can use to
add the assistant and tool messages to your conversation history.
It is also available in the onFinish callback of streamText.
The response.messages property contains an array of ModelMessage objects that you can add to your conversation history:
import { generateText, ModelMessage } from 'ai';
const messages: ModelMessage[] = [
// ...
];
const { response } = await generateText({
// ...
messages,
});
// add the response messages to your conversation history:
messages.push(...response.messages); // streamText: ...((await response).messages)
Dynamic Tools
AI SDK Core supports dynamic tools for scenarios where tool schemas are not known at compile time. This is useful for:
- MCP (Model Context Protocol) tools without schemas
- User-defined functions at runtime
- Tools loaded from external sources
Using dynamicTool
The dynamicTool helper creates tools with unknown input/output types:
import { dynamicTool } from 'ai';
import { z } from 'zod';
const customTool = dynamicTool({
description: 'Execute a custom function',
inputSchema: z.object({}),
execute: async input => {
// input is typed as 'unknown'
// You need to validate/cast it at runtime
const { action, parameters } = input as any;
// Execute your dynamic logic
return { result: `Executed ${action}` };
},
});
Type-Safe Handling
When using both static and dynamic tools, use the dynamic flag for type narrowing:
const result = await generateText({
model: __MODEL__,
tools: {
// Static tool with known types
weather: weatherTool,
// Dynamic tool
custom: dynamicTool({
/* ... */
}),
},
onStepFinish: ({ toolCalls, toolResults }) => {
// Type-safe iteration
for (const toolCall of toolCalls) {
if (toolCall.dynamic) {
// Dynamic tool: input is 'unknown'
console.log('Dynamic:', toolCall.toolName, toolCall.input);
continue;
}
// Static tool: full type inference
switch (toolCall.toolName) {
case 'weather':
console.log(toolCall.input.location); // typed as string
break;
}
}
},
});
Preliminary Tool Results
You can return an AsyncIterable over multiple results.
In this case, the last value from the iterable is the final tool result.
This can be used in combination with generator functions to e.g. stream status information during the tool execution:
tool({
description: 'Get the current weather.',
inputSchema: z.object({
location: z.string(),
}),
async *execute({ location }) {
yield {
status: 'loading' as const,
text: `Getting weather for ${location}`,
weather: undefined,
};
await new Promise(resolve => setTimeout(resolve, 3000));
const temperature = 72 + Math.floor(Math.random() * 21) - 10;
yield {
status: 'success' as const,
text: `The weather in ${location} is ${temperature}°F`,
temperature,
};
},
});
Tool Choice
You can use the toolChoice setting to influence when a tool is selected.
It supports the following settings:
auto(default): the model can choose whether and which tools to call.required: the model must call a tool. It can choose which tool to call.none: the model must not call tools{ type: 'tool', toolName: string (typed) }: the model must call the specified tool
import { z } from 'zod';
import { generateText, tool } from 'ai';
__PROVIDER_IMPORT__;
const result = await generateText({
model: __MODEL__,
tools: {
weather: tool({
description: 'Get the weather in a location',
inputSchema: z.object({
location: z.string().describe('The location to get the weather for'),
}),
execute: async ({ location }) => ({
location,
temperature: 72 + Math.floor(Math.random() * 21) - 10,
}),
}),
},
toolChoice: 'required', // force the model to call a tool
prompt: 'What is the weather in San Francisco?',
});
Tool Execution Options
When tools are called, they receive additional options as a second parameter.
Tool Call ID
The ID of the tool call is forwarded to the tool execution. You can use it e.g. when sending tool-call related information with stream data.
import {
streamText,
tool,
createUIMessageStream,
createUIMessageStreamResponse,
} from 'ai';
export async function POST(req: Request) {
const { messages } = await req.json();
const stream = createUIMessageStream({
execute: ({ writer }) => {
const result = streamText({
// ...
messages,
tools: {
myTool: tool({
// ...
execute: async (args, { toolCallId }) => {
// return e.g. custom status for tool call
writer.write({
type: 'data-tool-status',
id: toolCallId,
data: {
name: 'myTool',
status: 'in-progress',
},
});
// ...
},
}),
},
});
writer.merge(result.toUIMessageStream());
},
});
return createUIMessageStreamResponse({ stream });
}
Messages
The messages that were sent to the language model to initiate the response that contained the tool call are forwarded to the tool execution.
You can access them in the second parameter of the execute function.
In multi-step calls, the messages contain the text, tool calls, and tool results from all previous steps.
import { generateText, tool } from 'ai';
const result = await generateText({
// ...
tools: {
myTool: tool({
// ...
execute: async (args, { messages }) => {
// use the message history in e.g. calls to other language models
return { ... };
},
}),
},
});
Abort Signals
The abort signals from generateText and streamText are forwarded to the tool execution.
You can access them in the second parameter of the execute function and e.g. abort long-running computations or forward them to fetch calls inside tools.
import { z } from 'zod';
import { generateText, tool } from 'ai';
__PROVIDER_IMPORT__;
const result = await generateText({
model: __MODEL__,
abortSignal: myAbortSignal, // signal that will be forwarded to tools
tools: {
weather: tool({
description: 'Get the weather in a location',
inputSchema: z.object({ location: z.string() }),
execute: async ({ location }, { abortSignal }) => {
return fetch(
`https://api.weatherapi.com/v1/current.json?q=${location}`,
{ signal: abortSignal }, // forward the abort signal to fetch
);
},
}),
},
prompt: 'What is the weather in San Francisco?',
});
Context (experimental)
You can pass in arbitrary context from generateText or streamText via the experimental_context setting.
This context is available in the experimental_context tool execution option.
const result = await generateText({
// ...
tools: {
someTool: tool({
// ...
execute: async (input, { experimental_context: context }) => {
const typedContext = context as { example: string }; // or use type validation library
// ...
},
}),
},
experimental_context: { example: '123' },
});
Tool Input Lifecycle Hooks
The following tool input lifecycle hooks are available:
onInputStart: Called when the model starts generating the input (arguments) for the tool callonInputDelta: Called for each chunk of text as the input is streamedonInputAvailable: Called when the complete input is available and validated
onInputStart and onInputDelta are only called in streaming contexts (when using streamText). They are not called when using generateText.
Example
import { streamText, tool } from 'ai';
__PROVIDER_IMPORT__;
import { z } from 'zod';
const result = streamText({
model: __MODEL__,
tools: {
getWeather: tool({
description: 'Get the weather in a location',
inputSchema: z.object({
location: z.string().describe('The location to get the weather for'),
}),
execute: async ({ location }) => ({
temperature: 72 + Math.floor(Math.random() * 21) - 10,
}),
onInputStart: () => {
console.log('Tool call starting');
},
onInputDelta: ({ inputTextDelta }) => {
console.log('Received input chunk:', inputTextDelta);
},
onInputAvailable: ({ input }) => {
console.log('Complete input:', input);
},
}),
},
prompt: 'What is the weather in San Francisco?',
});
Types
Modularizing your code often requires defining types to ensure type safety and reusability. To enable this, the AI SDK provides several helper types for tools, tool calls, and tool results.
You can use them to strongly type your variables, function parameters, and return types
in parts of the code that are not directly related to streamText or generateText.
Each tool call is typed with ToolCall<NAME extends string, ARGS>, depending
on the tool that has been invoked.
Similarly, the tool results are typed with ToolResult<NAME extends string, ARGS, RESULT>.
The tools in streamText and generateText are defined as a ToolSet.
The type inference helpers TypedToolCall<TOOLS extends ToolSet>
and TypedToolResult<TOOLS extends ToolSet> can be used to
extract the tool call and tool result types from the tools.
import { TypedToolCall, TypedToolResult, generateText, tool } from 'ai';
__PROVIDER_IMPORT__;
import { z } from 'zod';
const myToolSet = {
firstTool: tool({
description: 'Greets the user',
inputSchema: z.object({ name: z.string() }),
execute: async ({ name }) => `Hello, ${name}!`,
}),
secondTool: tool({
description: 'Tells the user their age',
inputSchema: z.object({ age: z.number() }),
execute: async ({ age }) => `You are ${age} years old!`,
}),
};
type MyToolCall = TypedToolCall<typeof myToolSet>;
type MyToolResult = TypedToolResult<typeof myToolSet>;
async function generateSomething(prompt: string): Promise<{
text: string;
toolCalls: Array<MyToolCall>; // typed tool calls
toolResults: Array<MyToolResult>; // typed tool results
}> {
return generateText({
model: __MODEL__,
tools: myToolSet,
prompt,
});
}
Handling Errors
The AI SDK has three tool-call related errors:
NoSuchToolError: the model tries to call a tool that is not defined in the tools objectInvalidToolInputError: the model calls a tool with inputs that do not match the tool's input schemaToolCallRepairError: an error that occurred during tool call repair
When tool execution fails (errors thrown by your tool's execute function), the AI SDK adds them as tool-error content parts to enable automated LLM roundtrips in multi-step scenarios.
generateText
generateText throws errors for tool schema validation issues and other errors, and can be handled using a try/catch block. Tool execution errors appear as tool-error parts in the result steps:
try {
const result = await generateText({
//...
});
} catch (error) {
if (NoSuchToolError.isInstance(error)) {
// handle the no such tool error
} else if (InvalidToolInputError.isInstance(error)) {
// handle the invalid tool inputs error
} else {
// handle other errors
}
}
Tool execution errors are available in the result steps:
const { steps } = await generateText({
// ...
});
// check for tool errors in the steps
const toolErrors = steps.flatMap(step =>
step.content.filter(part => part.type === 'tool-error'),
);
toolErrors.forEach(toolError => {
console.log('Tool error:', toolError.error);
console.log('Tool name:', toolError.toolName);
console.log('Tool input:', toolError.input);
});
streamText
streamText sends errors as part of the full stream. Tool execution errors appear as tool-error parts, while other errors appear as error parts.
When using toUIMessageStreamResponse, you can pass an onError function to extract the error message from the error part and forward it as part of the stream response:
const result = streamText({
// ...
});
return result.toUIMessageStreamResponse({
onError: error => {
if (NoSuchToolError.isInstance(error)) {
return 'The model tried to call a unknown tool.';
} else if (InvalidToolInputError.isInstance(error)) {
return 'The model called a tool with invalid inputs.';
} else {
return 'An unknown error occurred.';
}
},
});
Tool Call Repair
The tool call repair feature is experimental and may change in the future.Language models sometimes fail to generate valid tool calls, especially when the input schema is complex or the model is smaller.
If you use multiple steps, those failed tool calls will be sent back to the LLM in the next step to give it an opportunity to fix it. However, you may want to control how invalid tool calls are repaired without requiring additional steps that pollute the message history.
You can use the experimental_repairToolCall function to attempt to repair the tool call
with a custom function.
You can use different strategies to repair the tool call:
- Use a model with structured outputs to generate the inputs.
- Send the messages, system prompt, and tool schema to a stronger model to generate the inputs.
- Provide more specific repair instructions based on which tool was called.
Example: Use a model with structured outputs for repair
import { openai } from '@ai-sdk/openai';
import { generateObject, generateText, NoSuchToolError, tool } from 'ai';
const result = await generateText({
model,
tools,
prompt,
experimental_repairToolCall: async ({
toolCall,
tools,
inputSchema,
error,
}) => {
if (NoSuchToolError.isInstance(error)) {
return null; // do not attempt to fix invalid tool names
}
const tool = tools[toolCall.toolName as keyof typeof tools];
const { object: repairedArgs } = await generateObject({
model: __MODEL__,
schema: tool.inputSchema,
prompt: [
`The model tried to call the tool "${toolCall.toolName}"` +
` with the following inputs:`,
JSON.stringify(toolCall.input),
`The tool accepts the following schema:`,
JSON.stringify(inputSchema(toolCall)),
'Please fix the inputs.',
].join('\n'),
});
return { ...toolCall, input: JSON.stringify(repairedArgs) };
},
});
Example: Use the re-ask strategy for repair
import { openai } from '@ai-sdk/openai';
import { generateObject, generateText, NoSuchToolError, tool } from 'ai';
const result = await generateText({
model,
tools,
prompt,
experimental_repairToolCall: async ({
toolCall,
tools,
error,
messages,
system,
}) => {
const result = await generateText({
model,
system,
messages: [
...messages,
{
role: 'assistant',
content: [
{
type: 'tool-call',
toolCallId: toolCall.toolCallId,
toolName: toolCall.toolName,
input: toolCall.input,
},
],
},
{
role: 'tool' as const,
content: [
{
type: 'tool-result',
toolCallId: toolCall.toolCallId,
toolName: toolCall.toolName,
output: error.message,
},
],
},
],
tools,
});
const newToolCall = result.toolCalls.find(
newToolCall => newToolCall.toolName === toolCall.toolName,
);
return newToolCall != null
? {
toolCallType: 'function' as const,
toolCallId: toolCall.toolCallId,
toolName: toolCall.toolName,
input: JSON.stringify(newToolCall.input),
}
: null;
},
});
Active Tools
Language models can only handle a limited number of tools at a time, depending on the model.
To allow for static typing using a large number of tools and limiting the available tools to the model at the same time,
the AI SDK provides the activeTools property.
It is an array of tool names that are currently active.
By default, the value is undefined and all tools are active.
import { openai } from '@ai-sdk/openai';
import { generateText } from 'ai';
__PROVIDER_IMPORT__;
const { text } = await generateText({
model: __MODEL__,
tools: myToolSet,
activeTools: ['firstTool'],
});
Multi-modal Tool Results
Multi-modal tool results are experimental and only supported by Anthropic and OpenAI.In order to send multi-modal tool results, e.g. screenshots, back to the model, they need to be converted into a specific format.
AI SDK Core tools have an optional toModelOutput function
that converts the tool result into a content part.
Here is an example for converting a screenshot into a content part:
const result = await generateText({
model: __MODEL__,
tools: {
computer: anthropic.tools.computer_20241022({
// ...
async execute({ action, coordinate, text }) {
switch (action) {
case 'screenshot': {
return {
type: 'image',
data: fs
.readFileSync('./data/screenshot-editor.png')
.toString('base64'),
};
}
default: {
return `executed ${action}`;
}
}
},
// map to tool result content for LLM consumption:
toModelOutput({ output }) {
return {
type: 'content',
value:
typeof output === 'string'
? [{ type: 'text', text: output }]
: [{ type: 'media', data: output.data, mediaType: 'image/png' }],
};
},
}),
},
// ...
});
Extracting Tools
Once you start having many tools, you might want to extract them into separate files.
The tool helper function is crucial for this, because it ensures correct type inference.
Here is an example of an extracted tool:
import { tool } from 'ai';
import { z } from 'zod';
// the `tool` helper function ensures correct type inference:
export const weatherTool = tool({
description: 'Get the weather in a location',
inputSchema: z.object({
location: z.string().describe('The location to get the weather for'),
}),
execute: async ({ location }) => ({
location,
temperature: 72 + Math.floor(Math.random() * 21) - 10,
}),
});
MCP Tools
The AI SDK supports connecting to Model Context Protocol (MCP) servers to access their tools. MCP enables your AI applications to discover and use tools across various services through a standardized interface.
For detailed information about MCP tools, including initialization, transport options, and usage patterns, see the MCP Tools documentation.
AI SDK Tools vs MCP Tools
In most cases, you should define your own AI SDK tools for production applications. They provide full control, type safety, and optimal performance. MCP tools are best suited for rapid development iteration and scenarios where users bring their own tools.
| Aspect | AI SDK Tools | MCP Tools |
|---|---|---|
| Type Safety | Full static typing end-to-end | Dynamic discovery at runtime |
| Execution | Same process as your request (low latency) | Separate server (network overhead) |
| Prompt Control | Full control over descriptions and schemas | Controlled by MCP server owner |
| Schema Control | You define and optimize for your model | Controlled by MCP server owner |
| Version Management | Full visibility over updates | Can update independently (version skew risk) |
| Authentication | Same process, no additional auth required | Separate server introduces additional auth complexity |
| Best For | Production applications requiring control and performance | Development iteration, user-provided tools |
Examples
You can see tools in action using various frameworks in the following examples:
<ExampleLinks examples={[ { title: 'Learn to use tools in Node.js', link: '/cookbook/node/call-tools', }, { title: 'Learn to use tools in Next.js with Route Handlers', link: '/cookbook/next/call-tools', }, { title: 'Learn to use MCP tools in Node.js', link: '/cookbook/node/mcp-tools', }, ]} />
title: Model Context Protocol (MCP) description: Learn how to connect to Model Context Protocol (MCP) servers and use their tools with AI SDK Core.
Model Context Protocol (MCP)
The AI SDK supports connecting to Model Context Protocol (MCP) servers to access their tools, resources, and prompts. This enables your AI applications to discover and use capabilities across various services through a standardized interface.
If you're using OpenAI's Responses API, you can also use the built-in `openai.tools.mcp` tool, which provides direct MCP server integration without needing to convert tools. See the [OpenAI provider documentation](/providers/ai-sdk-providers/openai#mcp-tool) for details.Initializing an MCP Client
We recommend using HTTP transport (like StreamableHTTPClientTransport) for production deployments. The stdio transport should only be used for connecting to local servers as it cannot be deployed to production environments.
Create an MCP client using one of the following transport options:
- HTTP transport (Recommended): Either configure HTTP directly via the client using
transport: { type: 'http', ... }, or use MCP's official TypeScript SDKStreamableHTTPClientTransport - SSE (Server-Sent Events): An alternative HTTP-based transport
stdio: For local development only. Uses standard input/output streams for local MCP servers
HTTP Transport (Recommended)
For production deployments, we recommend using the HTTP transport. You can configure it directly on the client:
import { createMCPClient } from '@ai-sdk/mcp';
const mcpClient = await createMCPClient({
transport: {
type: 'http',
url: 'https://your-server.com/mcp',
// optional: configure HTTP headers
headers: { Authorization: 'Bearer my-api-key' },
// optional: provide an OAuth client provider for automatic authorization
authProvider: myOAuthClientProvider,
},
});
Alternatively, you can use StreamableHTTPClientTransport from MCP's official TypeScript SDK:
import { createMCPClient } from '@ai-sdk/mcp';
import { StreamableHTTPClientTransport } from '@modelcontextprotocol/sdk/client/streamableHttp.js';
const url = new URL('https://your-server.com/mcp');
const mcpClient = await createMCPClient({
transport: new StreamableHTTPClientTransport(url, {
sessionId: 'session_123',
}),
});
SSE Transport
SSE provides an alternative HTTP-based transport option. Configure it with a type and url property. You can also provide an authProvider for OAuth:
import { createMCPClient } from '@ai-sdk/mcp';
const mcpClient = await createMCPClient({
transport: {
type: 'sse',
url: 'https://my-server.com/sse',
// optional: configure HTTP headers
headers: { Authorization: 'Bearer my-api-key' },
// optional: provide an OAuth client provider for automatic authorization
authProvider: myOAuthClientProvider,
},
});
Stdio Transport (Local Servers)
The stdio transport should only be used for local servers.The Stdio transport can be imported from either the MCP SDK or the AI SDK:
import { createMCPClient } from '@ai-sdk/mcp';
import { StdioClientTransport } from '@modelcontextprotocol/sdk/client/stdio.js';
// Or use the AI SDK's stdio transport:
// import { Experimental_StdioMCPTransport as StdioClientTransport } from '@ai-sdk/mcp/mcp-stdio';
const mcpClient = await createMCPClient({
transport: new StdioClientTransport({
command: 'node',
args: ['src/stdio/dist/server.js'],
}),
});
Custom Transport
You can also bring your own transport by implementing the MCPTransport interface for specific requirements not covered by the standard transports.
Authorization via OAuth is supported when using the AI SDK MCP HTTP or SSE
transports by providing an authProvider.
Closing the MCP Client
After initialization, you should close the MCP client based on your usage pattern:
- For short-lived usage (e.g., single requests), close the client when the response is finished
- For long-running clients (e.g., command line apps), keep the client open but ensure it's closed when the application terminates
When streaming responses, you can close the client when the LLM response has finished. For example, when using streamText, you should use the onFinish callback:
const mcpClient = await createMCPClient({
// ...
});
const tools = await mcpClient.tools();
const result = await streamText({
model: __MODEL__,
tools,
prompt: 'What is the weather in Brooklyn, New York?',
onFinish: async () => {
await mcpClient.close();
},
});
When generating responses without streaming, you can use try/finally or cleanup functions in your framework:
let mcpClient: MCPClient | undefined;
try {
mcpClient = await createMCPClient({
// ...
});
} finally {
await mcpClient?.close();
}
Using MCP Tools
The client's tools method acts as an adapter between MCP tools and AI SDK tools. It supports two approaches for working with tool schemas:
Schema Discovery
With schema discovery, all tools offered by the server are automatically listed, and input parameter types are inferred based on the schemas provided by the server:
const tools = await mcpClient.tools();
This approach is simpler to implement and automatically stays in sync with server changes. However, you won't have TypeScript type safety during development, and all tools from the server will be loaded
Schema Definition
For better type safety and control, you can define the tools and their input schemas explicitly in your client code:
import { z } from 'zod';
const tools = await mcpClient.tools({
schemas: {
'get-data': {
inputSchema: z.object({
query: z.string().describe('The data query'),
format: z.enum(['json', 'text']).optional(),
}),
},
// For tools with zero inputs, you should use an empty object:
'tool-with-no-args': {
inputSchema: z.object({}),
},
},
});
This approach provides full TypeScript type safety and IDE autocompletion, letting you catch parameter mismatches during development. When you define schemas, the client only pulls the explicitly defined tools, keeping your application focused on the tools it needs
Typed Tool Outputs
When MCP servers return structuredContent (per the MCP specification), you can define an outputSchema to get typed tool results:
import { z } from 'zod';
const tools = await mcpClient.tools({
schemas: {
'get-weather': {
inputSchema: z.object({
location: z.string(),
}),
// Define outputSchema for typed results
outputSchema: z.object({
temperature: z.number(),
conditions: z.string(),
humidity: z.number(),
}),
},
},
});
const result = await tools['get-weather'].execute(
{ location: 'New York' },
{ messages: [], toolCallId: 'weather-1' },
);
console.log(`Temperature: ${result.temperature}°C`);
When outputSchema is provided:
- The client extracts
structuredContentfrom the tool result - The output is validated against your schema at runtime
- You get full TypeScript type safety for the result
If the server doesn't return structuredContent, the client falls back to parsing JSON from the text content. If neither is available or validation fails, an error is thrown.
Using MCP Resources
According to the MCP specification, resources are application-driven data sources that provide context to the model. Unlike tools (which are model-controlled), your application decides when to fetch and pass resources as context.
The MCP client provides three methods for working with resources:
Listing Resources
List all available resources from the MCP server:
const resources = await mcpClient.listResources();
Reading Resource Contents
Read the contents of a specific resource by its URI:
const resourceData = await mcpClient.readResource({
uri: 'file:///example/document.txt',
});
Listing Resource Templates
Resource templates are dynamic URI patterns that allow flexible queries. List all available templates:
const templates = await mcpClient.listResourceTemplates();
Using MCP Prompts
MCP Prompts is an experimental feature and may change in the future.According to the MCP specification, prompts are user-controlled templates that servers expose for clients to list and retrieve with optional arguments.
Listing Prompts
const prompts = await mcpClient.experimental_listPrompts();
Getting a Prompt
Retrieve prompt messages, optionally passing arguments defined by the server:
const prompt = await mcpClient.experimental_getPrompt({
name: 'code_review',
arguments: { code: 'function add(a, b) { return a + b; }' },
});
Handling Elicitation Requests
Elicitation is a mechanism where MCP servers can request additional information from the client during tool execution. For example, a server might need user input to complete a registration form or confirmation for a sensitive operation.
It is up to the client application to handle elicitation requests properly. The MCP client simply surfaces these requests from the server to your application code.Enabling Elicitation Support
To enable elicitation, you need to advertise the capability when creating the MCP client:
const mcpClient = await createMCPClient({
transport: {
type: 'sse',
url: 'https://your-server.com/sse',
},
capabilities: {
elicitation: {},
},
});
Registering an Elicitation Handler
Use the onElicitationRequest method to register a handler that will be called when the server requests input:
import { ElicitationRequestSchema } from '@ai-sdk/mcp';
mcpClient.onElicitationRequest(ElicitationRequestSchema, async request => {
// request.params.message: A message describing what input is needed
// request.params.requestedSchema: JSON schema defining the expected input structure
// Get input from the user (implement according to your application's needs)
const userInput = await getInputFromUser(
request.params.message,
request.params.requestedSchema,
);
// Return the result with one of three actions:
return {
action: 'accept', // or 'decline' or 'cancel'
content: userInput, // only required when action is 'accept'
};
});
Elicitation Response Actions
Your handler must return an object with an action field that can be one of:
'accept': User provided the requested information. Must includecontentwith the data.'decline': User chose not to provide the information.'cancel': User cancelled the operation entirely.
Examples
You can see MCP in action in the following examples:
<ExampleLinks examples={[ { title: 'Learn to use MCP tools in Node.js', link: '/cookbook/node/mcp-tools', }, { title: 'Learn to handle MCP elicitation requests in Node.js', link: '/cookbook/node/mcp-elicitation', }, ]} />
title: Prompt Engineering description: Learn how to develop prompts with AI SDK Core.
Prompt Engineering
Tips
Prompts for Tools
When you create prompts that include tools, getting good results can be tricky as the number and complexity of your tools increases.
Here are a few tips to help you get the best results:
- Use a model that is strong at tool calling, such as
gpt-5orgpt-4.1. Weaker models will often struggle to call tools effectively and flawlessly. - Keep the number of tools low, e.g. to 5 or less.
- Keep the complexity of the tool parameters low. Complex Zod schemas with many nested and optional elements, unions, etc. can be challenging for the model to work with.
- Use semantically meaningful names for your tools, parameters, parameter properties, etc. The more information you pass to the model, the better it can understand what you want.
- Add
.describe("...")to your Zod schema properties to give the model hints about what a particular property is for. - When the output of a tool might be unclear to the model and there are dependencies between tools, use the
descriptionfield of a tool to provide information about the output of the tool execution. - You can include example input/outputs of tool calls in your prompt to help the model understand how to use the tools. Keep in mind that the tools work with JSON objects, so the examples should use JSON.
In general, the goal should be to give the model all information it needs in a clear way.
Tool & Structured Data Schemas
The mapping from Zod schemas to LLM inputs (typically JSON schema) is not always straightforward, since the mapping is not one-to-one.
Zod Dates
Zod expects JavaScript Date objects, but models return dates as strings.
You can specify and validate the date format using z.string().datetime() or z.string().date(),
and then use a Zod transformer to convert the string to a Date object.
const result = await generateObject({
model: __MODEL__,
schema: z.object({
events: z.array(
z.object({
event: z.string(),
date: z
.string()
.date()
.transform(value => new Date(value)),
}),
),
}),
prompt: 'List 5 important events from the year 2000.',
});
Optional Parameters
When working with tools that have optional parameters, you may encounter compatibility issues with certain providers that use strict schema validation.
This is particularly relevant for OpenAI models with structured outputs (strict mode).For maximum compatibility, optional parameters should use .nullable() instead of .optional():
// This may fail with strict schema validation
const failingTool = tool({
description: 'Execute a command',
inputSchema: z.object({
command: z.string(),
workdir: z.string().optional(), // This can cause errors
timeout: z.string().optional(),
}),
});
// This works with strict schema validation
const workingTool = tool({
description: 'Execute a command',
inputSchema: z.object({
command: z.string(),
workdir: z.string().nullable(), // Use nullable instead
timeout: z.string().nullable(),
}),
});
Temperature Settings
For tool calls and object generation, it's recommended to use temperature: 0 to ensure deterministic and consistent results:
const result = await generateText({
model: __MODEL__,
temperature: 0, // Recommended for tool calls
tools: {
myTool: tool({
description: 'Execute a command',
inputSchema: z.object({
command: z.string(),
}),
}),
},
prompt: 'Execute the ls command',
});
Lower temperature values reduce randomness in model outputs, which is particularly important when the model needs to:
- Generate structured data with specific formats
- Make precise tool calls with correct parameters
- Follow strict schemas consistently
Debugging
Inspecting Warnings
Not all providers support all AI SDK features. Providers either throw exceptions or return warnings when they do not support a feature. To check if your prompt, tools, and settings are handled correctly by the provider, you can check the call warnings:
const result = await generateText({
model: __MODEL__,
prompt: 'Hello, world!',
});
console.log(result.warnings);
HTTP Request Bodies
You can inspect the raw HTTP request bodies for models that expose them, e.g. OpenAI. This allows you to inspect the exact payload that is sent to the model provider in the provider-specific way.
Request bodies are available via the request.body property of the response:
const result = await generateText({
model: __MODEL__,
prompt: 'Hello, world!',
});
console.log(result.request.body);
title: Settings description: Learn how to configure the AI SDK.
Settings
Large language models (LLMs) typically provide settings to augment their output.
All AI SDK functions support the following common settings in addition to the model, the prompt, and additional provider-specific settings:
const result = await generateText({
model: __MODEL__,
maxOutputTokens: 512,
temperature: 0.3,
maxRetries: 5,
prompt: 'Invent a new holiday and describe its traditions.',
});
maxOutputTokens
Maximum number of tokens to generate.
temperature
Temperature setting.
The value is passed through to the provider. The range depends on the provider and model.
For most providers, 0 means almost deterministic results, and higher values mean more randomness.
It is recommended to set either temperature or topP, but not both.
In AI SDK 5.0, temperature is no longer set to 0 by default.
topP
Nucleus sampling.
The value is passed through to the provider. The range depends on the provider and model. For most providers, nucleus sampling is a number between 0 and 1. E.g. 0.1 would mean that only tokens with the top 10% probability mass are considered.
It is recommended to set either temperature or topP, but not both.
topK
Only sample from the top K options for each subsequent token.
Used to remove "long tail" low probability responses.
Recommended for advanced use cases only. You usually only need to use temperature.
presencePenalty
The presence penalty affects the likelihood of the model to repeat information that is already in the prompt.
The value is passed through to the provider. The range depends on the provider and model.
For most providers, 0 means no penalty.
frequencyPenalty
The frequency penalty affects the likelihood of the model to repeatedly use the same words or phrases.
The value is passed through to the provider. The range depends on the provider and model.
For most providers, 0 means no penalty.
stopSequences
The stop sequences to use for stopping the text generation.
If set, the model will stop generating text when one of the stop sequences is generated. Providers may have limits on the number of stop sequences.
seed
It is the seed (integer) to use for random sampling. If set and supported by the model, calls will generate deterministic results.
maxRetries
Maximum number of retries. Set to 0 to disable retries. Default: 2.
abortSignal
An optional abort signal that can be used to cancel the call.
The abort signal can e.g. be forwarded from a user interface to cancel the call,
or to define a timeout using AbortSignal.timeout.
Example: AbortSignal.timeout
const result = await generateText({
model: __MODEL__,
prompt: 'Invent a new holiday and describe its traditions.',
abortSignal: AbortSignal.timeout(5000), // 5 seconds
});
timeout
An optional timeout in milliseconds. The call will be aborted if it takes longer than the specified duration.
This is a convenience parameter that creates an abort signal internally. It can be used alongside abortSignal - if both are provided, the call will abort when either condition is met.
You can specify the timeout either as a number (milliseconds) or as an object with totalMs, stepMs, and/or chunkMs properties:
totalMs: The total timeout for the entire call including all steps.stepMs: The timeout for each individual step (LLM call). This is useful for multi-step generations where you want to limit the time spent on each step independently.chunkMs: The timeout between stream chunks (streaming only). The call will abort if no new chunk is received within this duration. This is useful for detecting stalled streams.
Example: 5 second timeout (number format)
const result = await generateText({
model: __MODEL__,
prompt: 'Invent a new holiday and describe its traditions.',
timeout: 5000, // 5 seconds
});
Example: 5 second total timeout (object format)
const result = await generateText({
model: __MODEL__,
prompt: 'Invent a new holiday and describe its traditions.',
timeout: { totalMs: 5000 }, // 5 seconds
});
Example: 10 second step timeout
const result = await generateText({
model: __MODEL__,
prompt: 'Invent a new holiday and describe its traditions.',
timeout: { stepMs: 10000 }, // 10 seconds per step
});
Example: Combined total and step timeout
const result = await generateText({
model: __MODEL__,
prompt: 'Invent a new holiday and describe its traditions.',
timeout: {
totalMs: 60000, // 60 seconds total
stepMs: 10000, // 10 seconds per step
},
});
Example: Per-chunk timeout for streaming (streamText only)
const result = streamText({
model: __MODEL__,
prompt: 'Invent a new holiday and describe its traditions.',
timeout: { chunkMs: 5000 }, // abort if no chunk received for 5 seconds
});
headers
Additional HTTP headers to be sent with the request. Only applicable for HTTP-based providers.
You can use the request headers to provide additional information to the provider,
depending on what the provider supports. For example, some observability providers support
headers such as Prompt-Id.
import { generateText } from 'ai';
__PROVIDER_IMPORT__;
const result = await generateText({
model: __MODEL__,
prompt: 'Invent a new holiday and describe its traditions.',
headers: {
'Prompt-Id': 'my-prompt-id',
},
});
title: Embeddings description: Learn how to embed values with the AI SDK.
Embeddings
Embeddings are a way to represent words, phrases, or images as vectors in a high-dimensional space. In this space, similar words are close to each other, and the distance between words can be used to measure their similarity.
Embedding a Single Value
The AI SDK provides the embed function to embed single values, which is useful for tasks such as finding similar words
or phrases or clustering text.
You can use it with embeddings models, e.g. openai.embeddingModel('text-embedding-3-large') or mistral.embeddingModel('mistral-embed').
import { embed } from 'ai';
import { openai } from '@ai-sdk/openai';
// 'embedding' is a single embedding object (number[])
const { embedding } = await embed({
model: 'openai/text-embedding-3-small',
value: 'sunny day at the beach',
});
Embedding Many Values
When loading data, e.g. when preparing a data store for retrieval-augmented generation (RAG), it is often useful to embed many values at once (batch embedding).
The AI SDK provides the embedMany function for this purpose.
Similar to embed, you can use it with embeddings models,
e.g. openai.embeddingModel('text-embedding-3-large') or mistral.embeddingModel('mistral-embed').
import { openai } from '@ai-sdk/openai';
import { embedMany } from 'ai';
// 'embeddings' is an array of embedding objects (number[][]).
// It is sorted in the same order as the input values.
const { embeddings } = await embedMany({
model: 'openai/text-embedding-3-small',
values: [
'sunny day at the beach',
'rainy afternoon in the city',
'snowy night in the mountains',
],
});
Embedding Similarity
After embedding values, you can calculate the similarity between them using the cosineSimilarity function.
This is useful to e.g. find similar words or phrases in a dataset.
You can also rank and filter related items based on their similarity.
import { openai } from '@ai-sdk/openai';
import { cosineSimilarity, embedMany } from 'ai';
const { embeddings } = await embedMany({
model: 'openai/text-embedding-3-small',
values: ['sunny day at the beach', 'rainy afternoon in the city'],
});
console.log(
`cosine similarity: ${cosineSimilarity(embeddings[0], embeddings[1])}`,
);
Token Usage
Many providers charge based on the number of tokens used to generate embeddings.
Both embed and embedMany provide token usage information in the usage property of the result object:
import { openai } from '@ai-sdk/openai';
import { embed } from 'ai';
const { embedding, usage } = await embed({
model: 'openai/text-embedding-3-small',
value: 'sunny day at the beach',
});
console.log(usage); // { tokens: 10 }
Settings
Provider Options
Embedding model settings can be configured using providerOptions for provider-specific parameters:
import { openai } from '@ai-sdk/openai';
import { embed } from 'ai';
const { embedding } = await embed({
model: 'openai/text-embedding-3-small',
value: 'sunny day at the beach',
providerOptions: {
openai: {
dimensions: 512, // Reduce embedding dimensions
},
},
});
Parallel Requests
The embedMany function now supports parallel processing with configurable maxParallelCalls to optimize performance:
import { openai } from '@ai-sdk/openai';
import { embedMany } from 'ai';
const { embeddings, usage } = await embedMany({
maxParallelCalls: 2, // Limit parallel requests
model: 'openai/text-embedding-3-small',
values: [
'sunny day at the beach',
'rainy afternoon in the city',
'snowy night in the mountains',
],
});
Retries
Both embed and embedMany accept an optional maxRetries parameter of type number
that you can use to set the maximum number of retries for the embedding process.
It defaults to 2 retries (3 attempts in total). You can set it to 0 to disable retries.
import { openai } from '@ai-sdk/openai';
import { embed } from 'ai';
const { embedding } = await embed({
model: 'openai/text-embedding-3-small',
value: 'sunny day at the beach',
maxRetries: 0, // Disable retries
});
Abort Signals and Timeouts
Both embed and embedMany accept an optional abortSignal parameter of
type AbortSignal
that you can use to abort the embedding process or set a timeout.
import { openai } from '@ai-sdk/openai';
import { embed } from 'ai';
const { embedding } = await embed({
model: 'openai/text-embedding-3-small',
value: 'sunny day at the beach',
abortSignal: AbortSignal.timeout(1000), // Abort after 1 second
});
Custom Headers
Both embed and embedMany accept an optional headers parameter of type Record<string, string>
that you can use to add custom headers to the embedding request.
import { openai } from '@ai-sdk/openai';
import { embed } from 'ai';
const { embedding } = await embed({
model: 'openai/text-embedding-3-small',
value: 'sunny day at the beach',
headers: { 'X-Custom-Header': 'custom-value' },
});
Response Information
Both embed and embedMany return response information that includes the raw provider response:
import { openai } from '@ai-sdk/openai';
import { embed } from 'ai';
const { embedding, response } = await embed({
model: 'openai/text-embedding-3-small',
value: 'sunny day at the beach',
});
console.log(response); // Raw provider response
Embedding Middleware
You can enhance embedding models, e.g. to set default values, using
wrapEmbeddingModel and EmbeddingModelV3Middleware.
Here is an example that uses the built-in defaultEmbeddingSettingsMiddleware:
import {
customProvider,
defaultEmbeddingSettingsMiddleware,
embed,
wrapEmbeddingModel,
gateway,
} from 'ai';
const embeddingModelWithDefaults = wrapEmbeddingModel({
model: gateway.embeddingModel('google/gemini-embedding-001'),
middleware: defaultEmbeddingSettingsMiddleware({
settings: {
providerOptions: {
google: {
outputDimensionality: 256,
taskType: 'CLASSIFICATION',
},
},
},
}),
});
Embedding Providers & Models
Several providers offer embedding models:
| Provider | Model | Embedding Dimensions |
|---|---|---|
| OpenAI | text-embedding-3-large |
3072 |
| OpenAI | text-embedding-3-small |
1536 |
| OpenAI | text-embedding-ada-002 |
1536 |
| Google Generative AI | gemini-embedding-001 |
3072 |
| Google Generative AI | text-embedding-004 |
768 |
| Mistral | mistral-embed |
1024 |
| Cohere | embed-english-v3.0 |
1024 |
| Cohere | embed-multilingual-v3.0 |
1024 |
| Cohere | embed-english-light-v3.0 |
384 |
| Cohere | embed-multilingual-light-v3.0 |
384 |
| Cohere | embed-english-v2.0 |
4096 |
| Cohere | embed-english-light-v2.0 |
1024 |
| Cohere | embed-multilingual-v2.0 |
768 |
| Amazon Bedrock | amazon.titan-embed-text-v1 |
1536 |
| Amazon Bedrock | amazon.titan-embed-text-v2:0 |
1024 |
title: Reranking description: Learn how to rerank documents with the AI SDK.
Reranking
Reranking is a technique used to improve search relevance by reordering a set of documents based on their relevance to a query. Unlike embedding-based similarity search, reranking models are specifically trained to understand the relationship between queries and documents, often producing more accurate relevance scores.
Reranking Documents
The AI SDK provides the rerank function to rerank documents based on their relevance to a query.
You can use it with reranking models, e.g. cohere.reranking('rerank-v3.5') or bedrock.reranking('cohere.rerank-v3-5:0').
import { rerank } from 'ai';
import { cohere } from '@ai-sdk/cohere';
const documents = [
'sunny day at the beach',
'rainy afternoon in the city',
'snowy night in the mountains',
];
const { ranking } = await rerank({
model: cohere.reranking('rerank-v3.5'),
documents,
query: 'talk about rain',
topN: 2, // Return top 2 most relevant documents
});
console.log(ranking);
// [
// { originalIndex: 1, score: 0.9, document: 'rainy afternoon in the city' },
// { originalIndex: 0, score: 0.3, document: 'sunny day at the beach' }
// ]
Working with Object Documents
Reranking also supports structured documents (JSON objects), making it ideal for searching through databases, emails, or other structured content:
import { rerank } from 'ai';
import { cohere } from '@ai-sdk/cohere';
const documents = [
{
from: 'Paul Doe',
subject: 'Follow-up',
text: 'We are happy to give you a discount of 20% on your next order.',
},
{
from: 'John McGill',
subject: 'Missing Info',
text: 'Sorry, but here is the pricing information from Oracle: $5000/month',
},
];
const { ranking, rerankedDocuments } = await rerank({
model: cohere.reranking('rerank-v3.5'),
documents,
query: 'Which pricing did we get from Oracle?',
topN: 1,
});
console.log(rerankedDocuments[0]);
// { from: 'John McGill', subject: 'Missing Info', text: '...' }
Understanding the Results
The rerank function returns a comprehensive result object:
import { cohere } from '@ai-sdk/cohere';
import { rerank } from 'ai';
const { ranking, rerankedDocuments, originalDocuments } = await rerank({
model: cohere.reranking('rerank-v3.5'),
documents: ['sunny day at the beach', 'rainy afternoon in the city'],
query: 'talk about rain',
});
// ranking: sorted array of { originalIndex, score, document }
// rerankedDocuments: documents sorted by relevance (convenience property)
// originalDocuments: original documents array
Each item in the ranking array contains:
originalIndex: Position in the original documents arrayscore: Relevance score (typically 0-1, where higher is more relevant)document: The original document
Settings
Top-N Results
Use topN to limit the number of results returned. This is useful for retrieving only the most relevant documents:
import { cohere } from '@ai-sdk/cohere';
import { rerank } from 'ai';
const { ranking } = await rerank({
model: cohere.reranking('rerank-v3.5'),
documents: ['doc1', 'doc2', 'doc3', 'doc4', 'doc5'],
query: 'relevant information',
topN: 3, // Return only top 3 most relevant documents
});
Provider Options
Reranking model settings can be configured using providerOptions for provider-specific parameters:
import { cohere } from '@ai-sdk/cohere';
import { rerank } from 'ai';
const { ranking } = await rerank({
model: cohere.reranking('rerank-v3.5'),
documents: ['sunny day at the beach', 'rainy afternoon in the city'],
query: 'talk about rain',
providerOptions: {
cohere: {
maxTokensPerDoc: 1000, // Limit tokens per document
},
},
});
Retries
The rerank function accepts an optional maxRetries parameter of type number
that you can use to set the maximum number of retries for the reranking process.
It defaults to 2 retries (3 attempts in total). You can set it to 0 to disable retries.
import { cohere } from '@ai-sdk/cohere';
import { rerank } from 'ai';
const { ranking } = await rerank({
model: cohere.reranking('rerank-v3.5'),
documents: ['sunny day at the beach', 'rainy afternoon in the city'],
query: 'talk about rain',
maxRetries: 0, // Disable retries
});
Abort Signals and Timeouts
The rerank function accepts an optional abortSignal parameter of
type AbortSignal
that you can use to abort the reranking process or set a timeout.
import { cohere } from '@ai-sdk/cohere';
import { rerank } from 'ai';
const { ranking } = await rerank({
model: cohere.reranking('rerank-v3.5'),
documents: ['sunny day at the beach', 'rainy afternoon in the city'],
query: 'talk about rain',
abortSignal: AbortSignal.timeout(5000), // Abort after 5 seconds
});
Custom Headers
The rerank function accepts an optional headers parameter of type Record<string, string>
that you can use to add custom headers to the reranking request.
import { cohere } from '@ai-sdk/cohere';
import { rerank } from 'ai';
const { ranking } = await rerank({
model: cohere.reranking('rerank-v3.5'),
documents: ['sunny day at the beach', 'rainy afternoon in the city'],
query: 'talk about rain',
headers: { 'X-Custom-Header': 'custom-value' },
});
Response Information
The rerank function returns response information that includes the raw provider response:
import { cohere } from '@ai-sdk/cohere';
import { rerank } from 'ai';
const { ranking, response } = await rerank({
model: cohere.reranking('rerank-v3.5'),
documents: ['sunny day at the beach', 'rainy afternoon in the city'],
query: 'talk about rain',
});
console.log(response); // { id, timestamp, modelId, headers, body }
Reranking Providers & Models
Several providers offer reranking models:
| Provider | Model |
|---|---|
| Cohere | rerank-v3.5 |
| Cohere | rerank-english-v3.0 |
| Cohere | rerank-multilingual-v3.0 |
| Amazon Bedrock | amazon.rerank-v1:0 |
| Amazon Bedrock | cohere.rerank-v3-5:0 |
| Together.ai | Salesforce/Llama-Rank-v1 |
| Together.ai | mixedbread-ai/Mxbai-Rerank-Large-V2 |
title: Image Generation description: Learn how to generate images with the AI SDK.
Image Generation
The AI SDK provides the generateImage
function to generate images based on a given prompt using an image model.
import { generateImage } from 'ai';
import { openai } from '@ai-sdk/openai';
const { image } = await generateImage({
model: openai.image('dall-e-3'),
prompt: 'Santa Claus driving a Cadillac',
});
You can access the image data using the base64 or uint8Array properties:
const base64 = image.base64; // base64 image data
const uint8Array = image.uint8Array; // Uint8Array image data
Settings
Size and Aspect Ratio
Depending on the model, you can either specify the size or the aspect ratio.
Size
The size is specified as a string in the format {width}x{height}.
Models only support a few sizes, and the supported sizes are different for each model and provider.
import { generateImage } from 'ai';
import { openai } from '@ai-sdk/openai';
const { image } = await generateImage({
model: openai.image('dall-e-3'),
prompt: 'Santa Claus driving a Cadillac',
size: '1024x1024',
});
Aspect Ratio
The aspect ratio is specified as a string in the format {width}:{height}.
Models only support a few aspect ratios, and the supported aspect ratios are different for each model and provider.
import { generateImage } from 'ai';
import { vertex } from '@ai-sdk/google-vertex';
const { image } = await generateImage({
model: vertex.image('imagen-4.0-generate-001'),
prompt: 'Santa Claus driving a Cadillac',
aspectRatio: '16:9',
});
Generating Multiple Images
generateImage also supports generating multiple images at once:
import { generateImage } from 'ai';
import { openai } from '@ai-sdk/openai';
const { images } = await generateImage({
model: openai.image('dall-e-2'),
prompt: 'Santa Claus driving a Cadillac',
n: 4, // number of images to generate
});
Each image model has an internal limit on how many images it can generate in a single API call. The AI SDK manages this automatically by batching requests appropriately when you request multiple images using the n parameter. By default, the SDK uses provider-documented limits (for example, DALL-E 3 can only generate 1 image per call, while DALL-E 2 supports up to 10).
If needed, you can override this behavior using the maxImagesPerCall setting when generating your image. This is particularly useful when working with new or custom models where the default batch size might not be optimal:
const { images } = await generateImage({
model: openai.image('dall-e-2'),
prompt: 'Santa Claus driving a Cadillac',
maxImagesPerCall: 5, // Override the default batch size
n: 10, // Will make 2 calls of 5 images each
});
Providing a Seed
You can provide a seed to the generateImage function to control the output of the image generation process.
If supported by the model, the same seed will always produce the same image.
import { generateImage } from 'ai';
import { openai } from '@ai-sdk/openai';
const { image } = await generateImage({
model: openai.image('dall-e-3'),
prompt: 'Santa Claus driving a Cadillac',
seed: 1234567890,
});
Provider-specific Settings
Image models often have provider- or even model-specific settings.
You can pass such settings to the generateImage function
using the providerOptions parameter. The options for the provider
(openai in the example below) become request body properties.
import { generateImage } from 'ai';
import { openai } from '@ai-sdk/openai';
const { image } = await generateImage({
model: openai.image('dall-e-3'),
prompt: 'Santa Claus driving a Cadillac',
size: '1024x1024',
providerOptions: {
openai: { style: 'vivid', quality: 'hd' },
},
});
Abort Signals and Timeouts
generateImage accepts an optional abortSignal parameter of
type AbortSignal
that you can use to abort the image generation process or set a timeout.
import { openai } from '@ai-sdk/openai';
import { generateImage } from 'ai';
const { image } = await generateImage({
model: openai.image('dall-e-3'),
prompt: 'Santa Claus driving a Cadillac',
abortSignal: AbortSignal.timeout(1000), // Abort after 1 second
});
Custom Headers
generateImage accepts an optional headers parameter of type Record<string, string>
that you can use to add custom headers to the image generation request.
import { openai } from '@ai-sdk/openai';
import { generateImage } from 'ai';
const { image } = await generateImage({
model: openai.image('dall-e-3'),
prompt: 'Santa Claus driving a Cadillac',
headers: { 'X-Custom-Header': 'custom-value' },
});
Warnings
If the model returns warnings, e.g. for unsupported parameters, they will be available in the warnings property of the response.
const { image, warnings } = await generateImage({
model: openai.image('dall-e-3'),
prompt: 'Santa Claus driving a Cadillac',
});
Additional provider-specific meta data
Some providers expose additional meta data for the result overall or per image.
const prompt = 'Santa Claus driving a Cadillac';
const { image, providerMetadata } = await generateImage({
model: openai.image('dall-e-3'),
prompt,
});
const revisedPrompt = providerMetadata.openai.images[0]?.revisedPrompt;
console.log({
prompt,
revisedPrompt,
});
The outer key of the returned providerMetadata is the provider name. The inner values are the metadata. An images key is always present in the metadata and is an array with the same length as the top level images key.
Error Handling
When generateImage cannot generate a valid image, it throws a AI_NoImageGeneratedError.
This error occurs when the AI provider fails to generate an image. It can arise due to the following reasons:
- The model failed to generate a response
- The model generated a response that could not be parsed
The error preserves the following information to help you log the issue:
responses: Metadata about the image model responses, including timestamp, model, and headers.cause: The cause of the error. You can use this for more detailed error handling
import { generateImage, NoImageGeneratedError } from 'ai';
try {
await generateImage({ model, prompt });
} catch (error) {
if (NoImageGeneratedError.isInstance(error)) {
console.log('NoImageGeneratedError');
console.log('Cause:', error.cause);
console.log('Responses:', error.responses);
}
}
Image Middleware
You can enhance image models, e.g. to set default values or implement logging, using
wrapImageModel and ImageModelV3Middleware.
Here is an example that sets a default size when none is provided:
import { generateImage, wrapImageModel } from 'ai';
import { openai } from '@ai-sdk/openai';
const model = wrapImageModel({
model: openai.image('gpt-image-1'),
middleware: {
specificationVersion: 'v3',
transformParams: async ({ params }) => ({
...params,
size: params.size ?? '1024x1024',
}),
},
});
const { image } = await generateImage({
model,
prompt: 'Santa Claus driving a Cadillac',
});
Generating Images with Language Models
Some language models such as Google gemini-2.5-flash-image-preview support multi-modal outputs including images.
With such models, you can access the generated images using the files property of the response.
import { google } from '@ai-sdk/google';
import { generateText } from 'ai';
const result = await generateText({
model: google('gemini-2.5-flash-image-preview'),
prompt: 'Generate an image of a comic cat',
});
for (const file of result.files) {
if (file.mediaType.startsWith('image/')) {
// The file object provides multiple data formats:
// Access images as base64 string, Uint8Array binary data, or check type
// - file.base64: string (data URL format)
// - file.uint8Array: Uint8Array (binary data)
// - file.mediaType: string (e.g. "image/png")
}
}
Image Models
| Provider | Model | Support sizes (width x height) or aspect ratios (width : height) |
|---|---|---|
| xAI Grok | grok-2-image |
1024x768 (default) |
| OpenAI | gpt-image-1 |
1024x1024, 1536x1024, 1024x1536 |
| OpenAI | dall-e-3 |
1024x1024, 1792x1024, 1024x1792 |
| OpenAI | dall-e-2 |
256x256, 512x512, 1024x1024 |
| Amazon Bedrock | amazon.nova-canvas-v1:0 |
320-4096 (multiples of 16), 1:4 to 4:1, max 4.2M pixels |
| Fal | fal-ai/flux/dev |
1:1, 3:4, 4:3, 9:16, 16:9, 9:21, 21:9 |
| Fal | fal-ai/flux-lora |
1:1, 3:4, 4:3, 9:16, 16:9, 9:21, 21:9 |
| Fal | fal-ai/fast-sdxl |
1:1, 3:4, 4:3, 9:16, 16:9, 9:21, 21:9 |
| Fal | fal-ai/flux-pro/v1.1-ultra |
1:1, 3:4, 4:3, 9:16, 16:9, 9:21, 21:9 |
| Fal | fal-ai/ideogram/v2 |
1:1, 3:4, 4:3, 9:16, 16:9, 9:21, 21:9 |
| Fal | fal-ai/recraft-v3 |
1:1, 3:4, 4:3, 9:16, 16:9, 9:21, 21:9 |
| Fal | fal-ai/stable-diffusion-3.5-large |
1:1, 3:4, 4:3, 9:16, 16:9, 9:21, 21:9 |
| Fal | fal-ai/hyper-sdxl |
1:1, 3:4, 4:3, 9:16, 16:9, 9:21, 21:9 |
| DeepInfra | stabilityai/sd3.5 |
1:1, 16:9, 1:9, 3:2, 2:3, 4:5, 5:4, 9:16, 9:21 |
| DeepInfra | black-forest-labs/FLUX-1.1-pro |
256-1440 (multiples of 32) |
| DeepInfra | black-forest-labs/FLUX-1-schnell |
256-1440 (multiples of 32) |
| DeepInfra | black-forest-labs/FLUX-1-dev |
256-1440 (multiples of 32) |
| DeepInfra | black-forest-labs/FLUX-pro |
256-1440 (multiples of 32) |
| DeepInfra | stabilityai/sd3.5-medium |
1:1, 16:9, 1:9, 3:2, 2:3, 4:5, 5:4, 9:16, 9:21 |
| DeepInfra | stabilityai/sdxl-turbo |
1:1, 16:9, 1:9, 3:2, 2:3, 4:5, 5:4, 9:16, 9:21 |
| Replicate | black-forest-labs/flux-schnell |
1:1, 2:3, 3:2, 4:5, 5:4, 16:9, 9:16, 9:21, 21:9 |
| Replicate | recraft-ai/recraft-v3 |
1024x1024, 1365x1024, 1024x1365, 1536x1024, 1024x1536, 1820x1024, 1024x1820, 1024x2048, 2048x1024, 1434x1024, 1024x1434, 1024x1280, 1280x1024, 1024x1707, 1707x1024 |
imagen-4.0-generate-001 |
1:1, 3:4, 4:3, 9:16, 16:9 | |
imagen-4.0-fast-generate-001 |
1:1, 3:4, 4:3, 9:16, 16:9 | |
imagen-4.0-ultra-generate-001 |
1:1, 3:4, 4:3, 9:16, 16:9 | |
| Google Vertex | imagen-4.0-generate-001 |
1:1, 3:4, 4:3, 9:16, 16:9 |
| Google Vertex | imagen-4.0-fast-generate-001 |
1:1, 3:4, 4:3, 9:16, 16:9 |
| Google Vertex | imagen-4.0-ultra-generate-001 |
1:1, 3:4, 4:3, 9:16, 16:9 |
| Google Vertex | imagen-3.0-fast-generate-001 |
1:1, 3:4, 4:3, 9:16, 16:9 |
| Fireworks | accounts/fireworks/models/flux-1-dev-fp8 |
1:1, 2:3, 3:2, 4:5, 5:4, 16:9, 9:16, 9:21, 21:9 |
| Fireworks | accounts/fireworks/models/flux-1-schnell-fp8 |
1:1, 2:3, 3:2, 4:5, 5:4, 16:9, 9:16, 9:21, 21:9 |
| Fireworks | accounts/fireworks/models/playground-v2-5-1024px-aesthetic |
640x1536, 768x1344, 832x1216, 896x1152, 1024x1024, 1152x896, 1216x832, 1344x768, 1536x640 |
| Fireworks | accounts/fireworks/models/japanese-stable-diffusion-xl |
640x1536, 768x1344, 832x1216, 896x1152, 1024x1024, 1152x896, 1216x832, 1344x768, 1536x640 |
| Fireworks | accounts/fireworks/models/playground-v2-1024px-aesthetic |
640x1536, 768x1344, 832x1216, 896x1152, 1024x1024, 1152x896, 1216x832, 1344x768, 1536x640 |
| Fireworks | accounts/fireworks/models/SSD-1B |
640x1536, 768x1344, 832x1216, 896x1152, 1024x1024, 1152x896, 1216x832, 1344x768, 1536x640 |
| Fireworks | accounts/fireworks/models/stable-diffusion-xl-1024-v1-0 |
640x1536, 768x1344, 832x1216, 896x1152, 1024x1024, 1152x896, 1216x832, 1344x768, 1536x640 |
| Luma | photon-1 |
1:1, 3:4, 4:3, 9:16, 16:9, 9:21, 21:9 |
| Luma | photon-flash-1 |
1:1, 3:4, 4:3, 9:16, 16:9, 9:21, 21:9 |
| Together.ai | stabilityai/stable-diffusion-xl-base-1.0 |
512x512, 768x768, 1024x1024 |
| Together.ai | black-forest-labs/FLUX.1-dev |
512x512, 768x768, 1024x1024 |
| Together.ai | black-forest-labs/FLUX.1-dev-lora |
512x512, 768x768, 1024x1024 |
| Together.ai | black-forest-labs/FLUX.1-schnell |
512x512, 768x768, 1024x1024 |
| Together.ai | black-forest-labs/FLUX.1-canny |
512x512, 768x768, 1024x1024 |
| Together.ai | black-forest-labs/FLUX.1-depth |
512x512, 768x768, 1024x1024 |
| Together.ai | black-forest-labs/FLUX.1-redux |
512x512, 768x768, 1024x1024 |
| Together.ai | black-forest-labs/FLUX.1.1-pro |
512x512, 768x768, 1024x1024 |
| Together.ai | black-forest-labs/FLUX.1-pro |
512x512, 768x768, 1024x1024 |
| Together.ai | black-forest-labs/FLUX.1-schnell-Free |
512x512, 768x768, 1024x1024 |
| Black Forest Labs | flux-kontext-pro |
From 3:7 (portrait) to 7:3 (landscape) |
| Black Forest Labs | flux-kontext-max |
From 3:7 (portrait) to 7:3 (landscape) |
| Black Forest Labs | flux-pro-1.1-ultra |
From 3:7 (portrait) to 7:3 (landscape) |
| Black Forest Labs | flux-pro-1.1 |
From 3:7 (portrait) to 7:3 (landscape) |
| Black Forest Labs | flux-pro-1.0-fill |
From 3:7 (portrait) to 7:3 (landscape) |
Above are a small subset of the image models supported by the AI SDK providers. For more, see the respective provider documentation.
title: Transcription description: Learn how to transcribe audio with the AI SDK.
Transcription
Transcription is an experimental feature.
The AI SDK provides the transcribe
function to transcribe audio using a transcription model.
import { experimental_transcribe as transcribe } from 'ai';
import { openai } from '@ai-sdk/openai';
import { readFile } from 'fs/promises';
const transcript = await transcribe({
model: openai.transcription('whisper-1'),
audio: await readFile('audio.mp3'),
});
The audio property can be a Uint8Array, ArrayBuffer, Buffer, string (base64 encoded audio data), or a URL.
To access the generated transcript:
const text = transcript.text; // transcript text e.g. "Hello, world!"
const segments = transcript.segments; // array of segments with start and end times, if available
const language = transcript.language; // language of the transcript e.g. "en", if available
const durationInSeconds = transcript.durationInSeconds; // duration of the transcript in seconds, if available
Settings
Provider-Specific settings
Transcription models often have provider or model-specific settings which you can set using the providerOptions parameter.
import { experimental_transcribe as transcribe } from 'ai';
import { openai } from '@ai-sdk/openai';
import { readFile } from 'fs/promises';
const transcript = await transcribe({
model: openai.transcription('whisper-1'),
audio: await readFile('audio.mp3'),
providerOptions: {
openai: {
timestampGranularities: ['word'],
},
},
});
Abort Signals and Timeouts
transcribe accepts an optional abortSignal parameter of
type AbortSignal
that you can use to abort the transcription process or set a timeout.
import { openai } from '@ai-sdk/openai';
import { experimental_transcribe as transcribe } from 'ai';
import { readFile } from 'fs/promises';
const transcript = await transcribe({
model: openai.transcription('whisper-1'),
audio: await readFile('audio.mp3'),
abortSignal: AbortSignal.timeout(1000), // Abort after 1 second
});
Custom Headers
transcribe accepts an optional headers parameter of type Record<string, string>
that you can use to add custom headers to the transcription request.
import { openai } from '@ai-sdk/openai';
import { experimental_transcribe as transcribe } from 'ai';
import { readFile } from 'fs/promises';
const transcript = await transcribe({
model: openai.transcription('whisper-1'),
audio: await readFile('audio.mp3'),
headers: { 'X-Custom-Header': 'custom-value' },
});
Warnings
Warnings (e.g. unsupported parameters) are available on the warnings property.
import { openai } from '@ai-sdk/openai';
import { experimental_transcribe as transcribe } from 'ai';
import { readFile } from 'fs/promises';
const transcript = await transcribe({
model: openai.transcription('whisper-1'),
audio: await readFile('audio.mp3'),
});
const warnings = transcript.warnings;
Error Handling
When transcribe cannot generate a valid transcript, it throws a AI_NoTranscriptGeneratedError.
This error can arise for any the following reasons:
- The model failed to generate a response
- The model generated a response that could not be parsed
The error preserves the following information to help you log the issue:
responses: Metadata about the transcription model responses, including timestamp, model, and headers.cause: The cause of the error. You can use this for more detailed error handling.
import {
experimental_transcribe as transcribe,
NoTranscriptGeneratedError,
} from 'ai';
import { openai } from '@ai-sdk/openai';
import { readFile } from 'fs/promises';
try {
await transcribe({
model: openai.transcription('whisper-1'),
audio: await readFile('audio.mp3'),
});
} catch (error) {
if (NoTranscriptGeneratedError.isInstance(error)) {
console.log('NoTranscriptGeneratedError');
console.log('Cause:', error.cause);
console.log('Responses:', error.responses);
}
}
Transcription Models
| Provider | Model |
|---|---|
| OpenAI | whisper-1 |
| OpenAI | gpt-4o-transcribe |
| OpenAI | gpt-4o-mini-transcribe |
| ElevenLabs | scribe_v1 |
| ElevenLabs | scribe_v1_experimental |
| Groq | whisper-large-v3-turbo |
| Groq | whisper-large-v3 |
| Azure OpenAI | whisper-1 |
| Azure OpenAI | gpt-4o-transcribe |
| Azure OpenAI | gpt-4o-mini-transcribe |
| Rev.ai | machine |
| Rev.ai | low_cost |
| Rev.ai | fusion |
| Deepgram | base (+ variants) |
| Deepgram | enhanced (+ variants) |
| Deepgram | nova (+ variants) |
| Deepgram | nova-2 (+ variants) |
| Deepgram | nova-3 (+ variants) |
| Gladia | default |
| AssemblyAI | best |
| AssemblyAI | nano |
| Fal | whisper |
| Fal | wizper |
Above are a small subset of the transcription models supported by the AI SDK providers. For more, see the respective provider documentation.
title: Speech description: Learn how to generate speech from text with the AI SDK.
Speech
Speech is an experimental feature.
The AI SDK provides the generateSpeech
function to generate speech from text using a speech model.
import { experimental_generateSpeech as generateSpeech } from 'ai';
import { openai } from '@ai-sdk/openai';
const audio = await generateSpeech({
model: openai.speech('tts-1'),
text: 'Hello, world!',
voice: 'alloy',
});
Language Setting
You can specify the language for speech generation (provider support varies):
import { experimental_generateSpeech as generateSpeech } from 'ai';
import { lmnt } from '@ai-sdk/lmnt';
const audio = await generateSpeech({
model: lmnt.speech('aurora'),
text: 'Hola, mundo!',
language: 'es', // Spanish
});
To access the generated audio:
const audio = audio.audioData; // audio data e.g. Uint8Array
Settings
Provider-Specific settings
You can set model-specific settings with the providerOptions parameter.
import { experimental_generateSpeech as generateSpeech } from 'ai';
import { openai } from '@ai-sdk/openai';
const audio = await generateSpeech({
model: openai.speech('tts-1'),
text: 'Hello, world!',
providerOptions: {
openai: {
// ...
},
},
});
Abort Signals and Timeouts
generateSpeech accepts an optional abortSignal parameter of
type AbortSignal
that you can use to abort the speech generation process or set a timeout.
import { openai } from '@ai-sdk/openai';
import { experimental_generateSpeech as generateSpeech } from 'ai';
const audio = await generateSpeech({
model: openai.speech('tts-1'),
text: 'Hello, world!',
abortSignal: AbortSignal.timeout(1000), // Abort after 1 second
});
Custom Headers
generateSpeech accepts an optional headers parameter of type Record<string, string>
that you can use to add custom headers to the speech generation request.
import { openai } from '@ai-sdk/openai';
import { experimental_generateSpeech as generateSpeech } from 'ai';
const audio = await generateSpeech({
model: openai.speech('tts-1'),
text: 'Hello, world!',
headers: { 'X-Custom-Header': 'custom-value' },
});
Warnings
Warnings (e.g. unsupported parameters) are available on the warnings property.
import { openai } from '@ai-sdk/openai';
import { experimental_generateSpeech as generateSpeech } from 'ai';
const audio = await generateSpeech({
model: openai.speech('tts-1'),
text: 'Hello, world!',
});
const warnings = audio.warnings;
Error Handling
When generateSpeech cannot generate a valid audio, it throws a AI_NoSpeechGeneratedError.
This error can arise for any the following reasons:
- The model failed to generate a response
- The model generated a response that could not be parsed
The error preserves the following information to help you log the issue:
responses: Metadata about the speech model responses, including timestamp, model, and headers.cause: The cause of the error. You can use this for more detailed error handling.
import {
experimental_generateSpeech as generateSpeech,
NoSpeechGeneratedError,
} from 'ai';
import { openai } from '@ai-sdk/openai';
try {
await generateSpeech({
model: openai.speech('tts-1'),
text: 'Hello, world!',
});
} catch (error) {
if (NoSpeechGeneratedError.isInstance(error)) {
console.log('AI_NoSpeechGeneratedError');
console.log('Cause:', error.cause);
console.log('Responses:', error.responses);
}
}
Speech Models
| Provider | Model |
|---|---|
| OpenAI | tts-1 |
| OpenAI | tts-1-hd |
| OpenAI | gpt-4o-mini-tts |
| ElevenLabs | eleven_v3 |
| ElevenLabs | eleven_multilingual_v2 |
| ElevenLabs | eleven_flash_v2_5 |
| ElevenLabs | eleven_flash_v2 |
| ElevenLabs | eleven_turbo_v2_5 |
| ElevenLabs | eleven_turbo_v2 |
| LMNT | aurora |
| LMNT | blizzard |
| Hume | default |
Above are a small subset of the speech models supported by the AI SDK providers. For more, see the respective provider documentation.
title: Language Model Middleware description: Learn how to use middleware to enhance the behavior of language models
Language Model Middleware
Language model middleware is a way to enhance the behavior of language models by intercepting and modifying the calls to the language model.
It can be used to add features like guardrails, RAG, caching, and logging in a language model agnostic way. Such middleware can be developed and distributed independently from the language models that they are applied to.
Using Language Model Middleware
You can use language model middleware with the wrapLanguageModel function.
It takes a language model and a language model middleware and returns a new
language model that incorporates the middleware.
import { wrapLanguageModel } from 'ai';
const wrappedLanguageModel = wrapLanguageModel({
model: yourModel,
middleware: yourLanguageModelMiddleware,
});
The wrapped language model can be used just like any other language model, e.g. in streamText:
const result = streamText({
model: wrappedLanguageModel,
prompt: 'What cities are in the United States?',
});
Multiple middlewares
You can provide multiple middlewares to the wrapLanguageModel function.
The middlewares will be applied in the order they are provided.
const wrappedLanguageModel = wrapLanguageModel({
model: yourModel,
middleware: [firstMiddleware, secondMiddleware],
});
// applied as: firstMiddleware(secondMiddleware(yourModel))
Built-in Middleware
The AI SDK comes with several built-in middlewares that you can use to configure language models:
extractReasoningMiddleware: Extracts reasoning information from the generated text and exposes it as areasoningproperty on the result.extractJsonMiddleware: Extracts JSON from text content by stripping markdown code fences. Useful when usingOutput.object()with models that wrap JSON responses in code blocks.simulateStreamingMiddleware: Simulates streaming behavior with responses from non-streaming language models.defaultSettingsMiddleware: Applies default settings to a language model.addToolInputExamplesMiddleware: Adds tool input examples to tool descriptions for providers that don't natively support theinputExamplesproperty.
Extract Reasoning
Some providers and models expose reasoning information in the generated text using special tags, e.g. <think> and </think>.
The extractReasoningMiddleware function can be used to extract this reasoning information and expose it as a reasoning property on the result.
import { wrapLanguageModel, extractReasoningMiddleware } from 'ai';
const model = wrapLanguageModel({
model: yourModel,
middleware: extractReasoningMiddleware({ tagName: 'think' }),
});
You can then use that enhanced model in functions like generateText and streamText.
The extractReasoningMiddleware function also includes a startWithReasoning option.
When set to true, the reasoning tag will be prepended to the generated text.
This is useful for models that do not include the reasoning tag at the beginning of the response.
For more details, see the DeepSeek R1 guide.
Extract JSON
Some models wrap JSON responses in markdown code fences (e.g., ```json ... ```) even when you request structured output.
The extractJsonMiddleware function strips these code fences from the response, making it compatible with Output.object().
import { wrapLanguageModel, extractJsonMiddleware, Output } from 'ai';
import { z } from 'zod';
const model = wrapLanguageModel({
model: yourModel,
middleware: extractJsonMiddleware(),
});
const result = await generateText({
model,
output: Output.object({
schema: z.object({
name: z.string(),
ingredients: z.array(z.string()),
}),
}),
prompt: 'Generate a recipe.',
});
You can also provide a custom transform function for models that use different formatting:
const model = wrapLanguageModel({
model: yourModel,
middleware: extractJsonMiddleware({
transform: text => text.replace(/^PREFIX/, '').replace(/SUFFIX$/, ''),
}),
});
Simulate Streaming
The simulateStreamingMiddleware function can be used to simulate streaming behavior with responses from non-streaming language models.
This is useful when you want to maintain a consistent streaming interface even when using models that only provide complete responses.
import { wrapLanguageModel, simulateStreamingMiddleware } from 'ai';
const model = wrapLanguageModel({
model: yourModel,
middleware: simulateStreamingMiddleware(),
});
Default Settings
The defaultSettingsMiddleware function can be used to apply default settings to a language model.
import { wrapLanguageModel, defaultSettingsMiddleware } from 'ai';
const model = wrapLanguageModel({
model: yourModel,
middleware: defaultSettingsMiddleware({
settings: {
temperature: 0.5,
maxOutputTokens: 800,
providerOptions: { openai: { store: false } },
},
}),
});
Add Tool Input Examples
The addToolInputExamplesMiddleware function adds tool input examples to tool descriptions.
This is useful for providers that don't natively support the inputExamples property on tools.
The middleware serializes the examples into the tool's description text so models can still benefit from seeing example inputs.
import { wrapLanguageModel, addToolInputExamplesMiddleware } from 'ai';
const model = wrapLanguageModel({
model: yourModel,
middleware: addToolInputExamplesMiddleware({
examplesPrefix: 'Input Examples:',
}),
});
When you define a tool with inputExamples, the middleware will append them to the tool's description:
import { generateText, tool } from 'ai';
import { z } from 'zod';
const result = await generateText({
model, // wrapped model from above
tools: {
weather: tool({
description: 'Get the weather in a location',
inputSchema: z.object({
location: z.string(),
}),
inputExamples: [
{ input: { location: 'San Francisco' } },
{ input: { location: 'London' } },
],
}),
},
prompt: 'What is the weather in Tokyo?',
});
The tool description will be transformed to:
Get the weather in a location
Input Examples:
{"location":"San Francisco"}
{"location":"London"}
Options
examplesPrefix(required): A prefix text to prepend before the examples.formatExample(optional): A custom formatter function for each example. Receives the example object and its index. Default:JSON.stringify(example.input).removeInputExamples(optional): Whether to remove theinputExamplesproperty from the tool after adding them to the description. Default:true.
const model = wrapLanguageModel({
model: yourModel,
middleware: addToolInputExamplesMiddleware({
examplesPrefix: 'Input Examples:',
formatExample: (example, index) =>
`${index + 1}. ${JSON.stringify(example.input)}`,
removeInputExamples: true,
}),
});
Community Middleware
The AI SDK provides a Language Model Middleware specification. Community members can develop middleware that adheres to this specification, making it compatible with the AI SDK ecosystem.
Here are some community middlewares that you can explore:
Custom tool call parser
The Custom tool call parser middleware extends tool call capabilities to models that don't natively support the OpenAI-style tools parameter. This includes many self-hosted and third-party models that lack native function calling features.
This middleware enables function calling capabilities by converting function schemas into prompt instructions and parsing the model's responses into structured function calls. It works by transforming the JSON function definitions into natural language instructions the model can understand, then analyzing the generated text to extract function call attempts. This approach allows developers to use the same function calling API across different model providers, even with models that don't natively support the OpenAI-style function calling format, providing a consistent function calling experience regardless of the underlying model implementation.
The @ai-sdk-tool/parser package offers three middleware variants:
createToolMiddleware: A flexible function for creating custom tool call middleware tailored to specific modelshermesToolMiddleware: Ready-to-use middleware for Hermes & Qwen format function callsgemmaToolMiddleware: Pre-configured middleware for Gemma 3 model series function call format
Here's how you can enable function calls with Gemma models that don't support them natively:
import { wrapLanguageModel } from 'ai';
import { gemmaToolMiddleware } from '@ai-sdk-tool/parser';
const model = wrapLanguageModel({
model: openrouter('google/gemma-3-27b-it'),
middleware: gemmaToolMiddleware,
});
Find more examples at this link.
Implementing Language Model Middleware
Implementing language model middleware is advanced functionality and requires a solid understanding of the [language model specification](https://github.com/vercel/ai/blob/v5/packages/provider/src/language-model/v2/language-model-v2.ts).You can implement any of the following three function to modify the behavior of the language model:
transformParams: Transforms the parameters before they are passed to the language model, for bothdoGenerateanddoStream.wrapGenerate: Wraps thedoGeneratemethod of the language model. You can modify the parameters, call the language model, and modify the result.wrapStream: Wraps thedoStreammethod of the language model. You can modify the parameters, call the language model, and modify the result.
Here are some examples of how to implement language model middleware:
Examples
These examples are not meant to be used in production. They are just to show how you can use middleware to enhance the behavior of language models.Logging
This example shows how to log the parameters and generated text of a language model call.
import type {
LanguageModelV3Middleware,
LanguageModelV3StreamPart,
} from '@ai-sdk/provider';
export const yourLogMiddleware: LanguageModelV3Middleware = {
wrapGenerate: async ({ doGenerate, params }) => {
console.log('doGenerate called');
console.log(`params: ${JSON.stringify(params, null, 2)}`);
const result = await doGenerate();
console.log('doGenerate finished');
console.log(`generated text: ${result.text}`);
return result;
},
wrapStream: async ({ doStream, params }) => {
console.log('doStream called');
console.log(`params: ${JSON.stringify(params, null, 2)}`);
const { stream, ...rest } = await doStream();
let generatedText = '';
const textBlocks = new Map<string, string>();
const transformStream = new TransformStream<
LanguageModelV3StreamPart,
LanguageModelV3StreamPart
>({
transform(chunk, controller) {
switch (chunk.type) {
case 'text-start': {
textBlocks.set(chunk.id, '');
break;
}
case 'text-delta': {
const existing = textBlocks.get(chunk.id) || '';
textBlocks.set(chunk.id, existing + chunk.delta);
generatedText += chunk.delta;
break;
}
case 'text-end': {
console.log(
`Text block ${chunk.id} completed:`,
textBlocks.get(chunk.id),
);
break;
}
}
controller.enqueue(chunk);
},
flush() {
console.log('doStream finished');
console.log(`generated text: ${generatedText}`);
},
});
return {
stream: stream.pipeThrough(transformStream),
...rest,
};
},
};
Caching
This example shows how to build a simple cache for the generated text of a language model call.
import type { LanguageModelV3Middleware } from '@ai-sdk/provider';
const cache = new Map<string, any>();
export const yourCacheMiddleware: LanguageModelV3Middleware = {
wrapGenerate: async ({ doGenerate, params }) => {
const cacheKey = JSON.stringify(params);
if (cache.has(cacheKey)) {
return cache.get(cacheKey);
}
const result = await doGenerate();
cache.set(cacheKey, result);
return result;
},
// here you would implement the caching logic for streaming
};
Retrieval Augmented Generation (RAG)
This example shows how to use RAG as middleware.
Helper functions like `getLastUserMessageText` and `findSources` are not part of the AI SDK. They are just used in this example to illustrate the concept of RAG.import type { LanguageModelV3Middleware } from '@ai-sdk/provider';
export const yourRagMiddleware: LanguageModelV3Middleware = {
transformParams: async ({ params }) => {
const lastUserMessageText = getLastUserMessageText({
prompt: params.prompt,
});
if (lastUserMessageText == null) {
return params; // do not use RAG (send unmodified parameters)
}
const instruction =
'Use the following information to answer the question:\n' +
findSources({ text: lastUserMessageText })
.map(chunk => JSON.stringify(chunk))
.join('\n');
return addToLastUserMessage({ params, text: instruction });
},
};
Guardrails
Guard rails are a way to ensure that the generated text of a language model call is safe and appropriate. This example shows how to use guardrails as middleware.
import type { LanguageModelV3Middleware } from '@ai-sdk/provider';
export const yourGuardrailMiddleware: LanguageModelV3Middleware = {
wrapGenerate: async ({ doGenerate }) => {
const { text, ...rest } = await doGenerate();
// filtering approach, e.g. for PII or other sensitive information:
const cleanedText = text?.replace(/badword/g, '<REDACTED>');
return { text: cleanedText, ...rest };
},
// here you would implement the guardrail logic for streaming
// Note: streaming guardrails are difficult to implement, because
// you do not know the full content of the stream until it's finished.
};
Configuring Per Request Custom Metadata
To send and access custom metadata in Middleware, you can use providerOptions. This is useful when building logging middleware where you want to pass additional context like user IDs, timestamps, or other contextual data that can help with tracking and debugging.
import { generateText, wrapLanguageModel } from 'ai';
__PROVIDER_IMPORT__;
import type { LanguageModelV3Middleware } from '@ai-sdk/provider';
export const yourLogMiddleware: LanguageModelV3Middleware = {
wrapGenerate: async ({ doGenerate, params }) => {
console.log('METADATA', params?.providerMetadata?.yourLogMiddleware);
const result = await doGenerate();
return result;
},
};
const { text } = await generateText({
model: wrapLanguageModel({
model: __MODEL__,
middleware: yourLogMiddleware,
}),
prompt: 'Invent a new holiday and describe its traditions.',
providerOptions: {
yourLogMiddleware: {
hello: 'world',
},
},
});
console.log(text);
title: Provider & Model Management description: Learn how to work with multiple providers and models
Provider & Model Management
When you work with multiple providers and models, it is often desirable to manage them in a central place and access the models through simple string ids.
The AI SDK offers custom providers and a provider registry for this purpose:
- With custom providers, you can pre-configure model settings, provide model name aliases, and limit the available models.
- The provider registry lets you mix multiple providers and access them through simple string ids.
You can mix and match custom providers, the provider registry, and middleware in your application.
Custom Providers
You can create a custom provider using customProvider.
Example: custom model settings
You might want to override the default model settings for a provider or provide model name aliases with pre-configured settings.
import {
gateway,
customProvider,
defaultSettingsMiddleware,
wrapLanguageModel,
} from 'ai';
// custom provider with different provider options:
export const openai = customProvider({
languageModels: {
// replacement model with custom provider options:
'gpt-5.1': wrapLanguageModel({
model: gateway('openai/gpt-5.1'),
middleware: defaultSettingsMiddleware({
settings: {
providerOptions: {
openai: {
reasoningEffort: 'high',
},
},
},
}),
}),
// alias model with custom provider options:
'gpt-5.1-high-reasoning': wrapLanguageModel({
model: gateway('openai/gpt-5.1'),
middleware: defaultSettingsMiddleware({
settings: {
providerOptions: {
openai: {
reasoningEffort: 'high',
},
},
},
}),
}),
},
fallbackProvider: gateway,
});
Example: model name alias
You can also provide model name aliases, so you can update the model version in one place in the future:
import { customProvider, gateway } from 'ai';
// custom provider with alias names:
export const anthropic = customProvider({
languageModels: {
opus: gateway('anthropic/claude-opus-4.1'),
sonnet: gateway('anthropic/claude-sonnet-4.5'),
haiku: gateway('anthropic/claude-haiku-4.5'),
},
fallbackProvider: gateway,
});
Example: limit available models
You can limit the available models in the system, even if you have multiple providers.
import {
customProvider,
defaultSettingsMiddleware,
wrapLanguageModel,
gateway,
} from 'ai';
export const myProvider = customProvider({
languageModels: {
'text-medium': gateway('anthropic/claude-3-5-sonnet-20240620'),
'text-small': gateway('openai/gpt-5-mini'),
'reasoning-medium': wrapLanguageModel({
model: gateway('openai/gpt-5.1'),
middleware: defaultSettingsMiddleware({
settings: {
providerOptions: {
openai: {
reasoningEffort: 'high',
},
},
},
}),
}),
'reasoning-fast': wrapLanguageModel({
model: gateway('openai/gpt-5.1'),
middleware: defaultSettingsMiddleware({
settings: {
providerOptions: {
openai: {
reasoningEffort: 'low',
},
},
},
}),
}),
},
embeddingModels: {
embedding: gateway.embeddingModel('openai/text-embedding-3-small'),
},
// no fallback provider
});
Provider Registry
You can create a provider registry with multiple providers and models using createProviderRegistry.
Setup
import { anthropic } from '@ai-sdk/anthropic';
import { openai } from '@ai-sdk/openai';
import { createProviderRegistry, gateway } from 'ai';
export const registry = createProviderRegistry({
// register provider with prefix and default setup using gateway:
gateway,
// register provider with prefix and direct provider import:
anthropic,
openai,
});
Setup with Custom Separator
By default, the registry uses : as the separator between provider and model IDs. You can customize this separator:
import { anthropic } from '@ai-sdk/anthropic';
import { openai } from '@ai-sdk/openai';
import { createProviderRegistry, gateway } from 'ai';
export const customSeparatorRegistry = createProviderRegistry(
{
gateway,
anthropic,
openai,
},
{ separator: ' > ' },
);
Example: Use language models
You can access language models by using the languageModel method on the registry.
The provider id will become the prefix of the model id: providerId:modelId.
import { generateText } from 'ai';
import { registry } from './registry';
const { text } = await generateText({
model: registry.languageModel('openai:gpt-5.1'), // default separator
// or with custom separator:
// model: customSeparatorRegistry.languageModel('openai > gpt-5.1'),
prompt: 'Invent a new holiday and describe its traditions.',
});
Example: Use text embedding models
You can access text embedding models by using the .embeddingModel method on the registry.
The provider id will become the prefix of the model id: providerId:modelId.
import { embed } from 'ai';
import { registry } from './registry';
const { embedding } = await embed({
model: registry.embeddingModel('openai:text-embedding-3-small'),
value: 'sunny day at the beach',
});
Example: Use image models
You can access image models by using the imageModel method on the registry.
The provider id will become the prefix of the model id: providerId:modelId.
import { generateImage } from 'ai';
import { registry } from './registry';
const { image } = await generateImage({
model: registry.imageModel('openai:dall-e-3'),
prompt: 'A beautiful sunset over a calm ocean',
});
Combining Custom Providers, Provider Registry, and Middleware
The central idea of provider management is to set up a file that contains all the providers and models you want to use. You may want to pre-configure model settings, provide model name aliases, limit the available models, and more.
Here is an example that implements the following concepts:
- pass through gateway with a namespace prefix (here:
gateway > *) - pass through a full provider with a namespace prefix (here:
xai > *) - setup an OpenAI-compatible provider with custom api key and base URL (here:
custom > *) - setup model name aliases (here:
anthropic > fast,anthropic > writing,anthropic > reasoning) - pre-configure model settings (here:
anthropic > reasoning) - validate the provider-specific options (here:
AnthropicProviderOptions) - use a fallback provider (here:
anthropic > *) - limit a provider to certain models without a fallback (here:
groq > gemma2-9b-it,groq > qwen-qwq-32b) - define a custom separator for the provider registry (here:
>)
import { anthropic, AnthropicProviderOptions } from '@ai-sdk/anthropic';
import { createOpenAICompatible } from '@ai-sdk/openai-compatible';
import { xai } from '@ai-sdk/xai';
import { groq } from '@ai-sdk/groq';
import {
createProviderRegistry,
customProvider,
defaultSettingsMiddleware,
gateway,
wrapLanguageModel,
} from 'ai';
export const registry = createProviderRegistry(
{
// pass through gateway with a namespace prefix
gateway,
// pass through full providers with namespace prefixes
xai,
// access an OpenAI-compatible provider with custom setup
custom: createOpenAICompatible({
name: 'provider-name',
apiKey: process.env.CUSTOM_API_KEY,
baseURL: 'https://api.custom.com/v1',
}),
// setup model name aliases
anthropic: customProvider({
languageModels: {
fast: anthropic('claude-haiku-4-5'),
// simple model
writing: anthropic('claude-sonnet-4-5'),
// extended reasoning model configuration:
reasoning: wrapLanguageModel({
model: anthropic('claude-sonnet-4-5'),
middleware: defaultSettingsMiddleware({
settings: {
maxOutputTokens: 100000, // example default setting
providerOptions: {
anthropic: {
thinking: {
type: 'enabled',
budgetTokens: 32000,
},
} satisfies AnthropicProviderOptions,
},
},
}),
}),
},
fallbackProvider: anthropic,
}),
// limit a provider to certain models without a fallback
groq: customProvider({
languageModels: {
'gemma2-9b-it': groq('gemma2-9b-it'),
'qwen-qwq-32b': groq('qwen-qwq-32b'),
},
}),
},
{ separator: ' > ' },
);
// usage:
const model = registry.languageModel('anthropic > reasoning');
Global Provider Configuration
The AI SDK 5 includes a global provider feature that allows you to specify a model using just a plain model ID string:
import { streamText } from 'ai';
__PROVIDER_IMPORT__;
const result = await streamText({
model: __MODEL__, // Uses the global provider (defaults to gateway)
prompt: 'Invent a new holiday and describe its traditions.',
});
By default, the global provider is set to the Vercel AI Gateway.
Customizing the Global Provider
You can set your own preferred global provider:
import { openai } from '@ai-sdk/openai';
// Initialize once during startup:
globalThis.AI_SDK_DEFAULT_PROVIDER = openai;
import { streamText } from 'ai';
const result = await streamText({
model: 'gpt-5.1', // Uses OpenAI provider without prefix
prompt: 'Invent a new holiday and describe its traditions.',
});
This simplifies provider usage and makes it easier to switch between providers without changing your model references throughout your codebase.
title: Error Handling description: Learn how to handle errors in the AI SDK Core
Error Handling
Handling regular errors
Regular errors are thrown and can be handled using the try/catch block.
import { generateText } from 'ai';
__PROVIDER_IMPORT__;
try {
const { text } = await generateText({
model: __MODEL__,
prompt: 'Write a vegetarian lasagna recipe for 4 people.',
});
} catch (error) {
// handle error
}
See Error Types for more information on the different types of errors that may be thrown.
Handling streaming errors (simple streams)
When errors occur during streams that do not support error chunks,
the error is thrown as a regular error.
You can handle these errors using the try/catch block.
import { streamText } from 'ai';
__PROVIDER_IMPORT__;
try {
const { textStream } = streamText({
model: __MODEL__,
prompt: 'Write a vegetarian lasagna recipe for 4 people.',
});
for await (const textPart of textStream) {
process.stdout.write(textPart);
}
} catch (error) {
// handle error
}
Handling streaming errors (streaming with error support)
Full streams support error parts. You can handle those parts similar to other parts. It is recommended to also add a try-catch block for errors that happen outside of the streaming.
import { streamText } from 'ai';
__PROVIDER_IMPORT__;
try {
const { fullStream } = streamText({
model: __MODEL__,
prompt: 'Write a vegetarian lasagna recipe for 4 people.',
});
for await (const part of fullStream) {
switch (part.type) {
// ... handle other part types
case 'error': {
const error = part.error;
// handle error
break;
}
case 'abort': {
// handle stream abort
break;
}
case 'tool-error': {
const error = part.error;
// handle error
break;
}
}
}
} catch (error) {
// handle error
}
Handling stream aborts
When streams are aborted (e.g., via chat stop button), you may want to perform cleanup operations like updating stored messages in your UI. Use the onAbort callback to handle these cases.
The onAbort callback is called when a stream is aborted via AbortSignal, but onFinish is not called. This ensures you can still update your UI state appropriately.
import { streamText } from 'ai';
__PROVIDER_IMPORT__;
const { textStream } = streamText({
model: __MODEL__,
prompt: 'Write a vegetarian lasagna recipe for 4 people.',
onAbort: ({ steps }) => {
// Update stored messages or perform cleanup
console.log('Stream aborted after', steps.length, 'steps');
},
onFinish: ({ steps, totalUsage }) => {
// This is called on normal completion
console.log('Stream completed normally');
},
});
for await (const textPart of textStream) {
process.stdout.write(textPart);
}
The onAbort callback receives:
steps: An array of all completed steps before the abort
You can also handle abort events directly in the stream:
import { streamText } from 'ai';
__PROVIDER_IMPORT__;
const { fullStream } = streamText({
model: __MODEL__,
prompt: 'Write a vegetarian lasagna recipe for 4 people.',
});
for await (const chunk of fullStream) {
switch (chunk.type) {
case 'abort': {
// Handle abort directly in stream
console.log('Stream was aborted');
break;
}
// ... handle other part types
}
}
title: Testing description: Learn how to use AI SDK Core mock providers for testing.
Testing
Testing language models can be challenging, because they are non-deterministic and calling them is slow and expensive.
To enable you to unit test your code that uses the AI SDK, the AI SDK Core
includes mock providers and test helpers. You can import the following helpers from ai/test:
MockEmbeddingModelV3: A mock embedding model using the embedding model v3 specification.MockLanguageModelV3: A mock language model using the language model v3 specification.mockId: Provides an incrementing integer ID.mockValues: Iterates over an array of values with each call. Returns the last value when the array is exhausted.simulateReadableStream: Simulates a readable stream with delays.
With mock providers and test helpers, you can control the output of the AI SDK and test your code in a repeatable and deterministic way without actually calling a language model provider.
Examples
You can use the test helpers with the AI Core functions in your unit tests:
generateText
import { generateText } from 'ai';
import { MockLanguageModelV3 } from 'ai/test';
const result = await generateText({
model: new MockLanguageModelV3({
doGenerate: async () => ({
content: [{ type: 'text', text: `Hello, world!` }],
finishReason: { unified: 'stop', raw: undefined },
usage: {
inputTokens: {
total: 10,
noCache: 10,
cacheRead: undefined,
cacheWrite: undefined,
},
outputTokens: {
total: 20,
text: 20,
reasoning: undefined,
},
},
warnings: [],
}),
}),
prompt: 'Hello, test!',
});
streamText
import { streamText, simulateReadableStream } from 'ai';
import { MockLanguageModelV3 } from 'ai/test';
const result = streamText({
model: new MockLanguageModelV3({
doStream: async () => ({
stream: simulateReadableStream({
chunks: [
{ type: 'text-start', id: 'text-1' },
{ type: 'text-delta', id: 'text-1', delta: 'Hello' },
{ type: 'text-delta', id: 'text-1', delta: ', ' },
{ type: 'text-delta', id: 'text-1', delta: 'world!' },
{ type: 'text-end', id: 'text-1' },
{
type: 'finish',
finishReason: { unified: 'stop', raw: undefined },
logprobs: undefined,
usage: {
inputTokens: {
total: 3,
noCache: 3,
cacheRead: undefined,
cacheWrite: undefined,
},
outputTokens: {
total: 10,
text: 10,
reasoning: undefined,
},
},
},
],
}),
}),
}),
prompt: 'Hello, test!',
});
generateObject
import { generateObject } from 'ai';
import { MockLanguageModelV3 } from 'ai/test';
import { z } from 'zod';
const result = await generateObject({
model: new MockLanguageModelV3({
doGenerate: async () => ({
content: [{ type: 'text', text: `{"content":"Hello, world!"}` }],
finishReason: { unified: 'stop', raw: undefined },
usage: {
inputTokens: {
total: 10,
noCache: 10,
cacheRead: undefined,
cacheWrite: undefined,
},
outputTokens: {
total: 20,
text: 20,
reasoning: undefined,
},
},
warnings: [],
}),
}),
schema: z.object({ content: z.string() }),
prompt: 'Hello, test!',
});
streamObject
import { streamObject, simulateReadableStream } from 'ai';
import { MockLanguageModelV3 } from 'ai/test';
import { z } from 'zod';
const result = streamObject({
model: new MockLanguageModelV3({
doStream: async () => ({
stream: simulateReadableStream({
chunks: [
{ type: 'text-start', id: 'text-1' },
{ type: 'text-delta', id: 'text-1', delta: '{ ' },
{ type: 'text-delta', id: 'text-1', delta: '"content": ' },
{ type: 'text-delta', id: 'text-1', delta: `"Hello, ` },
{ type: 'text-delta', id: 'text-1', delta: `world` },
{ type: 'text-delta', id: 'text-1', delta: `!"` },
{ type: 'text-delta', id: 'text-1', delta: ' }' },
{ type: 'text-end', id: 'text-1' },
{
type: 'finish',
finishReason: { unified: 'stop', raw: undefined },
logprobs: undefined,
usage: {
inputTokens: {
total: 3,
noCache: 3,
cacheRead: undefined,
cacheWrite: undefined,
},
outputTokens: {
total: 10,
text: 10,
reasoning: undefined,
},
},
},
],
}),
}),
}),
schema: z.object({ content: z.string() }),
prompt: 'Hello, test!',
});
Simulate UI Message Stream Responses
You can also simulate UI Message Stream responses for testing, debugging, or demonstration purposes.
Here is a Next example:
import { simulateReadableStream } from 'ai';
export async function POST(req: Request) {
return new Response(
simulateReadableStream({
initialDelayInMs: 1000, // Delay before the first chunk
chunkDelayInMs: 300, // Delay between chunks
chunks: [
`data: {"type":"start","messageId":"msg-123"}\n\n`,
`data: {"type":"text-start","id":"text-1"}\n\n`,
`data: {"type":"text-delta","id":"text-1","delta":"This"}\n\n`,
`data: {"type":"text-delta","id":"text-1","delta":" is an"}\n\n`,
`data: {"type":"text-delta","id":"text-1","delta":" example."}\n\n`,
`data: {"type":"text-end","id":"text-1"}\n\n`,
`data: {"type":"finish"}\n\n`,
`data: [DONE]\n\n`,
],
}).pipeThrough(new TextEncoderStream()),
{
status: 200,
headers: {
'Content-Type': 'text/event-stream',
'Cache-Control': 'no-cache',
Connection: 'keep-alive',
'x-vercel-ai-ui-message-stream': 'v1',
},
},
);
}
title: Telemetry description: Using OpenTelemetry with AI SDK Core
Telemetry
AI SDK Telemetry is experimental and may change in the future.The AI SDK uses OpenTelemetry to collect telemetry data. OpenTelemetry is an open-source observability framework designed to provide standardized instrumentation for collecting telemetry data.
Check out the AI SDK Observability Integrations to see providers that offer monitoring and tracing for AI SDK applications.
Enabling telemetry
For Next.js applications, please follow the Next.js OpenTelemetry guide to enable telemetry first.
You can then use the experimental_telemetry option to enable telemetry on specific function calls while the feature is experimental:
const result = await generateText({
model: __MODEL__,
prompt: 'Write a short story about a cat.',
experimental_telemetry: { isEnabled: true },
});
When telemetry is enabled, you can also control if you want to record the input values and the output values for the function.
By default, both are enabled. You can disable them by setting the recordInputs and recordOutputs options to false.
Disabling the recording of inputs and outputs can be useful for privacy, data transfer, and performance reasons. You might for example want to disable recording inputs if they contain sensitive information.
Telemetry Metadata
You can provide a functionId to identify the function that the telemetry data is for,
and metadata to include additional information in the telemetry data.
const result = await generateText({
model: __MODEL__,
prompt: 'Write a short story about a cat.',
experimental_telemetry: {
isEnabled: true,
functionId: 'my-awesome-function',
metadata: {
something: 'custom',
someOtherThing: 'other-value',
},
},
});
Custom Tracer
You may provide a tracer which must return an OpenTelemetry Tracer. This is useful in situations where
you want your traces to use a TracerProvider other than the one provided by the @opentelemetry/api singleton.
const tracerProvider = new NodeTracerProvider();
const result = await generateText({
model: __MODEL__,
prompt: 'Write a short story about a cat.',
experimental_telemetry: {
isEnabled: true,
tracer: tracerProvider.getTracer('ai'),
},
});
Collected Data
generateText function
generateText records 3 types of spans:
-
ai.generateText(span): the full length of the generateText call. It contains 1 or moreai.generateText.doGeneratespans. It contains the basic LLM span information and the following attributes:operation.name:ai.generateTextand the functionId that was set throughtelemetry.functionIdai.operationId:"ai.generateText"ai.prompt: the prompt that was used when callinggenerateTextai.response.text: the text that was generatedai.response.toolCalls: the tool calls that were made as part of the generation (stringified JSON)ai.response.finishReason: the reason why the generation finishedai.settings.maxOutputTokens: the maximum number of output tokens that were set
-
ai.generateText.doGenerate(span): a provider doGenerate call. It can containai.toolCallspans. It contains the call LLM span information and the following attributes:operation.name:ai.generateText.doGenerateand the functionId that was set throughtelemetry.functionIdai.operationId:"ai.generateText.doGenerate"ai.prompt.messages: the messages that were passed into the providerai.prompt.tools: array of stringified tool definitions. The tools can be of typefunctionorprovider-defined-client. Function tools have aname,description(optional), andinputSchema(JSON schema). Provider-defined-client tools have aname,id, andinput(Record).ai.prompt.toolChoice: the stringified tool choice setting (JSON). It has atypeproperty (auto,none,required,tool), and if the type istool, atoolNameproperty with the specific tool.ai.response.text: the text that was generatedai.response.toolCalls: the tool calls that were made as part of the generation (stringified JSON)ai.response.finishReason: the reason why the generation finished
-
ai.toolCall(span): a tool call that is made as part of the generateText call. See Tool call spans for more details.
streamText function
streamText records 3 types of spans and 2 types of events:
-
ai.streamText(span): the full length of the streamText call. It contains aai.streamText.doStreamspan. It contains the basic LLM span information and the following attributes:operation.name:ai.streamTextand the functionId that was set throughtelemetry.functionIdai.operationId:"ai.streamText"ai.prompt: the prompt that was used when callingstreamTextai.response.text: the text that was generatedai.response.toolCalls: the tool calls that were made as part of the generation (stringified JSON)ai.response.finishReason: the reason why the generation finishedai.settings.maxOutputTokens: the maximum number of output tokens that were set
-
ai.streamText.doStream(span): a provider doStream call. This span contains anai.stream.firstChunkevent andai.toolCallspans. It contains the call LLM span information and the following attributes:operation.name:ai.streamText.doStreamand the functionId that was set throughtelemetry.functionIdai.operationId:"ai.streamText.doStream"ai.prompt.messages: the messages that were passed into the providerai.prompt.tools: array of stringified tool definitions. The tools can be of typefunctionorprovider-defined-client. Function tools have aname,description(optional), andinputSchema(JSON schema). Provider-defined-client tools have aname,id, andinput(Record).ai.prompt.toolChoice: the stringified tool choice setting (JSON). It has atypeproperty (auto,none,required,tool), and if the type istool, atoolNameproperty with the specific tool.ai.response.text: the text that was generatedai.response.toolCalls: the tool calls that were made as part of the generation (stringified JSON)ai.response.msToFirstChunk: the time it took to receive the first chunk in millisecondsai.response.msToFinish: the time it took to receive the finish part of the LLM stream in millisecondsai.response.avgCompletionTokensPerSecond: the average number of completion tokens per secondai.response.finishReason: the reason why the generation finished
-
ai.toolCall(span): a tool call that is made as part of the generateText call. See Tool call spans for more details. -
ai.stream.firstChunk(event): an event that is emitted when the first chunk of the stream is received.ai.response.msToFirstChunk: the time it took to receive the first chunk
-
ai.stream.finish(event): an event that is emitted when the finish part of the LLM stream is received.
It also records a ai.stream.firstChunk event when the first chunk of the stream is received.
generateObject function
generateObject records 2 types of spans:
-
ai.generateObject(span): the full length of the generateObject call. It contains 1 or moreai.generateObject.doGeneratespans. It contains the basic LLM span information and the following attributes:operation.name:ai.generateObjectand the functionId that was set throughtelemetry.functionIdai.operationId:"ai.generateObject"ai.prompt: the prompt that was used when callinggenerateObjectai.schema: Stringified JSON schema version of the schema that was passed into thegenerateObjectfunctionai.schema.name: the name of the schema that was passed into thegenerateObjectfunctionai.schema.description: the description of the schema that was passed into thegenerateObjectfunctionai.response.object: the object that was generated (stringified JSON)ai.settings.output: the output type that was used, e.g.objectorno-schema
-
ai.generateObject.doGenerate(span): a provider doGenerate call. It contains the call LLM span information and the following attributes:operation.name:ai.generateObject.doGenerateand the functionId that was set throughtelemetry.functionIdai.operationId:"ai.generateObject.doGenerate"ai.prompt.messages: the messages that were passed into the providerai.response.object: the object that was generated (stringified JSON)ai.response.finishReason: the reason why the generation finished
streamObject function
streamObject records 2 types of spans and 1 type of event:
-
ai.streamObject(span): the full length of the streamObject call. It contains 1 or moreai.streamObject.doStreamspans. It contains the basic LLM span information and the following attributes:operation.name:ai.streamObjectand the functionId that was set throughtelemetry.functionIdai.operationId:"ai.streamObject"ai.prompt: the prompt that was used when callingstreamObjectai.schema: Stringified JSON schema version of the schema that was passed into thestreamObjectfunctionai.schema.name: the name of the schema that was passed into thestreamObjectfunctionai.schema.description: the description of the schema that was passed into thestreamObjectfunctionai.response.object: the object that was generated (stringified JSON)ai.settings.output: the output type that was used, e.g.objectorno-schema
-
ai.streamObject.doStream(span): a provider doStream call. This span contains anai.stream.firstChunkevent. It contains the call LLM span information and the following attributes:operation.name:ai.streamObject.doStreamand the functionId that was set throughtelemetry.functionIdai.operationId:"ai.streamObject.doStream"ai.prompt.messages: the messages that were passed into the providerai.response.object: the object that was generated (stringified JSON)ai.response.msToFirstChunk: the time it took to receive the first chunkai.response.finishReason: the reason why the generation finished
-
ai.stream.firstChunk(event): an event that is emitted when the first chunk of the stream is received.ai.response.msToFirstChunk: the time it took to receive the first chunk
embed function
embed records 2 types of spans:
-
ai.embed(span): the full length of the embed call. It contains 1ai.embed.doEmbedspans. It contains the basic embedding span information and the following attributes:operation.name:ai.embedand the functionId that was set throughtelemetry.functionIdai.operationId:"ai.embed"ai.value: the value that was passed into theembedfunctionai.embedding: a JSON-stringified embedding
-
ai.embed.doEmbed(span): a provider doEmbed call. It contains the basic embedding span information and the following attributes:operation.name:ai.embed.doEmbedand the functionId that was set throughtelemetry.functionIdai.operationId:"ai.embed.doEmbed"ai.values: the values that were passed into the provider (array)ai.embeddings: an array of JSON-stringified embeddings
embedMany function
embedMany records 2 types of spans:
-
ai.embedMany(span): the full length of the embedMany call. It contains 1 or moreai.embedMany.doEmbedspans. It contains the basic embedding span information and the following attributes:operation.name:ai.embedManyand the functionId that was set throughtelemetry.functionIdai.operationId:"ai.embedMany"ai.values: the values that were passed into theembedManyfunctionai.embeddings: an array of JSON-stringified embedding
-
ai.embedMany.doEmbed(span): a provider doEmbed call. It contains the basic embedding span information and the following attributes:operation.name:ai.embedMany.doEmbedand the functionId that was set throughtelemetry.functionIdai.operationId:"ai.embedMany.doEmbed"ai.values: the values that were sent to the providerai.embeddings: an array of JSON-stringified embeddings for each value
Span Details
Basic LLM span information
Many spans that use LLMs (ai.generateText, ai.generateText.doGenerate, ai.streamText, ai.streamText.doStream,
ai.generateObject, ai.generateObject.doGenerate, ai.streamObject, ai.streamObject.doStream) contain the following attributes:
resource.name: the functionId that was set throughtelemetry.functionIdai.model.id: the id of the modelai.model.provider: the provider of the modelai.request.headers.*: the request headers that were passed in throughheadersai.response.providerMetadata: provider specific metadata returned with the generation responseai.settings.maxRetries: the maximum number of retries that were setai.telemetry.functionId: the functionId that was set throughtelemetry.functionIdai.telemetry.metadata.*: the metadata that was passed in throughtelemetry.metadataai.usage.completionTokens: the number of completion tokens that were usedai.usage.promptTokens: the number of prompt tokens that were used
Call LLM span information
Spans that correspond to individual LLM calls (ai.generateText.doGenerate, ai.streamText.doStream, ai.generateObject.doGenerate, ai.streamObject.doStream) contain
basic LLM span information and the following attributes:
ai.response.model: the model that was used to generate the response. This can be different from the model that was requested if the provider supports aliases.ai.response.id: the id of the response. Uses the ID from the provider when available.ai.response.timestamp: the timestamp of the response. Uses the timestamp from the provider when available.- Semantic Conventions for GenAI operations
gen_ai.system: the provider that was usedgen_ai.request.model: the model that was requestedgen_ai.request.temperature: the temperature that was setgen_ai.request.max_tokens: the maximum number of tokens that were setgen_ai.request.frequency_penalty: the frequency penalty that was setgen_ai.request.presence_penalty: the presence penalty that was setgen_ai.request.top_k: the topK parameter value that was setgen_ai.request.top_p: the topP parameter value that was setgen_ai.request.stop_sequences: the stop sequencesgen_ai.response.finish_reasons: the finish reasons that were returned by the providergen_ai.response.model: the model that was used to generate the response. This can be different from the model that was requested if the provider supports aliases.gen_ai.response.id: the id of the response. Uses the ID from the provider when available.gen_ai.usage.input_tokens: the number of prompt tokens that were usedgen_ai.usage.output_tokens: the number of completion tokens that were used
Basic embedding span information
Many spans that use embedding models (ai.embed, ai.embed.doEmbed, ai.embedMany, ai.embedMany.doEmbed) contain the following attributes:
ai.model.id: the id of the modelai.model.provider: the provider of the modelai.request.headers.*: the request headers that were passed in throughheadersai.settings.maxRetries: the maximum number of retries that were setai.telemetry.functionId: the functionId that was set throughtelemetry.functionIdai.telemetry.metadata.*: the metadata that was passed in throughtelemetry.metadataai.usage.tokens: the number of tokens that were usedresource.name: the functionId that was set throughtelemetry.functionId
Tool call spans
Tool call spans (ai.toolCall) contain the following attributes:
operation.name:"ai.toolCall"ai.operationId:"ai.toolCall"ai.toolCall.name: the name of the toolai.toolCall.id: the id of the tool callai.toolCall.args: the input parameters of the tool callai.toolCall.result: the output result of the tool call. Only available if the tool call is successful and the result is serializable.
title: DevTools description: Debug and inspect AI SDK applications with DevTools
DevTools
AI SDK DevTools is experimental and intended for local development only. Do not use in production environments.AI SDK DevTools gives you full visibility over your AI SDK calls with generateText, streamText, and ToolLoopAgent. It helps you debug and inspect LLM requests, responses, tool calls, and multi-step interactions through a web-based UI.
DevTools is composed of two parts:
- Middleware: Captures runs and steps from your AI SDK calls
- Viewer: A web UI to inspect the captured data
Installation
Install the DevTools package:
pnpm add @ai-sdk/devtools
Requirements
- AI SDK v6 beta (
ai@^6.0.0-beta.0) - Node.js compatible runtime
Using DevTools
Add the middleware
Wrap your language model with the DevTools middleware using wrapLanguageModel:
import { wrapLanguageModel, gateway } from 'ai';
import { devToolsMiddleware } from '@ai-sdk/devtools';
const model = wrapLanguageModel({
model: gateway('anthropic/claude-sonnet-4.5'),
middleware: devToolsMiddleware(),
});
The wrapped model can be used with any AI SDK Core function:
import { generateText } from 'ai';
const result = await generateText({
model, // wrapped model with DevTools
prompt: 'What cities are in the United States?',
});
Launch the viewer
Start the DevTools viewer:
npx @ai-sdk/devtools
Open http://localhost:4983 to view your AI SDK interactions.
Captured data
The DevTools middleware captures the following information from your AI SDK calls:
- Input parameters and prompts: View the complete input sent to your LLM
- Output content and tool calls: Inspect generated text and tool invocations
- Token usage and timing: Monitor resource consumption and performance
- Raw provider data: Access complete request and response payloads
Runs and steps
DevTools organizes captured data into runs and steps:
- Run: A complete multi-step AI interaction, grouped by the initial prompt
- Step: A single LLM call within a run (e.g., one
generateTextorstreamTextcall)
Multi-step interactions, such as those created by tool calling or agent loops, are grouped together as a single run with multiple steps.
How it works
The DevTools middleware intercepts all generateText and streamText calls through the language model middleware system. Captured data is stored locally in a JSON file (.devtools/generations.json) and served through a web UI built with Hono and React.
Security considerations
DevTools stores all AI interactions locally in plain text files, including:
- User prompts and messages
- LLM responses
- Tool call arguments and results
- API request and response data
Only use DevTools in local development environments. Do not enable DevTools in production or when handling sensitive data.
title: Overview description: An overview of AI SDK UI.
AI SDK UI
AI SDK UI is designed to help you build interactive chat, completion, and assistant applications with ease. It is a framework-agnostic toolkit, streamlining the integration of advanced AI functionalities into your applications.
AI SDK UI provides robust abstractions that simplify the complex tasks of managing chat streams and UI updates on the frontend, enabling you to develop dynamic AI-driven interfaces more efficiently. With three main hooks — useChat, useCompletion, and useObject — you can incorporate real-time chat capabilities, text completions, streamed JSON, and interactive assistant features into your app.
useChatoffers real-time streaming of chat messages, abstracting state management for inputs, messages, loading, and errors, allowing for seamless integration into any UI design.useCompletionenables you to handle text completions in your applications, managing the prompt input and automatically updating the UI as new completions are streamed.useObjectis a hook that allows you to consume streamed JSON objects, providing a simple way to handle and display structured data in your application.
These hooks are designed to reduce the complexity and time required to implement AI interactions, letting you focus on creating exceptional user experiences.
UI Framework Support
AI SDK UI supports the following frameworks: React, Svelte, Vue.js, Angular, and SolidJS.
Here is a comparison of the supported functions across these frameworks:
| useChat | useCompletion | useObject | |
|---|---|---|---|
React @ai-sdk/react |
|||
Vue.js @ai-sdk/vue |
|||
Svelte @ai-sdk/svelte |
Chat | Completion | StructuredObject |
Angular @ai-sdk/angular |
Chat | Completion | StructuredObject |
| SolidJS (community) |
Framework Examples
Explore these example implementations for different frameworks:
API Reference
Please check out the AI SDK UI API Reference for more details on each function.
title: Chatbot description: Learn how to use the useChat hook.
Chatbot
The useChat hook makes it effortless to create a conversational user interface for your chatbot application. It enables the streaming of chat messages from your AI provider, manages the chat state, and updates the UI automatically as new messages arrive.
To summarize, the useChat hook provides the following features:
- Message Streaming: All the messages from the AI provider are streamed to the chat UI in real-time.
- Managed States: The hook manages the states for input, messages, status, error and more for you.
- Seamless Integration: Easily integrate your chat AI into any design or layout with minimal effort.
In this guide, you will learn how to use the useChat hook to create a chatbot application with real-time message streaming.
Check out our chatbot with tools guide to learn how to use tools in your chatbot.
Let's start with the following example first.
Example
'use client';
import { useChat } from '@ai-sdk/react';
import { DefaultChatTransport } from 'ai';
import { useState } from 'react';
export default function Page() {
const { messages, sendMessage, status } = useChat({
transport: new DefaultChatTransport({
api: '/api/chat',
}),
});
const [input, setInput] = useState('');
return (
<>
{messages.map(message => (
<div key={message.id}>
{message.role === 'user' ? 'User: ' : 'AI: '}
{message.parts.map((part, index) =>
part.type === 'text' ? <span key={index}>{part.text}</span> : null,
)}
</div>
))}
<form
onSubmit={e => {
e.preventDefault();
if (input.trim()) {
sendMessage({ text: input });
setInput('');
}
}}
>
<input
value={input}
onChange={e => setInput(e.target.value)}
disabled={status !== 'ready'}
placeholder="Say something..."
/>
<button type="submit" disabled={status !== 'ready'}>
Submit
</button>
</form>
</>
);
}
import { convertToModelMessages, streamText, UIMessage } from 'ai';
__PROVIDER_IMPORT__;
// Allow streaming responses up to 30 seconds
export const maxDuration = 30;
export async function POST(req: Request) {
const { messages }: { messages: UIMessage[] } = await req.json();
const result = streamText({
model: __MODEL__,
system: 'You are a helpful assistant.',
messages: await convertToModelMessages(messages),
});
return result.toUIMessageStreamResponse();
}
In the Page component, the useChat hook will request to your AI provider endpoint whenever the user sends a message using sendMessage.
The messages are then streamed back in real-time and displayed in the chat UI.
This enables a seamless chat experience where the user can see the AI response as soon as it is available, without having to wait for the entire response to be received.
Customized UI
useChat also provides ways to manage the chat message states via code, show status, and update messages without being triggered by user interactions.
Status
The useChat hook returns a status. It has the following possible values:
submitted: The message has been sent to the API and we're awaiting the start of the response stream.streaming: The response is actively streaming in from the API, receiving chunks of data.ready: The full response has been received and processed; a new user message can be submitted.error: An error occurred during the API request, preventing successful completion.
You can use status for e.g. the following purposes:
- To show a loading spinner while the chatbot is processing the user's message.
- To show a "Stop" button to abort the current message.
- To disable the submit button.
'use client';
import { useChat } from '@ai-sdk/react';
import { DefaultChatTransport } from 'ai';
import { useState } from 'react';
export default function Page() {
const { messages, sendMessage, status, stop } = useChat({
transport: new DefaultChatTransport({
api: '/api/chat',
}),
});
const [input, setInput] = useState('');
return (
<>
{messages.map(message => (
<div key={message.id}>
{message.role === 'user' ? 'User: ' : 'AI: '}
{message.parts.map((part, index) =>
part.type === 'text' ? <span key={index}>{part.text}</span> : null,
)}
</div>
))}
{(status === 'submitted' || status === 'streaming') && (
<div>
{status === 'submitted' && <Spinner />}
<button type="button" onClick={() => stop()}>
Stop
</button>
</div>
)}
<form
onSubmit={e => {
e.preventDefault();
if (input.trim()) {
sendMessage({ text: input });
setInput('');
}
}}
>
<input
value={input}
onChange={e => setInput(e.target.value)}
disabled={status !== 'ready'}
placeholder="Say something..."
/>
<button type="submit" disabled={status !== 'ready'}>
Submit
</button>
</form>
</>
);
}
Error State
Similarly, the error state reflects the error object thrown during the fetch request.
It can be used to display an error message, disable the submit button, or show a retry button:
'use client';
import { useChat } from '@ai-sdk/react';
import { DefaultChatTransport } from 'ai';
import { useState } from 'react';
export default function Chat() {
const { messages, sendMessage, error, reload } = useChat({
transport: new DefaultChatTransport({
api: '/api/chat',
}),
});
const [input, setInput] = useState('');
return (
<div>
{messages.map(m => (
<div key={m.id}>
{m.role}:{' '}
{m.parts.map((part, index) =>
part.type === 'text' ? <span key={index}>{part.text}</span> : null,
)}
</div>
))}
{error && (
<>
<div>An error occurred.</div>
<button type="button" onClick={() => reload()}>
Retry
</button>
</>
)}
<form
onSubmit={e => {
e.preventDefault();
if (input.trim()) {
sendMessage({ text: input });
setInput('');
}
}}
>
<input
value={input}
onChange={e => setInput(e.target.value)}
disabled={error != null}
/>
</form>
</div>
);
}
Please also see the error handling guide for more information.
Modify messages
Sometimes, you may want to directly modify some existing messages. For example, a delete button can be added to each message to allow users to remove them from the chat history.
The setMessages function can help you achieve these tasks:
const { messages, setMessages } = useChat()
const handleDelete = (id) => {
setMessages(messages.filter(message => message.id !== id))
}
return <>
{messages.map(message => (
<div key={message.id}>
{message.role === 'user' ? 'User: ' : 'AI: '}
{message.parts.map((part, index) => (
part.type === 'text' ? (
<span key={index}>{part.text}</span>
) : null
))}
<button onClick={() => handleDelete(message.id)}>Delete</button>
</div>
))}
...
You can think of messages and setMessages as a pair of state and setState in React.
Cancellation and regeneration
It's also a common use case to abort the response message while it's still streaming back from the AI provider. You can do this by calling the stop function returned by the useChat hook.
const { stop, status } = useChat()
return <>
<button onClick={stop} disabled={!(status === 'streaming' || status === 'submitted')}>Stop</button>
...
When the user clicks the "Stop" button, the fetch request will be aborted. This avoids consuming unnecessary resources and improves the UX of your chatbot application.
Similarly, you can also request the AI provider to reprocess the last message by calling the regenerate function returned by the useChat hook:
const { regenerate, status } = useChat();
return (
<>
<button
onClick={regenerate}
disabled={!(status === 'ready' || status === 'error')}
>
Regenerate
</button>
...
</>
);
When the user clicks the "Regenerate" button, the AI provider will regenerate the last message and replace the current one correspondingly.
Throttling UI Updates
This feature is currently only available for React.
By default, the useChat hook will trigger a render every time a new chunk is received.
You can throttle the UI updates with the experimental_throttle option.
const { messages, ... } = useChat({
// Throttle the messages and data updates to 50ms:
experimental_throttle: 50
})
Event Callbacks
useChat provides optional event callbacks that you can use to handle different stages of the chatbot lifecycle:
onFinish: Called when the assistant response is completed. The event includes the response message, all messages, and flags for abort, disconnect, and errors.onError: Called when an error occurs during the fetch request.onData: Called whenever a data part is received.
These callbacks can be used to trigger additional actions, such as logging, analytics, or custom UI updates.
import { UIMessage } from 'ai';
const {
/* ... */
} = useChat({
onFinish: ({ message, messages, isAbort, isDisconnect, isError }) => {
// use information to e.g. update other UI states
},
onError: error => {
console.error('An error occurred:', error);
},
onData: data => {
console.log('Received data part from server:', data);
},
});
It's worth noting that you can abort the processing by throwing an error in the onData callback. This will trigger the onError callback and stop the message from being appended to the chat UI. This can be useful for handling unexpected responses from the AI provider.
Request Configuration
Custom headers, body, and credentials
By default, the useChat hook sends a HTTP POST request to the /api/chat endpoint with the message list as the request body. You can customize the request in two ways:
Hook-Level Configuration (Applied to all requests)
You can configure transport-level options that will be applied to all requests made by the hook:
import { useChat } from '@ai-sdk/react';
import { DefaultChatTransport } from 'ai';
const { messages, sendMessage } = useChat({
transport: new DefaultChatTransport({
api: '/api/custom-chat',
headers: {
Authorization: 'your_token',
},
body: {
user_id: '123',
},
credentials: 'same-origin',
}),
});
Dynamic Hook-Level Configuration
You can also provide functions that return configuration values. This is useful for authentication tokens that need to be refreshed, or for configuration that depends on runtime conditions:
import { useChat } from '@ai-sdk/react';
import { DefaultChatTransport } from 'ai';
const { messages, sendMessage } = useChat({
transport: new DefaultChatTransport({
api: '/api/custom-chat',
headers: () => ({
Authorization: `Bearer ${getAuthToken()}`,
'X-User-ID': getCurrentUserId(),
}),
body: () => ({
sessionId: getCurrentSessionId(),
preferences: getUserPreferences(),
}),
credentials: () => 'include',
}),
});
Request-Level Configuration (Recommended)
**Recommended**: Use request-level options for better flexibility and control. Request-level options take precedence over hook-level options and allow you to customize each request individually.// Pass options as the second parameter to sendMessage
sendMessage(
{ text: input },
{
headers: {
Authorization: 'Bearer token123',
'X-Custom-Header': 'custom-value',
},
body: {
temperature: 0.7,
max_tokens: 100,
user_id: '123',
},
metadata: {
userId: 'user123',
sessionId: 'session456',
},
},
);
The request-level options are merged with hook-level options, with request-level options taking precedence. On your server side, you can handle the request with this additional information.
Setting custom body fields per request
You can configure custom body fields on a per-request basis using the second parameter of the sendMessage function.
This is useful if you want to pass in additional information to your backend that is not part of the message list.
'use client';
import { useChat } from '@ai-sdk/react';
import { useState } from 'react';
export default function Chat() {
const { messages, sendMessage } = useChat();
const [input, setInput] = useState('');
return (
<div>
{messages.map(m => (
<div key={m.id}>
{m.role}:{' '}
{m.parts.map((part, index) =>
part.type === 'text' ? <span key={index}>{part.text}</span> : null,
)}
</div>
))}
<form
onSubmit={event => {
event.preventDefault();
if (input.trim()) {
sendMessage(
{ text: input },
{
body: {
customKey: 'customValue',
},
},
);
setInput('');
}
}}
>
<input value={input} onChange={e => setInput(e.target.value)} />
</form>
</div>
);
}
You can retrieve these custom fields on your server side by destructuring the request body:
export async function POST(req: Request) {
// Extract additional information ("customKey") from the body of the request:
const { messages, customKey }: { messages: UIMessage[]; customKey: string } =
await req.json();
//...
}
Message Metadata
You can attach custom metadata to messages for tracking information like timestamps, model details, and token usage.
// Server: Send metadata about the message
return result.toUIMessageStreamResponse({
messageMetadata: ({ part }) => {
if (part.type === 'start') {
return {
createdAt: Date.now(),
model: 'gpt-5.1',
};
}
if (part.type === 'finish') {
return {
totalTokens: part.totalUsage.totalTokens,
};
}
},
});
// Client: Access metadata via message.metadata
{
messages.map(message => (
<div key={message.id}>
{message.role}:{' '}
{message.metadata?.createdAt &&
new Date(message.metadata.createdAt).toLocaleTimeString()}
{/* Render message content */}
{message.parts.map((part, index) =>
part.type === 'text' ? <span key={index}>{part.text}</span> : null,
)}
{/* Show token count if available */}
{message.metadata?.totalTokens && (
<span>{message.metadata.totalTokens} tokens</span>
)}
</div>
));
}
For complete examples with type safety and advanced use cases, see the Message Metadata documentation.
Transport Configuration
You can configure custom transport behavior using the transport option to customize how messages are sent to your API:
import { useChat } from '@ai-sdk/react';
import { DefaultChatTransport } from 'ai';
export default function Chat() {
const { messages, sendMessage } = useChat({
id: 'my-chat',
transport: new DefaultChatTransport({
prepareSendMessagesRequest: ({ id, messages }) => {
return {
body: {
id,
message: messages[messages.length - 1],
},
};
},
}),
});
// ... rest of your component
}
The corresponding API route receives the custom request format:
export async function POST(req: Request) {
const { id, message } = await req.json();
// Load existing messages and add the new one
const messages = await loadMessages(id);
messages.push(message);
const result = streamText({
model: __MODEL__,
messages: await convertToModelMessages(messages),
});
return result.toUIMessageStreamResponse();
}
Advanced: Trigger-based routing
For more complex scenarios like message regeneration, you can use trigger-based routing:
import { useChat } from '@ai-sdk/react';
import { DefaultChatTransport } from 'ai';
export default function Chat() {
const { messages, sendMessage, regenerate } = useChat({
id: 'my-chat',
transport: new DefaultChatTransport({
prepareSendMessagesRequest: ({ id, messages, trigger, messageId }) => {
if (trigger === 'submit-user-message') {
return {
body: {
trigger: 'submit-user-message',
id,
message: messages[messages.length - 1],
messageId,
},
};
} else if (trigger === 'regenerate-assistant-message') {
return {
body: {
trigger: 'regenerate-assistant-message',
id,
messageId,
},
};
}
throw new Error(`Unsupported trigger: ${trigger}`);
},
}),
});
// ... rest of your component
}
The corresponding API route would handle different triggers:
export async function POST(req: Request) {
const { trigger, id, message, messageId } = await req.json();
const chat = await readChat(id);
let messages = chat.messages;
if (trigger === 'submit-user-message') {
// Handle new user message
messages = [...messages, message];
} else if (trigger === 'regenerate-assistant-message') {
// Handle message regeneration - remove messages after messageId
const messageIndex = messages.findIndex(m => m.id === messageId);
if (messageIndex !== -1) {
messages = messages.slice(0, messageIndex);
}
}
const result = streamText({
model: __MODEL__,
messages: await convertToModelMessages(messages),
});
return result.toUIMessageStreamResponse();
}
To learn more about building custom transports, refer to the Transport API documentation.
Direct Agent Transport
For scenarios where you want to communicate directly with an Agent without going through HTTP, you can use DirectChatTransport. This is useful for:
- Server-side rendering scenarios
- Testing without network
- Single-process applications
import { useChat } from '@ai-sdk/react';
import { DirectChatTransport, ToolLoopAgent } from 'ai';
__PROVIDER_IMPORT__;
const agent = new ToolLoopAgent({
model: __MODEL__,
instructions: 'You are a helpful assistant.',
});
export default function Chat() {
const { messages, sendMessage, status } = useChat({
transport: new DirectChatTransport({ agent }),
});
return (
<>
{messages.map(message => (
<div key={message.id}>
{message.role === 'user' ? 'User: ' : 'AI: '}
{message.parts.map((part, index) =>
part.type === 'text' ? <span key={index}>{part.text}</span> : null,
)}
</div>
))}
<button
onClick={() => sendMessage({ text: 'Hello!' })}
disabled={status !== 'ready'}
>
Send
</button>
</>
);
}
The DirectChatTransport invokes the agent's stream() method directly, converting UI messages to model messages and streaming the response back as UI message chunks.
For more details, see the DirectChatTransport reference.
Controlling the response stream
With streamText, you can control how error messages and usage information are sent back to the client.
Error Messages
By default, the error message is masked for security reasons.
The default error message is "An error occurred."
You can forward error messages or send your own error message by providing a getErrorMessage function:
import { convertToModelMessages, streamText, UIMessage } from 'ai';
__PROVIDER_IMPORT__;
export async function POST(req: Request) {
const { messages }: { messages: UIMessage[] } = await req.json();
const result = streamText({
model: __MODEL__,
messages: await convertToModelMessages(messages),
});
return result.toUIMessageStreamResponse({
onError: error => {
if (error == null) {
return 'unknown error';
}
if (typeof error === 'string') {
return error;
}
if (error instanceof Error) {
return error.message;
}
return JSON.stringify(error);
},
});
}
Usage Information
Track token consumption and resource usage with message metadata:
- Define a custom metadata type with usage fields (optional, for type safety)
- Attach usage data using
messageMetadatain your response - Display usage metrics in your UI components
Usage data is attached as metadata to messages and becomes available once the model completes its response generation.
import { openai } from '@ai-sdk/openai';
import {
convertToModelMessages,
streamText,
UIMessage,
type LanguageModelUsage,
} from 'ai';
__PROVIDER_IMPORT__;
// Create a new metadata type (optional for type-safety)
type MyMetadata = {
totalUsage: LanguageModelUsage;
};
// Create a new custom message type with your own metadata
export type MyUIMessage = UIMessage<MyMetadata>;
export async function POST(req: Request) {
const { messages }: { messages: MyUIMessage[] } = await req.json();
const result = streamText({
model: __MODEL__,
messages: await convertToModelMessages(messages),
});
return result.toUIMessageStreamResponse({
originalMessages: messages,
messageMetadata: ({ part }) => {
// Send total usage when generation is finished
if (part.type === 'finish') {
return { totalUsage: part.totalUsage };
}
},
});
}
Then, on the client, you can access the message-level metadata.
'use client';
import { useChat } from '@ai-sdk/react';
import type { MyUIMessage } from './api/chat/route';
import { DefaultChatTransport } from 'ai';
export default function Chat() {
// Use custom message type defined on the server (optional for type-safety)
const { messages } = useChat<MyUIMessage>({
transport: new DefaultChatTransport({
api: '/api/chat',
}),
});
return (
<div className="flex flex-col w-full max-w-md py-24 mx-auto stretch">
{messages.map(m => (
<div key={m.id} className="whitespace-pre-wrap">
{m.role === 'user' ? 'User: ' : 'AI: '}
{m.parts.map(part => {
if (part.type === 'text') {
return part.text;
}
})}
{/* Render usage via metadata */}
{m.metadata?.totalUsage && (
<div>Total usage: {m.metadata?.totalUsage.totalTokens} tokens</div>
)}
</div>
))}
</div>
);
}
You can also access your metadata from the onFinish callback of useChat:
'use client';
import { useChat } from '@ai-sdk/react';
import type { MyUIMessage } from './api/chat/route';
import { DefaultChatTransport } from 'ai';
export default function Chat() {
// Use custom message type defined on the server (optional for type-safety)
const { messages } = useChat<MyUIMessage>({
transport: new DefaultChatTransport({
api: '/api/chat',
}),
onFinish: ({ message }) => {
// Access message metadata via onFinish callback
console.log(message.metadata?.totalUsage);
},
});
}
Text Streams
useChat can handle plain text streams by setting the streamProtocol option to text:
'use client';
import { useChat } from '@ai-sdk/react';
import { TextStreamChatTransport } from 'ai';
export default function Chat() {
const { messages } = useChat({
transport: new TextStreamChatTransport({
api: '/api/chat',
}),
});
return <>...</>;
}
This configuration also works with other backend servers that stream plain text. Check out the stream protocol guide for more information.
When using `TextStreamChatTransport`, tool calls, usage information and finish reasons are not available.Reasoning
Some models such as as DeepSeek deepseek-r1
and Anthropic claude-3-7-sonnet-20250219 support reasoning tokens.
These tokens are typically sent before the message content.
You can forward them to the client with the sendReasoning option:
import { convertToModelMessages, streamText, UIMessage } from 'ai';
export async function POST(req: Request) {
const { messages }: { messages: UIMessage[] } = await req.json();
const result = streamText({
model: 'deepseek/deepseek-r1',
messages: await convertToModelMessages(messages),
});
return result.toUIMessageStreamResponse({
sendReasoning: true,
});
}
On the client side, you can access the reasoning parts of the message object.
Reasoning parts have a text property that contains the reasoning content.
messages.map(message => (
<div key={message.id}>
{message.role === 'user' ? 'User: ' : 'AI: '}
{message.parts.map((part, index) => {
// text parts:
if (part.type === 'text') {
return <div key={index}>{part.text}</div>;
}
// reasoning parts:
if (part.type === 'reasoning') {
return <pre key={index}>{part.text}</pre>;
}
})}
</div>
));
Sources
Some providers such as Perplexity and Google Generative AI include sources in the response.
Currently sources are limited to web pages that ground the response.
You can forward them to the client with the sendSources option:
import { convertToModelMessages, streamText, UIMessage } from 'ai';
export async function POST(req: Request) {
const { messages }: { messages: UIMessage[] } = await req.json();
const result = streamText({
model: 'perplexity/sonar-pro',
messages: await convertToModelMessages(messages),
});
return result.toUIMessageStreamResponse({
sendSources: true,
});
}
On the client side, you can access source parts of the message object.
There are two types of sources: source-url for web pages and source-document for documents.
Here is an example that renders both types of sources:
messages.map(message => (
<div key={message.id}>
{message.role === 'user' ? 'User: ' : 'AI: '}
{/* Render URL sources */}
{message.parts
.filter(part => part.type === 'source-url')
.map(part => (
<span key={`source-${part.id}`}>
[
<a href={part.url} target="_blank">
{part.title ?? new URL(part.url).hostname}
</a>
]
</span>
))}
{/* Render document sources */}
{message.parts
.filter(part => part.type === 'source-document')
.map(part => (
<span key={`source-${part.id}`}>
[<span>{part.title ?? `Document ${part.id}`}</span>]
</span>
))}
</div>
));
Image Generation
Some models such as Google gemini-2.5-flash-image-preview support image generation.
When images are generated, they are exposed as files to the client.
On the client side, you can access file parts of the message object
and render them as images.
messages.map(message => (
<div key={message.id}>
{message.role === 'user' ? 'User: ' : 'AI: '}
{message.parts.map((part, index) => {
if (part.type === 'text') {
return <div key={index}>{part.text}</div>;
} else if (part.type === 'file' && part.mediaType.startsWith('image/')) {
return <img key={index} src={part.url} alt="Generated image" />;
}
})}
</div>
));
Attachments
The useChat hook supports sending file attachments along with a message as well as rendering them on the client. This can be useful for building applications that involve sending images, files, or other media content to the AI provider.
There are two ways to send files with a message: using a FileList object from file inputs or using an array of file objects.
FileList
By using FileList, you can send multiple files as attachments along with a message using the file input element. The useChat hook will automatically convert them into data URLs and send them to the AI provider.
'use client';
import { useChat } from '@ai-sdk/react';
import { useRef, useState } from 'react';
export default function Page() {
const { messages, sendMessage, status } = useChat();
const [input, setInput] = useState('');
const [files, setFiles] = useState<FileList | undefined>(undefined);
const fileInputRef = useRef<HTMLInputElement>(null);
return (
<div>
<div>
{messages.map(message => (
<div key={message.id}>
<div>{`${message.role}: `}</div>
<div>
{message.parts.map((part, index) => {
if (part.type === 'text') {
return <span key={index}>{part.text}</span>;
}
if (
part.type === 'file' &&
part.mediaType?.startsWith('image/')
) {
return <img key={index} src={part.url} alt={part.filename} />;
}
return null;
})}
</div>
</div>
))}
</div>
<form
onSubmit={event => {
event.preventDefault();
if (input.trim()) {
sendMessage({
text: input,
files,
});
setInput('');
setFiles(undefined);
if (fileInputRef.current) {
fileInputRef.current.value = '';
}
}
}}
>
<input
type="file"
onChange={event => {
if (event.target.files) {
setFiles(event.target.files);
}
}}
multiple
ref={fileInputRef}
/>
<input
value={input}
placeholder="Send message..."
onChange={e => setInput(e.target.value)}
disabled={status !== 'ready'}
/>
</form>
</div>
);
}
File Objects
You can also send files as objects along with a message. This can be useful for sending pre-uploaded files or data URLs.
'use client';
import { useChat } from '@ai-sdk/react';
import { useState } from 'react';
import { FileUIPart } from 'ai';
export default function Page() {
const { messages, sendMessage, status } = useChat();
const [input, setInput] = useState('');
const [files] = useState<FileUIPart[]>([
{
type: 'file',
filename: 'earth.png',
mediaType: 'image/png',
url: 'https://example.com/earth.png',
},
{
type: 'file',
filename: 'moon.png',
mediaType: 'image/png',
url: 'data:image/png;base64,iVBORw0KGgo...',
},
]);
return (
<div>
<div>
{messages.map(message => (
<div key={message.id}>
<div>{`${message.role}: `}</div>
<div>
{message.parts.map((part, index) => {
if (part.type === 'text') {
return <span key={index}>{part.text}</span>;
}
if (
part.type === 'file' &&
part.mediaType?.startsWith('image/')
) {
return <img key={index} src={part.url} alt={part.filename} />;
}
return null;
})}
</div>
</div>
))}
</div>
<form
onSubmit={event => {
event.preventDefault();
if (input.trim()) {
sendMessage({
text: input,
files,
});
setInput('');
}
}}
>
<input
value={input}
placeholder="Send message..."
onChange={e => setInput(e.target.value)}
disabled={status !== 'ready'}
/>
</form>
</div>
);
}
Type Inference for Tools
When working with tools in TypeScript, AI SDK UI provides type inference helpers to ensure type safety for your tool inputs and outputs.
InferUITool
The InferUITool type helper infers the input and output types of a single tool for use in UI messages:
import { InferUITool } from 'ai';
import { z } from 'zod';
const weatherTool = {
description: 'Get the current weather',
inputSchema: z.object({
location: z.string().describe('The city and state'),
}),
execute: async ({ location }) => {
return `The weather in ${location} is sunny.`;
},
};
// Infer the types from the tool
type WeatherUITool = InferUITool<typeof weatherTool>;
// This creates a type with:
// {
// input: { location: string };
// output: string;
// }
InferUITools
The InferUITools type helper infers the input and output types of a ToolSet:
import { InferUITools, ToolSet } from 'ai';
import { z } from 'zod';
const tools = {
weather: {
description: 'Get the current weather',
inputSchema: z.object({
location: z.string().describe('The city and state'),
}),
execute: async ({ location }) => {
return `The weather in ${location} is sunny.`;
},
},
calculator: {
description: 'Perform basic arithmetic',
inputSchema: z.object({
operation: z.enum(['add', 'subtract', 'multiply', 'divide']),
a: z.number(),
b: z.number(),
}),
execute: async ({ operation, a, b }) => {
switch (operation) {
case 'add':
return a + b;
case 'subtract':
return a - b;
case 'multiply':
return a * b;
case 'divide':
return a / b;
}
},
},
} satisfies ToolSet;
// Infer the types from the tool set
type MyUITools = InferUITools<typeof tools>;
// This creates a type with:
// {
// weather: { input: { location: string }; output: string };
// calculator: { input: { operation: 'add' | 'subtract' | 'multiply' | 'divide'; a: number; b: number }; output: number };
// }
Using Inferred Types
You can use these inferred types to create a custom UIMessage type and pass it to various AI SDK UI functions:
import { InferUITools, UIMessage, UIDataTypes } from 'ai';
type MyUITools = InferUITools<typeof tools>;
type MyUIMessage = UIMessage<never, UIDataTypes, MyUITools>;
Pass the custom type to useChat or createUIMessageStream:
import { useChat } from '@ai-sdk/react';
import { createUIMessageStream } from 'ai';
import type { MyUIMessage } from './types';
// With useChat
const { messages } = useChat<MyUIMessage>();
// With createUIMessageStream
const stream = createUIMessageStream<MyUIMessage>(/* ... */);
This provides full type safety for tool inputs and outputs on the client and server.
title: Chatbot Message Persistence description: Learn how to store and load chat messages in a chatbot.
Chatbot Message Persistence
Being able to store and load chat messages is crucial for most AI chatbots.
In this guide, we'll show how to implement message persistence with useChat and streamText.
Starting a new chat
When the user navigates to the chat page without providing a chat ID, we need to create a new chat and redirect to the chat page with the new chat ID.
import { redirect } from 'next/navigation';
import { createChat } from '@util/chat-store';
export default async function Page() {
const id = await createChat(); // create a new chat
redirect(`/chat/${id}`); // redirect to chat page, see below
}
Our example chat store implementation uses files to store the chat messages. In a real-world application, you would use a database or a cloud storage service, and get the chat ID from the database. That being said, the function interfaces are designed to be easily replaced with other implementations.
import { generateId } from 'ai';
import { existsSync, mkdirSync } from 'fs';
import { writeFile } from 'fs/promises';
import path from 'path';
export async function createChat(): Promise<string> {
const id = generateId(); // generate a unique chat ID
await writeFile(getChatFile(id), '[]'); // create an empty chat file
return id;
}
function getChatFile(id: string): string {
const chatDir = path.join(process.cwd(), '.chats');
if (!existsSync(chatDir)) mkdirSync(chatDir, { recursive: true });
return path.join(chatDir, `${id}.json`);
}
Loading an existing chat
When the user navigates to the chat page with a chat ID, we need to load the chat messages from storage.
The loadChat function in our file-based chat store is implemented as follows:
import { UIMessage } from 'ai';
import { readFile } from 'fs/promises';
export async function loadChat(id: string): Promise<UIMessage[]> {
return JSON.parse(await readFile(getChatFile(id), 'utf8'));
}
// ... rest of the file
Validating messages on the server
When processing messages on the server that contain tool calls, custom metadata, or data parts, you should validate them using validateUIMessages before sending them to the model.
Validation with tools
When your messages include tool calls, validate them against your tool definitions:
import {
convertToModelMessages,
streamText,
UIMessage,
validateUIMessages,
tool,
} from 'ai';
import { z } from 'zod';
import { loadChat, saveChat } from '@util/chat-store';
import { openai } from '@ai-sdk/openai';
import { dataPartsSchema, metadataSchema } from '@util/schemas';
// Define your tools
const tools = {
weather: tool({
description: 'Get weather information',
parameters: z.object({
location: z.string(),
units: z.enum(['celsius', 'fahrenheit']),
}),
execute: async ({ location, units }) => {
/* tool implementation */
},
}),
// other tools
};
export async function POST(req: Request) {
const { message, id } = await req.json();
// Load previous messages from database
const previousMessages = await loadChat(id);
// Append new message to previousMessages messages
const messages = [...previousMessages, message];
// Validate loaded messages against
// tools, data parts schema, and metadata schema
const validatedMessages = await validateUIMessages({
messages,
tools, // Ensures tool calls in messages match current schemas
dataPartsSchema,
metadataSchema,
});
const result = streamText({
model: 'openai/gpt-5-mini',
messages: convertToModelMessages(validatedMessages),
tools,
});
return result.toUIMessageStreamResponse({
originalMessages: messages,
onFinish: ({ messages }) => {
saveChat({ chatId: id, messages });
},
});
}
Handling validation errors
Handle validation errors gracefully when messages from the database don't match current schemas:
import {
convertToModelMessages,
streamText,
validateUIMessages,
TypeValidationError,
} from 'ai';
import { type MyUIMessage } from '@/types';
export async function POST(req: Request) {
const { message, id } = await req.json();
// Load and validate messages from database
let validatedMessages: MyUIMessage[];
try {
const previousMessages = await loadMessagesFromDB(id);
validatedMessages = await validateUIMessages({
// append the new message to the previous messages:
messages: [...previousMessages, message],
tools,
metadataSchema,
});
} catch (error) {
if (error instanceof TypeValidationError) {
// Log validation error for monitoring
console.error('Database messages validation failed:', error);
// Could implement message migration or filtering here
// For now, start with empty history
validatedMessages = [];
} else {
throw error;
}
}
// Continue with validated messages...
}
Displaying the chat
Once messages are loaded from storage, you can display them in your chat UI. Here's how to set up the page component and the chat display:
import { loadChat } from '@util/chat-store';
import Chat from '@ui/chat';
export default async function Page(props: { params: Promise<{ id: string }> }) {
const { id } = await props.params;
const messages = await loadChat(id);
return <Chat id={id} initialMessages={messages} />;
}
The chat component uses the useChat hook to manage the conversation:
'use client';
import { UIMessage, useChat } from '@ai-sdk/react';
import { DefaultChatTransport } from 'ai';
import { useState } from 'react';
export default function Chat({
id,
initialMessages,
}: { id?: string | undefined; initialMessages?: UIMessage[] } = {}) {
const [input, setInput] = useState('');
const { sendMessage, messages } = useChat({
id, // use the provided chat ID
messages: initialMessages, // load initial messages
transport: new DefaultChatTransport({
api: '/api/chat',
}),
});
const handleSubmit = (e: React.FormEvent) => {
e.preventDefault();
if (input.trim()) {
sendMessage({ text: input });
setInput('');
}
};
// simplified rendering code, extend as needed:
return (
<div>
{messages.map(m => (
<div key={m.id}>
{m.role === 'user' ? 'User: ' : 'AI: '}
{m.parts
.map(part => (part.type === 'text' ? part.text : ''))
.join('')}
</div>
))}
<form onSubmit={handleSubmit}>
<input
value={input}
onChange={e => setInput(e.target.value)}
placeholder="Type a message..."
/>
<button type="submit">Send</button>
</form>
</div>
);
}
Storing messages
useChat sends the chat id and the messages to the backend.
When loading messages from storage that contain tools, metadata, or custom data
parts, validate them using validateUIMessages before processing (see the
validation section above).
Storing messages is done in the onFinish callback of the toUIMessageStreamResponse function.
onFinish receives the complete messages including the new AI response as UIMessage[].
import { openai } from '@ai-sdk/openai';
import { saveChat } from '@util/chat-store';
import { convertToModelMessages, streamText, UIMessage } from 'ai';
export async function POST(req: Request) {
const { messages, chatId }: { messages: UIMessage[]; chatId: string } =
await req.json();
const result = streamText({
model: 'openai/gpt-5-mini',
messages: await convertToModelMessages(messages),
});
return result.toUIMessageStreamResponse({
originalMessages: messages,
onFinish: ({ messages }) => {
saveChat({ chatId, messages });
},
});
}
The actual storage of the messages is done in the saveChat function, which in
our file-based chat store is implemented as follows:
import { UIMessage } from 'ai';
import { writeFile } from 'fs/promises';
export async function saveChat({
chatId,
messages,
}: {
chatId: string;
messages: UIMessage[];
}): Promise<void> {
const content = JSON.stringify(messages, null, 2);
await writeFile(getChatFile(chatId), content);
}
// ... rest of the file
Message IDs
In addition to a chat ID, each message has an ID. You can use this message ID to e.g. manipulate individual messages.
Client-side vs Server-side ID Generation
By default, message IDs are generated client-side:
- User message IDs are generated by the
useChathook on the client - AI response message IDs are generated by
streamTexton the server
For applications without persistence, client-side ID generation works perfectly. However, for persistence, you need server-side generated IDs to ensure consistency across sessions and prevent ID conflicts when messages are stored and retrieved.
Setting Up Server-side ID Generation
When implementing persistence, you have two options for generating server-side IDs:
- Using
generateMessageIdintoUIMessageStreamResponse - Setting IDs in your start message part with
createUIMessageStream
Option 1: Using generateMessageId in toUIMessageStreamResponse
You can control the ID format by providing ID generators using createIdGenerator():
import { createIdGenerator, streamText } from 'ai';
export async function POST(req: Request) {
// ...
const result = streamText({
// ...
});
return result.toUIMessageStreamResponse({
originalMessages: messages,
// Generate consistent server-side IDs for persistence:
generateMessageId: createIdGenerator({
prefix: 'msg',
size: 16,
}),
onFinish: ({ messages }) => {
saveChat({ chatId, messages });
},
});
}
Option 2: Setting IDs with createUIMessageStream
Alternatively, you can use createUIMessageStream to control the message ID by writing a start message part:
import {
generateId,
streamText,
createUIMessageStream,
createUIMessageStreamResponse,
} from 'ai';
export async function POST(req: Request) {
const { messages, chatId } = await req.json();
const stream = createUIMessageStream({
execute: ({ writer }) => {
// Write start message part with custom ID
writer.write({
type: 'start',
messageId: generateId(), // Generate server-side ID for persistence
});
const result = streamText({
model: 'openai/gpt-5-mini',
messages: await convertToModelMessages(messages),
});
writer.merge(result.toUIMessageStream({ sendStart: false })); // omit start message part
},
originalMessages: messages,
onFinish: ({ responseMessage }) => {
// save your chat here
},
});
return createUIMessageStreamResponse({ stream });
}
import { createIdGenerator } from 'ai';
import { useChat } from '@ai-sdk/react';
const { ... } = useChat({
generateId: createIdGenerator({
prefix: 'msgc',
size: 16,
}),
// ...
});
Sending only the last message
Once you have implemented message persistence, you might want to send only the last message to the server. This reduces the amount of data sent to the server on each request and can improve performance.
To achieve this, you can provide a prepareSendMessagesRequest function to the transport.
This function receives the messages and the chat ID, and returns the request body to be sent to the server.
import { useChat } from '@ai-sdk/react';
import { DefaultChatTransport } from 'ai';
const {
// ...
} = useChat({
// ...
transport: new DefaultChatTransport({
api: '/api/chat',
// only send the last message to the server:
prepareSendMessagesRequest({ messages, id }) {
return { body: { message: messages[messages.length - 1], id } };
},
}),
});
On the server, you can then load the previous messages and append the new message to the previous messages. If your messages contain tools, metadata, or custom data parts, you should validate them:
import { convertToModelMessages, UIMessage, validateUIMessages } from 'ai';
// import your tools and schemas
export async function POST(req: Request) {
// get the last message from the client:
const { message, id } = await req.json();
// load the previous messages from the server:
const previousMessages = await loadChat(id);
// validate messages if they contain tools, metadata, or data parts:
const validatedMessages = await validateUIMessages({
// append the new message to the previous messages:
messages: [...previousMessages, message],
tools, // if using tools
metadataSchema, // if using custom metadata
dataSchemas, // if using custom data parts
});
const result = streamText({
// ...
messages: convertToModelMessages(validatedMessages),
});
return result.toUIMessageStreamResponse({
originalMessages: validatedMessages,
onFinish: ({ messages }) => {
saveChat({ chatId: id, messages });
},
});
}
Handling client disconnects
By default, the AI SDK streamText function uses backpressure to the language model provider to prevent
the consumption of tokens that are not yet requested.
However, this means that when the client disconnects, e.g. by closing the browser tab or because of a network issue, the stream from the LLM will be aborted and the conversation may end up in a broken state.
Assuming that you have a storage solution in place, you can use the consumeStream method to consume the stream on the backend,
and then save the result as usual.
consumeStream effectively removes the backpressure,
meaning that the result is stored even when the client has already disconnected.
import { convertToModelMessages, streamText, UIMessage } from 'ai';
import { saveChat } from '@util/chat-store';
export async function POST(req: Request) {
const { messages, chatId }: { messages: UIMessage[]; chatId: string } =
await req.json();
const result = streamText({
model,
messages: await convertToModelMessages(messages),
});
// consume the stream to ensure it runs to completion & triggers onFinish
// even when the client response is aborted:
result.consumeStream(); // no await
return result.toUIMessageStreamResponse({
originalMessages: messages,
onFinish: ({ messages }) => {
saveChat({ chatId, messages });
},
});
}
When the client reloads the page after a disconnect, the chat will be restored from the storage solution.
In production applications, you would also track the state of the request (in progress, complete) in your stored messages and use it on the client to cover the case where the client reloads the page after a disconnection, but the streaming is not yet complete.For more robust handling of disconnects, you may want to add resumability on disconnects. Check out the Chatbot Resume Streams documentation to learn more.
title: Chatbot Resume Streams description: Learn how to resume chatbot streams after client disconnects.
Chatbot Resume Streams
useChat supports resuming ongoing streams after page reloads. Use this feature to build applications with long-running generations.
How stream resumption works
Stream resumption requires persistence for messages and active streams in your application. The AI SDK provides tools to connect to storage, but you need to set up the storage yourself.
The AI SDK provides:
- A
resumeoption inuseChatthat automatically reconnects to active streams - Access to the outgoing stream through the
consumeSseStreamcallback - Automatic HTTP requests to your resume endpoints
You build:
- Storage to track which stream belongs to each chat
- Redis to store the UIMessage stream
- Two API endpoints: POST to create streams, GET to resume them
- Integration with
resumable-streamto manage Redis storage
Prerequisites
To implement resumable streams in your chat application, you need:
- The
resumable-streampackage - Handles the publisher/subscriber mechanism for streams - A Redis instance - Stores stream data (e.g. Redis through Vercel)
- A persistence layer - Tracks which stream ID is active for each chat (e.g. database)
Implementation
1. Client-side: Enable stream resumption
Use the resume option in the useChat hook to enable stream resumption. When resume is true, the hook automatically attempts to reconnect to any active stream for the chat on mount:
'use client';
import { useChat } from '@ai-sdk/react';
import { DefaultChatTransport, type UIMessage } from 'ai';
export function Chat({
chatData,
resume = false,
}: {
chatData: { id: string; messages: UIMessage[] };
resume?: boolean;
}) {
const { messages, sendMessage, status } = useChat({
id: chatData.id,
messages: chatData.messages,
resume, // Enable automatic stream resumption
transport: new DefaultChatTransport({
// You must send the id of the chat
prepareSendMessagesRequest: ({ id, messages }) => {
return {
body: {
id,
message: messages[messages.length - 1],
},
};
},
}),
});
return <div>{/* Your chat UI */}</div>;
}
When you enable resume, the useChat hook makes a GET request to /api/chat/[id]/stream on mount to check for and resume any active streams.
Let's start by creating the POST handler to create the resumable stream.
2. Create the POST handler
The POST handler creates resumable streams using the consumeSseStream callback:
import { openai } from '@ai-sdk/openai';
import { readChat, saveChat } from '@util/chat-store';
import {
convertToModelMessages,
generateId,
streamText,
type UIMessage,
} from 'ai';
import { after } from 'next/server';
import { createResumableStreamContext } from 'resumable-stream';
export async function POST(req: Request) {
const {
message,
id,
}: {
message: UIMessage | undefined;
id: string;
} = await req.json();
const chat = await readChat(id);
let messages = chat.messages;
messages = [...messages, message!];
// Clear any previous active stream and save the user message
saveChat({ id, messages, activeStreamId: null });
const result = streamText({
model: 'openai/gpt-5-mini',
messages: await convertToModelMessages(messages),
});
return result.toUIMessageStreamResponse({
originalMessages: messages,
generateMessageId: generateId,
onFinish: ({ messages }) => {
// Clear the active stream when finished
saveChat({ id, messages, activeStreamId: null });
},
async consumeSseStream({ stream }) {
const streamId = generateId();
// Create a resumable stream from the SSE stream
const streamContext = createResumableStreamContext({ waitUntil: after });
await streamContext.createNewResumableStream(streamId, () => stream);
// Update the chat with the active stream ID
saveChat({ id, activeStreamId: streamId });
},
});
}
3. Implement the GET handler
Create a GET handler at /api/chat/[id]/stream that:
- Reads the chat ID from the route params
- Loads the chat data to check for an active stream
- Returns 204 (No Content) if no stream is active
- Resumes the existing stream if one is found
import { readChat } from '@util/chat-store';
import { UI_MESSAGE_STREAM_HEADERS } from 'ai';
import { after } from 'next/server';
import { createResumableStreamContext } from 'resumable-stream';
export async function GET(
_: Request,
{ params }: { params: Promise<{ id: string }> },
) {
const { id } = await params;
const chat = await readChat(id);
if (chat.activeStreamId == null) {
// no content response when there is no active stream
return new Response(null, { status: 204 });
}
const streamContext = createResumableStreamContext({
waitUntil: after,
});
return new Response(
await streamContext.resumeExistingStream(chat.activeStreamId),
{ headers: UI_MESSAGE_STREAM_HEADERS },
);
}
How it works
Request lifecycle
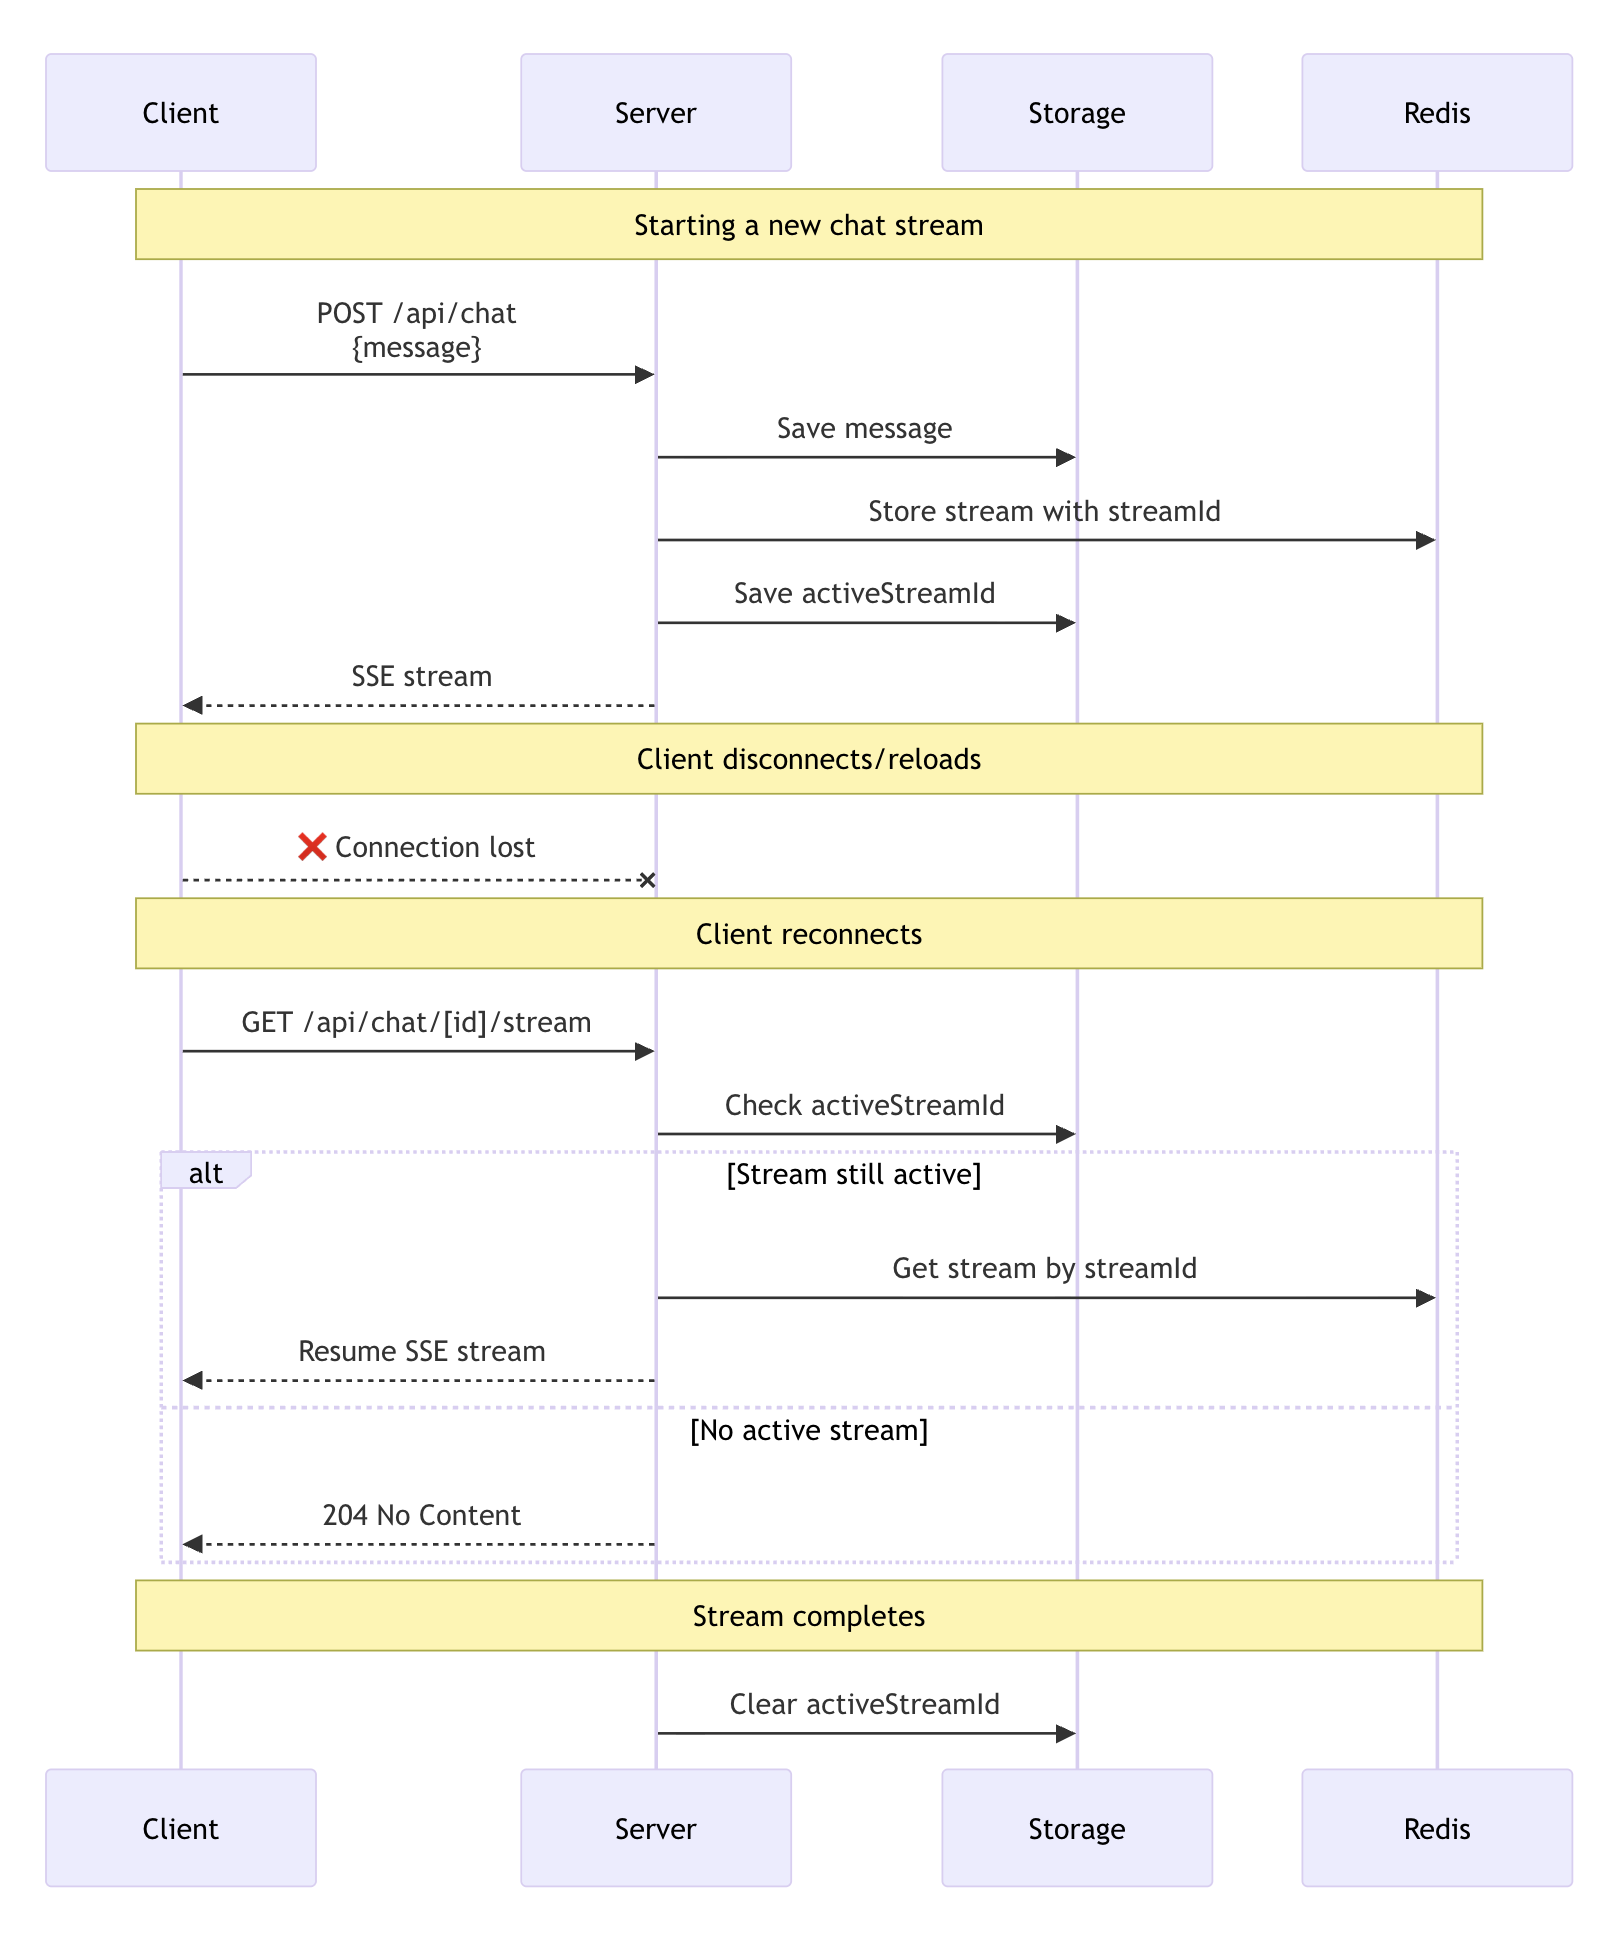
The diagram above shows the complete lifecycle of a resumable stream:
- Stream creation: When you send a new message, the POST handler uses
streamTextto generate the response. TheconsumeSseStreamcallback creates a resumable stream with a unique ID and stores it in Redis through theresumable-streampackage - Stream tracking: Your persistence layer saves the
activeStreamIdin the chat data - Client reconnection: When the client reconnects (page reload), the
resumeoption triggers a GET request to/api/chat/[id]/stream - Stream recovery: The GET handler checks for an
activeStreamIdand usesresumeExistingStreamto reconnect. If no active stream exists, it returns a 204 (No Content) response - Completion cleanup: When the stream finishes, the
onFinishcallback clears theactiveStreamIdby setting it tonull
Customize the resume endpoint
By default, the useChat hook makes a GET request to /api/chat/[id]/stream when resuming. Customize this endpoint, credentials, and headers, using the prepareReconnectToStreamRequest option in DefaultChatTransport:
import { useChat } from '@ai-sdk/react';
import { DefaultChatTransport } from 'ai';
export function Chat({ chatData, resume }) {
const { messages, sendMessage } = useChat({
id: chatData.id,
messages: chatData.messages,
resume,
transport: new DefaultChatTransport({
// Customize reconnect settings (optional)
prepareReconnectToStreamRequest: ({ id }) => {
return {
api: `/api/chat/${id}/stream`, // Default pattern
// Or use a different pattern:
// api: `/api/streams/${id}/resume`,
// api: `/api/resume-chat?id=${id}`,
credentials: 'include', // Include cookies/auth
headers: {
Authorization: 'Bearer token',
'X-Custom-Header': 'value',
},
};
},
}),
});
return <div>{/* Your chat UI */}</div>;
}
This lets you:
- Match your existing API route structure
- Add query parameters or custom paths
- Integrate with different backend architectures
Important considerations
- Incompatibility with abort: Stream resumption is not compatible with abort functionality. Closing a tab or refreshing the page triggers an abort signal that will break the resumption mechanism. Do not use
resume: trueif you need abort functionality in your application - Stream expiration: Streams in Redis expire after a set time (configurable in the
resumable-streampackage) - Multiple clients: Multiple clients can connect to the same stream simultaneously
- Error handling: When no active stream exists, the GET handler returns a 204 (No Content) status code
- Security: Ensure proper authentication and authorization for both creating and resuming streams
- Race conditions: Clear the
activeStreamIdwhen starting a new stream to prevent resuming outdated streams
title: Chatbot Tool Usage description: Learn how to use tools with the useChat hook.
Chatbot Tool Usage
With useChat and streamText, you can use tools in your chatbot application.
The AI SDK supports three types of tools in this context:
- Automatically executed server-side tools
- Automatically executed client-side tools
- Tools that require user interaction, such as confirmation dialogs
The flow is as follows:
- The user enters a message in the chat UI.
- The message is sent to the API route.
- In your server side route, the language model generates tool calls during the
streamTextcall. - All tool calls are forwarded to the client.
- Server-side tools are executed using their
executemethod and their results are forwarded to the client. - Client-side tools that should be automatically executed are handled with the
onToolCallcallback. You must calladdToolOutputto provide the tool result. - Client-side tool that require user interactions can be displayed in the UI.
The tool calls and results are available as tool invocation parts in the
partsproperty of the last assistant message. - When the user interaction is done,
addToolOutputcan be used to add the tool result to the chat. - The chat can be configured to automatically submit when all tool results are available using
sendAutomaticallyWhen. This triggers another iteration of this flow.
The tool calls and tool executions are integrated into the assistant message as typed tool parts. A tool part is at first a tool call, and then it becomes a tool result when the tool is executed. The tool result contains all information about the tool call as well as the result of the tool execution.
Tool result submission can be configured using the `sendAutomaticallyWhen` option. You can use the `lastAssistantMessageIsCompleteWithToolCalls` helper to automatically submit when all tool results are available. This simplifies the client-side code while still allowing full control when needed.Example
In this example, we'll use three tools:
getWeatherInformation: An automatically executed server-side tool that returns the weather in a given city.askForConfirmation: A user-interaction client-side tool that asks the user for confirmation.getLocation: An automatically executed client-side tool that returns a random city.
API route
import { convertToModelMessages, streamText, UIMessage } from 'ai';
__PROVIDER_IMPORT__;
import { z } from 'zod';
// Allow streaming responses up to 30 seconds
export const maxDuration = 30;
export async function POST(req: Request) {
const { messages }: { messages: UIMessage[] } = await req.json();
const result = streamText({
model: __MODEL__,
messages: await convertToModelMessages(messages),
tools: {
// server-side tool with execute function:
getWeatherInformation: {
description: 'show the weather in a given city to the user',
inputSchema: z.object({ city: z.string() }),
execute: async ({}: { city: string }) => {
const weatherOptions = ['sunny', 'cloudy', 'rainy', 'snowy', 'windy'];
return weatherOptions[
Math.floor(Math.random() * weatherOptions.length)
];
},
},
// client-side tool that starts user interaction:
askForConfirmation: {
description: 'Ask the user for confirmation.',
inputSchema: z.object({
message: z.string().describe('The message to ask for confirmation.'),
}),
},
// client-side tool that is automatically executed on the client:
getLocation: {
description:
'Get the user location. Always ask for confirmation before using this tool.',
inputSchema: z.object({}),
},
},
});
return result.toUIMessageStreamResponse();
}
Client-side page
The client-side page uses the useChat hook to create a chatbot application with real-time message streaming.
Tool calls are displayed in the chat UI as typed tool parts.
Please make sure to render the messages using the parts property of the message.
There are three things worth mentioning:
-
The
Always check `if (toolCall.dynamic)` first in your `onToolCall` handler. Without this check, TypeScript will throw an error like: `Type 'string' is not assignable to type '"toolName1" | "toolName2"'` when you try to use `toolCall.toolName` in `addToolOutput`.onToolCallcallback is used to handle client-side tools that should be automatically executed. In this example, thegetLocationtool is a client-side tool that returns a random city. You calladdToolOutputto provide the result (withoutawaitto avoid potential deadlocks). -
The
sendAutomaticallyWhenoption withlastAssistantMessageIsCompleteWithToolCallshelper automatically submits when all tool results are available. -
The
partsarray of assistant messages contains tool parts with typed names liketool-askForConfirmation. The client-side toolaskForConfirmationis displayed in the UI. It asks the user for confirmation and displays the result once the user confirms or denies the execution. The result is added to the chat usingaddToolOutputwith thetoolparameter for type safety.
'use client';
import { useChat } from '@ai-sdk/react';
import {
DefaultChatTransport,
lastAssistantMessageIsCompleteWithToolCalls,
} from 'ai';
import { useState } from 'react';
export default function Chat() {
const { messages, sendMessage, addToolOutput } = useChat({
transport: new DefaultChatTransport({
api: '/api/chat',
}),
sendAutomaticallyWhen: lastAssistantMessageIsCompleteWithToolCalls,
// run client-side tools that are automatically executed:
async onToolCall({ toolCall }) {
// Check if it's a dynamic tool first for proper type narrowing
if (toolCall.dynamic) {
return;
}
if (toolCall.toolName === 'getLocation') {
const cities = ['New York', 'Los Angeles', 'Chicago', 'San Francisco'];
// No await - avoids potential deadlocks
addToolOutput({
tool: 'getLocation',
toolCallId: toolCall.toolCallId,
output: cities[Math.floor(Math.random() * cities.length)],
});
}
},
});
const [input, setInput] = useState('');
return (
<>
{messages?.map(message => (
<div key={message.id}>
<strong>{`${message.role}: `}</strong>
{message.parts.map(part => {
switch (part.type) {
// render text parts as simple text:
case 'text':
return part.text;
// for tool parts, use the typed tool part names:
case 'tool-askForConfirmation': {
const callId = part.toolCallId;
switch (part.state) {
case 'input-streaming':
return (
<div key={callId}>Loading confirmation request...</div>
);
case 'input-available':
return (
<div key={callId}>
{part.input.message}
<div>
<button
onClick={() =>
addToolOutput({
tool: 'askForConfirmation',
toolCallId: callId,
output: 'Yes, confirmed.',
})
}
>
Yes
</button>
<button
onClick={() =>
addToolOutput({
tool: 'askForConfirmation',
toolCallId: callId,
output: 'No, denied',
})
}
>
No
</button>
</div>
</div>
);
case 'output-available':
return (
<div key={callId}>
Location access allowed: {part.output}
</div>
);
case 'output-error':
return <div key={callId}>Error: {part.errorText}</div>;
}
break;
}
case 'tool-getLocation': {
const callId = part.toolCallId;
switch (part.state) {
case 'input-streaming':
return (
<div key={callId}>Preparing location request...</div>
);
case 'input-available':
return <div key={callId}>Getting location...</div>;
case 'output-available':
return <div key={callId}>Location: {part.output}</div>;
case 'output-error':
return (
<div key={callId}>
Error getting location: {part.errorText}
</div>
);
}
break;
}
case 'tool-getWeatherInformation': {
const callId = part.toolCallId;
switch (part.state) {
// example of pre-rendering streaming tool inputs:
case 'input-streaming':
return (
<pre key={callId}>{JSON.stringify(part, null, 2)}</pre>
);
case 'input-available':
return (
<div key={callId}>
Getting weather information for {part.input.city}...
</div>
);
case 'output-available':
return (
<div key={callId}>
Weather in {part.input.city}: {part.output}
</div>
);
case 'output-error':
return (
<div key={callId}>
Error getting weather for {part.input.city}:{' '}
{part.errorText}
</div>
);
}
break;
}
}
})}
<br />
</div>
))}
<form
onSubmit={e => {
e.preventDefault();
if (input.trim()) {
sendMessage({ text: input });
setInput('');
}
}}
>
<input value={input} onChange={e => setInput(e.target.value)} />
</form>
</>
);
}
Error handling
Sometimes an error may occur during client-side tool execution. Use the addToolOutput method with a state of output-error and errorText value instead of output record the error.
'use client';
import { useChat } from '@ai-sdk/react';
import {
DefaultChatTransport,
lastAssistantMessageIsCompleteWithToolCalls,
} from 'ai';
import { useState } from 'react';
export default function Chat() {
const { messages, sendMessage, addToolOutput } = useChat({
transport: new DefaultChatTransport({
api: '/api/chat',
}),
sendAutomaticallyWhen: lastAssistantMessageIsCompleteWithToolCalls,
// run client-side tools that are automatically executed:
async onToolCall({ toolCall }) {
// Check if it's a dynamic tool first for proper type narrowing
if (toolCall.dynamic) {
return;
}
if (toolCall.toolName === 'getWeatherInformation') {
try {
const weather = await getWeatherInformation(toolCall.input);
// No await - avoids potential deadlocks
addToolOutput({
tool: 'getWeatherInformation',
toolCallId: toolCall.toolCallId,
output: weather,
});
} catch (err) {
addToolOutput({
tool: 'getWeatherInformation',
toolCallId: toolCall.toolCallId,
state: 'output-error',
errorText: 'Unable to get the weather information',
});
}
}
},
});
}
Tool Execution Approval
Tool execution approval lets you require user confirmation before a server-side tool runs. Unlike client-side tools that execute in the browser, tools with approval still execute on the server—but only after the user approves.
Use tool execution approval when you want to:
- Confirm sensitive operations (payments, deletions, external API calls)
- Let users review tool inputs before execution
- Add human oversight to automated workflows
For tools that need to run in the browser (updating UI state, accessing browser APIs), use client-side tools instead.
Server Setup
Enable approval by setting needsApproval on your tool. See Tool Execution Approval for configuration options including dynamic approval based on input.
import { streamText, tool } from 'ai';
__PROVIDER_IMPORT__;
import { z } from 'zod';
export async function POST(req: Request) {
const { messages } = await req.json();
const result = streamText({
model: __MODEL__,
messages,
tools: {
getWeather: tool({
description: 'Get the weather in a location',
inputSchema: z.object({
city: z.string(),
}),
needsApproval: true,
execute: async ({ city }) => {
const weather = await fetchWeather(city);
return weather;
},
}),
},
});
return result.toUIMessageStreamResponse();
}
Client-Side Approval UI
When a tool requires approval, the tool part state is approval-requested. Use addToolApprovalResponse to approve or deny:
'use client';
import { useChat } from '@ai-sdk/react';
export default function Chat() {
const { messages, addToolApprovalResponse } = useChat();
return (
<>
{messages.map(message => (
<div key={message.id}>
{message.parts.map(part => {
if (part.type === 'tool-getWeather') {
switch (part.state) {
case 'approval-requested':
return (
<div key={part.toolCallId}>
<p>Get weather for {part.input.city}?</p>
<button
onClick={() =>
addToolApprovalResponse({
id: part.approval.id,
approved: true,
})
}
>
Approve
</button>
<button
onClick={() =>
addToolApprovalResponse({
id: part.approval.id,
approved: false,
})
}
>
Deny
</button>
</div>
);
case 'output-available':
return (
<div key={part.toolCallId}>
Weather in {part.input.city}: {part.output}
</div>
);
}
}
// Handle other part types...
})}
</div>
))}
</>
);
}
Auto-Submit After Approval
If nothing happens after you approve a tool execution, make sure you either call `sendMessage` manually or configure `sendAutomaticallyWhen` on the `useChat` hook.Use lastAssistantMessageIsCompleteWithApprovalResponses to automatically continue the conversation after approvals:
import { useChat } from '@ai-sdk/react';
import { lastAssistantMessageIsCompleteWithApprovalResponses } from 'ai';
const { messages, addToolApprovalResponse } = useChat({
sendAutomaticallyWhen: lastAssistantMessageIsCompleteWithApprovalResponses,
});
Dynamic Tools
When using dynamic tools (tools with unknown types at compile time), the UI parts use a generic dynamic-tool type instead of specific tool types:
{
message.parts.map((part, index) => {
switch (part.type) {
// Static tools with specific (`tool-${toolName}`) types
case 'tool-getWeatherInformation':
return <WeatherDisplay part={part} />;
// Dynamic tools use generic `dynamic-tool` type
case 'dynamic-tool':
return (
<div key={index}>
<h4>Tool: {part.toolName}</h4>
{part.state === 'input-streaming' && (
<pre>{JSON.stringify(part.input, null, 2)}</pre>
)}
{part.state === 'output-available' && (
<pre>{JSON.stringify(part.output, null, 2)}</pre>
)}
{part.state === 'output-error' && (
<div>Error: {part.errorText}</div>
)}
</div>
);
}
});
}
Dynamic tools are useful when integrating with:
- MCP (Model Context Protocol) tools without schemas
- User-defined functions loaded at runtime
- External tool providers
Tool call streaming
Tool call streaming is enabled by default in AI SDK 5.0, allowing you to stream tool calls while they are being generated. This provides a better user experience by showing tool inputs as they are generated in real-time.
export async function POST(req: Request) {
const { messages }: { messages: UIMessage[] } = await req.json();
const result = streamText({
model: __MODEL__,
messages: await convertToModelMessages(messages),
// toolCallStreaming is enabled by default in v5
// ...
});
return result.toUIMessageStreamResponse();
}
With tool call streaming enabled, partial tool calls are streamed as part of the data stream.
They are available through the useChat hook.
The typed tool parts of assistant messages will also contain partial tool calls.
You can use the state property of the tool part to render the correct UI.
export default function Chat() {
// ...
return (
<>
{messages?.map(message => (
<div key={message.id}>
{message.parts.map(part => {
switch (part.type) {
case 'tool-askForConfirmation':
case 'tool-getLocation':
case 'tool-getWeatherInformation':
switch (part.state) {
case 'input-streaming':
return <pre>{JSON.stringify(part.input, null, 2)}</pre>;
case 'input-available':
return <pre>{JSON.stringify(part.input, null, 2)}</pre>;
case 'output-available':
return <pre>{JSON.stringify(part.output, null, 2)}</pre>;
case 'output-error':
return <div>Error: {part.errorText}</div>;
}
}
})}
</div>
))}
</>
);
}
Step start parts
When you are using multi-step tool calls, the AI SDK will add step start parts to the assistant messages.
If you want to display boundaries between tool calls, you can use the step-start parts as follows:
// ...
// where you render the message parts:
message.parts.map((part, index) => {
switch (part.type) {
case 'step-start':
// show step boundaries as horizontal lines:
return index > 0 ? (
<div key={index} className="text-gray-500">
<hr className="my-2 border-gray-300" />
</div>
) : null;
case 'text':
// ...
case 'tool-askForConfirmation':
case 'tool-getLocation':
case 'tool-getWeatherInformation':
// ...
}
});
// ...
Server-side Multi-Step Calls
You can also use multi-step calls on the server-side with streamText.
This works when all invoked tools have an execute function on the server side.
import { convertToModelMessages, streamText, UIMessage, stepCountIs } from 'ai';
__PROVIDER_IMPORT__;
import { z } from 'zod';
export async function POST(req: Request) {
const { messages }: { messages: UIMessage[] } = await req.json();
const result = streamText({
model: __MODEL__,
messages: await convertToModelMessages(messages),
tools: {
getWeatherInformation: {
description: 'show the weather in a given city to the user',
inputSchema: z.object({ city: z.string() }),
// tool has execute function:
execute: async ({}: { city: string }) => {
const weatherOptions = ['sunny', 'cloudy', 'rainy', 'snowy', 'windy'];
return weatherOptions[
Math.floor(Math.random() * weatherOptions.length)
];
},
},
},
stopWhen: stepCountIs(5),
});
return result.toUIMessageStreamResponse();
}
Errors
Language models can make errors when calling tools. By default, these errors are masked for security reasons, and show up as "An error occurred" in the UI.
To surface the errors, you can use the onError function when calling toUIMessageResponse.
export function errorHandler(error: unknown) {
if (error == null) {
return 'unknown error';
}
if (typeof error === 'string') {
return error;
}
if (error instanceof Error) {
return error.message;
}
return JSON.stringify(error);
}
const result = streamText({
// ...
});
return result.toUIMessageStreamResponse({
onError: errorHandler,
});
In case you are using createUIMessageResponse, you can use the onError function when calling toUIMessageResponse:
const response = createUIMessageResponse({
// ...
async execute(dataStream) {
// ...
},
onError: error => `Custom error: ${error.message}`,
});
title: Generative User Interfaces description: Learn how to build Generative UI with AI SDK UI.
Generative User Interfaces
Generative user interfaces (generative UI) is the process of allowing a large language model (LLM) to go beyond text and "generate UI". This creates a more engaging and AI-native experience for users.
At the core of generative UI are tools , which are functions you provide to the model to perform specialized tasks like getting the weather in a location. The model can decide when and how to use these tools based on the context of the conversation.
Generative UI is the process of connecting the results of a tool call to a React component. Here's how it works:
- You provide the model with a prompt or conversation history, along with a set of tools.
- Based on the context, the model may decide to call a tool.
- If a tool is called, it will execute and return data.
- This data can then be passed to a React component for rendering.
By passing the tool results to React components, you can create a generative UI experience that's more engaging and adaptive to your needs.
Build a Generative UI Chat Interface
Let's create a chat interface that handles text-based conversations and incorporates dynamic UI elements based on model responses.
Basic Chat Implementation
Start with a basic chat implementation using the useChat hook:
'use client';
import { useChat } from '@ai-sdk/react';
import { useState } from 'react';
export default function Page() {
const [input, setInput] = useState('');
const { messages, sendMessage } = useChat();
const handleSubmit = (e: React.FormEvent) => {
e.preventDefault();
sendMessage({ text: input });
setInput('');
};
return (
<div>
{messages.map(message => (
<div key={message.id}>
<div>{message.role === 'user' ? 'User: ' : 'AI: '}</div>
<div>
{message.parts.map((part, index) => {
if (part.type === 'text') {
return <span key={index}>{part.text}</span>;
}
return null;
})}
</div>
</div>
))}
<form onSubmit={handleSubmit}>
<input
value={input}
onChange={e => setInput(e.target.value)}
placeholder="Type a message..."
/>
<button type="submit">Send</button>
</form>
</div>
);
}
To handle the chat requests and model responses, set up an API route:
import { streamText, convertToModelMessages, UIMessage, stepCountIs } from 'ai';
__PROVIDER_IMPORT__;
export async function POST(request: Request) {
const { messages }: { messages: UIMessage[] } = await request.json();
const result = streamText({
model: __MODEL__,
system: 'You are a friendly assistant!',
messages: await convertToModelMessages(messages),
stopWhen: stepCountIs(5),
});
return result.toUIMessageStreamResponse();
}
This API route uses the streamText function to process chat messages and stream the model's responses back to the client.
Create a Tool
Before enhancing your chat interface with dynamic UI elements, you need to create a tool and corresponding React component. A tool will allow the model to perform a specific action, such as fetching weather information.
Create a new file called ai/tools.ts with the following content:
import { tool as createTool } from 'ai';
import { z } from 'zod';
export const weatherTool = createTool({
description: 'Display the weather for a location',
inputSchema: z.object({
location: z.string().describe('The location to get the weather for'),
}),
execute: async function ({ location }) {
await new Promise(resolve => setTimeout(resolve, 2000));
return { weather: 'Sunny', temperature: 75, location };
},
});
export const tools = {
displayWeather: weatherTool,
};
In this file, you've created a tool called weatherTool. This tool simulates fetching weather information for a given location. This tool will return simulated data after a 2-second delay. In a real-world application, you would replace this simulation with an actual API call to a weather service.
Update the API Route
Update the API route to include the tool you've defined:
import { streamText, convertToModelMessages, UIMessage, stepCountIs } from 'ai';
__PROVIDER_IMPORT__;
import { tools } from '@/ai/tools';
export async function POST(request: Request) {
const { messages }: { messages: UIMessage[] } = await request.json();
const result = streamText({
model: __MODEL__,
system: 'You are a friendly assistant!',
messages: await convertToModelMessages(messages),
stopWhen: stepCountIs(5),
tools,
});
return result.toUIMessageStreamResponse();
}
Now that you've defined the tool and added it to your streamText call, let's build a React component to display the weather information it returns.
Create UI Components
Create a new file called components/weather.tsx:
type WeatherProps = {
temperature: number;
weather: string;
location: string;
};
export const Weather = ({ temperature, weather, location }: WeatherProps) => {
return (
<div>
<h2>Current Weather for {location}</h2>
<p>Condition: {weather}</p>
<p>Temperature: {temperature}°C</p>
</div>
);
};
This component will display the weather information for a given location. It takes three props: temperature, weather, and location (exactly what the weatherTool returns).
Render the Weather Component
Now that you have your tool and corresponding React component, let's integrate them into your chat interface. You'll render the Weather component when the model calls the weather tool.
To check if the model has called a tool, you can check the parts array of the UIMessage object for tool-specific parts. In AI SDK 5.0, tool parts use typed naming: tool-${toolName} instead of generic types.
Update your page.tsx file:
'use client';
import { useChat } from '@ai-sdk/react';
import { useState } from 'react';
import { Weather } from '@/components/weather';
export default function Page() {
const [input, setInput] = useState('');
const { messages, sendMessage } = useChat();
const handleSubmit = (e: React.FormEvent) => {
e.preventDefault();
sendMessage({ text: input });
setInput('');
};
return (
<div>
{messages.map(message => (
<div key={message.id}>
<div>{message.role === 'user' ? 'User: ' : 'AI: '}</div>
<div>
{message.parts.map((part, index) => {
if (part.type === 'text') {
return <span key={index}>{part.text}</span>;
}
if (part.type === 'tool-displayWeather') {
switch (part.state) {
case 'input-available':
return <div key={index}>Loading weather...</div>;
case 'output-available':
return (
<div key={index}>
<Weather {...part.output} />
</div>
);
case 'output-error':
return <div key={index}>Error: {part.errorText}</div>;
default:
return null;
}
}
return null;
})}
</div>
</div>
))}
<form onSubmit={handleSubmit}>
<input
value={input}
onChange={e => setInput(e.target.value)}
placeholder="Type a message..."
/>
<button type="submit">Send</button>
</form>
</div>
);
}
In this updated code snippet, you:
- Use manual input state management with
useStateinstead of the built-ininputandhandleInputChange. - Use
sendMessageinstead ofhandleSubmitto send messages. - Check the
partsarray of each message for different content types. - Handle tool parts with type
tool-displayWeatherand their different states (input-available,output-available,output-error).
This approach allows you to dynamically render UI components based on the model's responses, creating a more interactive and context-aware chat experience.
Expanding Your Generative UI Application
You can enhance your chat application by adding more tools and components, creating a richer and more versatile user experience. Here's how you can expand your application:
Adding More Tools
To add more tools, simply define them in your ai/tools.ts file:
// Add a new stock tool
export const stockTool = createTool({
description: 'Get price for a stock',
inputSchema: z.object({
symbol: z.string().describe('The stock symbol to get the price for'),
}),
execute: async function ({ symbol }) {
// Simulated API call
await new Promise(resolve => setTimeout(resolve, 2000));
return { symbol, price: 100 };
},
});
// Update the tools object
export const tools = {
displayWeather: weatherTool,
getStockPrice: stockTool,
};
Now, create a new file called components/stock.tsx:
type StockProps = {
price: number;
symbol: string;
};
export const Stock = ({ price, symbol }: StockProps) => {
return (
<div>
<h2>Stock Information</h2>
<p>Symbol: {symbol}</p>
<p>Price: ${price}</p>
</div>
);
};
Finally, update your page.tsx file to include the new Stock component:
'use client';
import { useChat } from '@ai-sdk/react';
import { useState } from 'react';
import { Weather } from '@/components/weather';
import { Stock } from '@/components/stock';
export default function Page() {
const [input, setInput] = useState('');
const { messages, sendMessage } = useChat();
const handleSubmit = (e: React.FormEvent) => {
e.preventDefault();
sendMessage({ text: input });
setInput('');
};
return (
<div>
{messages.map(message => (
<div key={message.id}>
<div>{message.role}</div>
<div>
{message.parts.map((part, index) => {
if (part.type === 'text') {
return <span key={index}>{part.text}</span>;
}
if (part.type === 'tool-displayWeather') {
switch (part.state) {
case 'input-available':
return <div key={index}>Loading weather...</div>;
case 'output-available':
return (
<div key={index}>
<Weather {...part.output} />
</div>
);
case 'output-error':
return <div key={index}>Error: {part.errorText}</div>;
default:
return null;
}
}
if (part.type === 'tool-getStockPrice') {
switch (part.state) {
case 'input-available':
return <div key={index}>Loading stock price...</div>;
case 'output-available':
return (
<div key={index}>
<Stock {...part.output} />
</div>
);
case 'output-error':
return <div key={index}>Error: {part.errorText}</div>;
default:
return null;
}
}
return null;
})}
</div>
</div>
))}
<form onSubmit={handleSubmit}>
<input
type="text"
value={input}
onChange={e => setInput(e.target.value)}
/>
<button type="submit">Send</button>
</form>
</div>
);
}
By following this pattern, you can continue to add more tools and components, expanding the capabilities of your Generative UI application.
title: Completion description: Learn how to use the useCompletion hook.
Completion
The useCompletion hook allows you to create a user interface to handle text completions in your application. It enables the streaming of text completions from your AI provider, manages the state for chat input, and updates the UI automatically as new messages are received.
In this guide, you will learn how to use the useCompletion hook in your application to generate text completions and stream them in real-time to your users.
Example
'use client';
import { useCompletion } from '@ai-sdk/react';
export default function Page() {
const { completion, input, handleInputChange, handleSubmit } = useCompletion({
api: '/api/completion',
});
return (
<form onSubmit={handleSubmit}>
<input
name="prompt"
value={input}
onChange={handleInputChange}
id="input"
/>
<button type="submit">Submit</button>
<div>{completion}</div>
</form>
);
}
import { streamText } from 'ai';
__PROVIDER_IMPORT__;
// Allow streaming responses up to 30 seconds
export const maxDuration = 30;
export async function POST(req: Request) {
const { prompt }: { prompt: string } = await req.json();
const result = streamText({
model: __MODEL__,
prompt,
});
return result.toUIMessageStreamResponse();
}
In the Page component, the useCompletion hook will request to your AI provider endpoint whenever the user submits a message. The completion is then streamed back in real-time and displayed in the UI.
This enables a seamless text completion experience where the user can see the AI response as soon as it is available, without having to wait for the entire response to be received.
Customized UI
useCompletion also provides ways to manage the prompt via code, show loading and error states, and update messages without being triggered by user interactions.
Loading and error states
To show a loading spinner while the chatbot is processing the user's message, you can use the isLoading state returned by the useCompletion hook:
const { isLoading, ... } = useCompletion()
return(
<>
{isLoading ? <Spinner /> : null}
</>
)
Similarly, the error state reflects the error object thrown during the fetch request. It can be used to display an error message, or show a toast notification:
const { error, ... } = useCompletion()
useEffect(() => {
if (error) {
toast.error(error.message)
}
}, [error])
// Or display the error message in the UI:
return (
<>
{error ? <div>{error.message}</div> : null}
</>
)
Controlled input
In the initial example, we have handleSubmit and handleInputChange callbacks that manage the input changes and form submissions. These are handy for common use cases, but you can also use uncontrolled APIs for more advanced scenarios such as form validation or customized components.
The following example demonstrates how to use more granular APIs like setInput with your custom input and submit button components:
const { input, setInput } = useCompletion();
return (
<>
<MyCustomInput value={input} onChange={value => setInput(value)} />
</>
);
Cancelation
It's also a common use case to abort the response message while it's still streaming back from the AI provider. You can do this by calling the stop function returned by the useCompletion hook.
const { stop, isLoading, ... } = useCompletion()
return (
<>
<button onClick={stop} disabled={!isLoading}>Stop</button>
</>
)
When the user clicks the "Stop" button, the fetch request will be aborted. This avoids consuming unnecessary resources and improves the UX of your application.
Throttling UI Updates
This feature is currently only available for React.
By default, the useCompletion hook will trigger a render every time a new chunk is received.
You can throttle the UI updates with the experimental_throttle option.
const { completion, ... } = useCompletion({
// Throttle the completion and data updates to 50ms:
experimental_throttle: 50
})
Event Callbacks
useCompletion also provides optional event callbacks that you can use to handle different stages of the chatbot lifecycle. These callbacks can be used to trigger additional actions, such as logging, analytics, or custom UI updates.
const { ... } = useCompletion({
onResponse: (response: Response) => {
console.log('Received response from server:', response)
},
onFinish: (prompt: string, completion: string) => {
console.log('Finished streaming completion:', completion)
},
onError: (error: Error) => {
console.error('An error occurred:', error)
},
})
It's worth noting that you can abort the processing by throwing an error in the onResponse callback. This will trigger the onError callback and stop the message from being appended to the chat UI. This can be useful for handling unexpected responses from the AI provider.
Configure Request Options
By default, the useCompletion hook sends a HTTP POST request to the /api/completion endpoint with the prompt as part of the request body. You can customize the request by passing additional options to the useCompletion hook:
const { messages, input, handleInputChange, handleSubmit } = useCompletion({
api: '/api/custom-completion',
headers: {
Authorization: 'your_token',
},
body: {
user_id: '123',
},
credentials: 'same-origin',
});
In this example, the useCompletion hook sends a POST request to the /api/completion endpoint with the specified headers, additional body fields, and credentials for that fetch request. On your server side, you can handle the request with these additional information.
title: Object Generation description: Learn how to use the useObject hook.
Object Generation
`useObject` is an experimental feature and only available in React, Svelte, and Vue.The useObject hook allows you to create interfaces that represent a structured JSON object that is being streamed.
In this guide, you will learn how to use the useObject hook in your application to generate UIs for structured data on the fly.
Example
The example shows a small notifications demo app that generates fake notifications in real-time.
Schema
It is helpful to set up the schema in a separate file that is imported on both the client and server.
import { z } from 'zod';
// define a schema for the notifications
export const notificationSchema = z.object({
notifications: z.array(
z.object({
name: z.string().describe('Name of a fictional person.'),
message: z.string().describe('Message. Do not use emojis or links.'),
}),
),
});
Client
The client uses useObject to stream the object generation process.
The results are partial and are displayed as they are received.
Please note the code for handling undefined values in the JSX.
'use client';
import { experimental_useObject as useObject } from '@ai-sdk/react';
import { notificationSchema } from './api/notifications/schema';
export default function Page() {
const { object, submit } = useObject({
api: '/api/notifications',
schema: notificationSchema,
});
return (
<>
<button onClick={() => submit('Messages during finals week.')}>
Generate notifications
</button>
{object?.notifications?.map((notification, index) => (
<div key={index}>
<p>{notification?.name}</p>
<p>{notification?.message}</p>
</div>
))}
</>
);
}
Server
On the server, we use streamText with Output.object() to stream the object generation process.
import { streamText, Output } from 'ai';
__PROVIDER_IMPORT__;
import { notificationSchema } from './schema';
// Allow streaming responses up to 30 seconds
export const maxDuration = 30;
export async function POST(req: Request) {
const context = await req.json();
const result = streamText({
model: __MODEL__,
output: Output.object({ schema: notificationSchema }),
prompt:
`Generate 3 notifications for a messages app in this context:` + context,
});
return result.toTextStreamResponse();
}
Enum Output Mode
When you need to classify or categorize input into predefined options, you can use the enum output mode with useObject. This requires a specific schema structure where the object has enum as a key with z.enum containing your possible values.
Example: Text Classification
This example shows how to build a simple text classifier that categorizes statements as true or false.
Client
When using useObject with enum output mode, your schema must be an object with enum as the key:
'use client';
import { experimental_useObject as useObject } from '@ai-sdk/react';
import { z } from 'zod';
export default function ClassifyPage() {
const { object, submit, isLoading } = useObject({
api: '/api/classify',
schema: z.object({ enum: z.enum(['true', 'false']) }),
});
return (
<>
<button onClick={() => submit('The earth is flat')} disabled={isLoading}>
Classify statement
</button>
{object && <div>Classification: {object.enum}</div>}
</>
);
}
Server
On the server, use streamText with Output.choice() to stream the classification result:
import { streamText, Output } from 'ai';
__PROVIDER_IMPORT__;
export async function POST(req: Request) {
const context = await req.json();
const result = streamText({
model: __MODEL__,
output: Output.choice({ options: ['true', 'false'] }),
prompt: `Classify this statement as true or false: ${context}`,
});
return result.toTextStreamResponse();
}
Customized UI
useObject also provides ways to show loading and error states:
Loading State
The isLoading state returned by the useObject hook can be used for several
purposes:
- To show a loading spinner while the object is generated.
- To disable the submit button.
'use client';
import { useObject } from '@ai-sdk/react';
export default function Page() {
const { isLoading, object, submit } = useObject({
api: '/api/notifications',
schema: notificationSchema,
});
return (
<>
{isLoading && <Spinner />}
<button
onClick={() => submit('Messages during finals week.')}
disabled={isLoading}
>
Generate notifications
</button>
{object?.notifications?.map((notification, index) => (
<div key={index}>
<p>{notification?.name}</p>
<p>{notification?.message}</p>
</div>
))}
</>
);
}
Stop Handler
The stop function can be used to stop the object generation process. This can be useful if the user wants to cancel the request or if the server is taking too long to respond.
'use client';
import { useObject } from '@ai-sdk/react';
export default function Page() {
const { isLoading, stop, object, submit } = useObject({
api: '/api/notifications',
schema: notificationSchema,
});
return (
<>
{isLoading && (
<button type="button" onClick={() => stop()}>
Stop
</button>
)}
<button onClick={() => submit('Messages during finals week.')}>
Generate notifications
</button>
{object?.notifications?.map((notification, index) => (
<div key={index}>
<p>{notification?.name}</p>
<p>{notification?.message}</p>
</div>
))}
</>
);
}
Error State
Similarly, the error state reflects the error object thrown during the fetch request.
It can be used to display an error message, or to disable the submit button:
'use client';
import { useObject } from '@ai-sdk/react';
export default function Page() {
const { error, object, submit } = useObject({
api: '/api/notifications',
schema: notificationSchema,
});
return (
<>
{error && <div>An error occurred.</div>}
<button onClick={() => submit('Messages during finals week.')}>
Generate notifications
</button>
{object?.notifications?.map((notification, index) => (
<div key={index}>
<p>{notification?.name}</p>
<p>{notification?.message}</p>
</div>
))}
</>
);
}
Event Callbacks
useObject provides optional event callbacks that you can use to handle life-cycle events.
onFinish: Called when the object generation is completed.onError: Called when an error occurs during the fetch request.
These callbacks can be used to trigger additional actions, such as logging, analytics, or custom UI updates.
'use client';
import { experimental_useObject as useObject } from '@ai-sdk/react';
import { notificationSchema } from './api/notifications/schema';
export default function Page() {
const { object, submit } = useObject({
api: '/api/notifications',
schema: notificationSchema,
onFinish({ object, error }) {
// typed object, undefined if schema validation fails:
console.log('Object generation completed:', object);
// error, undefined if schema validation succeeds:
console.log('Schema validation error:', error);
},
onError(error) {
// error during fetch request:
console.error('An error occurred:', error);
},
});
return (
<div>
<button onClick={() => submit('Messages during finals week.')}>
Generate notifications
</button>
{object?.notifications?.map((notification, index) => (
<div key={index}>
<p>{notification?.name}</p>
<p>{notification?.message}</p>
</div>
))}
</div>
);
}
Configure Request Options
You can configure the API endpoint, optional headers and credentials using the api, headers and credentials settings.
const { submit, object } = useObject({
api: '/api/use-object',
headers: {
'X-Custom-Header': 'CustomValue',
},
credentials: 'include',
schema: yourSchema,
});
title: Streaming Custom Data description: Learn how to stream custom data from the server to the client.
Streaming Custom Data
It is often useful to send additional data alongside the model's response. For example, you may want to send status information, the message ids after storing them, or references to content that the language model is referring to.
The AI SDK provides several helpers that allows you to stream additional data to the client
and attach it to the UIMessage parts array:
createUIMessageStream: creates a data streamcreateUIMessageStreamResponse: creates a response object that streams datapipeUIMessageStreamToResponse: pipes a data stream to a server response object
The data is streamed as part of the response stream using Server-Sent Events.
Setting Up Type-Safe Data Streaming
First, define your custom message type with data part schemas for type safety:
import { UIMessage } from 'ai';
// Define your custom message type with data part schemas
export type MyUIMessage = UIMessage<
never, // metadata type
{
weather: {
city: string;
weather?: string;
status: 'loading' | 'success';
};
notification: {
message: string;
level: 'info' | 'warning' | 'error';
};
} // data parts type
>;
Streaming Data from the Server
In your server-side route handler, you can create a UIMessageStream and then pass it to createUIMessageStreamResponse:
import { openai } from '@ai-sdk/openai';
import {
createUIMessageStream,
createUIMessageStreamResponse,
streamText,
convertToModelMessages,
} from 'ai';
__PROVIDER_IMPORT__;
import type { MyUIMessage } from '@/ai/types';
export async function POST(req: Request) {
const { messages } = await req.json();
const stream = createUIMessageStream<MyUIMessage>({
execute: ({ writer }) => {
// 1. Send initial status (transient - won't be added to message history)
writer.write({
type: 'data-notification',
data: { message: 'Processing your request...', level: 'info' },
transient: true, // This part won't be added to message history
});
// 2. Send sources (useful for RAG use cases)
writer.write({
type: 'source',
value: {
type: 'source',
sourceType: 'url',
id: 'source-1',
url: 'https://weather.com',
title: 'Weather Data Source',
},
});
// 3. Send data parts with loading state
writer.write({
type: 'data-weather',
id: 'weather-1',
data: { city: 'San Francisco', status: 'loading' },
});
const result = streamText({
model: __MODEL__,
messages: await convertToModelMessages(messages),
onFinish() {
// 4. Update the same data part (reconciliation)
writer.write({
type: 'data-weather',
id: 'weather-1', // Same ID = update existing part
data: {
city: 'San Francisco',
weather: 'sunny',
status: 'success',
},
});
// 5. Send completion notification (transient)
writer.write({
type: 'data-notification',
data: { message: 'Request completed', level: 'info' },
transient: true, // Won't be added to message history
});
},
});
writer.merge(result.toUIMessageStream());
},
});
return createUIMessageStreamResponse({ stream });
}
Types of Streamable Data
Data Parts (Persistent)
Regular data parts are added to the message history and appear in message.parts:
writer.write({
type: 'data-weather',
id: 'weather-1', // Optional: enables reconciliation
data: { city: 'San Francisco', status: 'loading' },
});
Sources
Sources are useful for RAG implementations where you want to show which documents or URLs were referenced:
writer.write({
type: 'source',
value: {
type: 'source',
sourceType: 'url',
id: 'source-1',
url: 'https://example.com',
title: 'Example Source',
},
});
Transient Data Parts (Ephemeral)
Transient parts are sent to the client but not added to the message history. They are only accessible via the onData useChat handler:
// server
writer.write({
type: 'data-notification',
data: { message: 'Processing...', level: 'info' },
transient: true, // Won't be added to message history
});
// client
const [notification, setNotification] = useState();
const { messages } = useChat({
onData: ({ data, type }) => {
if (type === 'data-notification') {
setNotification({ message: data.message, level: data.level });
}
},
});
Data Part Reconciliation
When you write to a data part with the same ID, the client automatically reconciles and updates that part. This enables powerful dynamic experiences like:
- Collaborative artifacts - Update code, documents, or designs in real-time
- Progressive data loading - Show loading states that transform into final results
- Live status updates - Update progress bars, counters, or status indicators
- Interactive components - Build UI elements that evolve based on user interaction
The reconciliation happens automatically - simply use the same id when writing to the stream.
Processing Data on the Client
Using the onData Callback
The onData callback is essential for handling streaming data, especially transient parts:
import { useChat } from '@ai-sdk/react';
import type { MyUIMessage } from '@/ai/types';
const { messages } = useChat<MyUIMessage>({
api: '/api/chat',
onData: dataPart => {
// Handle all data parts as they arrive (including transient parts)
console.log('Received data part:', dataPart);
// Handle different data part types
if (dataPart.type === 'data-weather') {
console.log('Weather update:', dataPart.data);
}
// Handle transient notifications (ONLY available here, not in message.parts)
if (dataPart.type === 'data-notification') {
showToast(dataPart.data.message, dataPart.data.level);
}
},
});
Important: Transient data parts are only available through the onData callback. They will not appear in the message.parts array since they're not added to message history.
Rendering Persistent Data Parts
You can filter and render data parts from the message parts array:
const result = (
<>
{messages?.map(message => (
<div key={message.id}>
{/* Render weather data parts */}
{message.parts
.filter(part => part.type === 'data-weather')
.map((part, index) => (
<div key={index} className="weather-widget">
{part.data.status === 'loading' ? (
<>Getting weather for {part.data.city}...</>
) : (
<>
Weather in {part.data.city}: {part.data.weather}
</>
)}
</div>
))}
{/* Render text content */}
{message.parts
.filter(part => part.type === 'text')
.map((part, index) => (
<div key={index}>{part.text}</div>
))}
{/* Render sources */}
{message.parts
.filter(part => part.type === 'source')
.map((part, index) => (
<div key={index} className="source">
Source: <a href={part.url}>{part.title}</a>
</div>
))}
</div>
))}
</>
);
Complete Example
'use client';
import { useChat } from '@ai-sdk/react';
import { useState } from 'react';
import type { MyUIMessage } from '@/ai/types';
export default function Chat() {
const [input, setInput] = useState('');
const { messages, sendMessage } = useChat<MyUIMessage>({
api: '/api/chat',
onData: dataPart => {
// Handle transient notifications
if (dataPart.type === 'data-notification') {
console.log('Notification:', dataPart.data.message);
}
},
});
const handleSubmit = (e: React.FormEvent) => {
e.preventDefault();
sendMessage({ text: input });
setInput('');
};
return (
<>
{messages?.map(message => (
<div key={message.id}>
{message.role === 'user' ? 'User: ' : 'AI: '}
{/* Render weather data */}
{message.parts
.filter(part => part.type === 'data-weather')
.map((part, index) => (
<span key={index} className="weather-update">
{part.data.status === 'loading' ? (
<>Getting weather for {part.data.city}...</>
) : (
<>
Weather in {part.data.city}: {part.data.weather}
</>
)}
</span>
))}
{/* Render text content */}
{message.parts
.filter(part => part.type === 'text')
.map((part, index) => (
<div key={index}>{part.text}</div>
))}
</div>
))}
<form onSubmit={handleSubmit}>
<input
value={input}
onChange={e => setInput(e.target.value)}
placeholder="Ask about the weather..."
/>
<button type="submit">Send</button>
</form>
</>
);
}
Use Cases
- RAG Applications - Stream sources and retrieved documents
- Real-time Status - Show loading states and progress updates
- Collaborative Tools - Stream live updates to shared artifacts
- Analytics - Send usage data without cluttering message history
- Notifications - Display temporary alerts and status messages
Message Metadata vs Data Parts
Both message metadata and data parts allow you to send additional information alongside messages, but they serve different purposes:
Message Metadata
Message metadata is best for message-level information that describes the message as a whole:
- Attached at the message level via
message.metadata - Sent using the
messageMetadatacallback intoUIMessageStreamResponse - Ideal for: timestamps, model info, token usage, user context
- Type-safe with custom metadata types
// Server: Send metadata about the message
return result.toUIMessageStreamResponse({
messageMetadata: ({ part }) => {
if (part.type === 'finish') {
return {
model: part.response.modelId,
totalTokens: part.totalUsage.totalTokens,
createdAt: Date.now(),
};
}
},
});
Data Parts
Data parts are best for streaming dynamic arbitrary data:
- Added to the message parts array via
message.parts - Streamed using
createUIMessageStreamandwriter.write() - Can be reconciled/updated using the same ID
- Support transient parts that don't persist
- Ideal for: dynamic content, loading states, interactive components
// Server: Stream data as part of message content
writer.write({
type: 'data-weather',
id: 'weather-1',
data: { city: 'San Francisco', status: 'loading' },
});
For more details on message metadata, see the Message Metadata documentation.
title: Error Handling description: Learn how to handle errors in the AI SDK UI
Error Handling and warnings
Warnings
The AI SDK shows warnings when something might not work as expected. These warnings help you fix problems before they cause errors.
When Warnings Appear
Warnings are shown in the browser console when:
- Unsupported features: You use a feature or setting that is not supported by the AI model (e.g., certain options or parameters).
- Compatibility warnings: A feature is used in a compatibility mode, which might work differently or less optimally than intended.
- Other warnings: The AI model reports another type of issue, such as general problems or advisory messages.
Warning Messages
All warnings start with "AI SDK Warning:" so you can easily find them. For example:
AI SDK Warning: The feature "temperature" is not supported by this model
Turning Off Warnings
By default, warnings are shown in the console. You can control this behavior:
Turn Off All Warnings
Set a global variable to turn off warnings completely:
globalThis.AI_SDK_LOG_WARNINGS = false;
Custom Warning Handler
You can also provide your own function to handle warnings. It receives provider id, model id, and a list of warnings.
globalThis.AI_SDK_LOG_WARNINGS = ({ warnings, provider, model }) => {
// Handle warnings your own way
};
Error Handling
Error Helper Object
Each AI SDK UI hook also returns an error object that you can use to render the error in your UI. You can use the error object to show an error message, disable the submit button, or show a retry button.
We recommend showing a generic error message to the user, such as "Something went wrong." This is a good practice to avoid leaking information from the server.'use client';
import { useChat } from '@ai-sdk/react';
import { useState } from 'react';
export default function Chat() {
const [input, setInput] = useState('');
const { messages, sendMessage, error, regenerate } = useChat();
const handleSubmit = (e: React.FormEvent) => {
e.preventDefault();
sendMessage({ text: input });
setInput('');
};
return (
<div>
{messages.map(m => (
<div key={m.id}>
{m.role}:{' '}
{m.parts
.filter(part => part.type === 'text')
.map(part => part.text)
.join('')}
</div>
))}
{error && (
<>
<div>An error occurred.</div>
<button type="button" onClick={() => regenerate()}>
Retry
</button>
</>
)}
<form onSubmit={handleSubmit}>
<input
value={input}
onChange={e => setInput(e.target.value)}
disabled={error != null}
/>
</form>
</div>
);
}
Alternative: replace last message
Alternatively you can write a custom submit handler that replaces the last message when an error is present.
'use client';
import { useChat } from '@ai-sdk/react';
import { useState } from 'react';
export default function Chat() {
const [input, setInput] = useState('');
const { sendMessage, error, messages, setMessages } = useChat();
function customSubmit(event: React.FormEvent<HTMLFormElement>) {
event.preventDefault();
if (error != null) {
setMessages(messages.slice(0, -1)); // remove last message
}
sendMessage({ text: input });
setInput('');
}
return (
<div>
{messages.map(m => (
<div key={m.id}>
{m.role}:{' '}
{m.parts
.filter(part => part.type === 'text')
.map(part => part.text)
.join('')}
</div>
))}
{error && <div>An error occurred.</div>}
<form onSubmit={customSubmit}>
<input value={input} onChange={e => setInput(e.target.value)} />
</form>
</div>
);
}
Error Handling Callback
Errors can be processed by passing an onError callback function as an option to the useChat or useCompletion hooks.
The callback function receives an error object as an argument.
import { useChat } from '@ai-sdk/react';
export default function Page() {
const {
/* ... */
} = useChat({
// handle error:
onError: error => {
console.error(error);
},
});
}
Injecting Errors for Testing
You might want to create errors for testing. You can easily do so by throwing an error in your route handler:
export async function POST(req: Request) {
throw new Error('This is a test error');
}
title: Transport description: Learn how to use custom transports with useChat.
Transport
The useChat transport system provides fine-grained control over how messages are sent to your API endpoints and how responses are processed. This is particularly useful for alternative communication protocols like WebSockets, custom authentication patterns, or specialized backend integrations.
Default Transport
By default, useChat uses HTTP POST requests to send messages to /api/chat:
import { useChat } from '@ai-sdk/react';
// Uses default HTTP transport
const { messages, sendMessage } = useChat();
This is equivalent to:
import { useChat } from '@ai-sdk/react';
import { DefaultChatTransport } from 'ai';
const { messages, sendMessage } = useChat({
transport: new DefaultChatTransport({
api: '/api/chat',
}),
});
Custom Transport Configuration
Configure the default transport with custom options:
import { useChat } from '@ai-sdk/react';
import { DefaultChatTransport } from 'ai';
const { messages, sendMessage } = useChat({
transport: new DefaultChatTransport({
api: '/api/custom-chat',
headers: {
Authorization: 'Bearer your-token',
'X-API-Version': '2024-01',
},
credentials: 'include',
}),
});
Dynamic Configuration
You can also provide functions that return configuration values. This is useful for authentication tokens that need to be refreshed, or for configuration that depends on runtime conditions:
const { messages, sendMessage } = useChat({
transport: new DefaultChatTransport({
api: '/api/chat',
headers: () => ({
Authorization: `Bearer ${getAuthToken()}`,
'X-User-ID': getCurrentUserId(),
}),
body: () => ({
sessionId: getCurrentSessionId(),
preferences: getUserPreferences(),
}),
credentials: () => 'include',
}),
});
Request Transformation
Transform requests before sending to your API:
const { messages, sendMessage } = useChat({
transport: new DefaultChatTransport({
api: '/api/chat',
prepareSendMessagesRequest: ({ id, messages, trigger, messageId }) => {
return {
headers: {
'X-Session-ID': id,
},
body: {
messages: messages.slice(-10), // Only send last 10 messages
trigger,
messageId,
},
};
},
}),
});
Direct Agent Transport
For scenarios where you want to communicate directly with an Agent without going through HTTP, you can use DirectChatTransport. This transport invokes the agent's stream() method directly in-process.
This is useful for:
- Server-side rendering: Run the agent on the server without an API endpoint
- Testing: Test chat functionality without network requests
- Single-process applications: Desktop or CLI apps where client and agent run together
import { useChat } from '@ai-sdk/react';
import { DirectChatTransport, ToolLoopAgent } from 'ai';
__PROVIDER_IMPORT__;
const agent = new ToolLoopAgent({
model: __MODEL__,
instructions: 'You are a helpful assistant.',
tools: {
weather: weatherTool,
},
});
const { messages, sendMessage } = useChat({
transport: new DirectChatTransport({ agent }),
});
How It Works
Unlike DefaultChatTransport which sends HTTP requests:
DirectChatTransportvalidates incoming UI messages- Converts them to model messages using
convertToModelMessages - Calls the agent's
stream()method directly - Returns the result as a UI message stream via
toUIMessageStream()
Configuration Options
You can pass additional options to customize the stream output:
const transport = new DirectChatTransport({
agent,
// Pass options to the agent
options: { customOption: 'value' },
// Configure what's sent to the client
sendReasoning: true,
sendSources: true,
});
For complete API details, see the DirectChatTransport reference.
Building Custom Transports
To understand how to build your own transport, refer to the source code of the default implementation:
- DefaultChatTransport - The complete default HTTP transport implementation
- HttpChatTransport - Base HTTP transport with request handling
- ChatTransport Interface - The transport interface you need to implement
These implementations show you exactly how to:
- Handle the
sendMessagesmethod - Process UI message streams
- Transform requests and responses
- Handle errors and connection management
The transport system gives you complete control over how your chat application communicates, enabling integration with any backend protocol or service.
title: Reading UIMessage Streams description: Learn how to read UIMessage streams.
Reading UI Message Streams
UIMessage streams are useful outside of traditional chat use cases. You can consume them for terminal UIs, custom stream processing on the client, or React Server Components (RSC).
The readUIMessageStream helper transforms a stream of UIMessageChunk objects into an AsyncIterableStream of UIMessage objects, allowing you to process messages as they're being constructed.
Basic Usage
import { readUIMessageStream, streamText } from 'ai';
__PROVIDER_IMPORT__;
async function main() {
const result = streamText({
model: __MODEL__,
prompt: 'Write a short story about a robot.',
});
for await (const uiMessage of readUIMessageStream({
stream: result.toUIMessageStream(),
})) {
console.log('Current message state:', uiMessage);
}
}
Tool Calls Integration
Handle streaming responses that include tool calls:
import { readUIMessageStream, streamText, tool } from 'ai';
__PROVIDER_IMPORT__;
import { z } from 'zod';
async function handleToolCalls() {
const result = streamText({
model: __MODEL__,
tools: {
weather: tool({
description: 'Get the weather in a location',
inputSchema: z.object({
location: z.string().describe('The location to get the weather for'),
}),
execute: ({ location }) => ({
location,
temperature: 72 + Math.floor(Math.random() * 21) - 10,
}),
}),
},
prompt: 'What is the weather in Tokyo?',
});
for await (const uiMessage of readUIMessageStream({
stream: result.toUIMessageStream(),
})) {
// Handle different part types
uiMessage.parts.forEach(part => {
switch (part.type) {
case 'text':
console.log('Text:', part.text);
break;
case 'tool-call':
console.log('Tool called:', part.toolName, 'with args:', part.args);
break;
case 'tool-result':
console.log('Tool result:', part.result);
break;
}
});
}
}
Resuming Conversations
Resume streaming from a previous message state:
import { readUIMessageStream, streamText } from 'ai';
__PROVIDER_IMPORT__;
async function resumeConversation(lastMessage: UIMessage) {
const result = streamText({
model: __MODEL__,
messages: [
{ role: 'user', content: 'Continue our previous conversation.' },
],
});
// Resume from the last message
for await (const uiMessage of readUIMessageStream({
stream: result.toUIMessageStream(),
message: lastMessage, // Resume from this message
})) {
console.log('Resumed message:', uiMessage);
}
}
title: Message Metadata description: Learn how to attach and use metadata with messages in AI SDK UI
Message Metadata
Message metadata allows you to attach custom information to messages at the message level. This is useful for tracking timestamps, model information, token usage, user context, and other message-level data.
Overview
Message metadata differs from data parts in that it's attached at the message level rather than being part of the message content. While data parts are ideal for dynamic content that forms part of the message, metadata is perfect for information about the message itself.
Getting Started
Here's a simple example of using message metadata to track timestamps and model information:
Defining Metadata Types
First, define your metadata type for type safety:
import { UIMessage } from 'ai';
import { z } from 'zod';
// Define your metadata schema
export const messageMetadataSchema = z.object({
createdAt: z.number().optional(),
model: z.string().optional(),
totalTokens: z.number().optional(),
});
export type MessageMetadata = z.infer<typeof messageMetadataSchema>;
// Create a typed UIMessage
export type MyUIMessage = UIMessage<MessageMetadata>;
Sending Metadata from the Server
Use the messageMetadata callback in toUIMessageStreamResponse to send metadata at different streaming stages:
import { convertToModelMessages, streamText } from 'ai';
__PROVIDER_IMPORT__;
import type { MyUIMessage } from '@/types';
export async function POST(req: Request) {
const { messages }: { messages: MyUIMessage[] } = await req.json();
const result = streamText({
model: __MODEL__,
messages: await convertToModelMessages(messages),
});
return result.toUIMessageStreamResponse({
originalMessages: messages, // pass this in for type-safe return objects
messageMetadata: ({ part }) => {
// Send metadata when streaming starts
if (part.type === 'start') {
return {
createdAt: Date.now(),
model: 'your-model-id',
};
}
// Send additional metadata when streaming completes
if (part.type === 'finish') {
return {
totalTokens: part.totalUsage.totalTokens,
};
}
},
});
}
Accessing Metadata on the Client
Access metadata through the message.metadata property:
'use client';
import { useChat } from '@ai-sdk/react';
import { DefaultChatTransport } from 'ai';
import type { MyUIMessage } from '@/types';
export default function Chat() {
const { messages } = useChat<MyUIMessage>({
transport: new DefaultChatTransport({
api: '/api/chat',
}),
});
return (
<div>
{messages.map(message => (
<div key={message.id}>
<div>
{message.role === 'user' ? 'User: ' : 'AI: '}
{message.metadata?.createdAt && (
<span className="text-sm text-gray-500">
{new Date(message.metadata.createdAt).toLocaleTimeString()}
</span>
)}
</div>
{/* Render message content */}
{message.parts.map((part, index) =>
part.type === 'text' ? <div key={index}>{part.text}</div> : null,
)}
{/* Display additional metadata */}
{message.metadata?.totalTokens && (
<div className="text-xs text-gray-400">
{message.metadata.totalTokens} tokens
</div>
)}
</div>
))}
</div>
);
}
Common Use Cases
Message metadata is ideal for:
- Timestamps: When messages were created or completed
- Model Information: Which AI model was used
- Token Usage: Track costs and usage limits
- User Context: User IDs, session information
- Performance Metrics: Generation time, time to first token
- Quality Indicators: Finish reason, confidence scores
See Also
- Chatbot Guide - Message metadata in the context of building chatbots
- Streaming Data - Comparison with data parts
- UIMessage Reference - Complete UIMessage type reference
title: AI_APICallError description: Learn how to fix AI_APICallError
AI_APICallError
This error occurs when an API call fails.
Properties
url: The URL of the API request that failedrequestBodyValues: The request body values sent to the APIstatusCode: The HTTP status code returned by the APIresponseHeaders: The response headers returned by the APIresponseBody: The response body returned by the APIisRetryable: Whether the request can be retried based on the status codedata: Any additional data associated with the error
Checking for this Error
You can check if an error is an instance of AI_APICallError using:
import { APICallError } from 'ai';
if (APICallError.isInstance(error)) {
// Handle the error
}
title: AI_DownloadError description: Learn how to fix AI_DownloadError
AI_DownloadError
This error occurs when a download fails.
Properties
url: The URL that failed to downloadstatusCode: The HTTP status code returned by the serverstatusText: The HTTP status text returned by the servermessage: The error message containing details about the download failure
Checking for this Error
You can check if an error is an instance of AI_DownloadError using:
import { DownloadError } from 'ai';
if (DownloadError.isInstance(error)) {
// Handle the error
}
title: AI_EmptyResponseBodyError description: Learn how to fix AI_EmptyResponseBodyError
AI_EmptyResponseBodyError
This error occurs when the server returns an empty response body.
Properties
message: The error message
Checking for this Error
You can check if an error is an instance of AI_EmptyResponseBodyError using:
import { EmptyResponseBodyError } from 'ai';
if (EmptyResponseBodyError.isInstance(error)) {
// Handle the error
}
title: AI_InvalidArgumentError description: Learn how to fix AI_InvalidArgumentError
AI_InvalidArgumentError
This error occurs when an invalid argument was provided.
Properties
parameter: The name of the parameter that is invalidvalue: The invalid valuemessage: The error message
Checking for this Error
You can check if an error is an instance of AI_InvalidArgumentError using:
import { InvalidArgumentError } from 'ai';
if (InvalidArgumentError.isInstance(error)) {
// Handle the error
}
title: AI_InvalidDataContentError description: How to fix AI_InvalidDataContentError
AI_InvalidDataContentError
This error occurs when the data content provided in a multi-modal message part is invalid. Check out the prompt examples for multi-modal messages .
Properties
content: The invalid content valuemessage: The error message describing the expected and received content types
Checking for this Error
You can check if an error is an instance of AI_InvalidDataContentError using:
import { InvalidDataContentError } from 'ai';
if (InvalidDataContentError.isInstance(error)) {
// Handle the error
}
title: AI_InvalidDataContent description: Learn how to fix AI_InvalidDataContent
AI_InvalidDataContent
This error occurs when invalid data content is provided.
Properties
content: The invalid content valuemessage: The error messagecause: The cause of the error
Checking for this Error
You can check if an error is an instance of AI_InvalidDataContent using:
import { InvalidDataContent } from 'ai';
if (InvalidDataContent.isInstance(error)) {
// Handle the error
}
title: AI_InvalidMessageRoleError description: Learn how to fix AI_InvalidMessageRoleError
AI_InvalidMessageRoleError
This error occurs when an invalid message role is provided.
Properties
role: The invalid role valuemessage: The error message
Checking for this Error
You can check if an error is an instance of AI_InvalidMessageRoleError using:
import { InvalidMessageRoleError } from 'ai';
if (InvalidMessageRoleError.isInstance(error)) {
// Handle the error
}
title: AI_InvalidPromptError description: Learn how to fix AI_InvalidPromptError
AI_InvalidPromptError
This error occurs when the prompt provided is invalid.
Potential Causes
UI Messages
You are passing a UIMessage[] as messages into e.g. streamText.
You need to first convert them to a ModelMessage[] using convertToModelMessages().
import { type UIMessage, generateText, convertToModelMessages } from 'ai';
const messages: UIMessage[] = [
/* ... */
];
const result = await generateText({
// ...
messages: await convertToModelMessages(messages),
});
Properties
prompt: The invalid prompt valuemessage: The error messagecause: The cause of the error
Checking for this Error
You can check if an error is an instance of AI_InvalidPromptError using:
import { InvalidPromptError } from 'ai';
if (InvalidPromptError.isInstance(error)) {
// Handle the error
}
title: AI_InvalidResponseDataError description: Learn how to fix AI_InvalidResponseDataError
AI_InvalidResponseDataError
This error occurs when the server returns a response with invalid data content.
Properties
data: The invalid response data valuemessage: The error message
Checking for this Error
You can check if an error is an instance of AI_InvalidResponseDataError using:
import { InvalidResponseDataError } from 'ai';
if (InvalidResponseDataError.isInstance(error)) {
// Handle the error
}
title: AI_InvalidToolApprovalError description: Learn how to fix AI_InvalidToolApprovalError
AI_InvalidToolApprovalError
This error occurs when a tool approval response references an unknown approvalId. No matching tool-approval-request was found in the message history.
Properties
approvalId: The approval ID that was not foundmessage: The error message
Checking for this Error
You can check if an error is an instance of AI_InvalidToolApprovalError using:
import { InvalidToolApprovalError } from 'ai';
if (InvalidToolApprovalError.isInstance(error)) {
// Handle the error
}
title: AI_InvalidToolInputError description: Learn how to fix AI_InvalidToolInputError
AI_InvalidToolInputError
This error occurs when invalid tool input was provided.
Properties
toolName: The name of the tool with invalid inputstoolInput: The invalid tool inputsmessage: The error messagecause: The cause of the error
Checking for this Error
You can check if an error is an instance of AI_InvalidToolInputError using:
import { InvalidToolInputError } from 'ai';
if (InvalidToolInputError.isInstance(error)) {
// Handle the error
}
title: AI_JSONParseError description: Learn how to fix AI_JSONParseError
AI_JSONParseError
This error occurs when JSON fails to parse.
Properties
text: The text value that could not be parsedmessage: The error message including parse error details
Checking for this Error
You can check if an error is an instance of AI_JSONParseError using:
import { JSONParseError } from 'ai';
if (JSONParseError.isInstance(error)) {
// Handle the error
}
title: AI_LoadAPIKeyError description: Learn how to fix AI_LoadAPIKeyError
AI_LoadAPIKeyError
This error occurs when API key is not loaded successfully.
Properties
message: The error message
Checking for this Error
You can check if an error is an instance of AI_LoadAPIKeyError using:
import { LoadAPIKeyError } from 'ai';
if (LoadAPIKeyError.isInstance(error)) {
// Handle the error
}
title: AI_LoadSettingError description: Learn how to fix AI_LoadSettingError
AI_LoadSettingError
This error occurs when a setting is not loaded successfully.
Properties
message: The error message
Checking for this Error
You can check if an error is an instance of AI_LoadSettingError using:
import { LoadSettingError } from 'ai';
if (LoadSettingError.isInstance(error)) {
// Handle the error
}
title: AI_MessageConversionError description: Learn how to fix AI_MessageConversionError
AI_MessageConversionError
This error occurs when message conversion fails.
Properties
originalMessage: The original message that failed conversionmessage: The error message
Checking for this Error
You can check if an error is an instance of AI_MessageConversionError using:
import { MessageConversionError } from 'ai';
if (MessageConversionError.isInstance(error)) {
// Handle the error
}
title: AI_NoContentGeneratedError description: Learn how to fix AI_NoContentGeneratedError
AI_NoContentGeneratedError
This error occurs when the AI provider fails to generate content.
Properties
message: The error message
Checking for this Error
You can check if an error is an instance of AI_NoContentGeneratedError using:
import { NoContentGeneratedError } from 'ai';
if (NoContentGeneratedError.isInstance(error)) {
// Handle the error
}
title: AI_NoImageGeneratedError description: Learn how to fix AI_NoImageGeneratedError
AI_NoImageGeneratedError
This error occurs when the AI provider fails to generate an image. It can arise due to the following reasons:
- The model failed to generate a response.
- The model generated an invalid response.
Properties
message: The error message.responses: Metadata about the image model responses, including timestamp, model, and headers.cause: The cause of the error. You can use this for more detailed error handling.
Checking for this Error
You can check if an error is an instance of AI_NoImageGeneratedError using:
import { generateImage, NoImageGeneratedError } from 'ai';
try {
await generateImage({ model, prompt });
} catch (error) {
if (NoImageGeneratedError.isInstance(error)) {
console.log('NoImageGeneratedError');
console.log('Cause:', error.cause);
console.log('Responses:', error.responses);
}
}
title: AI_NoObjectGeneratedError description: Learn how to fix AI_NoObjectGeneratedError
AI_NoObjectGeneratedError
This error occurs when the AI provider fails to generate a parsable object that conforms to the schema. It can arise due to the following reasons:
- The model failed to generate a response.
- The model generated a response that could not be parsed.
- The model generated a response that could not be validated against the schema.
Properties
message: The error message.text: The text that was generated by the model. This can be the raw text or the tool call text, depending on the object generation mode.response: Metadata about the language model response, including response id, timestamp, and model.usage: Request token usage.finishReason: Request finish reason. For example 'length' if model generated maximum number of tokens, this could result in a JSON parsing error.cause: The cause of the error (e.g. a JSON parsing error). You can use this for more detailed error handling.
Checking for this Error
You can check if an error is an instance of AI_NoObjectGeneratedError using:
import { generateObject, NoObjectGeneratedError } from 'ai';
try {
await generateObject({ model, schema, prompt });
} catch (error) {
if (NoObjectGeneratedError.isInstance(error)) {
console.log('NoObjectGeneratedError');
console.log('Cause:', error.cause);
console.log('Text:', error.text);
console.log('Response:', error.response);
console.log('Usage:', error.usage);
console.log('Finish Reason:', error.finishReason);
}
}
title: AI_NoSpeechGeneratedError description: Learn how to fix AI_NoSpeechGeneratedError
AI_NoSpeechGeneratedError
This error occurs when no audio could be generated from the input.
Properties
responses: Array of responsesmessage: The error message
Checking for this Error
You can check if an error is an instance of AI_NoSpeechGeneratedError using:
import { NoSpeechGeneratedError } from 'ai';
if (NoSpeechGeneratedError.isInstance(error)) {
// Handle the error
}
title: AI_NoSuchModelError description: Learn how to fix AI_NoSuchModelError
AI_NoSuchModelError
This error occurs when a model ID is not found.
Properties
modelId: The ID of the model that was not foundmodelType: The type of modelmessage: The error message
Checking for this Error
You can check if an error is an instance of AI_NoSuchModelError using:
import { NoSuchModelError } from 'ai';
if (NoSuchModelError.isInstance(error)) {
// Handle the error
}
title: AI_NoSuchProviderError description: Learn how to fix AI_NoSuchProviderError
AI_NoSuchProviderError
This error occurs when a provider ID is not found.
Properties
providerId: The ID of the provider that was not foundavailableProviders: Array of available provider IDsmodelId: The ID of the modelmodelType: The type of modelmessage: The error message
Checking for this Error
You can check if an error is an instance of AI_NoSuchProviderError using:
import { NoSuchProviderError } from 'ai';
if (NoSuchProviderError.isInstance(error)) {
// Handle the error
}
title: AI_NoSuchToolError description: Learn how to fix AI_NoSuchToolError
AI_NoSuchToolError
This error occurs when a model tries to call an unavailable tool.
Properties
toolName: The name of the tool that was not foundavailableTools: Array of available tool namesmessage: The error message
Checking for this Error
You can check if an error is an instance of AI_NoSuchToolError using:
import { NoSuchToolError } from 'ai';
if (NoSuchToolError.isInstance(error)) {
// Handle the error
}
title: AI_NoTranscriptGeneratedError description: Learn how to fix AI_NoTranscriptGeneratedError
AI_NoTranscriptGeneratedError
This error occurs when no transcript could be generated from the input.
Properties
responses: Array of responsesmessage: The error message
Checking for this Error
You can check if an error is an instance of AI_NoTranscriptGeneratedError using:
import { NoTranscriptGeneratedError } from 'ai';
if (NoTranscriptGeneratedError.isInstance(error)) {
// Handle the error
}
title: AI_RetryError description: Learn how to fix AI_RetryError
AI_RetryError
This error occurs when a retry operation fails.
Properties
reason: The reason for the retry failurelastError: The most recent error that occurred during retrieserrors: Array of all errors that occurred during retry attemptsmessage: The error message
Checking for this Error
You can check if an error is an instance of AI_RetryError using:
import { RetryError } from 'ai';
if (RetryError.isInstance(error)) {
// Handle the error
}
title: AI_TooManyEmbeddingValuesForCallError description: Learn how to fix AI_TooManyEmbeddingValuesForCallError
AI_TooManyEmbeddingValuesForCallError
This error occurs when too many values are provided in a single embedding call.
Properties
provider: The AI provider namemodelId: The ID of the embedding modelmaxEmbeddingsPerCall: The maximum number of embeddings allowed per callvalues: The array of values that was provided
Checking for this Error
You can check if an error is an instance of AI_TooManyEmbeddingValuesForCallError using:
import { TooManyEmbeddingValuesForCallError } from 'ai';
if (TooManyEmbeddingValuesForCallError.isInstance(error)) {
// Handle the error
}
title: AI_ToolCallNotFoundForApprovalError description: Learn how to fix AI_ToolCallNotFoundForApprovalError
AI_ToolCallNotFoundForApprovalError
This error occurs when a tool approval request references a tool call that was not found. This can happen when processing provider-emitted approval requests (e.g., MCP flows) where the referenced tool call ID does not exist.
Properties
toolCallId: The tool call ID that was not foundapprovalId: The approval request IDmessage: The error message
Checking for this Error
You can check if an error is an instance of AI_ToolCallNotFoundForApprovalError using:
import { ToolCallNotFoundForApprovalError } from 'ai';
if (ToolCallNotFoundForApprovalError.isInstance(error)) {
// Handle the error
}
title: ToolCallRepairError description: Learn how to fix AI SDK ToolCallRepairError
ToolCallRepairError
This error occurs when there is a failure while attempting to repair an invalid tool call.
This typically happens when the AI attempts to fix either
a NoSuchToolError or InvalidToolInputError.
Properties
originalError: The original error that triggered the repair attempt (eitherNoSuchToolErrororInvalidToolInputError)message: The error messagecause: The underlying error that caused the repair to fail
Checking for this Error
You can check if an error is an instance of ToolCallRepairError using:
import { ToolCallRepairError } from 'ai';
if (ToolCallRepairError.isInstance(error)) {
// Handle the error
}
title: AI_TypeValidationError description: Learn how to fix AI_TypeValidationError
AI_TypeValidationError
This error occurs when type validation fails.
Properties
value: The value that failed validationmessage: The error message including validation details
Checking for this Error
You can check if an error is an instance of AI_TypeValidationError using:
import { TypeValidationError } from 'ai';
if (TypeValidationError.isInstance(error)) {
// Handle the error
}
title: AI_UIMessageStreamError description: Learn how to fix AI_UIMessageStreamError
AI_UIMessageStreamError
This error occurs when a UI message stream contains invalid or out-of-sequence chunks.
Common causes:
- Receiving a
text-deltachunk without a precedingtext-startchunk - Receiving a
text-endchunk without a precedingtext-startchunk - Receiving a
reasoning-deltachunk without a precedingreasoning-startchunk - Receiving a
reasoning-endchunk without a precedingreasoning-startchunk - Receiving a
tool-input-deltachunk without a precedingtool-input-startchunk - Attempting to access a tool invocation that doesn't exist
This error often surfaces when an upstream request fails before any tokens are streamed and a custom transport tries to write an inline error message to the UI stream without the proper start chunk.
Properties
chunkType: The type of chunk that caused the error (e.g.,text-delta,reasoning-end,tool-input-delta)chunkId: The ID associated with the failing chunk (part ID or toolCallId)message: The error message with details about what went wrong
Checking for this Error
You can check if an error is an instance of AI_UIMessageStreamError using:
import { UIMessageStreamError } from 'ai';
if (UIMessageStreamError.isInstance(error)) {
console.log('Chunk type:', error.chunkType);
console.log('Chunk ID:', error.chunkId);
// Handle the error
}
Common Solutions
-
Ensure proper chunk ordering: Always send a
*-startchunk before any*-deltaor*-endchunks for the same ID:// Correct order writer.write({ type: 'text-start', id: 'my-text' }); writer.write({ type: 'text-delta', id: 'my-text', delta: 'Hello' }); writer.write({ type: 'text-end', id: 'my-text' }); -
Verify IDs match: Ensure the
idused in*-deltaand*-endchunks matches theidused in the corresponding*-startchunk. -
Handle error paths correctly: When writing error messages in custom transports, ensure you emit the full start/delta/end sequence:
// When handling errors in custom transports writer.write({ type: 'text-start', id: errorId }); writer.write({ type: 'text-delta', id: errorId, delta: 'Request failed...', }); writer.write({ type: 'text-end', id: errorId }); -
Check stream producer logic: Review your streaming implementation to ensure chunks are sent in the correct order, especially when dealing with concurrent operations or merged streams.
title: AI_UnsupportedFunctionalityError description: Learn how to fix AI_UnsupportedFunctionalityError
AI_UnsupportedFunctionalityError
This error occurs when functionality is not unsupported.
Properties
functionality: The name of the unsupported functionalitymessage: The error message
Checking for this Error
You can check if an error is an instance of AI_UnsupportedFunctionalityError using:
import { UnsupportedFunctionalityError } from 'ai';
if (UnsupportedFunctionalityError.isInstance(error)) {
// Handle the error
}
title: AI Gateway description: Learn how to use the AI Gateway provider with the AI SDK.
AI Gateway Provider
The AI Gateway provider connects you to models from multiple AI providers through a single interface. Instead of integrating with each provider separately, you can access OpenAI, Anthropic, Google, Meta, xAI, and other providers and their models.
Features
- Access models from multiple providers without having to install additional provider modules/dependencies
- Use the same code structure across different AI providers
- Switch between models and providers easily
- Automatic authentication when deployed on Vercel
- View pricing information across providers
- Observability for AI model usage through the Vercel dashboard
Setup
The Vercel AI Gateway provider is part of the AI SDK.
Basic Usage
For most use cases, you can use the AI Gateway directly with a model string:
// use plain model string with global provider
import { generateText } from 'ai';
const { text } = await generateText({
model: 'openai/gpt-5',
prompt: 'Hello world',
});
// use provider instance (requires version 5.0.36 or later)
import { generateText, gateway } from 'ai';
const { text } = await generateText({
model: gateway('openai/gpt-5'),
prompt: 'Hello world',
});
The AI SDK automatically uses the AI Gateway when you pass a model string in the creator/model-name format.
Provider Instance
The `gateway` provider instance is available from the `ai` package in version 5.0.36 and later.You can also import the default provider instance gateway from ai:
import { gateway } from 'ai';
You may want to create a custom provider instance when you need to:
- Set custom configuration options (API key, base URL, headers)
- Use the provider in a provider registry
- Wrap the provider with middleware
- Use different settings for different parts of your application
To create a custom provider instance, import createGateway from ai:
import { createGateway } from 'ai';
const gateway = createGateway({
apiKey: process.env.AI_GATEWAY_API_KEY ?? '',
});
You can use the following optional settings to customize the AI Gateway provider instance:
-
baseURL string
Use a different URL prefix for API calls. The default prefix is
https://ai-gateway.vercel.sh/v3/ai. -
apiKey string
API key that is being sent using the
Authorizationheader. It defaults to theAI_GATEWAY_API_KEYenvironment variable. -
headers Record<string,string>
Custom headers to include in the requests.
-
fetch (input: RequestInfo, init?: RequestInit) => Promise<Response>
Custom fetch implementation. Defaults to the global
fetchfunction. You can use it as a middleware to intercept requests, or to provide a custom fetch implementation for e.g. testing. -
metadataCacheRefreshMillis number
How frequently to refresh the metadata cache in milliseconds. Defaults to 5 minutes (300,000ms).
Authentication
The Gateway provider supports two authentication methods:
API Key Authentication
Set your API key via environment variable:
AI_GATEWAY_API_KEY=your_api_key_here
Or pass it directly to the provider:
import { createGateway } from 'ai';
const gateway = createGateway({
apiKey: 'your_api_key_here',
});
OIDC Authentication (Vercel Deployments)
When deployed to Vercel, the AI Gateway provider supports authenticating using OIDC (OpenID Connect) tokens without API Keys.
How OIDC Authentication Works
-
In Production/Preview Deployments:
- OIDC authentication is automatically handled
- No manual configuration needed
- Tokens are automatically obtained and refreshed
-
In Local Development:
- First, install and authenticate with the Vercel CLI
- Run
vercel env pullto download your project's OIDC token locally - For automatic token management:
- Use
vercel devto start your development server - this will handle token refreshing automatically
- Use
- For manual token management:
- If not using
vercel dev, note that OIDC tokens expire after 12 hours - You'll need to run
vercel env pullagain to refresh the token before it expires
- If not using
Read more about using OIDC tokens in the Vercel AI Gateway docs.
Bring Your Own Key (BYOK)
You can connect your own provider credentials to use with Vercel AI Gateway. This lets you use your existing provider accounts and access private resources.
To set up BYOK, add your provider credentials in your Vercel team's AI Gateway settings. Once configured, AI Gateway automatically uses your credentials. No code changes are needed.
Learn more in the BYOK documentation.
Language Models
You can create language models using a provider instance. The first argument is the model ID in the format creator/model-name:
import { generateText } from 'ai';
const { text } = await generateText({
model: 'openai/gpt-5',
prompt: 'Explain quantum computing in simple terms',
});
AI Gateway language models can also be used in the streamText, generateObject, and streamObject functions (see AI SDK Core).
Available Models
The AI Gateway supports models from OpenAI, Anthropic, Google, Meta, xAI, Mistral, DeepSeek, Amazon Bedrock, Cohere, Perplexity, Alibaba, and other providers.
For the complete list of available models, see the AI Gateway documentation.
Dynamic Model Discovery
You can discover available models programmatically:
import { gateway, generateText } from 'ai';
const availableModels = await gateway.getAvailableModels();
// List all available models
availableModels.models.forEach(model => {
console.log(`${model.id}: ${model.name}`);
if (model.description) {
console.log(` Description: ${model.description}`);
}
if (model.pricing) {
console.log(` Input: $${model.pricing.input}/token`);
console.log(` Output: $${model.pricing.output}/token`);
if (model.pricing.cachedInputTokens) {
console.log(
` Cached input (read): $${model.pricing.cachedInputTokens}/token`,
);
}
if (model.pricing.cacheCreationInputTokens) {
console.log(
` Cache creation (write): $${model.pricing.cacheCreationInputTokens}/token`,
);
}
}
});
// Use any discovered model with plain string
const { text } = await generateText({
model: availableModels.models[0].id, // e.g., 'openai/gpt-4o'
prompt: 'Hello world',
});
Credit Usage
You can check your team's current credit balance and usage:
import { gateway } from 'ai';
const credits = await gateway.getCredits();
console.log(`Team balance: ${credits.balance} credits`);
console.log(`Team total used: ${credits.total_used} credits`);
The getCredits() method returns your team's credit information based on the authenticated API key or OIDC token:
- balance number - Your team's current available credit balance
- total_used number - Total credits consumed by your team
Examples
Basic Text Generation
import { generateText } from 'ai';
const { text } = await generateText({
model: 'anthropic/claude-sonnet-4',
prompt: 'Write a haiku about programming',
});
console.log(text);
Streaming
import { streamText } from 'ai';
const { textStream } = await streamText({
model: 'openai/gpt-5',
prompt: 'Explain the benefits of serverless architecture',
});
for await (const textPart of textStream) {
process.stdout.write(textPart);
}
Tool Usage
import { generateText, tool } from 'ai';
import { z } from 'zod';
const { text } = await generateText({
model: 'xai/grok-4',
prompt: 'What is the weather like in San Francisco?',
tools: {
getWeather: tool({
description: 'Get the current weather for a location',
parameters: z.object({
location: z.string().describe('The location to get weather for'),
}),
execute: async ({ location }) => {
// Your weather API call here
return `It's sunny in ${location}`;
},
}),
},
});
Provider-Executed Tools
Some providers offer tools that are executed by the provider itself, such as OpenAI's web search tool. To use these tools through AI Gateway, import the provider to access the tool definitions:
import { generateText, stepCountIs } from 'ai';
import { openai } from '@ai-sdk/openai';
const result = await generateText({
model: 'openai/gpt-5-mini',
prompt: 'What is the Vercel AI Gateway?',
stopWhen: stepCountIs(10),
tools: {
web_search: openai.tools.webSearch({}),
},
});
console.dir(result.text);
Gateway Tools
The AI Gateway provider includes built-in tools that are executed by the gateway itself. These tools can be used with any model through the gateway.
Perplexity Search
The Perplexity Search tool enables models to search the web using Perplexity's search API. This tool is executed by the AI Gateway and returns web search results that the model can use to provide up-to-date information.
import { gateway, generateText } from 'ai';
const result = await generateText({
model: 'openai/gpt-5-nano',
prompt: 'Search for news about AI regulations in January 2025.',
tools: {
perplexity_search: gateway.tools.perplexitySearch(),
},
});
console.log(result.text);
console.log('Tool calls:', JSON.stringify(result.toolCalls, null, 2));
console.log('Tool results:', JSON.stringify(result.toolResults, null, 2));
You can also configure the search with optional parameters:
import { gateway, generateText } from 'ai';
const result = await generateText({
model: 'openai/gpt-5-nano',
prompt:
'Search for news about AI regulations from the first week of January 2025.',
tools: {
perplexity_search: gateway.tools.perplexitySearch({
maxResults: 5,
searchLanguageFilter: ['en'],
country: 'US',
searchDomainFilter: ['reuters.com', 'bbc.com', 'nytimes.com'],
}),
},
});
console.log(result.text);
console.log('Tool calls:', JSON.stringify(result.toolCalls, null, 2));
console.log('Tool results:', JSON.stringify(result.toolResults, null, 2));
The Perplexity Search tool supports the following optional configuration options:
-
maxResults number
The maximum number of search results to return (1-20, default: 10).
-
maxTokensPerPage number
The maximum number of tokens to extract per search result page (256-2048, default: 2048).
-
maxTokens number
The maximum total tokens across all search results (default: 25000, max: 1000000).
-
searchLanguageFilter string[]
Filter search results by language using ISO 639-1 language codes (e.g.,
['en']for English,['en', 'es']for English and Spanish). -
country string
Filter search results by country using ISO 3166-1 alpha-2 country codes (e.g.,
'US'for United States,'GB'for United Kingdom). -
searchDomainFilter string[]
Limit search results to specific domains (e.g.,
['reuters.com', 'bbc.com']). This is useful for restricting results to trusted sources. -
searchRecencyFilter 'day' | 'week' | 'month' | 'year'
Filter search results by relative time period. Useful for always getting recent results (e.g., 'week' for results from the last week).
The tool works with both generateText and streamText:
import { gateway, streamText } from 'ai';
const result = streamText({
model: 'openai/gpt-5-nano',
prompt: 'Search for the latest news about AI regulations.',
tools: {
perplexity_search: gateway.tools.perplexitySearch(),
},
});
for await (const part of result.fullStream) {
switch (part.type) {
case 'text-delta':
process.stdout.write(part.text);
break;
case 'tool-call':
console.log('\nTool call:', JSON.stringify(part, null, 2));
break;
case 'tool-result':
console.log('\nTool result:', JSON.stringify(part, null, 2));
break;
}
}
Usage Tracking with User and Tags
Track usage per end-user and categorize requests with tags:
import type { GatewayProviderOptions } from '@ai-sdk/gateway';
import { generateText } from 'ai';
const { text } = await generateText({
model: 'openai/gpt-5',
prompt: 'Summarize this document...',
providerOptions: {
gateway: {
user: 'user-abc-123', // Track usage for this specific end-user
tags: ['document-summary', 'premium-feature'], // Categorize for reporting
} satisfies GatewayProviderOptions,
},
});
This allows you to:
- View usage and costs broken down by end-user in your analytics
- Filter and analyze spending by feature or use case using tags
- Track which users or features are driving the most AI usage
Provider Options
The AI Gateway provider accepts provider options that control routing behavior and provider-specific configurations.
Gateway Provider Options
You can use the gateway key in providerOptions to control how AI Gateway routes requests:
import type { GatewayProviderOptions } from '@ai-sdk/gateway';
import { generateText } from 'ai';
const { text } = await generateText({
model: 'anthropic/claude-sonnet-4',
prompt: 'Explain quantum computing',
providerOptions: {
gateway: {
order: ['vertex', 'anthropic'], // Try Vertex AI first, then Anthropic
only: ['vertex', 'anthropic'], // Only use these providers
} satisfies GatewayProviderOptions,
},
});
The following gateway provider options are available:
-
order string[]
Specifies the sequence of providers to attempt when routing requests. The gateway will try providers in the order specified. If a provider fails or is unavailable, it will move to the next provider in the list.
Example:
order: ['bedrock', 'anthropic']will attempt Amazon Bedrock first, then fall back to Anthropic. -
only string[]
Restricts routing to only the specified providers. When set, the gateway will never route to providers not in this list, even if they would otherwise be available.
Example:
only: ['anthropic', 'vertex']will only allow routing to Anthropic or Vertex AI. -
models string[]
Specifies fallback models to use when the primary model fails or is unavailable. The gateway will try the primary model first (specified in the
modelparameter), then try each model in this array in order until one succeeds.Example:
models: ['openai/gpt-5-nano', 'gemini-2.0-flash']will try the fallback models in order if the primary model fails. -
user string
Optional identifier for the end user on whose behalf the request is being made. This is used for spend tracking and attribution purposes, allowing you to track usage per end-user in your application.
Example:
user: 'user-123'will associate this request with end-user ID "user-123" in usage reports. -
tags string[]
Optional array of tags for categorizing and filtering usage in reports. Useful for tracking spend by feature, prompt version, or any other dimension relevant to your application.
Example:
tags: ['chat', 'v2']will tag this request with "chat" and "v2" for filtering in usage analytics. -
byok Record<string, Array<Record<string, unknown>>>
Request-scoped BYOK (Bring Your Own Key) credentials to use for this request. When provided, any cached BYOK credentials configured in the gateway system are not considered. Requests may still fall back to use system credentials if the provided credentials fail.
Each provider can have multiple credentials (tried in order). The structure is a record where keys are provider slugs and values are arrays of credential objects.
Examples:
- Single provider:
byok: { 'anthropic': [{ apiKey: 'sk-ant-...' }] } - Multiple credentials:
byok: { 'vertex': [{ project: 'proj-1', googleCredentials: { privateKey: '...', clientEmail: '...' } }, { project: 'proj-2', googleCredentials: { privateKey: '...', clientEmail: '...' } }] } - Multiple providers:
byok: { 'anthropic': [{ apiKey: '...' }], 'bedrock': [{ accessKeyId: '...', secretAccessKey: '...' }] }
- Single provider:
-
zeroDataRetention boolean
Restricts routing requests to providers that have zero data retention policies.
You can combine these options to have fine-grained control over routing and tracking:
import type { GatewayProviderOptions } from '@ai-sdk/gateway';
import { generateText } from 'ai';
const { text } = await generateText({
model: 'anthropic/claude-sonnet-4',
prompt: 'Write a haiku about programming',
providerOptions: {
gateway: {
order: ['vertex'], // Prefer Vertex AI
only: ['anthropic', 'vertex'], // Only allow these providers
} satisfies GatewayProviderOptions,
},
});
Model Fallbacks Example
The models option enables automatic fallback to alternative models when the primary model fails:
import type { GatewayProviderOptions } from '@ai-sdk/gateway';
import { generateText } from 'ai';
const { text } = await generateText({
model: 'openai/gpt-4o', // Primary model
prompt: 'Write a TypeScript haiku',
providerOptions: {
gateway: {
models: ['openai/gpt-5-nano', 'gemini-2.0-flash'], // Fallback models
} satisfies GatewayProviderOptions,
},
});
// This will:
// 1. Try openai/gpt-4o first
// 2. If it fails, try openai/gpt-5-nano
// 3. If that fails, try gemini-2.0-flash
// 4. Return the result from the first model that succeeds
Zero Data Retention Example
Set zeroDataRetention to true to ensure requests are only routed to providers
that have zero data retention policies. When zeroDataRetention is false or not
specified, there is no enforcement of restricting routing.
import type { GatewayProviderOptions } from '@ai-sdk/gateway';
import { generateText } from 'ai';
const { text } = await generateText({
model: 'anthropic/claude-sonnet-4.5',
prompt: 'Analyze this sensitive document...',
providerOptions: {
gateway: {
zeroDataRetention: true,
} satisfies GatewayProviderOptions,
},
});
Provider-Specific Options
When using provider-specific options through AI Gateway, use the actual provider name (e.g. anthropic, openai, not gateway) as the key:
import type { AnthropicProviderOptions } from '@ai-sdk/anthropic';
import type { GatewayProviderOptions } from '@ai-sdk/gateway';
import { generateText } from 'ai';
const { text } = await generateText({
model: 'anthropic/claude-sonnet-4',
prompt: 'Explain quantum computing',
providerOptions: {
gateway: {
order: ['vertex', 'anthropic'],
} satisfies GatewayProviderOptions,
anthropic: {
thinking: { type: 'enabled', budgetTokens: 12000 },
} satisfies AnthropicProviderOptions,
},
});
This works with any provider supported by AI Gateway. Each provider has its own set of options - see the individual provider documentation pages for details on provider-specific options.
Available Providers
AI Gateway supports routing to 20+ providers.
For a complete list of available providers and their slugs, see the AI Gateway documentation.
Model Capabilities
Model capabilities depend on the specific provider and model you're using. For detailed capability information, see:
- AI Gateway provider options for an overview of available providers
- Individual AI SDK provider pages for specific model capabilities and features
title: xAI Grok description: Learn how to use xAI Grok.
xAI Grok Provider
The xAI Grok provider contains language model support for the xAI API.
Setup
The xAI Grok provider is available via the @ai-sdk/xai module. You can
install it with
<Tabs items={['pnpm', 'npm', 'yarn', 'bun']}>
Provider Instance
You can import the default provider instance xai from @ai-sdk/xai:
import { xai } from '@ai-sdk/xai';
If you need a customized setup, you can import createXai from @ai-sdk/xai
and create a provider instance with your settings:
import { createXai } from '@ai-sdk/xai';
const xai = createXai({
apiKey: 'your-api-key',
});
You can use the following optional settings to customize the xAI provider instance:
-
baseURL string
Use a different URL prefix for API calls, e.g. to use proxy servers. The default prefix is
https://api.x.ai/v1. -
apiKey string
API key that is being sent using the
Authorizationheader. It defaults to theXAI_API_KEYenvironment variable. -
headers Record<string,string>
Custom headers to include in the requests.
-
fetch (input: RequestInfo, init?: RequestInit) => Promise<Response>
Custom fetch implementation. Defaults to the global
fetchfunction. You can use it as a middleware to intercept requests, or to provide a custom fetch implementation for e.g. testing.
Language Models
You can create xAI models using a provider instance. The
first argument is the model id, e.g. grok-3.
const model = xai('grok-3');
By default, xai(modelId) uses the Chat API. To use the Responses API with server-side agentic tools, explicitly use xai.responses(modelId).
Example
You can use xAI language models to generate text with the generateText function:
import { xai } from '@ai-sdk/xai';
import { generateText } from 'ai';
const { text } = await generateText({
model: xai('grok-3'),
prompt: 'Write a vegetarian lasagna recipe for 4 people.',
});
xAI language models can also be used in the streamText, generateObject, and streamObject functions
(see AI SDK Core).
Provider Options
xAI chat models support additional provider options that are not part of
the standard call settings. You can pass them in the providerOptions argument:
const model = xai('grok-3-mini');
await generateText({
model,
providerOptions: {
xai: {
reasoningEffort: 'high',
},
},
});
The following optional provider options are available for xAI chat models:
-
reasoningEffort 'low' | 'medium' | 'high'
Reasoning effort for reasoning models.
-
store boolean
Whether to store the generation. Defaults to
true. -
previousResponseId string
The ID of the previous response. You can use it to continue a conversation. Defaults to
undefined.
Responses API (Agentic Tools)
You can use the xAI Responses API with the xai.responses(modelId) factory method for server-side agentic tool calling. This enables the model to autonomously orchestrate tool calls and research on xAI's servers.
const model = xai.responses('grok-4-fast');
The Responses API provides server-side tools that the model can autonomously execute during its reasoning process:
- web_search: Real-time web search and page browsing
- x_search: Search X (Twitter) posts, users, and threads
- code_execution: Execute Python code for calculations and data analysis
- mcp_server: Connect to remote MCP servers and use their tools
Vision
The Responses API supports image input with vision models:
import { xai } from '@ai-sdk/xai';
import { generateText } from 'ai';
const { text } = await generateText({
model: xai.responses('grok-2-vision-1212'),
messages: [
{
role: 'user',
content: [
{ type: 'text', text: 'What do you see in this image?' },
{ type: 'image', image: fs.readFileSync('./image.png') },
],
},
],
});
Web Search Tool
The web search tool enables autonomous web research with optional domain filtering and image understanding:
import { xai } from '@ai-sdk/xai';
import { generateText } from 'ai';
const { text, sources } = await generateText({
model: xai.responses('grok-4-fast'),
prompt: 'What are the latest developments in AI?',
tools: {
web_search: xai.tools.webSearch({
allowedDomains: ['arxiv.org', 'openai.com'],
enableImageUnderstanding: true,
}),
},
});
console.log(text);
console.log('Citations:', sources);
Web Search Parameters
-
allowedDomains string[]
Only search within specified domains (max 5). Cannot be used with
excludedDomains. -
excludedDomains string[]
Exclude specified domains from search (max 5). Cannot be used with
allowedDomains. -
enableImageUnderstanding boolean
Enable the model to view and analyze images found during search. Increases token usage.
X Search Tool
The X search tool enables searching X (Twitter) for posts, with filtering by handles and date ranges:
const { text, sources } = await generateText({
model: xai.responses('grok-4-fast'),
prompt: 'What are people saying about AI on X this week?',
tools: {
x_search: xai.tools.xSearch({
allowedXHandles: ['elonmusk', 'xai'],
fromDate: '2025-10-23',
toDate: '2025-10-30',
enableImageUnderstanding: true,
enableVideoUnderstanding: true,
}),
},
});
X Search Parameters
-
allowedXHandles string[]
Only search posts from specified X handles (max 10). Cannot be used with
excludedXHandles. -
excludedXHandles string[]
Exclude posts from specified X handles (max 10). Cannot be used with
allowedXHandles. -
fromDate string
Start date for posts in ISO8601 format (
YYYY-MM-DD). -
toDate string
End date for posts in ISO8601 format (
YYYY-MM-DD). -
enableImageUnderstanding boolean
Enable the model to view and analyze images in X posts.
-
enableVideoUnderstanding boolean
Enable the model to view and analyze videos in X posts.
Code Execution Tool
The code execution tool enables the model to write and execute Python code for calculations and data analysis:
const { text } = await generateText({
model: xai.responses('grok-4-fast'),
prompt:
'Calculate the compound interest for $10,000 at 5% annually for 10 years',
tools: {
code_execution: xai.tools.codeExecution(),
},
});
MCP Server Tool
The MCP server tool enables the model to connect to remote Model Context Protocol (MCP) servers and use their tools:
const { text } = await generateText({
model: xai.responses('grok-4-fast'),
prompt: 'Use the weather tool to check conditions in San Francisco',
tools: {
weather_server: xai.tools.mcpServer({
serverUrl: 'https://example.com/mcp',
serverLabel: 'weather-service',
serverDescription: 'Weather data provider',
allowedTools: ['get_weather', 'get_forecast'],
}),
},
});
MCP Server Parameters
-
serverUrl string (required)
The URL of the remote MCP server.
-
serverLabel string (required)
A label to identify the MCP server.
-
serverDescription string
A description of what the MCP server provides.
-
allowedTools string[]
List of tool names that the model is allowed to use from the MCP server. If not specified, all tools are allowed.
-
headers Record<string, string>
Custom headers to include when connecting to the MCP server.
-
authorization string
Authorization header value for authenticating with the MCP server (e.g.,
'Bearer token123').
File Search Tool
xAI supports file search through OpenAI compatibility. You can use the OpenAI provider with xAI's base URL to search vector stores:
import { createOpenAI } from '@ai-sdk/openai';
import { streamText } from 'ai';
const openai = createOpenAI({
baseURL: 'https://api.x.ai/v1',
apiKey: process.env.XAI_API_KEY,
});
const result = streamText({
model: openai('grok-4'),
prompt: 'What documents do you have access to?',
tools: {
file_search: openai.tools.fileSearch({
vectorStoreIds: ['your-vector-store-id'],
maxNumResults: 5,
}),
},
});
Multiple Tools
You can combine multiple server-side tools for comprehensive research:
import { xai } from '@ai-sdk/xai';
import { streamText } from 'ai';
const { fullStream } = streamText({
model: xai.responses('grok-4-fast'),
prompt: 'Research AI safety developments and calculate risk metrics',
tools: {
web_search: xai.tools.webSearch(),
x_search: xai.tools.xSearch(),
code_execution: xai.tools.codeExecution(),
data_service: xai.tools.mcpServer({
serverUrl: 'https://data.example.com/mcp',
serverLabel: 'data-service',
}),
},
});
for await (const part of fullStream) {
if (part.type === 'text-delta') {
process.stdout.write(part.text);
} else if (part.type === 'source' && part.sourceType === 'url') {
console.log('\nSource:', part.url);
}
}
Provider Options
The Responses API supports the following provider options:
import { xai } from '@ai-sdk/xai';
import { generateText } from 'ai';
const result = await generateText({
model: xai.responses('grok-4-fast'),
providerOptions: {
xai: {
reasoningEffort: 'high',
},
},
// ...
});
The following provider options are available:
-
reasoningEffort 'low' | 'high'
Control the reasoning effort for the model. Higher effort may produce more thorough results at the cost of increased latency and token usage.
Live Search
xAI models support Live Search functionality, allowing them to query real-time data from various sources and include it in responses with citations.
Basic Search
To enable search, specify searchParameters with a search mode:
import { xai } from '@ai-sdk/xai';
import { generateText } from 'ai';
const { text, sources } = await generateText({
model: xai('grok-3-latest'),
prompt: 'What are the latest developments in AI?',
providerOptions: {
xai: {
searchParameters: {
mode: 'auto', // 'auto', 'on', or 'off'
returnCitations: true,
maxSearchResults: 5,
},
},
},
});
console.log(text);
console.log('Sources:', sources);
Search Parameters
The following search parameters are available:
-
mode 'auto' | 'on' | 'off'
Search mode preference:
'auto'(default): Model decides whether to search'on': Always enables search'off': Disables search completely
-
returnCitations boolean
Whether to return citations in the response. Defaults to
true. -
fromDate string
Start date for search data in ISO8601 format (
YYYY-MM-DD). -
toDate string
End date for search data in ISO8601 format (
YYYY-MM-DD). -
maxSearchResults number
Maximum number of search results to consider. Defaults to 20, max 50.
-
sources Array<SearchSource>
Data sources to search from. Defaults to
["web", "x"]if not specified.
Search Sources
You can specify different types of data sources for search:
Web Search
const result = await generateText({
model: xai('grok-3-latest'),
prompt: 'Best ski resorts in Switzerland',
providerOptions: {
xai: {
searchParameters: {
mode: 'on',
sources: [
{
type: 'web',
country: 'CH', // ISO alpha-2 country code
allowedWebsites: ['ski.com', 'snow-forecast.com'],
safeSearch: true,
},
],
},
},
},
});
Web source parameters
- country string: ISO alpha-2 country code
- allowedWebsites string[]: Max 5 allowed websites
- excludedWebsites string[]: Max 5 excluded websites
- safeSearch boolean: Enable safe search (default: true)
X (Twitter) Search
const result = await generateText({
model: xai('grok-3-latest'),
prompt: 'Latest updates on Grok AI',
providerOptions: {
xai: {
searchParameters: {
mode: 'on',
sources: [
{
type: 'x',
includedXHandles: ['grok', 'xai'],
excludedXHandles: ['openai'],
postFavoriteCount: 10,
postViewCount: 100,
},
],
},
},
},
});
X source parameters
- includedXHandles string[]: Array of X handles to search (without @ symbol)
- excludedXHandles string[]: Array of X handles to exclude from search (without @ symbol)
- postFavoriteCount number: Minimum favorite count of the X posts to consider.
- postViewCount number: Minimum view count of the X posts to consider.
News Search
const result = await generateText({
model: xai('grok-3-latest'),
prompt: 'Recent tech industry news',
providerOptions: {
xai: {
searchParameters: {
mode: 'on',
sources: [
{
type: 'news',
country: 'US',
excludedWebsites: ['tabloid.com'],
safeSearch: true,
},
],
},
},
},
});
News source parameters
- country string: ISO alpha-2 country code
- excludedWebsites string[]: Max 5 excluded websites
- safeSearch boolean: Enable safe search (default: true)
RSS Feed Search
const result = await generateText({
model: xai('grok-3-latest'),
prompt: 'Latest status updates',
providerOptions: {
xai: {
searchParameters: {
mode: 'on',
sources: [
{
type: 'rss',
links: ['https://status.x.ai/feed.xml'],
},
],
},
},
},
});
RSS source parameters
- links string[]: Array of RSS feed URLs (max 1 currently supported)
Multiple Sources
You can combine multiple data sources in a single search:
const result = await generateText({
model: xai('grok-3-latest'),
prompt: 'Comprehensive overview of recent AI breakthroughs',
providerOptions: {
xai: {
searchParameters: {
mode: 'on',
returnCitations: true,
maxSearchResults: 15,
sources: [
{
type: 'web',
allowedWebsites: ['arxiv.org', 'openai.com'],
},
{
type: 'news',
country: 'US',
},
{
type: 'x',
includedXHandles: ['openai', 'deepmind'],
},
],
},
},
},
});
Sources and Citations
When search is enabled with returnCitations: true, the response includes sources that were used to generate the answer:
const { text, sources } = await generateText({
model: xai('grok-3-latest'),
prompt: 'What are the latest developments in AI?',
providerOptions: {
xai: {
searchParameters: {
mode: 'auto',
returnCitations: true,
},
},
},
});
// Access the sources used
for (const source of sources) {
if (source.sourceType === 'url') {
console.log('Source:', source.url);
}
}
Streaming with Search
Live Search works with streaming responses. Citations are included when the stream completes:
import { streamText } from 'ai';
const result = streamText({
model: xai('grok-3-latest'),
prompt: 'What has happened in tech recently?',
providerOptions: {
xai: {
searchParameters: {
mode: 'auto',
returnCitations: true,
},
},
},
});
for await (const textPart of result.textStream) {
process.stdout.write(textPart);
}
console.log('Sources:', await result.sources);
Model Capabilities
| Model | Image Input | Object Generation | Tool Usage | Tool Streaming | Reasoning |
|---|---|---|---|---|---|
grok-4-fast-non-reasoning |
|||||
grok-4-fast-reasoning |
|||||
grok-code-fast-1 |
|||||
grok-4 |
|||||
grok-3 |
|||||
grok-3-latest |
|||||
grok-3-fast |
|||||
grok-3-fast-latest |
|||||
grok-3-mini |
|||||
grok-3-mini-latest |
|||||
grok-3-mini-fast |
|||||
grok-3-mini-fast-latest |
|||||
grok-2 |
|||||
grok-2-latest |
|||||
grok-2-1212 |
|||||
grok-2-vision |
|||||
grok-2-vision-latest |
|||||
grok-2-vision-1212 |
|||||
grok-beta |
|||||
grok-vision-beta |
Image Models
You can create xAI image models using the .image() factory method. For more on image generation with the AI SDK see generateImage().
import { xai } from '@ai-sdk/xai';
import { generateImage } from 'ai';
const { image } = await generateImage({
model: xai.image('grok-2-image'),
prompt: 'A futuristic cityscape at sunset',
});
Model-specific options
You can customize the image generation behavior with model-specific settings:
import { xai } from '@ai-sdk/xai';
import { generateImage } from 'ai';
const { images } = await generateImage({
model: xai.image('grok-2-image'),
prompt: 'A futuristic cityscape at sunset',
maxImagesPerCall: 5, // Default is 10
n: 2, // Generate 2 images
});
Model Capabilities
| Model | Sizes | Notes |
|---|---|---|
grok-2-image |
1024x768 (default) | xAI's text-to-image generation model, designed to create high-quality images from text prompts. It's trained on a diverse dataset and can generate images across various styles, subjects, and settings. |
title: Vercel description: Learn how to use Vercel's v0 models with the AI SDK.
Vercel Provider
The Vercel provider gives you access to the v0 API, designed for building modern web applications. The v0 models support text and image inputs and provide fast streaming responses.
You can create your Vercel API key at v0.dev.
The v0 API is currently in beta and requires a Premium or Team plan with usage-based billing enabled. For details, visit the [pricing page](https://v0.dev/pricing). To request a higher limit, contact Vercel at support@v0.dev.Features
- Framework aware completions: Evaluated on modern stacks like Next.js and Vercel
- Auto-fix: Identifies and corrects common coding issues during generation
- Quick edit: Streams inline edits as they're available
- Multimodal: Supports both text and image inputs
Setup
The Vercel provider is available via the @ai-sdk/vercel module. You can install it with:
<Tabs items={['pnpm', 'npm', 'yarn', 'bun']}>
Provider Instance
You can import the default provider instance vercel from @ai-sdk/vercel:
import { vercel } from '@ai-sdk/vercel';
If you need a customized setup, you can import createVercel from @ai-sdk/vercel and create a provider instance with your settings:
import { createVercel } from '@ai-sdk/vercel';
const vercel = createVercel({
apiKey: process.env.VERCEL_API_KEY ?? '',
});
You can use the following optional settings to customize the Vercel provider instance:
-
baseURL string
Use a different URL prefix for API calls. The default prefix is
https://api.v0.dev/v1. -
apiKey string
API key that is being sent using the
Authorizationheader. It defaults to theVERCEL_API_KEYenvironment variable. -
headers Record<string,string>
Custom headers to include in the requests.
-
fetch (input: RequestInfo, init?: RequestInit) => Promise<Response>
Custom fetch implementation. Defaults to the global
fetchfunction. You can use it as a middleware to intercept requests, or to provide a custom fetch implementation for e.g. testing.
Language Models
You can create language models using a provider instance. The first argument is the model ID, for example:
import { vercel } from '@ai-sdk/vercel';
import { generateText } from 'ai';
const { text } = await generateText({
model: vercel('v0-1.0-md'),
prompt: 'Create a Next.js AI chatbot',
});
Vercel language models can also be used in the streamText function (see AI SDK Core).
Models
v0-1.5-md
The v0-1.5-md model is for everyday tasks and UI generation.
v0-1.5-lg
The v0-1.5-lg model is for advanced thinking or reasoning.
v0-1.0-md (legacy)
The v0-1.0-md model is the legacy model served by the v0 API.
All v0 models have the following capabilities:
- Supports text and image inputs (multimodal)
- Supports function/tool calls
- Streaming responses with low latency
- Optimized for frontend and full-stack web development
Model Capabilities
| Model | Image Input | Object Generation | Tool Usage | Tool Streaming |
|---|---|---|---|---|
v0-1.5-md |
||||
v0-1.5-lg |
||||
v0-1.0-md |
title: OpenAI description: Learn how to use the OpenAI provider for the AI SDK.
OpenAI Provider
The OpenAI provider contains language model support for the OpenAI responses, chat, and completion APIs, as well as embedding model support for the OpenAI embeddings API.
Setup
The OpenAI provider is available in the @ai-sdk/openai module. You can install it with
<Tabs items={['pnpm', 'npm', 'yarn', 'bun']}>
Provider Instance
You can import the default provider instance openai from @ai-sdk/openai:
import { openai } from '@ai-sdk/openai';
If you need a customized setup, you can import createOpenAI from @ai-sdk/openai and create a provider instance with your settings:
import { createOpenAI } from '@ai-sdk/openai';
const openai = createOpenAI({
// custom settings, e.g.
headers: {
'header-name': 'header-value',
},
});
You can use the following optional settings to customize the OpenAI provider instance:
-
baseURL string
Use a different URL prefix for API calls, e.g. to use proxy servers. The default prefix is
https://api.openai.com/v1. -
apiKey string
API key that is being sent using the
Authorizationheader. It defaults to theOPENAI_API_KEYenvironment variable. -
name string
The provider name. You can set this when using OpenAI compatible providers to change the model provider property. Defaults to
openai. -
organization string
OpenAI Organization.
-
project string
OpenAI project.
-
headers Record<string,string>
Custom headers to include in the requests.
-
fetch (input: RequestInfo, init?: RequestInit) => Promise<Response>
Custom fetch implementation. Defaults to the global
fetchfunction. You can use it as a middleware to intercept requests, or to provide a custom fetch implementation for e.g. testing.
Language Models
The OpenAI provider instance is a function that you can invoke to create a language model:
const model = openai('gpt-5');
It automatically selects the correct API based on the model id. You can also pass additional settings in the second argument:
const model = openai('gpt-5', {
// additional settings
});
The available options depend on the API that's automatically chosen for the model (see below).
If you want to explicitly select a specific model API, you can use .responses, .chat, or .completion.
Example
You can use OpenAI language models to generate text with the generateText function:
import { openai } from '@ai-sdk/openai';
import { generateText } from 'ai';
const { text } = await generateText({
model: openai('gpt-5'),
prompt: 'Write a vegetarian lasagna recipe for 4 people.',
});
OpenAI language models can also be used in the streamText, generateObject, and streamObject functions
(see AI SDK Core).
Responses Models
You can use the OpenAI responses API with the openai(modelId) or openai.responses(modelId) factory methods. It is the default API that is used by the OpenAI provider (since AI SDK 5).
const model = openai('gpt-5');
Further configuration can be done using OpenAI provider options.
You can validate the provider options using the OpenAIResponsesProviderOptions type.
import { openai, OpenAIResponsesProviderOptions } from '@ai-sdk/openai';
import { generateText } from 'ai';
const result = await generateText({
model: openai('gpt-5'), // or openai.responses('gpt-5')
providerOptions: {
openai: {
parallelToolCalls: false,
store: false,
user: 'user_123',
// ...
} satisfies OpenAIResponsesProviderOptions,
},
// ...
});
The following provider options are available:
-
parallelToolCalls boolean Whether to use parallel tool calls. Defaults to
true. -
store boolean
Whether to store the generation. Defaults to
true. -
maxToolCalls integer The maximum number of total calls to built-in tools that can be processed in a response. This maximum number applies across all built-in tool calls, not per individual tool. Any further attempts to call a tool by the model will be ignored.
-
metadata Record<string, string> Additional metadata to store with the generation.
-
conversation string The ID of the OpenAI Conversation to continue. You must create a conversation first via the OpenAI API. Cannot be used in conjunction with
previousResponseId. Defaults toundefined. -
previousResponseId string The ID of the previous response. You can use it to continue a conversation. Defaults to
undefined. -
instructions string Instructions for the model. They can be used to change the system or developer message when continuing a conversation using the
previousResponseIdoption. Defaults toundefined. -
user string A unique identifier representing your end-user, which can help OpenAI to monitor and detect abuse. Defaults to
undefined. -
reasoningEffort 'none' | 'minimal' | 'low' | 'medium' | 'high' | 'xhigh' Reasoning effort for reasoning models. Defaults to
medium. If you useproviderOptionsto set thereasoningEffortoption, this model setting will be ignored.
-
reasoningSummary 'auto' | 'detailed' Controls whether the model returns its reasoning process. Set to
'auto'for a condensed summary,'detailed'for more comprehensive reasoning. Defaults toundefined(no reasoning summaries). When enabled, reasoning summaries appear in the stream as events with type'reasoning'and in non-streaming responses within thereasoningfield. -
strictJsonSchema boolean Whether to use strict JSON schema validation. Defaults to
true.
-
serviceTier 'auto' | 'flex' | 'priority' | 'default' Service tier for the request. Set to 'flex' for 50% cheaper processing at the cost of increased latency (available for o3, o4-mini, and gpt-5 models). Set to 'priority' for faster processing with Enterprise access (available for gpt-4, gpt-5, gpt-5-mini, o3, o4-mini; gpt-5-nano is not supported).
Defaults to 'auto'.
-
textVerbosity 'low' | 'medium' | 'high' Controls the verbosity of the model's response. Lower values result in more concise responses, while higher values result in more verbose responses. Defaults to
'medium'. -
include Array<string> Specifies additional content to include in the response. Supported values:
['file_search_call.results']for including file search results in responses.['message.output_text.logprobs']for logprobs. Defaults toundefined. -
truncation string The truncation strategy to use for the model response.
- Auto: If the input to this Response exceeds the model's context window size, the model will truncate the response to fit the context window by dropping items from the beginning of the conversation.
- disabled (default): If the input size will exceed the context window size for a model, the request will fail with a 400 error.
-
promptCacheKey string A cache key for manual prompt caching control. Used by OpenAI to cache responses for similar requests to optimize your cache hit rates.
-
promptCacheRetention 'in_memory' | '24h' The retention policy for the prompt cache. Set to
'24h'to enable extended prompt caching, which keeps cached prefixes active for up to 24 hours. Defaults to'in_memory'for standard prompt caching. Note:'24h'is currently only available for the 5.1 series of models. -
safetyIdentifier string A stable identifier used to help detect users of your application that may be violating OpenAI's usage policies. The IDs should be a string that uniquely identifies each user.
-
systemMessageMode 'system' | 'developer' | 'remove' Controls the role of the system message when making requests. By default (when omitted), for models that support reasoning the
systemmessage is automatically converted to adevelopermessage. SettingsystemMessageModetosystempasses the system message as a system-level instruction;developerpasses it as a developer message;removeomits the system message from the request. -
forceReasoning boolean Force treating this model as a reasoning model. This is useful for "stealth" reasoning models (e.g. via a custom baseURL) where the model ID is not recognized by the SDK's allowlist. When enabled, the SDK applies reasoning-model parameter compatibility rules and defaults
systemMessageModetodeveloperunless overridden.
The OpenAI responses provider also returns provider-specific metadata:
const { providerMetadata } = await generateText({
model: openai.responses('gpt-5'),
});
const openaiMetadata = providerMetadata?.openai;
The following OpenAI-specific metadata is returned:
-
responseId string The ID of the response. Can be used to continue a conversation.
-
cachedPromptTokens number The number of prompt tokens that were a cache hit.
-
reasoningTokens number The number of reasoning tokens that the model generated.
Reasoning Output
For reasoning models like gpt-5, you can enable reasoning summaries to see the model's thought process. Different models support different summarizers—for example, o4-mini supports detailed summaries. Set reasoningSummary: "auto" to automatically receive the richest level available.
import { openai } from '@ai-sdk/openai';
import { streamText } from 'ai';
const result = streamText({
model: openai('gpt-5'),
prompt: 'Tell me about the Mission burrito debate in San Francisco.',
providerOptions: {
openai: {
reasoningSummary: 'detailed', // 'auto' for condensed or 'detailed' for comprehensive
},
},
});
for await (const part of result.fullStream) {
if (part.type === 'reasoning') {
console.log(`Reasoning: ${part.textDelta}`);
} else if (part.type === 'text-delta') {
process.stdout.write(part.textDelta);
}
}
For non-streaming calls with generateText, the reasoning summaries are available in the reasoning field of the response:
import { openai } from '@ai-sdk/openai';
import { generateText } from 'ai';
const result = await generateText({
model: openai('gpt-5'),
prompt: 'Tell me about the Mission burrito debate in San Francisco.',
providerOptions: {
openai: {
reasoningSummary: 'auto',
},
},
});
console.log('Reasoning:', result.reasoning);
Learn more about reasoning summaries in the OpenAI documentation.
Verbosity Control
You can control the length and detail of model responses using the textVerbosity parameter:
import { openai } from '@ai-sdk/openai';
import { generateText } from 'ai';
const result = await generateText({
model: openai('gpt-5-mini'),
prompt: 'Write a poem about a boy and his first pet dog.',
providerOptions: {
openai: {
textVerbosity: 'low', // 'low' for concise, 'medium' (default), or 'high' for verbose
},
},
});
The textVerbosity parameter scales output length without changing the underlying prompt:
'low': Produces terse, minimal responses'medium': Balanced detail (default)'high': Verbose responses with comprehensive detail
Web Search Tool
The OpenAI responses API supports web search through the openai.tools.webSearch tool.
const result = await generateText({
model: openai('gpt-5'),
prompt: 'What happened in San Francisco last week?',
tools: {
web_search: openai.tools.webSearch({
// optional configuration:
externalWebAccess: true,
searchContextSize: 'high',
userLocation: {
type: 'approximate',
city: 'San Francisco',
region: 'California',
},
}),
},
// Force web search tool (optional):
toolChoice: { type: 'tool', toolName: 'web_search' },
});
// URL sources directly from `results`
const sources = result.sources;
// Or access sources from tool results
for (const toolResult of result.toolResults) {
if (toolResult.toolName === 'web_search') {
console.log('Query:', toolResult.output.action.query);
console.log('Sources:', toolResult.output.sources);
// `sources` is an array of object: { type: 'url', url: string }
}
}
For detailed information on configuration options see the OpenAI Web Search Tool documentation.
File Search Tool
The OpenAI responses API supports file search through the openai.tools.fileSearch tool.
You can force the use of the file search tool by setting the toolChoice parameter to { type: 'tool', toolName: 'file_search' }.
const result = await generateText({
model: openai('gpt-5'),
prompt: 'What does the document say about user authentication?',
tools: {
file_search: openai.tools.fileSearch({
vectorStoreIds: ['vs_123'],
// configuration below is optional:
maxNumResults: 5,
filters: {
key: 'author',
type: 'eq',
value: 'Jane Smith',
},
ranking: {
ranker: 'auto',
scoreThreshold: 0.5,
},
}),
},
providerOptions: {
openai: {
// optional: include results
include: ['file_search_call.results'],
} satisfies OpenAIResponsesProviderOptions,
},
});
Image Generation Tool
OpenAI's Responses API supports multi-modal image generation as a provider-defined tool.
Availability is restricted to specific models (for example, gpt-5 variants).
You can use the image tool with either generateText or streamText:
import { openai } from '@ai-sdk/openai';
import { generateText } from 'ai';
const result = await generateText({
model: openai('gpt-5'),
prompt:
'Generate an image of an echidna swimming across the Mozambique channel.',
tools: {
image_generation: openai.tools.imageGeneration({ outputFormat: 'webp' }),
},
});
for (const toolResult of result.staticToolResults) {
if (toolResult.toolName === 'image_generation') {
const base64Image = toolResult.output.result;
}
}
import { openai } from '@ai-sdk/openai';
import { streamText } from 'ai';
const result = streamText({
model: openai('gpt-5'),
prompt:
'Generate an image of an echidna swimming across the Mozambique channel.',
tools: {
image_generation: openai.tools.imageGeneration({
outputFormat: 'webp',
quality: 'low',
}),
},
});
for await (const part of result.fullStream) {
if (part.type == 'tool-result' && !part.dynamic) {
const base64Image = part.output.result;
}
}
For complete details on model availability, image quality controls, supported sizes, and tool-specific parameters, refer to the OpenAI documentation:
- Image generation overview and models: OpenAI Image Generation
- Image generation tool parameters (background, size, quality, format, etc.): Image Generation Tool Options
Code Interpreter Tool
The OpenAI responses API supports the code interpreter tool through the openai.tools.codeInterpreter tool.
This allows models to write and execute Python code.
import { openai } from '@ai-sdk/openai';
import { generateText } from 'ai';
const result = await generateText({
model: openai('gpt-5'),
prompt: 'Write and run Python code to calculate the factorial of 10',
tools: {
code_interpreter: openai.tools.codeInterpreter({
// optional configuration:
container: {
fileIds: ['file-123', 'file-456'], // optional file IDs to make available
},
}),
},
});
The code interpreter tool can be configured with:
- container: Either a container ID string or an object with
fileIdsto specify uploaded files that should be available to the code interpreter
MCP Tool
The OpenAI responses API supports connecting to Model Context Protocol (MCP) servers through the openai.tools.mcp tool. This allows models to call tools exposed by remote MCP servers or service connectors.
import { openai } from '@ai-sdk/openai';
import { generateText } from 'ai';
const result = await generateText({
model: openai('gpt-5'),
prompt: 'Search the web for the latest news about AI developments',
tools: {
mcp: openai.tools.mcp({
serverLabel: 'web-search',
serverUrl: 'https://mcp.exa.ai/mcp',
serverDescription: 'A web-search API for AI agents',
}),
},
});
The MCP tool can be configured with:
-
serverLabel string (required)
A label to identify the MCP server. This label is used in tool calls to distinguish between multiple MCP servers.
-
serverUrl string (required if
connectorIdis not provided)The URL for the MCP server. Either
serverUrlorconnectorIdmust be provided. -
connectorId string (required if
serverUrlis not provided)Identifier for a service connector. Either
serverUrlorconnectorIdmust be provided. -
serverDescription string (optional)
Optional description of the MCP server that helps the model understand its purpose.
-
allowedTools string[] | object (optional)
Controls which tools from the MCP server are available. Can be:
- An array of tool names:
['tool1', 'tool2'] - An object with filters:
{ readOnly: true, // Only allow read-only tools toolNames: ['tool1', 'tool2'] // Specific tool names }
- An array of tool names:
-
authorization string (optional)
OAuth access token for authenticating with the MCP server or connector.
-
headers Record<string, string> (optional)
Optional HTTP headers to include in requests to the MCP server.
-
requireApproval 'always' | 'never' | object (optional)
Controls which MCP tool calls require user approval before execution. Can be:
'always': All MCP tool calls require approval'never': No MCP tool calls require approval (default)- An object with filters:
{ never: { toolNames: ['safe_tool', 'another_safe_tool']; // Skip approval for these tools } }
When approval is required, the model will return a
tool-approval-requestcontent part that you can use to prompt the user for approval. See Human in the Loop for more details on implementing approval workflows.
Local Shell Tool
The OpenAI responses API support the local shell tool for Codex models through the openai.tools.localShell tool.
Local shell is a tool that allows agents to run shell commands locally on a machine you or the user provides.
import { openai } from '@ai-sdk/openai';
import { generateText } from 'ai';
const result = await generateText({
model: openai.responses('gpt-5-codex'),
tools: {
local_shell: openai.tools.localShell({
execute: async ({ action }) => {
// ... your implementation, e.g. sandbox access ...
return { output: stdout };
},
}),
},
prompt: 'List the files in my home directory.',
stopWhen: stepCountIs(2),
});
Shell Tool
The OpenAI Responses API supports the shell tool for GPT-5.1 models through the openai.tools.shell tool.
The shell tool allows allows running bash commands and interacting with a command line.
The model proposes shell commands; your integration executes them and returns the outputs.
import { openai } from '@ai-sdk/openai';
import { generateText } from 'ai';
import { exec } from 'child_process';
import { promisify } from 'util';
const execAsync = promisify(exec);
const result = await generateText({
model: openai('gpt-5.1'),
tools: {
shell: openai.tools.shell({
execute: async ({ action }) => {
// ... your implementation, e.g. sandbox access ...
return { output: results };
},
}),
},
prompt: 'List the files in the current directory and show disk usage.',
});
Your execute function must return an output array with results for each command:
- stdout string - Standard output from the command
- stderr string - Standard error from the command
- outcome - Either
{ type: 'timeout' }or{ type: 'exit', exitCode: number }
Apply Patch Tool
The OpenAI Responses API supports the apply patch tool for GPT-5.1 models through the openai.tools.applyPatch tool.
The apply patch tool lets the model create, update, and delete files in your codebase using structured diffs.
Instead of just suggesting edits, the model emits patch operations that your application applies and reports back on,
enabling iterative, multi-step code editing workflows.
import { openai } from '@ai-sdk/openai';
import { generateText, stepCountIs } from 'ai';
const result = await generateText({
model: openai('gpt-5.1'),
tools: {
apply_patch: openai.tools.applyPatch({
execute: async ({ callId, operation }) => {
// ... your implementation for applying the diffs.
},
}),
},
prompt: 'Create a python file that calculates the factorial of a number',
stopWhen: stepCountIs(5),
});
Your execute function must return:
- status 'completed' | 'failed' - Whether the patch was applied successfully
- output string (optional) - Human-readable log text (e.g., results or error messages)
Image Inputs
The OpenAI Responses API supports Image inputs for appropriate models. You can pass Image files as part of the message content using the 'image' type:
const result = await generateText({
model: openai('gpt-5'),
messages: [
{
role: 'user',
content: [
{
type: 'text',
text: 'Please describe the image.',
},
{
type: 'image',
image: readFileSync('./data/image.png'),
},
],
},
],
});
The model will have access to the image and will respond to questions about it.
The image should be passed using the image field.
You can also pass a file-id from the OpenAI Files API.
{
type: 'image',
image: 'file-8EFBcWHsQxZV7YGezBC1fq'
}
You can also pass the URL of an image.
{
type: 'image',
image: 'https://sample.edu/image.png',
}
PDF Inputs
The OpenAI Responses API supports reading PDF files.
You can pass PDF files as part of the message content using the file type:
const result = await generateText({
model: openai('gpt-5'),
messages: [
{
role: 'user',
content: [
{
type: 'text',
text: 'What is an embedding model?',
},
{
type: 'file',
data: readFileSync('./data/ai.pdf'),
mediaType: 'application/pdf',
filename: 'ai.pdf', // optional
},
],
},
],
});
You can also pass a file-id from the OpenAI Files API.
{
type: 'file',
data: 'file-8EFBcWHsQxZV7YGezBC1fq',
mediaType: 'application/pdf',
}
You can also pass the URL of a pdf.
{
type: 'file',
data: 'https://sample.edu/example.pdf',
mediaType: 'application/pdf',
filename: 'ai.pdf', // optional
}
The model will have access to the contents of the PDF file and
respond to questions about it.
The PDF file should be passed using the data field,
and the mediaType should be set to 'application/pdf'.
Structured Outputs
The OpenAI Responses API supports structured outputs. You can enforce structured outputs using generateObject or streamObject, which expose a schema option. Additionally, you can pass a Zod or JSON Schema object to the output option when using generateText or streamText.
// Using generateObject
const result = await generateObject({
model: openai('gpt-4.1'),
schema: z.object({
recipe: z.object({
name: z.string(),
ingredients: z.array(
z.object({
name: z.string(),
amount: z.string(),
}),
),
steps: z.array(z.string()),
}),
}),
prompt: 'Generate a lasagna recipe.',
});
// Using generateText
const result = await generateText({
model: openai('gpt-4.1'),
prompt: 'How do I make a pizza?',
output: Output.object({
schema: z.object({
ingredients: z.array(z.string()),
steps: z.array(z.string()),
}),
}),
});
Typed providerMetadata in Text Parts
When using the OpenAI Responses API, the SDK attaches OpenAI-specific metadata to output parts via providerMetadata.
This metadata can be used on the client side for tasks such as rendering citations or downloading files generated by the Code Interpreter. To enable type-safe handling of this metadata, the AI SDK exports dedicated TypeScript types.
For text parts, when part.type === 'text', the providerMetadata is provided in the form of OpenaiResponsesTextProviderMetadata.
This metadata includes the following fields:
-
itemIdThe ID of the output item in the Responses API. -
annotations(optional) An array of annotation objects generated by the model. If no annotations are present, this property itself may be omitted (undefined).Each element in
annotationsis a discriminated union with a requiredtypefield. Supported types include, for example:url_citationfile_citationcontainer_file_citationfile_path
These annotations directly correspond to the annotation objects defined by the Responses API and can be used for inline reference rendering or output analysis. For details, see the official OpenAI documentation: Responses API – output text annotations.
import {
openai,
type OpenaiResponsesTextProviderMetadata,
} from '@ai-sdk/openai';
import { generateText } from 'ai';
const result = await generateText({
model: openai('gpt-4.1-mini'),
prompt:
'Create a program that generates five random numbers between 1 and 100 with two decimal places, and show me the execution results. Also save the result to a file.',
tools: {
code_interpreter: openai.tools.codeInterpreter(),
web_search: openai.tools.webSearch(),
file_search: openai.tools.fileSearch({ vectorStoreIds: ['vs_1234'] }), // requires a configured vector store
},
});
for (const part of result.content) {
if (part.type === 'text') {
const providerMetadata = part.providerMetadata as
| OpenaiResponsesTextProviderMetadata
| undefined;
if (!providerMetadata) continue;
const { itemId: _itemId, annotations } = providerMetadata.openai;
if (!annotations) continue;
for (const annotation of annotations) {
switch (annotation.type) {
case 'url_citation':
// url_citation is returned from web_search and provides:
// properties: type, url, title, start_index and end_index
break;
case 'file_citation':
// file_citation is returned from file_search and provides:
// properties: type, file_id, filename and index
break;
case 'container_file_citation':
// container_file_citation is returned from code_interpreter and provides:
// properties: type, container_id, file_id, filename, start_index and end_index
break;
case 'file_path':
// file_path provides:
// properties: type, file_id and index
break;
default: {
const _exhaustiveCheck: never = annotation;
throw new Error(
`Unhandled annotation: ${JSON.stringify(_exhaustiveCheck)}`,
);
}
}
}
}
}
Typed providerMetadata in Source Document Parts
For source document parts, when part.type === 'source' and sourceType === 'document', the providerMetadata is provided as OpenaiResponsesSourceDocumentProviderMetadata.
This metadata is also a discriminated union with a required type field. Supported types include:
file_citationcontainer_file_citationfile_path
Each type includes the identifiers required to work with the referenced resource, such as fileId and containerId.
import {
openai,
type OpenaiResponsesSourceDocumentProviderMetadata,
} from '@ai-sdk/openai';
import { generateText } from 'ai';
const result = await generateText({
model: openai('gpt-4.1-mini'),
prompt:
'Create a program that generates five random numbers between 1 and 100 with two decimal places, and show me the execution results. Also save the result to a file.',
tools: {
code_interpreter: openai.tools.codeInterpreter(),
web_search: openai.tools.webSearch(),
file_search: openai.tools.fileSearch({ vectorStoreIds: ['vs_1234'] }), // requires a configured vector store
},
});
for (const part of result.content) {
if (part.type === 'source') {
if (part.sourceType === 'document') {
const providerMetadata = part.providerMetadata as
| OpenaiResponsesSourceDocumentProviderMetadata
| undefined;
if (!providerMetadata) continue;
const annotation = providerMetadata.openai;
switch (annotation.type) {
case 'file_citation':
// file_citation is returned from file_search and provides:
// properties: type, fileId and index
// The filename can be accessed via part.filename.
break;
case 'container_file_citation':
// container_file_citation is returned from code_interpreter and provides:
// properties: type, containerId and fileId
// The filename can be accessed via part.filename.
break;
case 'file_path':
// file_path provides:
// properties: type, fileId and index
break;
default: {
const _exhaustiveCheck: never = annotation;
throw new Error(
`Unhandled annotation: ${JSON.stringify(_exhaustiveCheck)}`,
);
}
}
}
}
}
Chat Models
You can create models that call the OpenAI chat API using the .chat() factory method.
The first argument is the model id, e.g. gpt-4.
The OpenAI chat models support tool calls and some have multi-modal capabilities.
const model = openai.chat('gpt-5');
OpenAI chat models support also some model specific provider options that are not part of the standard call settings.
You can pass them in the providerOptions argument:
import { openai, type OpenAIChatLanguageModelOptions } from '@ai-sdk/openai';
const model = openai.chat('gpt-5');
await generateText({
model,
providerOptions: {
openai: {
logitBias: {
// optional likelihood for specific tokens
'50256': -100,
},
user: 'test-user', // optional unique user identifier
} satisfies OpenAIChatLanguageModelOptions,
},
});
The following optional provider options are available for OpenAI chat models:
-
logitBias Record<number, number>
Modifies the likelihood of specified tokens appearing in the completion.
Accepts a JSON object that maps tokens (specified by their token ID in the GPT tokenizer) to an associated bias value from -100 to 100. You can use this tokenizer tool to convert text to token IDs. Mathematically, the bias is added to the logits generated by the model prior to sampling. The exact effect will vary per model, but values between -1 and 1 should decrease or increase likelihood of selection; values like -100 or 100 should result in a ban or exclusive selection of the relevant token.
As an example, you can pass
{"50256": -100}to prevent the token from being generated. -
logprobs boolean | number
Return the log probabilities of the tokens. Including logprobs will increase the response size and can slow down response times. However, it can be useful to better understand how the model is behaving.
Setting to true will return the log probabilities of the tokens that were generated.
Setting to a number will return the log probabilities of the top n tokens that were generated.
-
parallelToolCalls boolean
Whether to enable parallel function calling during tool use. Defaults to
true. -
user string
A unique identifier representing your end-user, which can help OpenAI to monitor and detect abuse. Learn more.
-
reasoningEffort 'minimal' | 'low' | 'medium' | 'high' | 'xhigh'
Reasoning effort for reasoning models. Defaults to
medium. If you useproviderOptionsto set thereasoningEffortoption, this model setting will be ignored. -
maxCompletionTokens number
Maximum number of completion tokens to generate. Useful for reasoning models.
-
store boolean
Whether to enable persistence in Responses API.
-
metadata Record<string, string>
Metadata to associate with the request.
-
prediction Record<string, any>
Parameters for prediction mode.
-
serviceTier 'auto' | 'flex' | 'priority' | 'default'
Service tier for the request. Set to 'flex' for 50% cheaper processing at the cost of increased latency (available for o3, o4-mini, and gpt-5 models). Set to 'priority' for faster processing with Enterprise access (available for gpt-4, gpt-5, gpt-5-mini, o3, o4-mini; gpt-5-nano is not supported).
Defaults to 'auto'.
-
strictJsonSchema boolean
Whether to use strict JSON schema validation. Defaults to
true. -
textVerbosity 'low' | 'medium' | 'high'
Controls the verbosity of the model's responses. Lower values will result in more concise responses, while higher values will result in more verbose responses.
-
promptCacheKey string
A cache key for manual prompt caching control. Used by OpenAI to cache responses for similar requests to optimize your cache hit rates.
-
promptCacheRetention 'in_memory' | '24h'
The retention policy for the prompt cache. Set to
'24h'to enable extended prompt caching, which keeps cached prefixes active for up to 24 hours. Defaults to'in_memory'for standard prompt caching. Note:'24h'is currently only available for the 5.1 series of models. -
safetyIdentifier string
A stable identifier used to help detect users of your application that may be violating OpenAI's usage policies. The IDs should be a string that uniquely identifies each user.
Reasoning
OpenAI has introduced the o1,o3, and o4 series of reasoning models.
Currently, o4-mini, o3, o3-mini, and o1 are available via both the chat and responses APIs. The
models codex-mini-latest and computer-use-preview are available only via the responses API.
Reasoning models currently only generate text, have several limitations, and are only supported using generateText and streamText.
They support additional settings and response metadata:
-
You can use
providerOptionsto set- the
reasoningEffortoption (or alternatively thereasoningEffortmodel setting), which determines the amount of reasoning the model performs.
- the
-
You can use response
providerMetadatato access the number of reasoning tokens that the model generated.
import { openai } from '@ai-sdk/openai';
import { generateText } from 'ai';
const { text, usage, providerMetadata } = await generateText({
model: openai.chat('gpt-5'),
prompt: 'Invent a new holiday and describe its traditions.',
providerOptions: {
openai: {
reasoningEffort: 'low',
},
},
});
console.log(text);
console.log('Usage:', {
...usage,
reasoningTokens: providerMetadata?.openai?.reasoningTokens,
});
-
You can control how system messages are handled by providerOptions
systemMessageMode:developer: treat the prompt as a developer message (default for reasoning models).system: keep the system message as a system-level instruction.remove: remove the system message from the messages.
import { openai } from '@ai-sdk/openai';
import { generateText } from 'ai';
const result = await generateText({
model: openai.chat('gpt-5'),
messages: [
{ role: 'system', content: 'You are a helpful assistant.' },
{ role: 'user', content: 'Tell me a joke.' },
],
providerOptions: {
openai: {
systemMessageMode: 'system',
},
},
});
Strict Structured Outputs
Strict structured outputs are enabled by default.
You can disable them by setting the strictJsonSchema option to false.
import { openai, OpenAIChatLanguageModelOptions } from '@ai-sdk/openai';
import { generateObject } from 'ai';
import { z } from 'zod';
const result = await generateObject({
model: openai.chat('gpt-4o-2024-08-06'),
providerOptions: {
openai: {
strictJsonSchema: false,
} satisfies OpenAIChatLanguageModelOptions,
},
schemaName: 'recipe',
schemaDescription: 'A recipe for lasagna.',
schema: z.object({
name: z.string(),
ingredients: z.array(
z.object({
name: z.string(),
amount: z.string(),
}),
),
steps: z.array(z.string()),
}),
prompt: 'Generate a lasagna recipe.',
});
console.log(JSON.stringify(result.object, null, 2));
For example, optional schema properties are not supported.
You need to change Zod .nullish() and .optional() to .nullable().
Logprobs
OpenAI provides logprobs information for completion/chat models.
You can access it in the providerMetadata object.
import { openai } from '@ai-sdk/openai';
import { generateText } from 'ai';
const result = await generateText({
model: openai.chat('gpt-5'),
prompt: 'Write a vegetarian lasagna recipe for 4 people.',
providerOptions: {
openai: {
// this can also be a number,
// refer to logprobs provider options section for more
logprobs: true,
},
},
});
const openaiMetadata = (await result.providerMetadata)?.openai;
const logprobs = openaiMetadata?.logprobs;
Image Support
The OpenAI Chat API supports Image inputs for appropriate models. You can pass Image files as part of the message content using the 'image' type:
const result = await generateText({
model: openai.chat('gpt-5'),
messages: [
{
role: 'user',
content: [
{
type: 'text',
text: 'Please describe the image.',
},
{
type: 'image',
image: readFileSync('./data/image.png'),
},
],
},
],
});
The model will have access to the image and will respond to questions about it.
The image should be passed using the image field.
You can also pass the URL of an image.
{
type: 'image',
image: 'https://sample.edu/image.png',
}
PDF support
The OpenAI Chat API supports reading PDF files.
You can pass PDF files as part of the message content using the file type:
const result = await generateText({
model: openai.chat('gpt-5'),
messages: [
{
role: 'user',
content: [
{
type: 'text',
text: 'What is an embedding model?',
},
{
type: 'file',
data: readFileSync('./data/ai.pdf'),
mediaType: 'application/pdf',
filename: 'ai.pdf', // optional
},
],
},
],
});
The model will have access to the contents of the PDF file and
respond to questions about it.
The PDF file should be passed using the data field,
and the mediaType should be set to 'application/pdf'.
You can also pass a file-id from the OpenAI Files API.
{
type: 'file',
data: 'file-8EFBcWHsQxZV7YGezBC1fq',
mediaType: 'application/pdf',
}
You can also pass the URL of a PDF.
{
type: 'file',
data: 'https://sample.edu/example.pdf',
mediaType: 'application/pdf',
filename: 'ai.pdf', // optional
}
Predicted Outputs
OpenAI supports predicted outputs for gpt-4o and gpt-4o-mini.
Predicted outputs help you reduce latency by allowing you to specify a base text that the model should modify.
You can enable predicted outputs by adding the prediction option to the providerOptions.openai object:
const result = streamText({
model: openai.chat('gpt-5'),
messages: [
{
role: 'user',
content: 'Replace the Username property with an Email property.',
},
{
role: 'user',
content: existingCode,
},
],
providerOptions: {
openai: {
prediction: {
type: 'content',
content: existingCode,
},
},
},
});
OpenAI provides usage information for predicted outputs (acceptedPredictionTokens and rejectedPredictionTokens).
You can access it in the providerMetadata object.
const openaiMetadata = (await result.providerMetadata)?.openai;
const acceptedPredictionTokens = openaiMetadata?.acceptedPredictionTokens;
const rejectedPredictionTokens = openaiMetadata?.rejectedPredictionTokens;
Image Detail
You can use the openai provider option to set the image input detail to high, low, or auto:
const result = await generateText({
model: openai.chat('gpt-5'),
messages: [
{
role: 'user',
content: [
{ type: 'text', text: 'Describe the image in detail.' },
{
type: 'image',
image:
'https://github.com/vercel/ai/blob/main/examples/ai-functions/data/comic-cat.png?raw=true',
// OpenAI specific options - image detail:
providerOptions: {
openai: { imageDetail: 'low' },
},
},
],
},
],
});
Distillation
OpenAI supports model distillation for some models.
If you want to store a generation for use in the distillation process, you can add the store option to the providerOptions.openai object.
This will save the generation to the OpenAI platform for later use in distillation.
import { openai } from '@ai-sdk/openai';
import { generateText } from 'ai';
import 'dotenv/config';
async function main() {
const { text, usage } = await generateText({
model: openai.chat('gpt-4o-mini'),
prompt: 'Who worked on the original macintosh?',
providerOptions: {
openai: {
store: true,
metadata: {
custom: 'value',
},
},
},
});
console.log(text);
console.log();
console.log('Usage:', usage);
}
main().catch(console.error);
Prompt Caching
OpenAI has introduced Prompt Caching for supported models
including gpt-4o and gpt-4o-mini.
- Prompt caching is automatically enabled for these models, when the prompt is 1024 tokens or longer. It does not need to be explicitly enabled.
- You can use response
providerMetadatato access the number of prompt tokens that were a cache hit. - Note that caching behavior is dependent on load on OpenAI's infrastructure. Prompt prefixes generally remain in the cache following 5-10 minutes of inactivity before they are evicted, but during off-peak periods they may persist for up to an hour.
import { openai } from '@ai-sdk/openai';
import { generateText } from 'ai';
const { text, usage, providerMetadata } = await generateText({
model: openai.chat('gpt-4o-mini'),
prompt: `A 1024-token or longer prompt...`,
});
console.log(`usage:`, {
...usage,
cachedPromptTokens: providerMetadata?.openai?.cachedPromptTokens,
});
To improve cache hit rates, you can manually control caching using the promptCacheKey option:
import { openai } from '@ai-sdk/openai';
import { generateText } from 'ai';
const { text, usage, providerMetadata } = await generateText({
model: openai.chat('gpt-5'),
prompt: `A 1024-token or longer prompt...`,
providerOptions: {
openai: {
promptCacheKey: 'my-custom-cache-key-123',
},
},
});
console.log(`usage:`, {
...usage,
cachedPromptTokens: providerMetadata?.openai?.cachedPromptTokens,
});
For GPT-5.1 models, you can enable extended prompt caching that keeps cached prefixes active for up to 24 hours:
import { openai } from '@ai-sdk/openai';
import { generateText } from 'ai';
const { text, usage, providerMetadata } = await generateText({
model: openai.chat('gpt-5.1'),
prompt: `A 1024-token or longer prompt...`,
providerOptions: {
openai: {
promptCacheKey: 'my-custom-cache-key-123',
promptCacheRetention: '24h', // Extended caching for GPT-5.1
},
},
});
console.log(`usage:`, {
...usage,
cachedPromptTokens: providerMetadata?.openai?.cachedPromptTokens,
});
Audio Input
With the gpt-4o-audio-preview model, you can pass audio files to the model.
import { openai } from '@ai-sdk/openai';
import { generateText } from 'ai';
const result = await generateText({
model: openai.chat('gpt-4o-audio-preview'),
messages: [
{
role: 'user',
content: [
{ type: 'text', text: 'What is the audio saying?' },
{
type: 'file',
mediaType: 'audio/mpeg',
data: readFileSync('./data/galileo.mp3'),
},
],
},
],
});
Completion Models
You can create models that call the OpenAI completions API using the .completion() factory method.
The first argument is the model id.
Currently only gpt-3.5-turbo-instruct is supported.
const model = openai.completion('gpt-3.5-turbo-instruct');
OpenAI completion models support also some model specific settings that are not part of the standard call settings. You can pass them as an options argument:
const model = openai.completion('gpt-3.5-turbo-instruct');
await model.doGenerate({
providerOptions: {
openai: {
echo: true, // optional, echo the prompt in addition to the completion
logitBias: {
// optional likelihood for specific tokens
'50256': -100,
},
suffix: 'some text', // optional suffix that comes after a completion of inserted text
user: 'test-user', // optional unique user identifier
},
},
});
The following optional provider options are available for OpenAI completion models:
-
echo: boolean
Echo back the prompt in addition to the completion.
-
logitBias Record<number, number>
Modifies the likelihood of specified tokens appearing in the completion.
Accepts a JSON object that maps tokens (specified by their token ID in the GPT tokenizer) to an associated bias value from -100 to 100. You can use this tokenizer tool to convert text to token IDs. Mathematically, the bias is added to the logits generated by the model prior to sampling. The exact effect will vary per model, but values between -1 and 1 should decrease or increase likelihood of selection; values like -100 or 100 should result in a ban or exclusive selection of the relevant token.
As an example, you can pass
{"50256": -100}to prevent the <|endoftext|> token from being generated. -
logprobs boolean | number
Return the log probabilities of the tokens. Including logprobs will increase the response size and can slow down response times. However, it can be useful to better understand how the model is behaving.
Setting to true will return the log probabilities of the tokens that were generated.
Setting to a number will return the log probabilities of the top n tokens that were generated.
-
suffix string
The suffix that comes after a completion of inserted text.
-
user string
A unique identifier representing your end-user, which can help OpenAI to monitor and detect abuse. Learn more.
Model Capabilities
| Model | Image Input | Audio Input | Object Generation | Tool Usage |
|---|---|---|---|---|
gpt-5.2-pro |
||||
gpt-5.2-chat-latest |
||||
gpt-5.2 |
||||
gpt-5.1-codex-mini |
||||
gpt-5.1-codex |
||||
gpt-5.1-chat-latest |
||||
gpt-5.1 |
||||
gpt-5-pro |
||||
gpt-5 |
||||
gpt-5-mini |
||||
gpt-5-nano |
||||
gpt-5-codex |
||||
gpt-5-chat-latest |
||||
gpt-4.1 |
||||
gpt-4.1-mini |
||||
gpt-4.1-nano |
||||
gpt-4o |
||||
gpt-4o-mini |
Embedding Models
You can create models that call the OpenAI embeddings API
using the .embedding() factory method.
const model = openai.embedding('text-embedding-3-large');
OpenAI embedding models support several additional provider options. You can pass them as an options argument:
import { openai } from '@ai-sdk/openai';
import { embed } from 'ai';
const { embedding } = await embed({
model: openai.embedding('text-embedding-3-large'),
value: 'sunny day at the beach',
providerOptions: {
openai: {
dimensions: 512, // optional, number of dimensions for the embedding
user: 'test-user', // optional unique user identifier
},
},
});
The following optional provider options are available for OpenAI embedding models:
-
dimensions: number
The number of dimensions the resulting output embeddings should have. Only supported in text-embedding-3 and later models.
-
user string
A unique identifier representing your end-user, which can help OpenAI to monitor and detect abuse. Learn more.
Model Capabilities
| Model | Default Dimensions | Custom Dimensions |
|---|---|---|
text-embedding-3-large |
3072 | |
text-embedding-3-small |
1536 | |
text-embedding-ada-002 |
1536 |
Image Models
You can create models that call the OpenAI image generation API
using the .image() factory method.
const model = openai.image('dall-e-3');
Image Editing
OpenAI's gpt-image-1 model supports powerful image editing capabilities. Pass input images via prompt.images to transform, combine, or edit existing images.
Basic Image Editing
Transform an existing image using text prompts:
const imageBuffer = readFileSync('./input-image.png');
const { images } = await generateImage({
model: openai.image('gpt-image-1'),
prompt: {
text: 'Turn the cat into a dog but retain the style of the original image',
images: [imageBuffer],
},
});
Inpainting with Mask
Edit specific parts of an image using a mask. Transparent areas in the mask indicate where the image should be edited:
const image = readFileSync('./input-image.png');
const mask = readFileSync('./mask.png'); // Transparent areas = edit regions
const { images } = await generateImage({
model: openai.image('gpt-image-1'),
prompt: {
text: 'A sunlit indoor lounge area with a pool containing a flamingo',
images: [image],
mask: mask,
},
});
Background Removal
Remove the background from an image by setting background to transparent:
const imageBuffer = readFileSync('./input-image.png');
const { images } = await generateImage({
model: openai.image('gpt-image-1'),
prompt: {
text: 'do not change anything',
images: [imageBuffer],
},
providerOptions: {
openai: {
background: 'transparent',
output_format: 'png',
},
},
});
Multi-Image Combining
Combine multiple reference images into a single output. gpt-image-1 supports up to 16 input images:
const cat = readFileSync('./cat.png');
const dog = readFileSync('./dog.png');
const owl = readFileSync('./owl.png');
const bear = readFileSync('./bear.png');
const { images } = await generateImage({
model: openai.image('gpt-image-1'),
prompt: {
text: 'Combine these animals into a group photo, retaining the original style',
images: [cat, dog, owl, bear],
},
});
Model Capabilities
| Model | Sizes |
|---|---|
gpt-image-1.5 |
1024x1024, 1536x1024, 1024x1536 |
gpt-image-1-mini |
1024x1024, 1536x1024, 1024x1536 |
gpt-image-1 |
1024x1024, 1536x1024, 1024x1536 |
dall-e-3 |
1024x1024, 1792x1024, 1024x1792 |
dall-e-2 |
256x256, 512x512, 1024x1024 |
You can pass optional providerOptions to the image model. These are prone to change by OpenAI and are model dependent. For example, the gpt-image-1 model supports the quality option:
const { image, providerMetadata } = await generateImage({
model: openai.image('gpt-image-1.5'),
prompt: 'A salamander at sunrise in a forest pond in the Seychelles.',
providerOptions: {
openai: { quality: 'high' },
},
});
For more on generateImage() see Image Generation.
OpenAI's image models return additional metadata in the response that can be
accessed via providerMetadata.openai. The following OpenAI-specific metadata
is available:
-
images Array<object>
Array of image-specific metadata. Each image object may contain:
revisedPromptstring - The revised prompt that was actually used to generate the image (OpenAI may modify your prompt for safety or clarity)creatednumber - The Unix timestamp (in seconds) of when the image was createdsizestring - The size of the generated image. One of1024x1024,1024x1536, or1536x1024qualitystring - The quality of the generated image. One oflow,medium, orhighbackgroundstring - The background parameter used for the image generation. EithertransparentoropaqueoutputFormatstring - The output format of the generated image. One ofpng,webp, orjpeg
For more information on the available OpenAI image model options, see the OpenAI API reference.
Transcription Models
You can create models that call the OpenAI transcription API
using the .transcription() factory method.
The first argument is the model id e.g. whisper-1.
const model = openai.transcription('whisper-1');
You can also pass additional provider-specific options using the providerOptions argument. For example, supplying the input language in ISO-639-1 (e.g. en) format will improve accuracy and latency.
import { experimental_transcribe as transcribe } from 'ai';
import { openai } from '@ai-sdk/openai';
const result = await transcribe({
model: openai.transcription('whisper-1'),
audio: new Uint8Array([1, 2, 3, 4]),
providerOptions: { openai: { language: 'en' } },
});
To get word-level timestamps, specify the granularity:
import { experimental_transcribe as transcribe } from 'ai';
import { openai } from '@ai-sdk/openai';
const result = await transcribe({
model: openai.transcription('whisper-1'),
audio: new Uint8Array([1, 2, 3, 4]),
providerOptions: {
openai: {
//timestampGranularities: ['word'],
timestampGranularities: ['segment'],
},
},
});
// Access word-level timestamps
console.log(result.segments); // Array of segments with startSecond/endSecond
The following provider options are available:
-
timestampGranularities string[] The granularity of the timestamps in the transcription. Defaults to
['segment']. Possible values are['word'],['segment'], and['word', 'segment']. Note: There is no additional latency for segment timestamps, but generating word timestamps incurs additional latency. -
language string The language of the input audio. Supplying the input language in ISO-639-1 format (e.g. 'en') will improve accuracy and latency. Optional.
-
prompt string An optional text to guide the model's style or continue a previous audio segment. The prompt should match the audio language. Optional.
-
temperature number The sampling temperature, between 0 and 1. Higher values like 0.8 will make the output more random, while lower values like 0.2 will make it more focused and deterministic. If set to 0, the model will use log probability to automatically increase the temperature until certain thresholds are hit. Defaults to 0. Optional.
-
include string[] Additional information to include in the transcription response.
Model Capabilities
| Model | Transcription | Duration | Segments | Language |
|---|---|---|---|---|
whisper-1 |
||||
gpt-4o-mini-transcribe |
||||
gpt-4o-transcribe |
Speech Models
You can create models that call the OpenAI speech API
using the .speech() factory method.
The first argument is the model id e.g. tts-1.
const model = openai.speech('tts-1');
The voice argument can be set to one of OpenAI's available voices: alloy, ash, coral, echo, fable, onyx, nova, sage, or shimmer.
import { experimental_generateSpeech as generateSpeech } from 'ai';
import { openai } from '@ai-sdk/openai';
const result = await generateSpeech({
model: openai.speech('tts-1'),
text: 'Hello, world!',
voice: 'alloy', // OpenAI voice ID
});
You can also pass additional provider-specific options using the providerOptions argument:
import { experimental_generateSpeech as generateSpeech } from 'ai';
import { openai } from '@ai-sdk/openai';
const result = await generateSpeech({
model: openai.speech('tts-1'),
text: 'Hello, world!',
voice: 'alloy',
providerOptions: {
openai: {
speed: 1.2,
},
},
});
-
instructions string Control the voice of your generated audio with additional instructions e.g. "Speak in a slow and steady tone". Does not work with
tts-1ortts-1-hd. Optional. -
response_format string The format to audio in. Supported formats are
mp3,opus,aac,flac,wav, andpcm. Defaults tomp3. Optional. -
speed number The speed of the generated audio. Select a value from 0.25 to 4.0. Defaults to 1.0. Optional.
Model Capabilities
| Model | Instructions |
|---|---|
tts-1 |
|
tts-1-hd |
|
gpt-4o-mini-tts |
title: Azure OpenAI description: Learn how to use the Azure OpenAI provider for the AI SDK.
Azure OpenAI Provider
The Azure OpenAI provider contains language model support for the Azure OpenAI chat API.
Setup
The Azure OpenAI provider is available in the @ai-sdk/azure module. You can install it with
<Tabs items={['pnpm', 'npm', 'yarn', 'bun']}>
Provider Instance
You can import the default provider instance azure from @ai-sdk/azure:
import { azure } from '@ai-sdk/azure';
If you need a customized setup, you can import createAzure from @ai-sdk/azure and create a provider instance with your settings:
import { createAzure } from '@ai-sdk/azure';
const azure = createAzure({
resourceName: 'your-resource-name', // Azure resource name
apiKey: 'your-api-key',
});
You can use the following optional settings to customize the OpenAI provider instance:
-
resourceName string
Azure resource name. It defaults to the
AZURE_RESOURCE_NAMEenvironment variable.The resource name is used in the assembled URL:
https://{resourceName}.openai.azure.com/openai/v1{path}. You can usebaseURLinstead to specify the URL prefix. -
apiKey string
API key that is being sent using the
api-keyheader. It defaults to theAZURE_API_KEYenvironment variable. -
apiVersion string
Sets a custom api version. Defaults to
v1. -
baseURL string
Use a different URL prefix for API calls, e.g. to use proxy servers.
Either this or
resourceNamecan be used. When a baseURL is provided, the resourceName is ignored.With a baseURL, the resolved URL is
{baseURL}/v1{path}. -
headers Record<string,string>
Custom headers to include in the requests.
-
fetch (input: RequestInfo, init?: RequestInit) => Promise<Response>
Custom fetch implementation. Defaults to the global
fetchfunction. You can use it as a middleware to intercept requests, or to provide a custom fetch implementation for e.g. testing. -
useDeploymentBasedUrls boolean
Use deployment-based URLs for API calls. Set to
trueto use the legacy deployment format:{baseURL}/deployments/{deploymentId}{path}?api-version={apiVersion}instead of{baseURL}/v1{path}?api-version={apiVersion}. Defaults tofalse.This option is useful for compatibility with certain Azure OpenAI models or deployments that require the legacy endpoint format.
Language Models
The Azure OpenAI provider instance is a function that you can invoke to create a language model:
const model = azure('your-deployment-name');
You need to pass your deployment name as the first argument.
Reasoning Models
Azure exposes the thinking of DeepSeek-R1 in the generated text using the <think> tag.
You can use the extractReasoningMiddleware to extract this reasoning and expose it as a reasoning property on the result:
import { azure } from '@ai-sdk/azure';
import { wrapLanguageModel, extractReasoningMiddleware } from 'ai';
const enhancedModel = wrapLanguageModel({
model: azure('your-deepseek-r1-deployment-name'),
middleware: extractReasoningMiddleware({ tagName: 'think' }),
});
You can then use that enhanced model in functions like generateText and streamText.
Example
You can use OpenAI language models to generate text with the generateText function:
import { azure } from '@ai-sdk/azure';
import { generateText } from 'ai';
const { text } = await generateText({
model: azure('your-deployment-name'),
prompt: 'Write a vegetarian lasagna recipe for 4 people.',
});
OpenAI language models can also be used in the streamText, generateObject, and streamObject functions
(see AI SDK Core).
Provider Options
When using OpenAI language models on Azure, you can configure provider-specific options using providerOptions.openai. More information on available configuration options are on the OpenAI provider page.
const messages = [
{
role: 'user',
content: [
{
type: 'text',
text: 'What is the capital of the moon?',
},
{
type: 'image',
image: 'https://example.com/image.png',
providerOptions: {
openai: { imageDetail: 'low' },
},
},
],
},
];
const { text } = await generateText({
model: azure('your-deployment-name'),
providerOptions: {
openai: {
reasoningEffort: 'low',
},
},
});
Chat Models
The URL for calling Azure chat models will be constructed as follows: `https://RESOURCE_NAME.openai.azure.com/openai/v1/chat/completions?api-version=v1`You can create models that call the Azure OpenAI chat completions API using the .chat() factory method:
const model = azure.chat('your-deployment-name');
Azure OpenAI chat models support also some model specific settings that are not part of the standard call settings. You can pass them as an options argument:
import { azure } from '@ai-sdk/azure';
import { generateText } from 'ai';
const result = await generateText({
model: azure.chat('your-deployment-name'),
prompt: 'Write a short story about a robot.',
providerOptions: {
openai: {
logitBias: {
// optional likelihood for specific tokens
'50256': -100,
},
user: 'test-user', // optional unique user identifier
},
},
});
The following optional provider options are available for OpenAI chat models:
-
logitBias Record<number, number>
Modifies the likelihood of specified tokens appearing in the completion.
Accepts a JSON object that maps tokens (specified by their token ID in the GPT tokenizer) to an associated bias value from -100 to 100. You can use this tokenizer tool to convert text to token IDs. Mathematically, the bias is added to the logits generated by the model prior to sampling. The exact effect will vary per model, but values between -1 and 1 should decrease or increase likelihood of selection; values like -100 or 100 should result in a ban or exclusive selection of the relevant token.
As an example, you can pass
{"50256": -100}to prevent the token from being generated. -
logprobs boolean | number
Return the log probabilities of the tokens. Including logprobs will increase the response size and can slow down response times. However, it can be useful to better understand how the model is behaving.
Setting to true will return the log probabilities of the tokens that were generated.
Setting to a number will return the log probabilities of the top n tokens that were generated.
-
parallelToolCalls boolean
Whether to enable parallel function calling during tool use. Default to true.
-
user string
A unique identifier representing your end-user, which can help OpenAI to monitor and detect abuse. Learn more.
Responses Models
Azure OpenAI uses responses API as default with the azure(deploymentName) factory method.
const model = azure('your-deployment-name');
Further configuration can be done using OpenAI provider options.
You can validate the provider options using the OpenAIResponsesProviderOptions type.
import { azure, OpenAIResponsesProviderOptions } from '@ai-sdk/azure';
import { generateText } from 'ai';
const result = await generateText({
model: azure('your-deployment-name'),
providerOptions: {
azure: {
parallelToolCalls: false,
store: false,
user: 'user_123',
// ...
} satisfies OpenAIResponsesProviderOptions,
},
// ...
});
The following provider options are available:
-
parallelToolCalls boolean Whether to use parallel tool calls. Defaults to
true. -
store boolean Whether to store the generation. Defaults to
true. -
metadata Record<string, string> Additional metadata to store with the generation.
-
previousResponseId string The ID of the previous response. You can use it to continue a conversation. Defaults to
undefined. -
instructions string Instructions for the model. They can be used to change the system or developer message when continuing a conversation using the
previousResponseIdoption. Defaults toundefined. -
user string A unique identifier representing your end-user, which can help OpenAI to monitor and detect abuse. Defaults to
undefined. -
reasoningEffort 'low' | 'medium' | 'high' Reasoning effort for reasoning models. Defaults to
medium. If you useproviderOptionsto set thereasoningEffortoption, this model setting will be ignored. -
strictJsonSchema boolean Whether to use strict JSON schema validation. Defaults to
false.
The Azure OpenAI provider also returns provider-specific metadata:
const { providerMetadata } = await generateText({
model: azure('your-deployment-name'),
});
const openaiMetadata = providerMetadata?.openai;
The following OpenAI-specific metadata is returned:
-
responseId string The ID of the response. Can be used to continue a conversation.
-
cachedPromptTokens number The number of prompt tokens that were a cache hit.
-
reasoningTokens number The number of reasoning tokens that the model generated.
Web Search Tool
The Azure OpenAI responses API supports web search(preview) through the azure.tools.webSearchPreview tool.
const result = await generateText({
model: azure('gpt-4.1-mini'),
prompt: 'What happened in San Francisco last week?',
tools: {
web_search_preview: azure.tools.webSearchPreview({
// optional configuration:
searchContextSize: 'low',
userLocation: {
type: 'approximate',
city: 'San Francisco',
region: 'California',
},
}),
},
// Force web search tool (optional):
toolChoice: { type: 'tool', toolName: 'web_search_preview' },
});
console.log(result.text);
// URL sources directly from `results`
const sources = result.sources;
for (const source of sources) {
console.log('source:', source);
}
File Search Tool
The Azure OpenAI provider supports file search through the azure.tools.fileSearch tool.
You can force the use of the file search tool by setting the toolChoice parameter to { type: 'tool', toolName: 'file_search' }.
const result = await generateText({
model: azure('gpt-5'),
prompt: 'What does the document say about user authentication?',
tools: {
file_search: azure.tools.fileSearch({
// optional configuration:
vectorStoreIds: ['vs_123', 'vs_456'],
maxNumResults: 10,
ranking: {
ranker: 'auto',
},
}),
},
// Force file search tool:
toolChoice: { type: 'tool', toolName: 'file_search' },
});
Image Generation Tool
Azure OpenAI's Responses API supports multi-modal image generation as a provider-defined tool.
Availability is restricted to specific models (for example, gpt-5 variants).
import { createAzure } from '@ai-sdk/azure';
import { generateText } from 'ai';
const azure = createAzure({
headers: {
'x-ms-oai-image-generation-deployment': 'gpt-image-1', // use your own image model deployment
},
});
const result = await generateText({
model: azure('gpt-5'),
prompt:
'Generate an image of an echidna swimming across the Mozambique channel.',
tools: {
image_generation: azure.tools.imageGeneration({ outputFormat: 'png' }),
},
});
for (const toolResult of result.staticToolResults) {
if (toolResult.toolName === 'image_generation') {
const base64Image = toolResult.output.result;
}
}
Code Interpreter Tool
The Azure OpenAI provider supports the code interpreter tool through the azure.tools.codeInterpreter tool. This allows models to write and execute Python code.
import { azure } from '@ai-sdk/azure';
import { generateText } from 'ai';
const result = await generateText({
model: azure('gpt-5'),
prompt: 'Write and run Python code to calculate the factorial of 10',
tools: {
code_interpreter: azure.tools.codeInterpreter({
// optional configuration:
container: {
fileIds: ['assistant-123', 'assistant-456'], // optional file IDs to make available
},
}),
},
});
The code interpreter tool can be configured with:
- container: Either a container ID string or an object with
fileIdsto specify uploaded files that should be available to the code interpreter
PDF support
The Azure OpenAI provider supports reading PDF files.
You can pass PDF files as part of the message content using the file type:
const result = await generateText({
model: azure('your-deployment-name'),
messages: [
{
role: 'user',
content: [
{
type: 'text',
text: 'What is an embedding model?',
},
{
type: 'file',
data: fs.readFileSync('./data/ai.pdf'),
mediaType: 'application/pdf',
filename: 'ai.pdf', // optional
},
],
},
],
});
The model will have access to the contents of the PDF file and
respond to questions about it.
The PDF file should be passed using the data field,
and the mediaType should be set to 'application/pdf'.
Typed providerMetadata in Text Parts
When using the Azure OpenAI Responses API, the SDK attaches Azure OpenAI-specific metadata to output parts via providerMetadata.
This metadata can be used on the client side for tasks such as rendering citations or downloading files generated by the Code Interpreter. To enable type-safe handling of this metadata, the AI SDK exports dedicated TypeScript types.
For text parts, when part.type === 'text', the providerMetadata is provided in the form of AzureResponsesTextProviderMetadata.
This metadata includes the following fields:
-
itemId
The ID of the output item in the Responses API. -
annotations(optional) An array of annotation objects generated by the model. If no annotations are present, this property itself may be omitted (undefined).Each element in
annotationsis a discriminated union with a requiredtypefield. Supported types include, for example:url_citationfile_citationcontainer_file_citationfile_path
These annotations directly correspond to the annotation objects defined by the Responses API and can be used for inline reference rendering or output analysis. For details, see the official OpenAI documentation: Responses API – output text annotations.
import { azure, type AzureResponsesTextProviderMetadata } from '@ai-sdk/azure';
import { generateText } from 'ai';
const result = await generateText({
model: azure('gpt-4.1-mini'),
prompt:
'Create a program that generates five random numbers between 1 and 100 with two decimal places, and show me the execution results. Also save the result to a file.',
tools: {
code_interpreter: azure.tools.codeInterpreter(),
web_search_preview: azure.tools.webSearchPreview({}),
file_search: azure.tools.fileSearch({ vectorStoreIds: ['vs_1234'] }), // requires a configured vector store
},
});
for (const part of result.content) {
if (part.type === 'text') {
const providerMetadata = part.providerMetadata as
| AzureResponsesTextProviderMetadata
| undefined;
if (!providerMetadata) continue;
const { itemId: _itemId, annotations } = providerMetadata.azure;
if (!annotations) continue;
for (const annotation of annotations) {
switch (annotation.type) {
case 'url_citation':
// url_citation is returned from web_search and provides:
// properties: type, url, title, start_index and end_index
break;
case 'file_citation':
// file_citation is returned from file_search and provides:
// properties: type, file_id, filename and index
break;
case 'container_file_citation':
// container_file_citation is returned from code_interpreter and provides:
// properties: type, container_id, file_id, filename, start_index and end_index
break;
case 'file_path':
// file_path provides:
// properties: type, file_id and index
break;
default: {
const _exhaustiveCheck: never = annotation;
throw new Error(
`Unhandled annotation: ${JSON.stringify(_exhaustiveCheck)}`,
);
}
}
}
}
}
Typed providerMetadata in Source Document Parts
For source document parts, when part.type === 'source' and sourceType === 'document', the providerMetadata is provided as AzureResponsesSourceDocumentProviderMetadata.
This metadata is also a discriminated union with a required type field. Supported types include:
file_citationcontainer_file_citationfile_path
Each type includes the identifiers required to work with the referenced resource, such as fileId and containerId.
import {
azure,
type AzureResponsesSourceDocumentProviderMetadata,
} from '@ai-sdk/azure';
import { generateText } from 'ai';
const result = await generateText({
model: azure('gpt-4.1-mini'),
prompt:
'Create a program that generates five random numbers between 1 and 100 with two decimal places, and show me the execution results. Also save the result to a file.',
tools: {
code_interpreter: azure.tools.codeInterpreter(),
web_search_preview: azure.tools.webSearchPreview({}),
file_search: azure.tools.fileSearch({ vectorStoreIds: ['vs_1234'] }), // requires a configured vector store
},
});
for (const part of result.content) {
if (part.type === 'source') {
if (part.sourceType === 'document') {
const providerMetadata = part.providerMetadata as
| AzureResponsesSourceDocumentProviderMetadata
| undefined;
if (!providerMetadata) continue;
const annotation = providerMetadata.azure;
switch (annotation.type) {
case 'file_citation':
// file_citation is returned from file_search and provides:
// properties: type, fileId and index
// The filename can be accessed via part.filename.
break;
case 'container_file_citation':
// container_file_citation is returned from code_interpreter and provides:
// properties: type, containerId and fileId
// The filename can be accessed via part.filename.
break;
case 'file_path':
// file_path provides:
// properties: type, fileId and index
break;
default: {
const _exhaustiveCheck: never = annotation;
throw new Error(
`Unhandled annotation: ${JSON.stringify(_exhaustiveCheck)}`,
);
}
}
}
}
}
Completion Models
You can create models that call the completions API using the .completion() factory method.
The first argument is the model id.
Currently only gpt-35-turbo-instruct is supported.
const model = azure.completion('your-gpt-35-turbo-instruct-deployment');
OpenAI completion models support also some model specific settings that are not part of the standard call settings. You can pass them as an options argument:
import { azure } from '@ai-sdk/azure';
import { generateText } from 'ai';
const result = await generateText({
model: azure.completion('your-gpt-35-turbo-instruct-deployment'),
prompt: 'Write a haiku about coding.',
providerOptions: {
openai: {
echo: true, // optional, echo the prompt in addition to the completion
logitBias: {
// optional likelihood for specific tokens
'50256': -100,
},
suffix: 'some text', // optional suffix that comes after a completion of inserted text
user: 'test-user', // optional unique user identifier
},
},
});
The following optional provider options are available for Azure OpenAI completion models:
-
echo: boolean
Echo back the prompt in addition to the completion.
-
logitBias Record<number, number>
Modifies the likelihood of specified tokens appearing in the completion.
Accepts a JSON object that maps tokens (specified by their token ID in the GPT tokenizer) to an associated bias value from -100 to 100. You can use this tokenizer tool to convert text to token IDs. Mathematically, the bias is added to the logits generated by the model prior to sampling. The exact effect will vary per model, but values between -1 and 1 should decrease or increase likelihood of selection; values like -100 or 100 should result in a ban or exclusive selection of the relevant token.
As an example, you can pass
{"50256": -100}to prevent the <|endoftext|> token from being generated. -
logprobs boolean | number
Return the log probabilities of the tokens. Including logprobs will increase the response size and can slow down response times. However, it can be useful to better understand how the model is behaving.
Setting to true will return the log probabilities of the tokens that were generated.
Setting to a number will return the log probabilities of the top n tokens that were generated.
-
suffix string
The suffix that comes after a completion of inserted text.
-
user string
A unique identifier representing your end-user, which can help OpenAI to monitor and detect abuse. Learn more.
Embedding Models
You can create models that call the Azure OpenAI embeddings API
using the .embedding() factory method.
const model = azure.embedding('your-embedding-deployment');
Azure OpenAI embedding models support several additional settings. You can pass them as an options argument:
import { azure } from '@ai-sdk/azure';
import { embed } from 'ai';
const { embedding } = await embed({
model: azure.embedding('your-embedding-deployment'),
value: 'sunny day at the beach',
providerOptions: {
openai: {
dimensions: 512, // optional, number of dimensions for the embedding
user: 'test-user', // optional unique user identifier
},
},
});
The following optional provider options are available for Azure OpenAI embedding models:
-
dimensions: number
The number of dimensions the resulting output embeddings should have. Only supported in text-embedding-3 and later models.
-
user string
A unique identifier representing your end-user, which can help OpenAI to monitor and detect abuse. Learn more.
Image Models
You can create models that call the Azure OpenAI image generation API (DALL-E) using the .image() factory method. The first argument is your deployment name for the DALL-E model.
const model = azure.image('your-dalle-deployment-name');
Azure OpenAI image models support several additional settings. You can pass them as providerOptions.openai when generating the image:
await generateImage({
model: azure.image('your-dalle-deployment-name'),
prompt: 'A photorealistic image of a cat astronaut floating in space',
size: '1024x1024', // '1024x1024', '1792x1024', or '1024x1792' for DALL-E 3
providerOptions: {
openai: {
user: 'test-user', // optional unique user identifier
responseFormat: 'url', // 'url' or 'b64_json', defaults to 'url'
},
},
});
Example
You can use Azure OpenAI image models to generate images with the generateImage function:
import { azure } from '@ai-sdk/azure';
import { generateImage } from 'ai';
const { image } = await generateImage({
model: azure.image('your-dalle-deployment-name'),
prompt: 'A photorealistic image of a cat astronaut floating in space',
size: '1024x1024', // '1024x1024', '1792x1024', or '1024x1792' for DALL-E 3
});
// image contains the URL or base64 data of the generated image
console.log(image);
Model Capabilities
Azure OpenAI supports DALL-E 2 and DALL-E 3 models through deployments. The capabilities depend on which model version your deployment is using:
| Model Version | Sizes |
|---|---|
| DALL-E 3 | 1024x1024, 1792x1024, 1024x1792 |
| DALL-E 2 | 256x256, 512x512, 1024x1024 |
Transcription Models
You can create models that call the Azure OpenAI transcription API using the .transcription() factory method.
The first argument is the model id e.g. whisper-1.
const model = azure.transcription('whisper-1');
const azure = createAzure({
useDeploymentBasedUrls: true,
apiVersion: '2025-04-01-preview',
});
This uses the legacy endpoint format which may be required for certain Azure OpenAI deployments.
When using useDeploymentBasedUrls, the default api-version is not valid. You must set it to 2025-04-01-preview or an earlier value.
You can also pass additional provider-specific options using the providerOptions argument. For example, supplying the input language in ISO-639-1 (e.g. en) format will improve accuracy and latency.
import { experimental_transcribe as transcribe } from 'ai';
import { azure } from '@ai-sdk/azure';
import { readFile } from 'fs/promises';
const result = await transcribe({
model: azure.transcription('whisper-1'),
audio: await readFile('audio.mp3'),
providerOptions: { openai: { language: 'en' } },
});
The following provider options are available:
-
timestampGranularities string[] The granularity of the timestamps in the transcription. Defaults to
['segment']. Possible values are['word'],['segment'], and['word', 'segment']. Note: There is no additional latency for segment timestamps, but generating word timestamps incurs additional latency. -
language string The language of the input audio. Supplying the input language in ISO-639-1 format (e.g. 'en') will improve accuracy and latency. Optional.
-
prompt string An optional text to guide the model's style or continue a previous audio segment. The prompt should match the audio language. Optional.
-
temperature number The sampling temperature, between 0 and 1. Higher values like 0.8 will make the output more random, while lower values like 0.2 will make it more focused and deterministic. If set to 0, the model will use log probability to automatically increase the temperature until certain thresholds are hit. Defaults to 0. Optional.
-
include string[] Additional information to include in the transcription response.
Model Capabilities
| Model | Transcription | Duration | Segments | Language |
|---|---|---|---|---|
whisper-1 |
||||
gpt-4o-mini-transcribe |
||||
gpt-4o-transcribe |
title: Anthropic description: Learn how to use the Anthropic provider for the AI SDK.
Anthropic Provider
The Anthropic provider contains language model support for the Anthropic Messages API.
Setup
The Anthropic provider is available in the @ai-sdk/anthropic module. You can install it with
<Tabs items={['pnpm', 'npm', 'yarn', 'bun']}>
Provider Instance
You can import the default provider instance anthropic from @ai-sdk/anthropic:
import { anthropic } from '@ai-sdk/anthropic';
If you need a customized setup, you can import createAnthropic from @ai-sdk/anthropic and create a provider instance with your settings:
import { createAnthropic } from '@ai-sdk/anthropic';
const anthropic = createAnthropic({
// custom settings
});
You can use the following optional settings to customize the Anthropic provider instance:
-
baseURL string
Use a different URL prefix for API calls, e.g. to use proxy servers. The default prefix is
https://api.anthropic.com/v1. -
apiKey string
API key that is being sent using the
x-api-keyheader. It defaults to theANTHROPIC_API_KEYenvironment variable. -
headers Record<string,string>
Custom headers to include in the requests.
-
fetch (input: RequestInfo, init?: RequestInit) => Promise<Response>
Custom fetch implementation. Defaults to the global
fetchfunction. You can use it as a middleware to intercept requests, or to provide a custom fetch implementation for e.g. testing.
Language Models
You can create models that call the Anthropic Messages API using the provider instance.
The first argument is the model id, e.g. claude-3-haiku-20240307.
Some models have multi-modal capabilities.
const model = anthropic('claude-3-haiku-20240307');
You can use Anthropic language models to generate text with the generateText function:
import { anthropic } from '@ai-sdk/anthropic';
import { generateText } from 'ai';
const { text } = await generateText({
model: anthropic('claude-3-haiku-20240307'),
prompt: 'Write a vegetarian lasagna recipe for 4 people.',
});
Anthropic language models can also be used in the streamText, generateObject, and streamObject functions
(see AI SDK Core).
The following optional provider options are available for Anthropic models:
-
disableParallelToolUsebooleanOptional. Disables the use of parallel tool calls. Defaults to
false.When set to
true, the model will only call one tool at a time instead of potentially calling multiple tools in parallel. -
sendReasoningbooleanOptional. Include reasoning content in requests sent to the model. Defaults to
true.If you are experiencing issues with the model handling requests involving reasoning content, you can set this to
falseto omit them from the request. -
effort"high" | "medium" | "low"Optional. See Effort section for more details.
-
thinkingobjectOptional. See Reasoning section for more details.
-
toolStreamingbooleanWhether to enable tool streaming (and structured output streaming). Default to
true. -
structuredOutputMode"outputFormat" | "jsonTool" | "auto"Determines how structured outputs are generated. Optional.
"outputFormat": Use theoutput_formatparameter to specify the structured output format."jsonTool": Use a special"json"tool to specify the structured output format."auto": Use"outputFormat"when supported, otherwise fall back to"jsonTool"(default).
Structured Outputs and Tool Input Streaming
Tool call streaming is enabled by default. You can opt out by setting the
toolStreaming provider option to false.
import { anthropic } from '@ai-sdk/anthropic';
import { streamText, tool } from 'ai';
import { z } from 'zod';
const result = streamText({
model: anthropic('claude-sonnet-4-20250514'),
tools: {
writeFile: tool({
description: 'Write content to a file',
inputSchema: z.object({
path: z.string(),
content: z.string(),
}),
execute: async ({ path, content }) => {
// Implementation
return { success: true };
},
}),
},
prompt: 'Write a short story to story.txt',
});
Effort
Anthropic introduced an effort option with claude-opus-4-5 that affects thinking, text responses, and function calls. Effort defaults to high and you can set it to medium or low to save tokens and to lower time-to-last-token latency (TTLT).
import { anthropic, AnthropicProviderOptions } from '@ai-sdk/anthropic';
import { generateText } from 'ai';
const { text, usage } = await generateText({
model: anthropic('claude-opus-4-20250514'),
prompt: 'How many people will live in the world in 2040?',
providerOptions: {
anthropic: {
effort: 'low',
} satisfies AnthropicProviderOptions,
},
});
console.log(text); // resulting text
console.log(usage); // token usage
Reasoning
Anthropic has reasoning support for claude-opus-4-20250514, claude-sonnet-4-20250514, and claude-3-7-sonnet-20250219 models.
You can enable it using the thinking provider option
and specifying a thinking budget in tokens.
import { anthropic, AnthropicProviderOptions } from '@ai-sdk/anthropic';
import { generateText } from 'ai';
const { text, reasoningText, reasoning } = await generateText({
model: anthropic('claude-opus-4-20250514'),
prompt: 'How many people will live in the world in 2040?',
providerOptions: {
anthropic: {
thinking: { type: 'enabled', budgetTokens: 12000 },
} satisfies AnthropicProviderOptions,
},
});
console.log(reasoningText); // reasoning text
console.log(reasoning); // reasoning details including redacted reasoning
console.log(text); // text response
See AI SDK UI: Chatbot for more details on how to integrate reasoning into your chatbot.
Context Management
Anthropic's Context Management feature allows you to automatically manage conversation context by clearing tool uses or thinking content when certain conditions are met. This helps optimize token usage and manage long conversations more efficiently.
You can configure context management using the contextManagement provider option:
import { anthropic, AnthropicProviderOptions } from '@ai-sdk/anthropic';
import { generateText } from 'ai';
const result = await generateText({
model: anthropic('claude-3-7-sonnet-20250219'),
prompt: 'Continue our conversation...',
providerOptions: {
anthropic: {
contextManagement: {
edits: [
{
type: 'clear_tool_uses_20250919',
trigger: { type: 'input_tokens', value: 10000 },
keep: { type: 'tool_uses', value: 5 },
clearAtLeast: { type: 'input_tokens', value: 1000 },
clearToolInputs: true,
excludeTools: ['important_tool'],
},
],
},
} satisfies AnthropicProviderOptions,
},
});
// Check what was cleared
console.log(result.providerMetadata?.anthropic?.contextManagement);
Clear Tool Uses
The clear_tool_uses_20250919 edit type removes old tool calls from the conversation history:
- trigger - Condition that triggers the clearing (e.g.,
{ type: 'input_tokens', value: 10000 }) - keep - How many recent tool uses to preserve (e.g.,
{ type: 'tool_uses', value: 5 }) - clearAtLeast - Minimum amount to clear (e.g.,
{ type: 'input_tokens', value: 1000 }) - clearToolInputs - Whether to clear tool input parameters (boolean)
- excludeTools - Array of tool names to never clear
Clear Thinking
The clear_thinking_20251015 edit type removes thinking/reasoning content:
const result = await generateText({
model: anthropic('claude-opus-4-20250514'),
prompt: 'Continue reasoning...',
providerOptions: {
anthropic: {
thinking: { type: 'enabled', budgetTokens: 12000 },
contextManagement: {
edits: [
{
type: 'clear_thinking_20251015',
keep: { type: 'thinking_turns', value: 2 },
},
],
},
} satisfies AnthropicProviderOptions,
},
});
Applied Edits Metadata
After generation, you can check which edits were applied in the provider metadata:
const metadata = result.providerMetadata?.anthropic?.contextManagement;
if (metadata?.appliedEdits) {
metadata.appliedEdits.forEach(edit => {
if (edit.type === 'clear_tool_uses_20250919') {
console.log(`Cleared ${edit.clearedToolUses} tool uses`);
console.log(`Freed ${edit.clearedInputTokens} tokens`);
} else if (edit.type === 'clear_thinking_20251015') {
console.log(`Cleared ${edit.clearedThinkingTurns} thinking turns`);
console.log(`Freed ${edit.clearedInputTokens} tokens`);
}
});
}
For more details, see Anthropic's Context Management documentation.
Cache Control
In the messages and message parts, you can use the providerOptions property to set cache control breakpoints.
You need to set the anthropic property in the providerOptions object to { cacheControl: { type: 'ephemeral' } } to set a cache control breakpoint.
The cache creation input tokens are then returned in the providerMetadata object
for generateText and generateObject, again under the anthropic property.
When you use streamText or streamObject, the response contains a promise
that resolves to the metadata. Alternatively you can receive it in the
onFinish callback.
import { anthropic } from '@ai-sdk/anthropic';
import { generateText } from 'ai';
const errorMessage = '... long error message ...';
const result = await generateText({
model: anthropic('claude-3-5-sonnet-20240620'),
messages: [
{
role: 'user',
content: [
{ type: 'text', text: 'You are a JavaScript expert.' },
{
type: 'text',
text: `Error message: ${errorMessage}`,
providerOptions: {
anthropic: { cacheControl: { type: 'ephemeral' } },
},
},
{ type: 'text', text: 'Explain the error message.' },
],
},
],
});
console.log(result.text);
console.log(result.providerMetadata?.anthropic);
// e.g. { cacheCreationInputTokens: 2118 }
You can also use cache control on system messages by providing multiple system messages at the head of your messages array:
const result = await generateText({
model: anthropic('claude-3-5-sonnet-20240620'),
messages: [
{
role: 'system',
content: 'Cached system message part',
providerOptions: {
anthropic: { cacheControl: { type: 'ephemeral' } },
},
},
{
role: 'system',
content: 'Uncached system message part',
},
{
role: 'user',
content: 'User prompt',
},
],
});
Cache control for tools:
const result = await generateText({
model: anthropic('claude-3-5-haiku-latest'),
tools: {
cityAttractions: tool({
inputSchema: z.object({ city: z.string() }),
providerOptions: {
anthropic: {
cacheControl: { type: 'ephemeral' },
},
},
}),
},
messages: [
{
role: 'user',
content: 'User prompt',
},
],
});
Longer cache TTL
Anthropic also supports a longer 1-hour cache duration.
Here's an example:
const result = await generateText({
model: anthropic('claude-3-5-haiku-latest'),
messages: [
{
role: 'user',
content: [
{
type: 'text',
text: 'Long cached message',
providerOptions: {
anthropic: {
cacheControl: { type: 'ephemeral', ttl: '1h' },
},
},
},
],
},
],
});
Limitations
The minimum cacheable prompt length is:
- 4096 tokens for Claude Opus 4.5
- 1024 tokens for Claude Opus 4.1, Claude Opus 4, Claude Sonnet 4.5, Claude Sonnet 4, Claude Sonnet 3.7, and Claude Opus 3
- 4096 tokens for Claude Haiku 4.5
- 2048 tokens for Claude Haiku 3.5 and Claude Haiku 3
Shorter prompts cannot be cached, even if marked with cacheControl. Any requests to cache fewer than this number of tokens will be processed without caching.
For more on prompt caching with Anthropic, see Anthropic's Cache Control documentation.
Because the `UIMessage` type (used by AI SDK UI hooks like `useChat`) does not support the `providerOptions` property, you can use `convertToModelMessages` first before passing the messages to functions like `generateText` or `streamText`. For more details on `providerOptions` usage, see [here](/docs/foundations/prompts#provider-options).Bash Tool
The Bash Tool allows running bash commands. Here's how to create and use it:
const bashTool = anthropic.tools.bash_20241022({
execute: async ({ command, restart }) => {
// Implement your bash command execution logic here
// Return the result of the command execution
},
});
Parameters:
command(string): The bash command to run. Required unless the tool is being restarted.restart(boolean, optional): Specifying true will restart this tool.
Only certain Claude versions are supported.
Memory Tool
The Memory Tool allows Claude to use a local memory, e.g. in the filesystem. Here's how to create it:
const memory = anthropic.tools.memory_20250818({
execute: async action => {
// Implement your memory command execution logic here
// Return the result of the command execution
},
});
Only certain Claude versions are supported.
Text Editor Tool
The Text Editor Tool provides functionality for viewing and editing text files.
const tools = {
str_replace_based_edit_tool: anthropic.tools.textEditor_20250728({
maxCharacters: 10000, // optional
async execute({ command, path, old_str, new_str }) {
// ...
},
}),
} satisfies ToolSet;
Parameters:
command('view' | 'create' | 'str_replace' | 'insert' | 'undo_edit'): The command to run. Note:undo_editis only available in Claude 3.5 Sonnet and earlier models.path(string): Absolute path to file or directory, e.g./repo/file.pyor/repo.file_text(string, optional): Required forcreatecommand, with the content of the file to be created.insert_line(number, optional): Required forinsertcommand. The line number after which to insert the new string.new_str(string, optional): New string forstr_replaceorinsertcommands.old_str(string, optional): Required forstr_replacecommand, containing the string to replace.view_range(number[], optional): Optional forviewcommand to specify line range to show.
Computer Tool
The Computer Tool enables control of keyboard and mouse actions on a computer:
const computerTool = anthropic.tools.computer_20241022({
displayWidthPx: 1920,
displayHeightPx: 1080,
displayNumber: 0, // Optional, for X11 environments
execute: async ({ action, coordinate, text }) => {
// Implement your computer control logic here
// Return the result of the action
// Example code:
switch (action) {
case 'screenshot': {
// multipart result:
return {
type: 'image',
data: fs
.readFileSync('./data/screenshot-editor.png')
.toString('base64'),
};
}
default: {
console.log('Action:', action);
console.log('Coordinate:', coordinate);
console.log('Text:', text);
return `executed ${action}`;
}
}
},
// map to tool result content for LLM consumption:
toModelOutput({ output }) {
return typeof output === 'string'
? [{ type: 'text', text: output }]
: [{ type: 'image', data: output.data, mediaType: 'image/png' }];
},
});
Parameters:
action('key' | 'type' | 'mouse_move' | 'left_click' | 'left_click_drag' | 'right_click' | 'middle_click' | 'double_click' | 'screenshot' | 'cursor_position'): The action to perform.coordinate(number[], optional): Required formouse_moveandleft_click_dragactions. Specifies the (x, y) coordinates.text(string, optional): Required fortypeandkeyactions.
These tools can be used in conjunction with the sonnet-3-5-sonnet-20240620 model to enable more complex interactions and tasks.
Web Search Tool
Anthropic provides a provider-defined web search tool that gives Claude direct access to real-time web content, allowing it to answer questions with up-to-date information beyond its knowledge cutoff.
You can enable web search using the provider-defined web search tool:
import { anthropic } from '@ai-sdk/anthropic';
import { generateText } from 'ai';
const webSearchTool = anthropic.tools.webSearch_20250305({
maxUses: 5,
});
const result = await generateText({
model: anthropic('claude-opus-4-20250514'),
prompt: 'What are the latest developments in AI?',
tools: {
web_search: webSearchTool,
},
});
Configuration Options
The web search tool supports several configuration options:
-
maxUses number
Maximum number of web searches Claude can perform during the conversation.
-
allowedDomains string[]
Optional list of domains that Claude is allowed to search. If provided, searches will be restricted to these domains.
-
blockedDomains string[]
Optional list of domains that Claude should avoid when searching.
-
userLocation object
Optional user location information to provide geographically relevant search results.
const webSearchTool = anthropic.tools.webSearch_20250305({
maxUses: 3,
allowedDomains: ['techcrunch.com', 'wired.com'],
blockedDomains: ['example-spam-site.com'],
userLocation: {
type: 'approximate',
country: 'US',
region: 'California',
city: 'San Francisco',
timezone: 'America/Los_Angeles',
},
});
const result = await generateText({
model: anthropic('claude-opus-4-20250514'),
prompt: 'Find local news about technology',
tools: {
web_search: webSearchTool,
},
});
Web Fetch Tool
Anthropic provides a provider-defined web fetch tool that allows Claude to retrieve content from specific URLs. This is useful when you want Claude to analyze or reference content from a particular webpage or document.
You can enable web fetch using the provider-defined web fetch tool:
import { anthropic } from '@ai-sdk/anthropic';
import { generateText } from 'ai';
const result = await generateText({
model: anthropic('claude-sonnet-4-0'),
prompt:
'What is this page about? https://en.wikipedia.org/wiki/Maglemosian_culture',
tools: {
web_fetch: anthropic.tools.webFetch_20250910({ maxUses: 1 }),
},
});
Tool Search
Anthropic provides provider-defined tool search tools that enable Claude to work with hundreds or thousands of tools by dynamically discovering and loading them on-demand. Instead of loading all tool definitions into the context window upfront, Claude searches your tool catalog and loads only the tools it needs.
There are two variants:
- BM25 Search - Uses natural language queries to find tools
- Regex Search - Uses regex patterns (Python
re.search()syntax) to find tools
Basic Usage
import { anthropic } from '@ai-sdk/anthropic';
import { generateText, tool } from 'ai';
import { z } from 'zod';
const result = await generateText({
model: anthropic('claude-sonnet-4-5'),
prompt: 'What is the weather in San Francisco?',
tools: {
toolSearch: anthropic.tools.toolSearchBm25_20251119(),
get_weather: tool({
description: 'Get the current weather at a specific location',
inputSchema: z.object({
location: z.string().describe('The city and state'),
}),
execute: async ({ location }) => ({
location,
temperature: 72,
condition: 'Sunny',
}),
// Defer tool here - Claude discovers these via the tool search tool
providerOptions: {
anthropic: { deferLoading: true },
},
}),
},
});
Using Regex Search
For more precise tool matching, you can use the regex variant:
const result = await generateText({
model: anthropic('claude-sonnet-4-5'),
prompt: 'Get the weather data',
tools: {
toolSearch: anthropic.tools.toolSearchRegex_20251119(),
// ... deferred tools
},
});
Claude will construct regex patterns like weather|temperature|forecast to find matching tools.
MCP Connectors
Anthropic supports connecting to MCP servers as part of their execution.
You can enable this feature with the mcpServers provider option:
import { anthropic, AnthropicProviderOptions } from '@ai-sdk/anthropic';
import { generateText } from 'ai';
const result = await generateText({
model: anthropic('claude-sonnet-4-5'),
prompt: `Call the echo tool with "hello world". what does it respond with back?`,
providerOptions: {
anthropic: {
mcpServers: [
{
type: 'url',
name: 'echo',
url: 'https://echo.mcp.inevitable.fyi/mcp',
// optional: authorization token
authorizationToken: mcpAuthToken,
// optional: tool configuration
toolConfiguration: {
enabled: true,
allowedTools: ['echo'],
},
},
],
} satisfies AnthropicProviderOptions,
},
});
The tool calls and results are dynamic, i.e. the input and output schemas are not known.
Configuration Options
The web fetch tool supports several configuration options:
-
maxUses number
The maxUses parameter limits the number of web fetches performed.
-
allowedDomains string[]
Only fetch from these domains.
-
blockedDomains string[]
Never fetch from these domains.
-
citations object
Unlike web search where citations are always enabled, citations are optional for web fetch. Set
"citations": {"enabled": true}to enable Claude to cite specific passages from fetched documents. -
maxContentTokens number
The maxContentTokens parameter limits the amount of content that will be included in the context.
Error Handling
Web search errors are handled differently depending on whether you're using streaming or non-streaming:
Non-streaming (generateText, generateObject):
Web search errors throw exceptions that you can catch:
try {
const result = await generateText({
model: anthropic('claude-opus-4-20250514'),
prompt: 'Search for something',
tools: {
web_search: webSearchTool,
},
});
} catch (error) {
if (error.message.includes('Web search failed')) {
console.log('Search error:', error.message);
// Handle search error appropriately
}
}
Streaming (streamText, streamObject):
Web search errors are delivered as error parts in the stream:
const result = await streamText({
model: anthropic('claude-opus-4-20250514'),
prompt: 'Search for something',
tools: {
web_search: webSearchTool,
},
});
for await (const part of result.textStream) {
if (part.type === 'error') {
console.log('Search error:', part.error);
// Handle search error appropriately
}
}
Code Execution
Anthropic provides a provider-defined code execution tool that gives Claude direct access to a real Python environment allowing it to execute code to inform its responses.
You can enable code execution using the provider-defined code execution tool:
import { anthropic } from '@ai-sdk/anthropic';
import { generateText } from 'ai';
const codeExecutionTool = anthropic.tools.codeExecution_20250825();
const result = await generateText({
model: anthropic('claude-opus-4-20250514'),
prompt:
'Calculate the mean and standard deviation of [1, 2, 3, 4, 5, 6, 7, 8, 9, 10]',
tools: {
code_execution: codeExecutionTool,
},
});
Error Handling
Code execution errors are handled differently depending on whether you're using streaming or non-streaming:
Non-streaming (generateText, generateObject):
Code execution errors are delivered as tool result parts in the response:
const result = await generateText({
model: anthropic('claude-opus-4-20250514'),
prompt: 'Execute some Python script',
tools: {
code_execution: codeExecutionTool,
},
});
const toolErrors = result.content?.filter(
content => content.type === 'tool-error',
);
toolErrors?.forEach(error => {
console.error('Tool execution error:', {
toolName: error.toolName,
toolCallId: error.toolCallId,
error: error.error,
});
});
Streaming (streamText, streamObject):
Code execution errors are delivered as error parts in the stream:
const result = await streamText({
model: anthropic('claude-opus-4-20250514'),
prompt: 'Execute some Python script',
tools: {
code_execution: codeExecutionTool,
},
});
for await (const part of result.textStream) {
if (part.type === 'error') {
console.log('Code execution error:', part.error);
// Handle code execution error appropriately
}
}
Programmatic Tool Calling
Programmatic Tool Calling allows Claude to write code that calls your tools programmatically within a code execution container, rather than requiring round trips through the model for each tool invocation. This reduces latency for multi-tool workflows and decreases token consumption.
To enable programmatic tool calling, use the allowedCallers provider option on tools that you want to be callable from within code execution:
import {
anthropic,
forwardAnthropicContainerIdFromLastStep,
} from '@ai-sdk/anthropic';
import { generateText, tool, stepCountIs } from 'ai';
import { z } from 'zod';
const result = await generateText({
model: anthropic('claude-sonnet-4-5'),
stopWhen: stepCountIs(10),
prompt:
'Get the weather for Tokyo, Sydney, and London, then calculate the average temperature.',
tools: {
code_execution: anthropic.tools.codeExecution_20250825(),
getWeather: tool({
description: 'Get current weather data for a city.',
inputSchema: z.object({
city: z.string().describe('Name of the city'),
}),
execute: async ({ city }) => {
// Your weather API implementation
return { temp: 22, condition: 'Sunny' };
},
// Enable this tool to be called from within code execution
providerOptions: {
anthropic: {
allowedCallers: ['code_execution_20250825'],
},
},
}),
},
// Propagate container ID between steps for code execution continuity
prepareStep: forwardAnthropicContainerIdFromLastStep,
});
In this flow:
- Claude writes Python code that calls your
getWeathertool multiple times in parallel - The SDK automatically executes your tool and returns results to the code execution container
- Claude processes the results in code and generates the final response
Container Persistence
When using programmatic tool calling across multiple steps, you need to preserve the container ID between steps using prepareStep. You can use the forwardAnthropicContainerIdFromLastStep helper function to do this automatically. The container ID is available in providerMetadata.anthropic.container.id after each step completes.
Agent Skills
Anthropic Agent Skills enable Claude to perform specialized tasks like document processing (PPTX, DOCX, PDF, XLSX) and data analysis. Skills run in a sandboxed container and require the code execution tool to be enabled.
Using Built-in Skills
Anthropic provides several built-in skills:
- pptx - Create and edit PowerPoint presentations
- docx - Create and edit Word documents
- pdf - Process and analyze PDF files
- xlsx - Work with Excel spreadsheets
To use skills, you need to:
- Enable the code execution tool
- Specify the container with skills in
providerOptions
import { anthropic, AnthropicProviderOptions } from '@ai-sdk/anthropic';
import { generateText } from 'ai';
const result = await generateText({
model: anthropic('claude-sonnet-4-5'),
tools: {
code_execution: anthropic.tools.codeExecution_20250825(),
},
prompt: 'Create a presentation about renewable energy with 5 slides',
providerOptions: {
anthropic: {
container: {
skills: [
{
type: 'anthropic',
skillId: 'pptx',
version: 'latest', // optional
},
],
},
} satisfies AnthropicProviderOptions,
},
});
Custom Skills
You can also use custom skills by specifying type: 'custom':
const result = await generateText({
model: anthropic('claude-sonnet-4-5'),
tools: {
code_execution: anthropic.tools.codeExecution_20250825(),
},
prompt: 'Use my custom skill to process this data',
providerOptions: {
anthropic: {
container: {
skills: [
{
type: 'custom',
skillId: 'my-custom-skill-id',
version: '1.0', // optional
},
],
},
} satisfies AnthropicProviderOptions,
},
});
PDF support
Anthropic Sonnet claude-3-5-sonnet-20241022 supports reading PDF files.
You can pass PDF files as part of the message content using the file type:
Option 1: URL-based PDF document
const result = await generateText({
model: anthropic('claude-3-5-sonnet-20241022'),
messages: [
{
role: 'user',
content: [
{
type: 'text',
text: 'What is an embedding model according to this document?',
},
{
type: 'file',
data: new URL(
'https://github.com/vercel/ai/blob/main/examples/ai-functions/data/ai.pdf?raw=true',
),
mimeType: 'application/pdf',
},
],
},
],
});
Option 2: Base64-encoded PDF document
const result = await generateText({
model: anthropic('claude-3-5-sonnet-20241022'),
messages: [
{
role: 'user',
content: [
{
type: 'text',
text: 'What is an embedding model according to this document?',
},
{
type: 'file',
data: fs.readFileSync('./data/ai.pdf'),
mediaType: 'application/pdf',
},
],
},
],
});
The model will have access to the contents of the PDF file and
respond to questions about it.
The PDF file should be passed using the data field,
and the mediaType should be set to 'application/pdf'.
Model Capabilities
| Model | Image Input | Object Generation | Tool Usage | Computer Use | Web Search | Tool Search |
|---|---|---|---|---|---|---|
claude-opus-4-5 |
||||||
claude-haiku-4-5 |
||||||
claude-sonnet-4-5 |
||||||
claude-opus-4-1 |
||||||
claude-opus-4-0 |
||||||
claude-sonnet-4-0 |
||||||
claude-3-7-sonnet-latest |
||||||
claude-3-5-haiku-latest |
title: Amazon Bedrock description: Learn how to use the Amazon Bedrock provider.
Amazon Bedrock Provider
The Amazon Bedrock provider for the AI SDK contains language model support for the Amazon Bedrock APIs.
Setup
The Bedrock provider is available in the @ai-sdk/amazon-bedrock module. You can install it with
<Tabs items={['pnpm', 'npm', 'yarn', 'bun']}>
Prerequisites
Access to Amazon Bedrock foundation models isn't granted by default. In order to gain access to a foundation model, an IAM user with sufficient permissions needs to request access to it through the console. Once access is provided to a model, it is available for all users in the account.
See the Model Access Docs for more information.
Authentication
Using IAM Access Key and Secret Key
Step 1: Creating AWS Access Key and Secret Key
To get started, you'll need to create an AWS access key and secret key. Here's how:
Login to AWS Management Console
- Go to the AWS Management Console and log in with your AWS account credentials.
Create an IAM User
- Navigate to the IAM dashboard and click on "Users" in the left-hand navigation menu.
- Click on "Create user" and fill in the required details to create a new IAM user.
- Make sure to select "Programmatic access" as the access type.
- The user account needs the
AmazonBedrockFullAccesspolicy attached to it.
Create Access Key
- Click on the "Security credentials" tab and then click on "Create access key".
- Click "Create access key" to generate a new access key pair.
- Download the
.csvfile containing the access key ID and secret access key.
Step 2: Configuring the Access Key and Secret Key
Within your project add a .env file if you don't already have one. This file will be used to set the access key and secret key as environment variables. Add the following lines to the .env file:
AWS_ACCESS_KEY_ID=YOUR_ACCESS_KEY_ID
AWS_SECRET_ACCESS_KEY=YOUR_SECRET_ACCESS_KEY
AWS_REGION=YOUR_REGION
Remember to replace YOUR_ACCESS_KEY_ID, YOUR_SECRET_ACCESS_KEY, and YOUR_REGION with the actual values from your AWS account.
Using AWS SDK Credentials Chain (instance profiles, instance roles, ECS roles, EKS Service Accounts, etc.)
When using AWS SDK, the SDK will automatically use the credentials chain to determine the credentials to use. This includes instance profiles, instance roles, ECS roles, EKS Service Accounts, etc. A similar behavior is possible using the AI SDK by not specifying the accessKeyId and secretAccessKey, sessionToken properties in the provider settings and instead passing a credentialProvider property.
Usage:
@aws-sdk/credential-providers package provides a set of credential providers that can be used to create a credential provider chain.
<Tabs items={['pnpm', 'npm', 'yarn', 'bun']}>
import { createAmazonBedrock } from '@ai-sdk/amazon-bedrock';
import { fromNodeProviderChain } from '@aws-sdk/credential-providers';
const bedrock = createAmazonBedrock({
region: 'us-east-1',
credentialProvider: fromNodeProviderChain(),
});
Provider Instance
You can import the default provider instance bedrock from @ai-sdk/amazon-bedrock:
import { bedrock } from '@ai-sdk/amazon-bedrock';
If you need a customized setup, you can import createAmazonBedrock from @ai-sdk/amazon-bedrock and create a provider instance with your settings:
import { createAmazonBedrock } from '@ai-sdk/amazon-bedrock';
const bedrock = createAmazonBedrock({
region: 'us-east-1',
accessKeyId: 'xxxxxxxxx',
secretAccessKey: 'xxxxxxxxx',
sessionToken: 'xxxxxxxxx',
});
You can use the following optional settings to customize the Amazon Bedrock provider instance:
-
region string
The AWS region that you want to use for the API calls. It uses the
AWS_REGIONenvironment variable by default. -
accessKeyId string
The AWS access key ID that you want to use for the API calls. It uses the
AWS_ACCESS_KEY_IDenvironment variable by default. -
secretAccessKey string
The AWS secret access key that you want to use for the API calls. It uses the
AWS_SECRET_ACCESS_KEYenvironment variable by default. -
sessionToken string
Optional. The AWS session token that you want to use for the API calls. It uses the
AWS_SESSION_TOKENenvironment variable by default. -
credentialProvider () => Promise<{ accessKeyId: string; secretAccessKey: string; sessionToken?: string; }>
Optional. The AWS credential provider chain that you want to use for the API calls. It uses the specified credentials by default.
Language Models
You can create models that call the Bedrock API using the provider instance.
The first argument is the model id, e.g. meta.llama3-70b-instruct-v1:0.
const model = bedrock('meta.llama3-70b-instruct-v1:0');
Amazon Bedrock models also support some model specific provider options that are not part of the standard call settings.
You can pass them in the providerOptions argument:
const model = bedrock('anthropic.claude-3-sonnet-20240229-v1:0');
await generateText({
model,
providerOptions: {
anthropic: {
additionalModelRequestFields: { top_k: 350 },
},
},
});
Documentation for additional settings based on the selected model can be found within the Amazon Bedrock Inference Parameter Documentation.
You can use Amazon Bedrock language models to generate text with the generateText function:
import { bedrock } from '@ai-sdk/amazon-bedrock';
import { generateText } from 'ai';
const { text } = await generateText({
model: bedrock('meta.llama3-70b-instruct-v1:0'),
prompt: 'Write a vegetarian lasagna recipe for 4 people.',
});
Amazon Bedrock language models can also be used in the streamText function
(see AI SDK Core).
File Inputs
Amazon Bedrock supports file inputs in combination with specific models, e.g. `anthropic.claude-3-haiku-20240307-v1:0`.The Amazon Bedrock provider supports file inputs, e.g. PDF files.
import { bedrock } from '@ai-sdk/amazon-bedrock';
import { generateText } from 'ai';
const result = await generateText({
model: bedrock('anthropic.claude-3-haiku-20240307-v1:0'),
messages: [
{
role: 'user',
content: [
{ type: 'text', text: 'Describe the pdf in detail.' },
{
type: 'file',
data: readFileSync('./data/ai.pdf'),
mediaType: 'application/pdf',
},
],
},
],
});
Guardrails
You can use the bedrock provider options to utilize Amazon Bedrock Guardrails:
const result = await generateText({
model: bedrock('anthropic.claude-3-sonnet-20240229-v1:0'),
prompt: 'Write a story about space exploration.',
providerOptions: {
bedrock: {
guardrailConfig: {
guardrailIdentifier: '1abcd2ef34gh',
guardrailVersion: '1',
trace: 'enabled' as const,
streamProcessingMode: 'async',
},
},
},
});
Tracing information will be returned in the provider metadata if you have tracing enabled.
if (result.providerMetadata?.bedrock.trace) {
// ...
}
See the Amazon Bedrock Guardrails documentation for more information.
Citations
Amazon Bedrock supports citations for document-based inputs across compatible models. When enabled:
- Some models can read documents with visual understanding, not just extracting text
- Models can cite specific parts of documents you provide, making it easier to trace information back to its source (Not Supported Yet)
import { bedrock } from '@ai-sdk/amazon-bedrock';
import { generateObject } from 'ai';
import { z } from 'zod';
import fs from 'fs';
const result = await generateObject({
model: bedrock('apac.anthropic.claude-sonnet-4-20250514-v1:0'),
schema: z.object({
summary: z.string().describe('Summary of the PDF document'),
keyPoints: z.array(z.string()).describe('Key points from the PDF'),
}),
messages: [
{
role: 'user',
content: [
{
type: 'text',
text: 'Summarize this PDF and provide key points.',
},
{
type: 'file',
data: readFileSync('./document.pdf'),
mediaType: 'application/pdf',
providerOptions: {
bedrock: {
citations: { enabled: true },
},
},
},
],
},
],
});
console.log('Response:', result.object);
Cache Points
Amazon Bedrock prompt caching is currently in preview release. To request access, visit the [Amazon Bedrock prompt caching page](https://aws.amazon.com/bedrock/prompt-caching/).In messages, you can use the providerOptions property to set cache points. Set the bedrock property in the providerOptions object to { cachePoint: { type: 'default' } } to create a cache point.
Cache usage information is returned in the providerMetadata object`. See examples below.
import { bedrock } from '@ai-sdk/amazon-bedrock';
import { generateText } from 'ai';
const cyberpunkAnalysis =
'... literary analysis of cyberpunk themes and concepts ...';
const result = await generateText({
model: bedrock('anthropic.claude-3-5-sonnet-20241022-v2:0'),
messages: [
{
role: 'system',
content: `You are an expert on William Gibson's cyberpunk literature and themes. You have access to the following academic analysis: ${cyberpunkAnalysis}`,
providerOptions: {
bedrock: { cachePoint: { type: 'default' } },
},
},
{
role: 'user',
content:
'What are the key cyberpunk themes that Gibson explores in Neuromancer?',
},
],
});
console.log(result.text);
console.log(result.providerMetadata?.bedrock?.usage);
// Shows cache read/write token usage, e.g.:
// {
// cacheReadInputTokens: 1337,
// cacheWriteInputTokens: 42,
// }
Cache points also work with streaming responses:
import { bedrock } from '@ai-sdk/amazon-bedrock';
import { streamText } from 'ai';
const cyberpunkAnalysis =
'... literary analysis of cyberpunk themes and concepts ...';
const result = streamText({
model: bedrock('anthropic.claude-3-5-sonnet-20241022-v2:0'),
messages: [
{
role: 'assistant',
content: [
{ type: 'text', text: 'You are an expert on cyberpunk literature.' },
{ type: 'text', text: `Academic analysis: ${cyberpunkAnalysis}` },
],
providerOptions: { bedrock: { cachePoint: { type: 'default' } } },
},
{
role: 'user',
content:
'How does Gibson explore the relationship between humanity and technology?',
},
],
});
for await (const textPart of result.textStream) {
process.stdout.write(textPart);
}
console.log(
'Cache token usage:',
(await result.providerMetadata)?.bedrock?.usage,
);
// Shows cache read/write token usage, e.g.:
// {
// cacheReadInputTokens: 1337,
// cacheWriteInputTokens: 42,
// }
Reasoning
Amazon Bedrock supports model creator-specific reasoning features:
- Anthropic (e.g.
claude-3-7-sonnet-20250219): enable via thereasoningConfigprovider option and specifying a thinking budget in tokens (minimum:1024, maximum:64000). - Amazon (e.g.
us.amazon.nova-2-lite-v1:0): enable via thereasoningConfigprovider option and specifying a maximum reasoning effort level ('low' | 'medium' | 'high').
import { bedrock } from '@ai-sdk/amazon-bedrock';
import { generateText } from 'ai';
// Anthropic example
const anthropicResult = await generateText({
model: bedrock('us.anthropclaude-3-7-sonnet-20250219-v1:0'),
prompt: 'How many people will live in the world in 2040?',
providerOptions: {
bedrock: {
reasoningConfig: { type: 'enabled', budgetTokens: 1024 },
},
},
});
console.log(anthropicResult.reasoningText); // reasoning text
console.log(anthropicResult.text); // text response
// Nova 2 example
const amazonResult = await generateText({
model: bedrock('us.amazon.nova-2-lite-v1:0'),
prompt: 'How many people will live in the world in 2040?',
providerOptions: {
bedrock: {
reasoningConfig: { type: 'enabled', maxReasoningEffort: 'medium' },
},
},
});
console.log(amazonResult.reasoningText); // reasoning text
console.log(amazonResult.text); // text response
See AI SDK UI: Chatbot for more details on how to integrate reasoning into your chatbot.
Extended Context Window
Claude Sonnet 4 models on Amazon Bedrock support an extended context window of up to 1 million tokens when using the context-1m-2025-08-07 beta feature.
import { bedrock } from '@ai-sdk/amazon-bedrock';
import { generateText } from 'ai';
const result = await generateText({
model: bedrock('us.anthropic.claude-sonnet-4-20250514-v1:0'),
prompt: 'analyze this large document...',
providerOptions: {
bedrock: {
anthropicBeta: ['context-1m-2025-08-07'],
},
},
});
Computer Use
Via Anthropic, Amazon Bedrock provides three provider-defined tools that can be used to interact with external systems:
- Bash Tool: Allows running bash commands.
- Text Editor Tool: Provides functionality for viewing and editing text files.
- Computer Tool: Enables control of keyboard and mouse actions on a computer.
They are available via the tools property of the provider instance.
Bash Tool
The Bash Tool allows running bash commands. Here's how to create and use it:
const bashTool = anthropic.tools.bash_20241022({
execute: async ({ command, restart }) => {
// Implement your bash command execution logic here
// Return the result of the command execution
},
});
Parameters:
command(string): The bash command to run. Required unless the tool is being restarted.restart(boolean, optional): Specifying true will restart this tool.
Text Editor Tool
The Text Editor Tool provides functionality for viewing and editing text files.
For Claude 4 models (Opus & Sonnet):
const textEditorTool = anthropic.tools.textEditor_20250429({
execute: async ({
command,
path,
file_text,
insert_line,
new_str,
old_str,
view_range,
}) => {
// Implement your text editing logic here
// Return the result of the text editing operation
},
});
For Claude 3.5 Sonnet and earlier models:
const textEditorTool = anthropic.tools.textEditor_20241022({
execute: async ({
command,
path,
file_text,
insert_line,
new_str,
old_str,
view_range,
}) => {
// Implement your text editing logic here
// Return the result of the text editing operation
},
});
Parameters:
command('view' | 'create' | 'str_replace' | 'insert' | 'undo_edit'): The command to run. Note:undo_editis only available in Claude 3.5 Sonnet and earlier models.path(string): Absolute path to file or directory, e.g./repo/file.pyor/repo.file_text(string, optional): Required forcreatecommand, with the content of the file to be created.insert_line(number, optional): Required forinsertcommand. The line number after which to insert the new string.new_str(string, optional): New string forstr_replaceorinsertcommands.old_str(string, optional): Required forstr_replacecommand, containing the string to replace.view_range(number[], optional): Optional forviewcommand to specify line range to show.
When using the Text Editor Tool, make sure to name the key in the tools object correctly:
- Claude 4 models: Use
str_replace_based_edit_tool - Claude 3.5 Sonnet and earlier: Use
str_replace_editor
// For Claude 4 models
const response = await generateText({
model: bedrock('us.anthropic.claude-sonnet-4-20250514-v1:0'),
prompt:
"Create a new file called example.txt, write 'Hello World' to it, and run 'cat example.txt' in the terminal",
tools: {
str_replace_based_edit_tool: textEditorTool, // Claude 4 tool name
},
});
// For Claude 3.5 Sonnet and earlier
const response = await generateText({
model: bedrock('anthropic.claude-3-5-sonnet-20241022-v2:0'),
prompt:
"Create a new file called example.txt, write 'Hello World' to it, and run 'cat example.txt' in the terminal",
tools: {
str_replace_editor: textEditorTool, // Earlier models tool name
},
});
Computer Tool
The Computer Tool enables control of keyboard and mouse actions on a computer:
const computerTool = anthropic.tools.computer_20241022({
displayWidthPx: 1920,
displayHeightPx: 1080,
displayNumber: 0, // Optional, for X11 environments
execute: async ({ action, coordinate, text }) => {
// Implement your computer control logic here
// Return the result of the action
// Example code:
switch (action) {
case 'screenshot': {
// multipart result:
return {
type: 'image',
data: fs
.readFileSync('./data/screenshot-editor.png')
.toString('base64'),
};
}
default: {
console.log('Action:', action);
console.log('Coordinate:', coordinate);
console.log('Text:', text);
return `executed ${action}`;
}
}
},
// map to tool result content for LLM consumption:
toModelOutput({ output }) {
return typeof output === 'string'
? [{ type: 'text', text: output }]
: [{ type: 'image', data: output.data, mediaType: 'image/png' }];
},
});
Parameters:
action('key' | 'type' | 'mouse_move' | 'left_click' | 'left_click_drag' | 'right_click' | 'middle_click' | 'double_click' | 'screenshot' | 'cursor_position'): The action to perform.coordinate(number[], optional): Required formouse_moveandleft_click_dragactions. Specifies the (x, y) coordinates.text(string, optional): Required fortypeandkeyactions.
These tools can be used in conjunction with the anthropic.claude-3-5-sonnet-20240620-v1:0 model to enable more complex interactions and tasks.
Model Capabilities
| Model | Image Input | Object Generation | Tool Usage | Tool Streaming |
|---|---|---|---|---|
amazon.titan-tg1-large |
||||
amazon.titan-text-express-v1 |
||||
amazon.titan-text-lite-v1 |
||||
us.amazon.nova-premier-v1:0 |
||||
us.amazon.nova-pro-v1:0 |
||||
us.amazon.nova-lite-v1:0 |
||||
us.amazon.nova-micro-v1:0 |
||||
anthropic.claude-haiku-4-5-20251001-v1:0 |
||||
anthropic.claude-sonnet-4-20250514-v1:0 |
||||
anthropic.claude-sonnet-4-5-20250929-v1:0 |
||||
anthropic.claude-opus-4-20250514-v1:0 |
||||
anthropic.claude-opus-4-1-20250805-v1:0 |
||||
anthropic.claude-3-7-sonnet-20250219-v1:0 |
||||
anthropic.claude-3-5-sonnet-20241022-v2:0 |
||||
anthropic.claude-3-5-sonnet-20240620-v1:0 |
||||
anthropic.claude-3-5-haiku-20241022-v1:0 |
||||
anthropic.claude-3-opus-20240229-v1:0 |
||||
anthropic.claude-3-sonnet-20240229-v1:0 |
||||
anthropic.claude-3-haiku-20240307-v1:0 |
||||
us.anthropic.claude-sonnet-4-20250514-v1:0 |
||||
us.anthropic.claude-sonnet-4-5-20250929-v1:0 |
||||
us.anthropic.claude-opus-4-20250514-v1:0 |
||||
us.anthropic.claude-opus-4-1-20250805-v1:0 |
||||
us.anthropic.claude-3-7-sonnet-20250219-v1:0 |
||||
us.anthropic.claude-3-5-sonnet-20241022-v2:0 |
||||
us.anthropic.claude-3-5-sonnet-20240620-v1:0 |
||||
us.anthropic.claude-3-5-haiku-20241022-v1:0 |
||||
us.anthropic.claude-3-sonnet-20240229-v1:0 |
||||
us.anthropic.claude-3-opus-20240229-v1:0 |
||||
us.anthropic.claude-3-haiku-20240307-v1:0 |
||||
anthropic.claude-v2 |
||||
anthropic.claude-v2:1 |
||||
anthropic.claude-instant-v1 |
||||
cohere.command-text-v14 |
||||
cohere.command-light-text-v14 |
||||
cohere.command-r-v1:0 |
||||
cohere.command-r-plus-v1:0 |
||||
us.deepseek.r1-v1:0 |
||||
meta.llama3-8b-instruct-v1:0 |
||||
meta.llama3-70b-instruct-v1:0 |
||||
meta.llama3-1-8b-instruct-v1:0 |
||||
meta.llama3-1-70b-instruct-v1:0 |
||||
meta.llama3-1-405b-instruct-v1:0 |
||||
meta.llama3-2-1b-instruct-v1:0 |
||||
meta.llama3-2-3b-instruct-v1:0 |
||||
meta.llama3-2-11b-instruct-v1:0 |
||||
meta.llama3-2-90b-instruct-v1:0 |
||||
us.meta.llama3-2-1b-instruct-v1:0 |
||||
us.meta.llama3-2-3b-instruct-v1:0 |
||||
us.meta.llama3-2-11b-instruct-v1:0 |
||||
us.meta.llama3-2-90b-instruct-v1:0 |
||||
us.meta.llama3-1-8b-instruct-v1:0 |
||||
us.meta.llama3-1-70b-instruct-v1:0 |
||||
us.meta.llama3-3-70b-instruct-v1:0 |
||||
us.meta.llama4-scout-17b-instruct-v1:0 |
||||
us.meta.llama4-maverick-17b-instruct-v1:0 |
||||
mistral.mistral-7b-instruct-v0:2 |
||||
mistral.mixtral-8x7b-instruct-v0:1 |
||||
mistral.mistral-large-2402-v1:0 |
||||
mistral.mistral-small-2402-v1:0 |
||||
us.mistral.pixtral-large-2502-v1:0 |
||||
openai.gpt-oss-120b-1:0 |
||||
openai.gpt-oss-20b-1:0 |
Embedding Models
You can create models that call the Bedrock API Bedrock API
using the .embedding() factory method.
const model = bedrock.embedding('amazon.titan-embed-text-v1');
Bedrock Titan embedding model amazon.titan-embed-text-v2:0 supports several additional settings. You can pass them as an options argument:
import { bedrock } from '@ai-sdk/amazon-bedrock';
import { embed } from 'ai';
const model = bedrock.embedding('amazon.titan-embed-text-v2:0');
const { embedding } = await embed({
model,
value: 'sunny day at the beach',
providerOptions: {
bedrock: {
dimensions: 512, // optional, number of dimensions for the embedding
normalize: true, // optional, normalize the output embeddings
},
},
});
The following optional provider options are available for Bedrock Titan embedding models:
-
dimensions: number
The number of dimensions the output embeddings should have. The following values are accepted: 1024 (default), 512, 256.
-
normalize boolean
Flag indicating whether or not to normalize the output embeddings. Defaults to true.
Model Capabilities
| Model | Default Dimensions | Custom Dimensions |
|---|---|---|
amazon.titan-embed-text-v1 |
1536 | |
amazon.titan-embed-text-v2:0 |
1024 | |
cohere.embed-english-v3 |
1024 | |
cohere.embed-multilingual-v3 |
1024 |
Reranking Models
You can create models that call the Bedrock Rerank API
using the .reranking() factory method.
const model = bedrock.reranking('cohere.rerank-v3-5:0');
You can use Amazon Bedrock reranking models to rerank documents with the rerank function:
import { bedrock } from '@ai-sdk/amazon-bedrock';
import { rerank } from 'ai';
const documents = [
'sunny day at the beach',
'rainy afternoon in the city',
'snowy night in the mountains',
];
const { ranking } = await rerank({
model: bedrock.reranking('cohere.rerank-v3-5:0'),
documents,
query: 'talk about rain',
topN: 2,
});
console.log(ranking);
// [
// { originalIndex: 1, score: 0.9, document: 'rainy afternoon in the city' },
// { originalIndex: 0, score: 0.3, document: 'sunny day at the beach' }
// ]
Amazon Bedrock reranking models support additional provider options that can be passed via providerOptions.bedrock:
import { bedrock } from '@ai-sdk/amazon-bedrock';
import { rerank } from 'ai';
const { ranking } = await rerank({
model: bedrock.reranking('cohere.rerank-v3-5:0'),
documents: ['sunny day at the beach', 'rainy afternoon in the city'],
query: 'talk about rain',
providerOptions: {
bedrock: {
nextToken: 'pagination_token_here',
},
},
});
The following provider options are available:
-
nextToken string
Token for pagination of results.
-
additionalModelRequestFields Record<string, unknown>
Additional model-specific request fields.
Model Capabilities
| Model |
|---|
amazon.rerank-v1:0 |
cohere.rerank-v3-5:0 |
Image Models
You can create models that call the Bedrock API Bedrock API
using the .image() factory method.
For more on the Amazon Nova Canvas image model, see the Nova Canvas Overview.
The `amazon.nova-canvas-v1:0` model is available in the `us-east-1`, `eu-west-1`, and `ap-northeast-1` regions.const model = bedrock.image('amazon.nova-canvas-v1:0');
You can then generate images with the generateImage function:
import { bedrock } from '@ai-sdk/amazon-bedrock';
import { generateImage } from 'ai';
const { image } = await generateImage({
model: bedrock.image('amazon.nova-canvas-v1:0'),
prompt: 'A beautiful sunset over a calm ocean',
size: '512x512',
seed: 42,
});
You can also pass the providerOptions object to the generateImage function to customize the generation behavior:
import { bedrock } from '@ai-sdk/amazon-bedrock';
import { generateImage } from 'ai';
const { image } = await generateImage({
model: bedrock.image('amazon.nova-canvas-v1:0'),
prompt: 'A beautiful sunset over a calm ocean',
size: '512x512',
seed: 42,
providerOptions: {
bedrock: {
quality: 'premium',
negativeText: 'blurry, low quality',
cfgScale: 7.5,
style: 'PHOTOREALISM',
},
},
});
The following optional provider options are available for Amazon Nova Canvas:
-
quality string
The quality level for image generation. Accepts
'standard'or'premium'. -
negativeText string
Text describing what you don't want in the generated image.
-
cfgScale number
Controls how closely the generated image adheres to the prompt. Higher values result in images that are more closely aligned to the prompt.
-
style string
Predefined visual style for image generation. Accepts one of:
3D_ANIMATED_FAMILY_FILM·DESIGN_SKETCH·FLAT_VECTOR_ILLUSTRATION·GRAPHIC_NOVEL_ILLUSTRATION·MAXIMALISM·MIDCENTURY_RETRO·PHOTOREALISM·SOFT_DIGITAL_PAINTING.
Documentation for additional settings can be found within the Amazon Bedrock User Guide for Amazon Nova Documentation.
Image Editing
Amazon Nova Canvas supports several image editing task types. When you provide input images via prompt.images, the model automatically detects the appropriate editing mode, or you can explicitly specify the taskType in provider options.
Image Variation
Create variations of an existing image while maintaining its core characteristics:
const imageBuffer = readFileSync('./input-image.png');
const { images } = await generateImage({
model: bedrock.image('amazon.nova-canvas-v1:0'),
prompt: {
text: 'Modernize the style, photo-realistic, 8k, hdr',
images: [imageBuffer],
},
providerOptions: {
bedrock: {
taskType: 'IMAGE_VARIATION',
similarityStrength: 0.7, // 0-1, higher = closer to original
negativeText: 'bad quality, low resolution',
},
},
});
-
similarityStrength number
Controls how similar the output is to the input image. Values range from 0 to 1, where higher values produce results closer to the original.
Inpainting
Edit specific parts of an image. You can define the area to modify using either a mask image or a text prompt:
Using a mask prompt (text-based selection):
const imageBuffer = readFileSync('./input-image.png');
const { images } = await generateImage({
model: bedrock.image('amazon.nova-canvas-v1:0'),
prompt: {
text: 'a cute corgi dog in the same style',
images: [imageBuffer],
},
providerOptions: {
bedrock: {
maskPrompt: 'cat', // Describe what to replace
},
},
seed: 42,
});
Using a mask image:
const image = readFileSync('./input-image.png');
const mask = readFileSync('./mask.png'); // White pixels = area to change
const { images } = await generateImage({
model: bedrock.image('amazon.nova-canvas-v1:0'),
prompt: {
text: 'A sunlit indoor lounge area with a pool containing a flamingo',
images: [image],
mask: mask,
},
});
-
maskPrompt string
A text description of the area to modify. The model will automatically identify and mask the described region.
Outpainting
Extend an image beyond its original boundaries:
const imageBuffer = readFileSync('./input-image.png');
const { images } = await generateImage({
model: bedrock.image('amazon.nova-canvas-v1:0'),
prompt: {
text: 'A beautiful sunset landscape with mountains',
images: [imageBuffer],
},
providerOptions: {
bedrock: {
taskType: 'OUTPAINTING',
maskPrompt: 'background',
outPaintingMode: 'DEFAULT', // or 'PRECISE'
},
},
});
-
outPaintingMode string
Controls how the outpainting is performed. Accepts
'DEFAULT'or'PRECISE'.
Background Removal
Remove the background from an image:
const imageBuffer = readFileSync('./input-image.png');
const { images } = await generateImage({
model: bedrock.image('amazon.nova-canvas-v1:0'),
prompt: {
images: [imageBuffer],
},
providerOptions: {
bedrock: {
taskType: 'BACKGROUND_REMOVAL',
},
},
});
Image Editing Provider Options
The following additional provider options are available for image editing:
-
taskType string
Explicitly set the editing task type. Accepts
'TEXT_IMAGE'(default for text-only),'IMAGE_VARIATION','INPAINTING','OUTPAINTING', or'BACKGROUND_REMOVAL'. When images are provided without an explicit taskType, the model defaults to'IMAGE_VARIATION'(or'INPAINTING'if a mask is provided). -
maskPrompt string
Text description of the area to modify (for inpainting/outpainting). Alternative to providing a mask image.
-
similarityStrength number
For
IMAGE_VARIATION: Controls similarity to the original (0-1). -
outPaintingMode string
For
OUTPAINTING: Controls the outpainting behavior ('DEFAULT'or'PRECISE').
Image Model Settings
You can customize the generation behavior with optional options:
await generateImage({
model: bedrock.image('amazon.nova-canvas-v1:0'),
prompt: 'A beautiful sunset over a calm ocean',
size: '512x512',
seed: 42,
maxImagesPerCall: 1, // Maximum number of images to generate per API call
});
-
maxImagesPerCall number
Override the maximum number of images generated per API call. Default can vary by model, with 5 as a common default.
Model Capabilities
The Amazon Nova Canvas model supports custom sizes with constraints as follows:
- Each side must be between 320-4096 pixels, inclusive.
- Each side must be evenly divisible by 16.
- The aspect ratio must be between 1:4 and 4:1. That is, one side can't be more than 4 times longer than the other side.
- The total pixel count must be less than 4,194,304.
For more, see Image generation access and usage.
| Model | Sizes |
|---|---|
amazon.nova-canvas-v1:0 |
Custom sizes: 320-4096px per side (must be divisible by 16), aspect ratio 1:4 to 4:1, max 4.2M pixels |
Response Headers
The Amazon Bedrock provider will return the response headers associated with network requests made of the Bedrock servers.
import { bedrock } from '@ai-sdk/amazon-bedrock';
import { generateText } from 'ai';
const { text } = await generateText({
model: bedrock('meta.llama3-70b-instruct-v1:0'),
prompt: 'Write a vegetarian lasagna recipe for 4 people.',
});
console.log(result.response.headers);
Below is sample output where you can see the x-amzn-requestid header. This can
be useful for correlating Bedrock API calls with requests made by the AI SDK:
{
connection: 'keep-alive',
'content-length': '2399',
'content-type': 'application/json',
date: 'Fri, 07 Feb 2025 04:28:30 GMT',
'x-amzn-requestid': 'c9f3ace4-dd5d-49e5-9807-39aedfa47c8e'
}
This information is also available with streamText:
import { bedrock } from '@ai-sdk/amazon-bedrock';
import { streamText } from 'ai';
const result = streamText({
model: bedrock('meta.llama3-70b-instruct-v1:0'),
prompt: 'Write a vegetarian lasagna recipe for 4 people.',
});
for await (const textPart of result.textStream) {
process.stdout.write(textPart);
}
console.log('Response headers:', (await result.response).headers);
With sample output as:
{
connection: 'keep-alive',
'content-type': 'application/vnd.amazon.eventstream',
date: 'Fri, 07 Feb 2025 04:33:37 GMT',
'transfer-encoding': 'chunked',
'x-amzn-requestid': 'a976e3fc-0e45-4241-9954-b9bdd80ab407'
}
Bedrock Anthropic Provider Usage
The Bedrock Anthropic provider offers support for Anthropic's Claude models through Amazon Bedrock's native InvokeModel API. This provides full feature parity with the Anthropic API, including features that may not be available through the Converse API (such as stop_sequence in streaming responses).
For more information on Claude models available on Amazon Bedrock, see Claude on Amazon Bedrock.
Provider Instance
You can import the default provider instance bedrockAnthropic from @ai-sdk/amazon-bedrock/anthropic:
import { bedrockAnthropic } from '@ai-sdk/amazon-bedrock/anthropic';
If you need a customized setup, you can import createBedrockAnthropic from @ai-sdk/amazon-bedrock/anthropic and create a provider instance with your settings:
import { createBedrockAnthropic } from '@ai-sdk/amazon-bedrock/anthropic';
const bedrockAnthropic = createBedrockAnthropic({
region: 'us-east-1', // optional
accessKeyId: 'xxxxxxxxx', // optional
secretAccessKey: 'xxxxxxxxx', // optional
sessionToken: 'xxxxxxxxx', // optional
});
Provider Settings
You can use the following optional settings to customize the Bedrock Anthropic provider instance:
-
region string
The AWS region that you want to use for the API calls. It uses the
AWS_REGIONenvironment variable by default. -
accessKeyId string
The AWS access key ID that you want to use for the API calls. It uses the
AWS_ACCESS_KEY_IDenvironment variable by default. -
secretAccessKey string
The AWS secret access key that you want to use for the API calls. It uses the
AWS_SECRET_ACCESS_KEYenvironment variable by default. -
sessionToken string
Optional. The AWS session token that you want to use for the API calls. It uses the
AWS_SESSION_TOKENenvironment variable by default. -
apiKey string
API key for authenticating requests using Bearer token authentication. When provided, this will be used instead of AWS SigV4 authentication. It uses the
AWS_BEARER_TOKEN_BEDROCKenvironment variable by default. -
baseURL string
Base URL for the Bedrock API calls. Useful for custom endpoints or proxy configurations.
-
headers Resolvable<Record<string, string | undefined>>
Headers to include in the requests.
-
fetch (input: RequestInfo, init?: RequestInit) => Promise<Response>
Custom fetch implementation. You can use it as a middleware to intercept requests, or to provide a custom fetch implementation for e.g. testing.
-
credentialProvider () => PromiseLike<BedrockCredentials>
The AWS credential provider to use for the Bedrock provider to get dynamic credentials similar to the AWS SDK. Setting a provider here will cause its credential values to be used instead of the
accessKeyId,secretAccessKey, andsessionTokensettings.
Language Models
You can create models that call the Anthropic Messages API using the provider instance.
The first argument is the model id, e.g. us.anthropic.claude-3-5-sonnet-20241022-v2:0.
const model = bedrockAnthropic('us.anthropic.claude-3-5-sonnet-20241022-v2:0');
You can use Bedrock Anthropic language models to generate text with the generateText function:
import { bedrockAnthropic } from '@ai-sdk/amazon-bedrock/anthropic';
import { generateText } from 'ai';
const { text } = await generateText({
model: bedrockAnthropic('us.anthropic.claude-3-5-sonnet-20241022-v2:0'),
prompt: 'Write a vegetarian lasagna recipe for 4 people.',
});
Cache Control
In the messages and message parts, you can use the providerOptions property to set cache control breakpoints.
You need to set the anthropic property in the providerOptions object to { cacheControl: { type: 'ephemeral' } } to set a cache control breakpoint.
import { bedrockAnthropic } from '@ai-sdk/amazon-bedrock/anthropic';
import { generateText } from 'ai';
const result = await generateText({
model: bedrockAnthropic('us.anthropic.claude-3-7-sonnet-20250219-v1:0'),
messages: [
{
role: 'system',
content: 'You are an expert assistant.',
providerOptions: {
anthropic: { cacheControl: { type: 'ephemeral' } },
},
},
{
role: 'user',
content: 'Explain quantum computing.',
},
],
});
Computer Use
The Bedrock Anthropic provider supports Anthropic's computer use tools:
- Bash Tool: Allows running bash commands.
- Text Editor Tool: Provides functionality for viewing and editing text files.
- Computer Tool: Enables control of keyboard and mouse actions on a computer.
They are available via the tools property of the provider instance.
Bash Tool
import { bedrockAnthropic } from '@ai-sdk/amazon-bedrock/anthropic';
import { generateText, stepCountIs } from 'ai';
const result = await generateText({
model: bedrockAnthropic('us.anthropic.claude-3-7-sonnet-20250219-v1:0'),
tools: {
bash: bedrockAnthropic.tools.bash_20241022({
execute: async ({ command }) => {
// Implement your bash command execution logic here
return [{ type: 'text', text: `Executed: ${command}` }];
},
}),
},
prompt: 'List the files in my directory.',
stopWhen: stepCountIs(2),
});
Text Editor Tool
import { bedrockAnthropic } from '@ai-sdk/amazon-bedrock/anthropic';
import { generateText, stepCountIs } from 'ai';
const result = await generateText({
model: bedrockAnthropic('us.anthropic.claude-3-7-sonnet-20250219-v1:0'),
tools: {
str_replace_editor: bedrockAnthropic.tools.textEditor_20241022({
execute: async ({ command, path, old_str, new_str }) => {
// Implement your text editing logic here
return 'File updated successfully';
},
}),
},
prompt: 'Update my README file.',
stopWhen: stepCountIs(5),
});
Computer Tool
import { bedrockAnthropic } from '@ai-sdk/amazon-bedrock/anthropic';
import { generateText, stepCountIs } from 'ai';
import fs from 'fs';
const result = await generateText({
model: bedrockAnthropic('us.anthropic.claude-3-7-sonnet-20250219-v1:0'),
tools: {
computer: bedrockAnthropic.tools.computer_20241022({
displayWidthPx: 1024,
displayHeightPx: 768,
execute: async ({ action, coordinate, text }) => {
if (action === 'screenshot') {
return {
type: 'image',
data: fs.readFileSync('./screenshot.png').toString('base64'),
};
}
return `executed ${action}`;
},
toModelOutput({ output }) {
return {
type: 'content',
value: [
typeof output === 'string'
? { type: 'text', text: output }
: {
type: 'image-data',
data: output.data,
mediaType: 'image/png',
},
],
};
},
}),
},
prompt: 'Take a screenshot.',
stopWhen: stepCountIs(3),
});
Reasoning
Anthropic has reasoning support for Claude 3.7 and Claude 4 models on Bedrock, including:
us.anthropic.claude-opus-4-5-20251101-v1:0us.anthropic.claude-sonnet-4-5-20250929-v1:0us.anthropic.claude-opus-4-20250514-v1:0us.anthropic.claude-sonnet-4-20250514-v1:0us.anthropic.claude-opus-4-1-20250805-v1:0us.anthropic.claude-haiku-4-5-20251001-v1:0us.anthropic.claude-3-7-sonnet-20250219-v1:0
You can enable it using the thinking provider option and specifying a thinking budget in tokens.
import { bedrockAnthropic } from '@ai-sdk/amazon-bedrock/anthropic';
import { generateText } from 'ai';
const { text, reasoningText, reasoning } = await generateText({
model: bedrockAnthropic('us.anthropic.claude-sonnet-4-5-20250929-v1:0'),
prompt: 'How many people will live in the world in 2040?',
providerOptions: {
anthropic: {
thinking: { type: 'enabled', budgetTokens: 12000 },
},
},
});
console.log(reasoningText); // reasoning text
console.log(reasoning); // reasoning details including redacted reasoning
console.log(text); // text response
See AI SDK UI: Chatbot for more details on how to integrate reasoning into your chatbot.
Model Capabilities
| Model | Image Input | Object Generation | Tool Usage | Computer Use | Reasoning |
|---|---|---|---|---|---|
us.anthropic.claude-opus-4-5-20251101-v1:0 |
|||||
us.anthropic.claude-sonnet-4-5-20250929-v1:0 |
|||||
us.anthropic.claude-opus-4-20250514-v1:0 |
|||||
us.anthropic.claude-sonnet-4-20250514-v1:0 |
|||||
us.anthropic.claude-opus-4-1-20250805-v1:0 |
|||||
us.anthropic.claude-haiku-4-5-20251001-v1:0 |
|||||
us.anthropic.claude-3-7-sonnet-20250219-v1:0 |
|||||
us.anthropic.claude-3-5-sonnet-20241022-v2:0 |
|||||
us.anthropic.claude-3-5-haiku-20241022-v1:0 |
Migrating to @ai-sdk/amazon-bedrock 2.x
The Amazon Bedrock provider was rewritten in version 2.x to remove the
dependency on the @aws-sdk/client-bedrock-runtime package.
The bedrockOptions provider setting previously available has been removed. If
you were using the bedrockOptions object, you should now use the region,
accessKeyId, secretAccessKey, and sessionToken settings directly instead.
Note that you may need to set all of these explicitly, e.g. even if you're not
using sessionToken, set it to undefined. If you're running in a serverless
environment, there may be default environment variables set by your containing
environment that the Amazon Bedrock provider will then pick up and could
conflict with the ones you're intending to use.
title: Groq description: Learn how to use Groq.
Groq Provider
The Groq provider contains language model support for the Groq API.
Setup
The Groq provider is available via the @ai-sdk/groq module.
You can install it with
<Tabs items={['pnpm', 'npm', 'yarn', 'bun']}>
Provider Instance
You can import the default provider instance groq from @ai-sdk/groq:
import { groq } from '@ai-sdk/groq';
If you need a customized setup, you can import createGroq from @ai-sdk/groq
and create a provider instance with your settings:
import { createGroq } from '@ai-sdk/groq';
const groq = createGroq({
// custom settings
});
You can use the following optional settings to customize the Groq provider instance:
-
baseURL string
Use a different URL prefix for API calls, e.g. to use proxy servers. The default prefix is
https://api.groq.com/openai/v1. -
apiKey string
API key that is being sent using the
Authorizationheader. It defaults to theGROQ_API_KEYenvironment variable. -
headers Record<string,string>
Custom headers to include in the requests.
-
fetch (input: RequestInfo, init?: RequestInit) => Promise<Response>
Custom fetch implementation. Defaults to the global
fetchfunction. You can use it as a middleware to intercept requests, or to provide a custom fetch implementation for e.g. testing.
Language Models
You can create Groq models using a provider instance.
The first argument is the model id, e.g. gemma2-9b-it.
const model = groq('gemma2-9b-it');
Reasoning Models
Groq offers several reasoning models such as qwen-qwq-32b and deepseek-r1-distill-llama-70b.
You can configure how the reasoning is exposed in the generated text by using the reasoningFormat option.
It supports the options parsed, hidden, and raw.
import { groq } from '@ai-sdk/groq';
import { generateText } from 'ai';
const result = await generateText({
model: groq('qwen/qwen3-32b'),
providerOptions: {
groq: {
reasoningFormat: 'parsed',
reasoningEffort: 'default',
parallelToolCalls: true, // Enable parallel function calling (default: true)
user: 'user-123', // Unique identifier for end-user (optional)
serviceTier: 'flex', // Use flex tier for higher throughput (optional)
},
},
prompt: 'How many "r"s are in the word "strawberry"?',
});
The following optional provider options are available for Groq language models:
-
reasoningFormat 'parsed' | 'raw' | 'hidden'
Controls how reasoning is exposed in the generated text. Only supported by reasoning models like
qwen-qwq-32banddeepseek-r1-distill-*models.For a complete list of reasoning models and their capabilities, see Groq's reasoning models documentation.
-
reasoningEffort 'low' | 'meduim' | 'high' | 'none' | 'default'
Controls the level of effort the model will put into reasoning.
qwen/qwen3-32b- Supported values:
none: Disable reasoning. The model will not use any reasoning tokens.default: Enable reasoning.
- Supported values:
gpt-oss20b/gpt-oss120b- Supported values:
low: Use a low level of reasoning effort.medium: Use a medium level of reasoning effort.high: Use a high level of reasoning effort.
- Supported values:
Defaults to
defaultforqwen/qwen3-32b. -
structuredOutputs boolean
Whether to use structured outputs.
Defaults to
true.When enabled, object generation will use the
json_schemaformat instead ofjson_objectformat, providing more reliable structured outputs. -
strictJsonSchema boolean
Whether to use strict JSON schema validation. When
true, the model uses constrained decoding to guarantee schema compliance.Defaults to
true.Only used when
structuredOutputsis enabled and a schema is provided. See Groq's Structured Outputs documentation for details on strict mode limitations. -
parallelToolCalls boolean
Whether to enable parallel function calling during tool use. Defaults to
true. -
user string
A unique identifier representing your end-user, which can help with monitoring and abuse detection.
-
serviceTier 'on_demand' | 'flex' | 'auto'
Service tier for the request. Defaults to
'on_demand'.'on_demand': Default tier with consistent performance and fairness'flex': Higher throughput tier (10x rate limits) optimized for workloads that can handle occasional request failures'auto': Uses on_demand rate limits first, then falls back to flex tier if exceeded
For more details about service tiers and their benefits, see Groq's Flex Processing documentation.
Only Groq reasoning models support the reasoningFormat option.
Structured Outputs
Structured outputs are enabled by default for Groq models.
You can disable them by setting the structuredOutputs option to false.
import { groq } from '@ai-sdk/groq';
import { generateObject } from 'ai';
import { z } from 'zod';
const result = await generateObject({
model: groq('moonshotai/kimi-k2-instruct-0905'),
schema: z.object({
recipe: z.object({
name: z.string(),
ingredients: z.array(z.string()),
instructions: z.array(z.string()),
}),
}),
prompt: 'Generate a simple pasta recipe.',
});
console.log(JSON.stringify(result.object, null, 2));
You can disable structured outputs for models that don't support them:
import { groq } from '@ai-sdk/groq';
import { generateObject } from 'ai';
import { z } from 'zod';
const result = await generateObject({
model: groq('gemma2-9b-it'),
providerOptions: {
groq: {
structuredOutputs: false,
},
},
schema: z.object({
recipe: z.object({
name: z.string(),
ingredients: z.array(z.string()),
instructions: z.array(z.string()),
}),
}),
prompt: 'Generate a simple pasta recipe in JSON format.',
});
console.log(JSON.stringify(result.object, null, 2));
Example
You can use Groq language models to generate text with the generateText function:
import { groq } from '@ai-sdk/groq';
import { generateText } from 'ai';
const { text } = await generateText({
model: groq('gemma2-9b-it'),
prompt: 'Write a vegetarian lasagna recipe for 4 people.',
});
Image Input
Groq's multi-modal models like meta-llama/llama-4-scout-17b-16e-instruct support image inputs. You can include images in your messages using either URLs or base64-encoded data:
import { groq } from '@ai-sdk/groq';
import { generateText } from 'ai';
const { text } = await generateText({
model: groq('meta-llama/llama-4-scout-17b-16e-instruct'),
messages: [
{
role: 'user',
content: [
{ type: 'text', text: 'What do you see in this image?' },
{
type: 'image',
image: 'https://example.com/image.jpg',
},
],
},
],
});
You can also use base64-encoded images:
import { groq } from '@ai-sdk/groq';
import { generateText } from 'ai';
import { readFileSync } from 'fs';
const imageData = readFileSync('path/to/image.jpg', 'base64');
const { text } = await generateText({
model: groq('meta-llama/llama-4-scout-17b-16e-instruct'),
messages: [
{
role: 'user',
content: [
{ type: 'text', text: 'Describe this image in detail.' },
{
type: 'image',
image: `data:image/jpeg;base64,${imageData}`,
},
],
},
],
});
Model Capabilities
| Model | Image Input | Object Generation | Tool Usage | Tool Streaming |
|---|---|---|---|---|
gemma2-9b-it |
||||
llama-3.1-8b-instant |
||||
llama-3.3-70b-versatile |
||||
meta-llama/llama-guard-4-12b |
||||
deepseek-r1-distill-llama-70b |
||||
meta-llama/llama-4-maverick-17b-128e-instruct |
||||
meta-llama/llama-4-scout-17b-16e-instruct |
||||
meta-llama/llama-prompt-guard-2-22m |
||||
meta-llama/llama-prompt-guard-2-86m |
||||
moonshotai/kimi-k2-instruct-0905 |
||||
qwen/qwen3-32b |
||||
llama-guard-3-8b |
||||
llama3-70b-8192 |
||||
llama3-8b-8192 |
||||
mixtral-8x7b-32768 |
||||
qwen-qwq-32b |
||||
qwen-2.5-32b |
||||
deepseek-r1-distill-qwen-32b |
||||
openai/gpt-oss-20b |
||||
openai/gpt-oss-120b |
Browser Search Tool
Groq provides a browser search tool that offers interactive web browsing capabilities. Unlike traditional web search, browser search navigates websites interactively, providing more detailed and comprehensive results.
Supported Models
Browser search is only available for these specific models:
openai/gpt-oss-20bopenai/gpt-oss-120b
Basic Usage
import { groq } from '@ai-sdk/groq';
import { generateText } from 'ai';
const result = await generateText({
model: groq('openai/gpt-oss-120b'), // Must use supported model
prompt:
'What are the latest developments in AI? Please search for recent news.',
tools: {
browser_search: groq.tools.browserSearch({}),
},
toolChoice: 'required', // Ensure the tool is used
});
console.log(result.text);
Streaming Example
import { groq } from '@ai-sdk/groq';
import { streamText } from 'ai';
const result = streamText({
model: groq('openai/gpt-oss-120b'),
prompt: 'Search for the latest tech news and summarize it.',
tools: {
browser_search: groq.tools.browserSearch({}),
},
toolChoice: 'required',
});
for await (const delta of result.fullStream) {
if (delta.type === 'text-delta') {
process.stdout.write(delta.text);
}
}
Key Features
- Interactive Browsing: Navigates websites like a human user
- Comprehensive Results: More detailed than traditional search snippets
- Server-side Execution: Runs on Groq's infrastructure, no setup required
- Powered by Exa: Uses Exa search engine for optimal results
- Currently Free: Available at no additional charge during beta
Best Practices
- Use
toolChoice: 'required'to ensure the browser search is activated - Only supported on
openai/gpt-oss-20bandopenai/gpt-oss-120bmodels - The tool works automatically - no configuration parameters needed
- Server-side execution means no additional API keys or setup required
Model Validation
The provider automatically validates model compatibility:
// ✅ Supported - will work
const result = await generateText({
model: groq('openai/gpt-oss-120b'),
tools: { browser_search: groq.tools.browserSearch({}) },
});
// ❌ Unsupported - will show warning and ignore tool
const result = await generateText({
model: groq('gemma2-9b-it'),
tools: { browser_search: groq.tools.browserSearch({}) },
});
// Warning: "Browser search is only supported on models: openai/gpt-oss-20b, openai/gpt-oss-120b"
Transcription Models
You can create models that call the Groq transcription API
using the .transcription() factory method.
The first argument is the model id e.g. whisper-large-v3.
const model = groq.transcription('whisper-large-v3');
You can also pass additional provider-specific options using the providerOptions argument. For example, supplying the input language in ISO-639-1 (e.g. en) format will improve accuracy and latency.
import { experimental_transcribe as transcribe } from 'ai';
import { groq } from '@ai-sdk/groq';
import { readFile } from 'fs/promises';
const result = await transcribe({
model: groq.transcription('whisper-large-v3'),
audio: await readFile('audio.mp3'),
providerOptions: { groq: { language: 'en' } },
});
The following provider options are available:
-
timestampGranularities string[] The granularity of the timestamps in the transcription. Defaults to
['segment']. Possible values are['word'],['segment'], and['word', 'segment']. Note: There is no additional latency for segment timestamps, but generating word timestamps incurs additional latency. Important: RequiresresponseFormatto be set to'verbose_json'. -
responseFormat string The format of the response. Set to
'verbose_json'to receive timestamps for audio segments and enabletimestampGranularities. Set to'text'to return only the transcribed text. Optional. -
language string The language of the input audio. Supplying the input language in ISO-639-1 format (e.g. 'en') will improve accuracy and latency. Optional.
-
prompt string An optional text to guide the model's style or continue a previous audio segment. The prompt should match the audio language. Optional.
-
temperature number The sampling temperature, between 0 and 1. Higher values like 0.8 will make the output more random, while lower values like 0.2 will make it more focused and deterministic. If set to 0, the model will use log probability to automatically increase the temperature until certain thresholds are hit. Defaults to 0. Optional.
Model Capabilities
| Model | Transcription | Duration | Segments | Language |
|---|---|---|---|---|
whisper-large-v3 |
||||
whisper-large-v3-turbo |
title: Fal description: Learn how to use Fal AI models with the AI SDK.
Fal Provider
Fal AI provides a generative media platform for developers with lightning-fast inference capabilities. Their platform offers optimized performance for running diffusion models, with speeds up to 4x faster than alternatives.
Setup
The Fal provider is available via the @ai-sdk/fal module. You can install it with
<Tabs items={['pnpm', 'npm', 'yarn', 'bun']}>
Provider Instance
You can import the default provider instance fal from @ai-sdk/fal:
import { fal } from '@ai-sdk/fal';
If you need a customized setup, you can import createFal and create a provider instance with your settings:
import { createFal } from '@ai-sdk/fal';
const fal = createFal({
apiKey: 'your-api-key', // optional, defaults to FAL_API_KEY environment variable, falling back to FAL_KEY
baseURL: 'custom-url', // optional
headers: {
/* custom headers */
}, // optional
});
You can use the following optional settings to customize the Fal provider instance:
-
baseURL string
Use a different URL prefix for API calls, e.g. to use proxy servers. The default prefix is
https://fal.run. -
apiKey string
API key that is being sent using the
Authorizationheader. It defaults to theFAL_API_KEYenvironment variable, falling back toFAL_KEY. -
headers Record<string,string>
Custom headers to include in the requests.
-
fetch (input: RequestInfo, init?: RequestInit) => Promise<Response>
Custom fetch implementation. You can use it as a middleware to intercept requests, or to provide a custom fetch implementation for e.g. testing.
Image Models
You can create Fal image models using the .image() factory method.
For more on image generation with the AI SDK see generateImage().
Basic Usage
import { fal } from '@ai-sdk/fal';
import { generateImage } from 'ai';
import fs from 'fs';
const { image, providerMetadata } = await generateImage({
model: fal.image('fal-ai/flux/dev'),
prompt: 'A serene mountain landscape at sunset',
});
const filename = `image-${Date.now()}.png`;
fs.writeFileSync(filename, image.uint8Array);
console.log(`Image saved to ${filename}`);
Fal image models may return additional information for the images and the request.
Here are some examples of properties that may be set for each image
providerMetadata.fal.images[0].nsfw; // boolean, image is not safe for work
providerMetadata.fal.images[0].width; // number, image width
providerMetadata.fal.images[0].height; // number, image height
providerMetadata.fal.images[0].content_type; // string, mime type of the image
Model Capabilities
Fal offers many models optimized for different use cases. Here are a few popular examples. For a full list of models, see the Fal AI Search Page.
| Model | Description |
|---|---|
fal-ai/flux/dev |
FLUX.1 [dev] model for high-quality image generation |
fal-ai/flux-pro/kontext |
FLUX.1 Kontext [pro] handles both text and reference images as inputs, enabling targeted edits and complex transformations |
fal-ai/flux-pro/kontext/max |
FLUX.1 Kontext [max] with improved prompt adherence and typography generation |
fal-ai/flux-lora |
Super fast endpoint for FLUX.1 with LoRA support |
fal-ai/ideogram/character |
Generate consistent character appearances across multiple images. Maintain facial features, proportions, and distinctive traits |
fal-ai/qwen-image |
Qwen-Image foundation model with significant advances in complex text rendering and precise image editing |
fal-ai/omnigen-v2 |
Unified image generation model for Image Editing, Personalized Image Generation, Virtual Try-On, Multi Person Generation and more |
fal-ai/bytedance/dreamina/v3.1/text-to-image |
Dreamina showcases superior picture effects with improvements in aesthetics, precise and diverse styles, and rich details |
fal-ai/recraft/v3/text-to-image |
SOTA in image generation with vector art and brand style capabilities |
fal-ai/wan/v2.2-a14b/text-to-image |
High-resolution, photorealistic images with fine-grained detail |
Fal models support the following aspect ratios:
- 1:1 (square HD)
- 16:9 (landscape)
- 9:16 (portrait)
- 4:3 (landscape)
- 3:4 (portrait)
- 16:10 (1280x800)
- 10:16 (800x1280)
- 21:9 (2560x1080)
- 9:21 (1080x2560)
Key features of Fal models include:
- Up to 4x faster inference speeds compared to alternatives
- Optimized by the Fal Inference Engine™
- Support for real-time infrastructure
- Cost-effective scaling with pay-per-use pricing
- LoRA training capabilities for model personalization
Modify Image
Transform existing images using text prompts.
await generateImage({
model: fal.image('fal-ai/flux-pro/kontext/max'),
prompt: {
text: 'Put a donut next to the flour.',
images: [
'https://v3.fal.media/files/rabbit/rmgBxhwGYb2d3pl3x9sKf_output.png',
],
},
});
Images can also be passed as base64-encoded string, a Uint8Array, an ArrayBuffer, or a Buffer.
A mask can be passed as well
await generateImage({
model: fal.image('fal-ai/flux-pro/kontext/max'),
prompt: {
text: 'Put a donut next to the flour.',
images: [imageBuffer],
mask: maskBuffer,
},
});
Provider Options
Fal image models support flexible provider options through the providerOptions.fal object. You can pass any parameters supported by the specific Fal model's API. Common options include:
- imageUrl - Reference image URL for image-to-image generation
- strength - Controls how much the output differs from the input image
- guidanceScale - Controls adherence to the prompt (range: 1-20)
- numInferenceSteps - Number of denoising steps (range: 1-50)
- enableSafetyChecker - Enable/disable safety filtering
- outputFormat - Output format: 'jpeg' or 'png'
- syncMode - Wait for completion before returning response
- acceleration - Speed of generation: 'none', 'regular', or 'high'
- safetyTolerance - Content safety filtering level (1-6, where 1 is strictest)
Refer to the Fal AI model documentation for model-specific parameters.
Advanced Features
Fal's platform offers several advanced capabilities:
- Private Model Inference: Run your own diffusion transformer models with up to 50% faster inference
- LoRA Training: Train and personalize models in under 5 minutes
- Real-time Infrastructure: Enable new user experiences with fast inference times
- Scalable Architecture: Scale to thousands of GPUs when needed
For more details about Fal's capabilities and features, visit the Fal AI documentation.
Transcription Models
You can create models that call the Fal transcription API
using the .transcription() factory method.
The first argument is the model id without the fal-ai/ prefix e.g. wizper.
const model = fal.transcription('wizper');
You can also pass additional provider-specific options using the providerOptions argument. For example, supplying the batchSize option will increase the number of audio chunks processed in parallel.
import { experimental_transcribe as transcribe } from 'ai';
import { fal } from '@ai-sdk/fal';
import { readFile } from 'fs/promises';
const result = await transcribe({
model: fal.transcription('wizper'),
audio: await readFile('audio.mp3'),
providerOptions: { fal: { batchSize: 10 } },
});
The following provider options are available:
-
language string Language of the audio file. If set to null, the language will be automatically detected. Accepts ISO language codes like 'en', 'fr', 'zh', etc. Optional.
-
diarize boolean Whether to diarize the audio file (identify different speakers). Defaults to true. Optional.
-
chunkLevel string Level of the chunks to return. Either 'segment' or 'word'. Default value: "segment" Optional.
-
version string Version of the model to use. All models are Whisper large variants. Default value: "3" Optional.
-
batchSize number Batch size for processing. Default value: 64 Optional.
-
numSpeakers number Number of speakers in the audio file. If not provided, the number of speakers will be automatically detected. Optional.
Model Capabilities
| Model | Transcription | Duration | Segments | Language |
|---|---|---|---|---|
whisper |
||||
wizper |
Speech Models
You can create models that call Fal text-to-speech endpoints using the .speech() factory method.
Basic Usage
import { experimental_generateSpeech as generateSpeech } from 'ai';
import { fal } from '@ai-sdk/fal';
const result = await generateSpeech({
model: fal.speech('fal-ai/minimax/speech-02-hd'),
text: 'Hello from the AI SDK!',
});
Model Capabilities
| Model | Description |
|---|---|
fal-ai/minimax/voice-clone |
Clone a voice from a sample audio and generate speech from text prompts |
fal-ai/minimax/voice-design |
Design a personalized voice from a text description and generate speech from text prompts |
fal-ai/dia-tts/voice-clone |
Clone dialog voices from a sample audio and generate dialogs from text prompts |
fal-ai/minimax/speech-02-hd |
Generate speech from text prompts and different voices |
fal-ai/minimax/speech-02-turbo |
Generate fast speech from text prompts and different voices |
fal-ai/dia-tts |
Directly generates realistic dialogue from transcripts with audio conditioning for emotion control. Produces natural nonverbals like laughter and throat clearing |
resemble-ai/chatterboxhd/text-to-speech |
Generate expressive, natural speech with Resemble AI's Chatterbox. Features unique emotion control, instant voice cloning from short audio, and built-in watermarking |
Provider Options
Pass provider-specific options via providerOptions.fal depending on the model:
-
voice_setting object
voice_id(string): predefined voice IDspeed(number): 0.5–2.0vol(number): 0–10pitch(number): -12–12emotion(enum): happy | sad | angry | fearful | disgusted | surprised | neutralenglish_normalization(boolean)
-
audio_setting object Audio configuration settings specific to the model.
-
language_boost enum Chinese | Chinese,Yue | English | Arabic | Russian | Spanish | French | Portuguese | German | Turkish | Dutch | Ukrainian | Vietnamese | Indonesian | Japanese | Italian | Korean | Thai | Polish | Romanian | Greek | Czech | Finnish | Hindi | auto
-
pronunciation_dict object Custom pronunciation dictionary for specific words.
Model-specific parameters (e.g., audio_url, prompt, preview_text, ref_audio_url, ref_text) can be passed directly under providerOptions.fal and will be forwarded to the Fal API.
title: AssemblyAI description: Learn how to use the AssemblyAI provider for the AI SDK.
AssemblyAI Provider
The AssemblyAI provider contains language model support for the AssemblyAI transcription API.
Setup
The AssemblyAI provider is available in the @ai-sdk/assemblyai module. You can install it with
<Tabs items={['pnpm', 'npm', 'yarn', 'bun']}>
Provider Instance
You can import the default provider instance assemblyai from @ai-sdk/assemblyai:
import { assemblyai } from '@ai-sdk/assemblyai';
If you need a customized setup, you can import createAssemblyAI from @ai-sdk/assemblyai and create a provider instance with your settings:
import { createAssemblyAI } from '@ai-sdk/assemblyai';
const assemblyai = createAssemblyAI({
// custom settings, e.g.
fetch: customFetch,
});
You can use the following optional settings to customize the AssemblyAI provider instance:
-
apiKey string
API key that is being sent using the
Authorizationheader. It defaults to theASSEMBLYAI_API_KEYenvironment variable. -
headers Record<string,string>
Custom headers to include in the requests.
-
fetch (input: RequestInfo, init?: RequestInit) => Promise<Response>
Custom fetch implementation. Defaults to the global
fetchfunction. You can use it as a middleware to intercept requests, or to provide a custom fetch implementation for e.g. testing.
Transcription Models
You can create models that call the AssemblyAI transcription API
using the .transcription() factory method.
The first argument is the model id e.g. best.
const model = assemblyai.transcription('best');
You can also pass additional provider-specific options using the providerOptions argument. For example, supplying the contentSafety option will enable content safety filtering.
import { experimental_transcribe as transcribe } from 'ai';
import { assemblyai } from '@ai-sdk/assemblyai';
import { readFile } from 'fs/promises';
const result = await transcribe({
model: assemblyai.transcription('best'),
audio: await readFile('audio.mp3'),
providerOptions: { assemblyai: { contentSafety: true } },
});
The following provider options are available:
-
audioEndAt number
End time of the audio in milliseconds. Optional.
-
audioStartFrom number
Start time of the audio in milliseconds. Optional.
-
autoChapters boolean
Whether to automatically generate chapters for the transcription. Optional.
-
autoHighlights boolean
Whether to automatically generate highlights for the transcription. Optional.
-
boostParam enum
Boost parameter for the transcription. Allowed values:
'low','default','high'. Optional. -
contentSafety boolean
Whether to enable content safety filtering. Optional.
-
contentSafetyConfidence number
Confidence threshold for content safety filtering (25-100). Optional.
-
customSpelling array of objects
Custom spelling rules for the transcription. Each object has
from(array of strings) andto(string) properties. Optional. -
disfluencies boolean
Whether to include disfluencies (um, uh, etc.) in the transcription. Optional.
-
entityDetection boolean
Whether to detect entities in the transcription. Optional.
-
filterProfanity boolean
Whether to filter profanity in the transcription. Optional.
-
formatText boolean
Whether to format the text in the transcription. Optional.
-
iabCategories boolean
Whether to include IAB categories in the transcription. Optional.
-
languageCode string
Language code for the audio. Supports numerous ISO-639-1 and ISO-639-3 language codes. Optional.
-
languageConfidenceThreshold number
Confidence threshold for language detection. Optional.
-
languageDetection boolean
Whether to enable language detection. Optional.
-
multichannel boolean
Whether to process multiple audio channels separately. Optional.
-
punctuate boolean
Whether to add punctuation to the transcription. Optional.
-
redactPii boolean
Whether to redact personally identifiable information. Optional.
-
redactPiiAudio boolean
Whether to redact PII in the audio file. Optional.
-
redactPiiAudioQuality enum
Quality of the redacted audio file. Allowed values:
'mp3','wav'. Optional. -
redactPiiPolicies array of enums
Policies for PII redaction, specifying which types of information to redact. Supports numerous types like
'person_name','phone_number', etc. Optional. -
redactPiiSub enum
Substitution method for redacted PII. Allowed values:
'entity_name','hash'. Optional. -
sentimentAnalysis boolean
Whether to perform sentiment analysis on the transcription. Optional.
-
speakerLabels boolean
Whether to label different speakers in the transcription. Optional.
-
speakersExpected number
Expected number of speakers in the audio. Optional.
-
speechThreshold number
Threshold for speech detection (0-1). Optional.
-
summarization boolean
Whether to generate a summary of the transcription. Optional.
-
summaryModel enum
Model to use for summarization. Allowed values:
'informative','conversational','catchy'. Optional. -
summaryType enum
Type of summary to generate. Allowed values:
'bullets','bullets_verbose','gist','headline','paragraph'. Optional. -
topics array of strings
List of topics to detect in the transcription. Optional.
-
webhookAuthHeaderName string
Name of the authentication header for webhook requests. Optional.
-
webhookAuthHeaderValue string
Value of the authentication header for webhook requests. Optional.
-
webhookUrl string
URL to send webhook notifications to. Optional.
-
wordBoost array of strings
List of words to boost in the transcription. Optional.
Model Capabilities
| Model | Transcription | Duration | Segments | Language |
|---|---|---|---|---|
best |
||||
nano |
title: DeepInfra description: Learn how to use DeepInfra's models with the AI SDK.
DeepInfra Provider
The DeepInfra provider contains support for state-of-the-art models through the DeepInfra API, including Llama 3, Mixtral, Qwen, and many other popular open-source models.
Setup
The DeepInfra provider is available via the @ai-sdk/deepinfra module. You can install it with:
<Tabs items={['pnpm', 'npm', 'yarn', 'bun']}>
Provider Instance
You can import the default provider instance deepinfra from @ai-sdk/deepinfra:
import { deepinfra } from '@ai-sdk/deepinfra';
If you need a customized setup, you can import createDeepInfra from @ai-sdk/deepinfra and create a provider instance with your settings:
import { createDeepInfra } from '@ai-sdk/deepinfra';
const deepinfra = createDeepInfra({
apiKey: process.env.DEEPINFRA_API_KEY ?? '',
});
You can use the following optional settings to customize the DeepInfra provider instance:
-
baseURL string
Use a different URL prefix for API calls, e.g. to use proxy servers. The default prefix is
https://api.deepinfra.com/v1.Note: Language models and embeddings use OpenAI-compatible endpoints at
{baseURL}/openai, while image models use{baseURL}/inference. -
apiKey string
API key that is being sent using the
Authorizationheader. It defaults to theDEEPINFRA_API_KEYenvironment variable. -
headers Record<string,string>
Custom headers to include in the requests.
-
fetch (input: RequestInfo, init?: RequestInit) => Promise<Response>
Custom fetch implementation. Defaults to the global
fetchfunction. You can use it as a middleware to intercept requests, or to provide a custom fetch implementation for e.g. testing.
Language Models
You can create language models using a provider instance. The first argument is the model ID, for example:
import { deepinfra } from '@ai-sdk/deepinfra';
import { generateText } from 'ai';
const { text } = await generateText({
model: deepinfra('meta-llama/Meta-Llama-3.1-70B-Instruct'),
prompt: 'Write a vegetarian lasagna recipe for 4 people.',
});
DeepInfra language models can also be used in the streamText function (see AI SDK Core).
Model Capabilities
| Model | Image Input | Object Generation | Tool Usage | Tool Streaming |
|---|---|---|---|---|
meta-llama/Llama-4-Maverick-17B-128E-Instruct-FP8 |
||||
meta-llama/Llama-4-Scout-17B-16E-Instruct |
||||
meta-llama/Llama-3.3-70B-Instruct-Turbo |
||||
meta-llama/Llama-3.3-70B-Instruct |
||||
meta-llama/Meta-Llama-3.1-405B-Instruct |
||||
meta-llama/Meta-Llama-3.1-70B-Instruct-Turbo |
||||
meta-llama/Meta-Llama-3.1-70B-Instruct |
||||
meta-llama/Meta-Llama-3.1-8B-Instruct-Turbo |
||||
meta-llama/Meta-Llama-3.1-8B-Instruct |
||||
meta-llama/Llama-3.2-11B-Vision-Instruct |
||||
meta-llama/Llama-3.2-90B-Vision-Instruct |
||||
mistralai/Mixtral-8x7B-Instruct-v0.1 |
||||
deepseek-ai/DeepSeek-V3 |
||||
deepseek-ai/DeepSeek-R1 |
||||
deepseek-ai/DeepSeek-R1-Distill-Llama-70B |
||||
deepseek-ai/DeepSeek-R1-Turbo |
||||
nvidia/Llama-3.1-Nemotron-70B-Instruct |
||||
Qwen/Qwen2-7B-Instruct |
||||
Qwen/Qwen2.5-72B-Instruct |
||||
Qwen/Qwen2.5-Coder-32B-Instruct |
||||
Qwen/QwQ-32B-Preview |
||||
google/codegemma-7b-it |
||||
google/gemma-2-9b-it |
||||
microsoft/WizardLM-2-8x22B |
Image Models
You can create DeepInfra image models using the .image() factory method.
For more on image generation with the AI SDK see generateImage().
import { deepinfra } from '@ai-sdk/deepinfra';
import { generateImage } from 'ai';
const { image } = await generateImage({
model: deepinfra.image('stabilityai/sd3.5'),
prompt: 'A futuristic cityscape at sunset',
aspectRatio: '16:9',
});
Model-specific options
You can pass model-specific parameters using the providerOptions.deepinfra field:
import { deepinfra } from '@ai-sdk/deepinfra';
import { generateImage } from 'ai';
const { image } = await generateImage({
model: deepinfra.image('stabilityai/sd3.5'),
prompt: 'A futuristic cityscape at sunset',
aspectRatio: '16:9',
providerOptions: {
deepinfra: {
num_inference_steps: 30, // Control the number of denoising steps (1-50)
},
},
});
Image Editing
DeepInfra supports image editing through models like Qwen/Qwen-Image-Edit. Pass input images via prompt.images to transform or edit existing images.
Basic Image Editing
Transform an existing image using text prompts:
const imageBuffer = readFileSync('./input-image.png');
const { images } = await generateImage({
model: deepinfra.image('Qwen/Qwen-Image-Edit'),
prompt: {
text: 'Turn the cat into a golden retriever dog',
images: [imageBuffer],
},
size: '1024x1024',
});
Inpainting with Mask
Edit specific parts of an image using a mask. Transparent areas in the mask indicate where the image should be edited:
const image = readFileSync('./input-image.png');
const mask = readFileSync('./mask.png');
const { images } = await generateImage({
model: deepinfra.image('Qwen/Qwen-Image-Edit'),
prompt: {
text: 'A sunlit indoor lounge area with a pool containing a flamingo',
images: [image],
mask: mask,
},
});
Multi-Image Combining
Combine multiple reference images into a single output:
const cat = readFileSync('./cat.png');
const dog = readFileSync('./dog.png');
const { images } = await generateImage({
model: deepinfra.image('Qwen/Qwen-Image-Edit'),
prompt: {
text: 'Create a scene with both animals together, playing as friends',
images: [cat, dog],
},
});
Model Capabilities
For models supporting aspect ratios, the following ratios are typically supported:
1:1 (default), 16:9, 1:9, 3:2, 2:3, 4:5, 5:4, 9:16, 9:21
For models supporting size parameters, dimensions must typically be:
- Multiples of 32
- Width and height between 256 and 1440 pixels
- Default size is 1024x1024
| Model | Dimensions Specification | Notes |
|---|---|---|
stabilityai/sd3.5 |
Aspect Ratio | Premium quality base model, 8B parameters |
black-forest-labs/FLUX-1.1-pro |
Size | Latest state-of-art model with superior prompt following |
black-forest-labs/FLUX-1-schnell |
Size | Fast generation in 1-4 steps |
black-forest-labs/FLUX-1-dev |
Size | Optimized for anatomical accuracy |
black-forest-labs/FLUX-pro |
Size | Flagship Flux model |
stabilityai/sd3.5-medium |
Aspect Ratio | Balanced 2.5B parameter model |
stabilityai/sdxl-turbo |
Aspect Ratio | Optimized for fast generation |
For more details and pricing information, see the DeepInfra text-to-image models page.
Embedding Models
You can create DeepInfra embedding models using the .embedding() factory method.
For more on embedding models with the AI SDK see embed().
import { deepinfra } from '@ai-sdk/deepinfra';
import { embed } from 'ai';
const { embedding } = await embed({
model: deepinfra.embedding('BAAI/bge-large-en-v1.5'),
value: 'sunny day at the beach',
});
Model Capabilities
| Model | Dimensions | Max Tokens |
|---|---|---|
BAAI/bge-base-en-v1.5 |
768 | 512 |
BAAI/bge-large-en-v1.5 |
1024 | 512 |
BAAI/bge-m3 |
1024 | 8192 |
intfloat/e5-base-v2 |
768 | 512 |
intfloat/e5-large-v2 |
1024 | 512 |
intfloat/multilingual-e5-large |
1024 | 512 |
sentence-transformers/all-MiniLM-L12-v2 |
384 | 256 |
sentence-transformers/all-MiniLM-L6-v2 |
384 | 256 |
sentence-transformers/all-mpnet-base-v2 |
768 | 384 |
sentence-transformers/clip-ViT-B-32 |
512 | 77 |
sentence-transformers/clip-ViT-B-32-multilingual-v1 |
512 | 77 |
sentence-transformers/multi-qa-mpnet-base-dot-v1 |
768 | 512 |
sentence-transformers/paraphrase-MiniLM-L6-v2 |
384 | 128 |
shibing624/text2vec-base-chinese |
768 | 512 |
thenlper/gte-base |
768 | 512 |
thenlper/gte-large |
1024 | 512 |
title: Deepgram description: Learn how to use the Deepgram provider for the AI SDK.
Deepgram Provider
The Deepgram provider contains language model support for the Deepgram transcription API.
Setup
The Deepgram provider is available in the @ai-sdk/deepgram module. You can install it with
<Tabs items={['pnpm', 'npm', 'yarn', 'bun']}>
Provider Instance
You can import the default provider instance deepgram from @ai-sdk/deepgram:
import { deepgram } from '@ai-sdk/deepgram';
If you need a customized setup, you can import createDeepgram from @ai-sdk/deepgram and create a provider instance with your settings:
import { createDeepgram } from '@ai-sdk/deepgram';
const deepgram = createDeepgram({
// custom settings, e.g.
fetch: customFetch,
});
You can use the following optional settings to customize the Deepgram provider instance:
-
apiKey string
API key that is being sent using the
Authorizationheader. It defaults to theDEEPGRAM_API_KEYenvironment variable. -
headers Record<string,string>
Custom headers to include in the requests.
-
fetch (input: RequestInfo, init?: RequestInit) => Promise<Response>
Custom fetch implementation. Defaults to the global
fetchfunction. You can use it as a middleware to intercept requests, or to provide a custom fetch implementation for e.g. testing.
Transcription Models
You can create models that call the Deepgram transcription API
using the .transcription() factory method.
The first argument is the model id e.g. nova-3.
const model = deepgram.transcription('nova-3');
You can also pass additional provider-specific options using the providerOptions argument. For example, supplying the summarize option will enable summaries for sections of content.
import { experimental_transcribe as transcribe } from 'ai';
import { deepgram } from '@ai-sdk/deepgram';
import { readFile } from 'fs/promises';
const result = await transcribe({
model: deepgram.transcription('nova-3'),
audio: await readFile('audio.mp3'),
providerOptions: { deepgram: { summarize: true } },
});
The following provider options are available:
-
language string
Language code for the audio. Supports numerous ISO-639-1 and ISO-639-3 language codes. Optional.
-
smartFormat boolean
Whether to apply smart formatting to the transcription. Optional.
-
punctuate boolean
Whether to add punctuation to the transcription. Optional.
-
paragraphs boolean
Whether to format the transcription into paragraphs. Optional.
-
summarize enum | boolean
Whether to generate a summary of the transcription. Allowed values:
'v2',false. Optional. -
topics boolean
Whether to detect topics in the transcription. Optional.
-
intents boolean
Whether to detect intents in the transcription. Optional.
-
sentiment boolean
Whether to perform sentiment analysis on the transcription. Optional.
-
detectEntities boolean
Whether to detect entities in the transcription. Optional.
-
redact string | array of strings
Specifies what content to redact from the transcription. Optional.
-
replace string
Replacement string for redacted content. Optional.
-
search string
Search term to find in the transcription. Optional.
-
keyterm string
Key terms to identify in the transcription. Optional.
-
diarize boolean
Whether to identify different speakers in the transcription. Defaults to
true. Optional. -
utterances boolean
Whether to segment the transcription into utterances. Optional.
-
uttSplit number
Threshold for splitting utterances. Optional.
-
fillerWords boolean
Whether to include filler words (um, uh, etc.) in the transcription. Optional.
Model Capabilities
| Model | Transcription | Duration | Segments | Language |
|---|---|---|---|---|
nova-3 (+ variants) |
||||
nova-2 (+ variants) |
||||
nova (+ variants) |
||||
enhanced (+ variants) |
||||
base (+ variants) |
title: Black Forest Labs description: Learn how to use Black Forest Labs models with the AI SDK.
Black Forest Labs Provider
Black Forest Labs provides a generative image platform for developers with FLUX-based models. Their platform offers fast, high quality, and in-context image generation and editing with precise and coherent results.
Setup
The Black Forest Labs provider is available via the @ai-sdk/black-forest-labs module. You can install it with
<Tabs items={['pnpm', 'npm', 'yarn', 'bun']}>
Provider Instance
You can import the default provider instance blackForestLabs from @ai-sdk/black-forest-labs:
import { blackForestLabs } from '@ai-sdk/black-forest-labs';
If you need a customized setup, you can import createBlackForestLabs and create a provider instance with your settings:
import { createBlackForestLabs } from '@ai-sdk/black-forest-labs';
const blackForestLabs = createBlackForestLabs({
apiKey: 'your-api-key', // optional, defaults to BFL_API_KEY environment variable
baseURL: 'custom-url', // optional
headers: {
/* custom headers */
}, // optional
});
You can use the following optional settings to customize the Black Forest Labs provider instance:
-
baseURL string
Use a different URL prefix for API calls, e.g. to use a regional endpoint. The default prefix is
https://api.bfl.ai/v1. -
apiKey string
API key that is being sent using the
x-keyheader. It defaults to theBFL_API_KEYenvironment variable. -
headers Record<string,string>
Custom headers to include in the requests.
-
fetch (input: RequestInfo, init?: RequestInit) => Promise<Response>
Custom fetch implementation. You can use it as a middleware to intercept requests, or to provide a custom fetch implementation for e.g. testing.
Image Models
You can create Black Forest Labs image models using the .image() factory method.
For more on image generation with the AI SDK see generateImage().
Basic Usage
import { writeFileSync } from 'node:fs';
import { blackForestLabs } from '@ai-sdk/black-forest-labs';
import { generateImage } from 'ai';
const { image, providerMetadata } = await generateImage({
model: blackForestLabs.image('flux-pro-1.1'),
prompt: 'A serene mountain landscape at sunset',
});
const filename = `image-${Date.now()}.png`;
writeFileSync(filename, image.uint8Array);
console.log(`Image saved to ${filename}`);
Model Capabilities
Black Forest Labs offers many models optimized for different use cases. Here are a few popular examples. For a full list of models, see the Black Forest Labs Models Page.
| Model | Description |
|---|---|
flux-kontext-pro |
FLUX.1 Kontext [pro] handles both text and reference images as inputs, enabling targeted edits and complex transformations |
flux-kontext-max |
FLUX.1 Kontext [max] with improved prompt adherence and typography generation |
flux-pro-1.1-ultra |
Ultra-fast, ultra high-resolution image creation |
flux-pro-1.1 |
Fast, high-quality image generation from text. |
Black Forest Labs models support aspect ratios from 3:7 (portrait) to 7:3 (landscape).
Image Editing
Black Forest Labs Kontext models support powerful image editing capabilities using reference images. Pass input images via prompt.images to transform, combine, or edit existing images.
Single Image Editing
Transform an existing image using text prompts:
import {
blackForestLabs,
BlackForestLabsImageProviderOptions,
} from '@ai-sdk/black-forest-labs';
import { generateImage } from 'ai';
const { images } = await generateImage({
model: blackForestLabs.image('flux-kontext-pro'),
prompt: {
text: 'A baby elephant with a shirt that has the logo from the input image.',
images: [
'https://www.google.com/images/branding/googlelogo/1x/googlelogo_color_272x92dp.png',
],
},
providerOptions: {
blackForestLabs: {
width: 1024,
height: 768,
} satisfies BlackForestLabsImageProviderOptions,
},
});
Multi-Reference Editing
Combine multiple reference images for complex transformations. Black Forest Labs supports up to 10 input images:
import { blackForestLabs } from '@ai-sdk/black-forest-labs';
import { generateImage } from 'ai';
const { images } = await generateImage({
model: blackForestLabs.image('flux-kontext-pro'),
prompt: {
text: 'Combine the style of image 1 with the subject of image 2',
images: [
'https://example.com/style-reference.jpg',
'https://example.com/subject-reference.jpg',
],
},
});
Provider Options
Black Forest Labs image models support flexible provider options through the providerOptions.blackForestLabs object. The supported parameters depend on the used model ID:
- width number - Output width in pixels (256–1920). When set, this overrides any width derived from
size. - height number - Output height in pixels (256–1920). When set, this overrides any height derived from
size. - outputFormat string - Desired format of the output image (
"jpeg"or"png"). - steps number - Number of inference steps. Higher values may improve quality but increase generation time.
- guidance number - Guidance scale for generation. Higher values follow the prompt more closely.
- imagePrompt string - Base64-encoded image to use as additional visual context for generation.
- imagePromptStrength number - Strength of the image prompt influence on generation (0.0 to 1.0).
- promptUpsampling boolean - If true, performs upsampling on the prompt.
- raw boolean - Enable raw mode for more natural, authentic aesthetics.
- safetyTolerance number - Moderation level for inputs and outputs (0 = most strict, 6 = more permissive).
- pollIntervalMillis number - Interval in milliseconds between polling attempts (default 500ms).
- pollTimeoutMillis number - Overall timeout in milliseconds for polling before timing out (default 60s).
- webhookUrl string - URL for asynchronous completion notification. Must be a valid HTTP/HTTPS URL.
- webhookSecret string - Secret for webhook signature verification, sent in the
X-Webhook-Secretheader.
Regional Endpoints
By default, requests are sent to https://api.bfl.ai/v1. You can select a regional endpoint by setting baseURL when creating the provider instance:
import { createBlackForestLabs } from '@ai-sdk/black-forest-labs';
const blackForestLabs = createBlackForestLabs({
baseURL: 'https://api.eu.bfl.ai/v1', // or https://api.us.bfl.ai/v1
});
title: Gladia description: Learn how to use the Gladia provider for the AI SDK.
Gladia Provider
The Gladia provider contains language model support for the Gladia transcription API.
Setup
The Gladia provider is available in the @ai-sdk/gladia module. You can install it with
<Tabs items={['pnpm', 'npm', 'yarn', 'bun']}>
Provider Instance
You can import the default provider instance gladia from @ai-sdk/gladia:
import { gladia } from '@ai-sdk/gladia';
If you need a customized setup, you can import createGladia from @ai-sdk/gladia and create a provider instance with your settings:
import { createGladia } from '@ai-sdk/gladia';
const gladia = createGladia({
// custom settings, e.g.
fetch: customFetch,
});
You can use the following optional settings to customize the Gladia provider instance:
-
apiKey string
API key that is being sent using the
Authorizationheader. It defaults to theGLADIA_API_KEYenvironment variable. -
headers Record<string,string>
Custom headers to include in the requests.
-
fetch (input: RequestInfo, init?: RequestInit) => Promise<Response>
Custom fetch implementation. Defaults to the global
fetchfunction. You can use it as a middleware to intercept requests, or to provide a custom fetch implementation for e.g. testing.
Transcription Models
You can create models that call the Gladia transcription API
using the .transcription() factory method.
const model = gladia.transcription();
You can also pass additional provider-specific options using the providerOptions argument. For example, supplying the summarize option will enable summaries for sections of content.
import { experimental_transcribe as transcribe } from 'ai';
import { gladia } from '@ai-sdk/gladia';
import { readFile } from 'fs/promises';
const result = await transcribe({
model: gladia.transcription(),
audio: await readFile('audio.mp3'),
providerOptions: { gladia: { summarize: true } },
});
The following provider options are available:
-
contextPrompt string
Context to feed the transcription model with for possible better accuracy. Optional.
-
customVocabulary boolean | any[]
Custom vocabulary to improve transcription accuracy. Optional.
-
customVocabularyConfig object
Configuration for custom vocabulary. Optional.
- vocabulary Array<string | { value: string, intensity?: number, pronunciations?: string[], language?: string }>
- defaultIntensity number
-
detectLanguage boolean
Whether to automatically detect the language. Optional.
-
enableCodeSwitching boolean
Enable code switching for multilingual audio. Optional.
-
codeSwitchingConfig object
Configuration for code switching. Optional.
- languages string[]
-
language string
Specify the language of the audio. Optional.
-
callback boolean
Enable callback when transcription is complete. Optional.
-
callbackConfig object
Configuration for callback. Optional.
- url string
- method 'POST' | 'PUT'
-
subtitles boolean
Generate subtitles from the transcription. Optional.
-
subtitlesConfig object
Configuration for subtitles. Optional.
- formats Array<'srt' | 'vtt'>
- minimumDuration number
- maximumDuration number
- maximumCharactersPerRow number
- maximumRowsPerCaption number
- style 'default' | 'compliance'
-
diarization boolean
Enable speaker diarization. Defaults to
true. Optional. -
diarizationConfig object
Configuration for diarization. Optional.
- numberOfSpeakers number
- minSpeakers number
- maxSpeakers number
- enhanced boolean
-
translation boolean
Enable translation of the transcription. Optional.
-
translationConfig object
Configuration for translation. Optional.
- targetLanguages string[]
- model 'base' | 'enhanced'
- matchOriginalUtterances boolean
-
summarization boolean
Enable summarization of the transcription. Optional.
-
summarizationConfig object
Configuration for summarization. Optional.
- type 'general' | 'bullet_points' | 'concise'
-
moderation boolean
Enable content moderation. Optional.
-
namedEntityRecognition boolean
Enable named entity recognition. Optional.
-
chapterization boolean
Enable chapterization of the transcription. Optional.
-
nameConsistency boolean
Enable name consistency in the transcription. Optional.
-
customSpelling boolean
Enable custom spelling. Optional.
-
customSpellingConfig object
Configuration for custom spelling. Optional.
- spellingDictionary Record<string, string[]>
-
structuredDataExtraction boolean
Enable structured data extraction. Optional.
-
structuredDataExtractionConfig object
Configuration for structured data extraction. Optional.
- classes string[]
-
sentimentAnalysis boolean
Enable sentiment analysis. Optional.
-
audioToLlm boolean
Enable audio to LLM processing. Optional.
-
audioToLlmConfig object
Configuration for audio to LLM. Optional.
- prompts string[]
-
customMetadata Record<string, any>
Custom metadata to include with the request. Optional.
-
sentences boolean
Enable sentence detection. Optional.
-
displayMode boolean
Enable display mode. Optional.
-
punctuationEnhanced boolean
Enable enhanced punctuation. Optional.
Model Capabilities
| Model | Transcription | Duration | Segments | Language |
|---|---|---|---|---|
Default |
title: LMNT description: Learn how to use the LMNT provider for the AI SDK.
LMNT Provider
The LMNT provider contains language model support for the LMNT transcription API.
Setup
The LMNT provider is available in the @ai-sdk/lmnt module. You can install it with
<Tabs items={['pnpm', 'npm', 'yarn', 'bun']}>
Provider Instance
You can import the default provider instance lmnt from @ai-sdk/lmnt:
import { lmnt } from '@ai-sdk/lmnt';
If you need a customized setup, you can import createLMNT from @ai-sdk/lmnt and create a provider instance with your settings:
import { createLMNT } from '@ai-sdk/lmnt';
const lmnt = createLMNT({
// custom settings, e.g.
fetch: customFetch,
});
You can use the following optional settings to customize the LMNT provider instance:
-
apiKey string
API key that is being sent using the
Authorizationheader. It defaults to theLMNT_API_KEYenvironment variable. -
headers Record<string,string>
Custom headers to include in the requests.
-
fetch (input: RequestInfo, init?: RequestInit) => Promise<Response>
Custom fetch implementation. Defaults to the global
fetchfunction. You can use it as a middleware to intercept requests, or to provide a custom fetch implementation for e.g. testing.
Speech Models
You can create models that call the LMNT speech API
using the .speech() factory method.
The first argument is the model id e.g. aurora.
const model = lmnt.speech('aurora');
You can also pass additional provider-specific options using the providerOptions argument. For example, supplying a voice to use for the generated audio.
import { experimental_generateSpeech as generateSpeech } from 'ai';
import { lmnt } from '@ai-sdk/lmnt';
const result = await generateSpeech({
model: lmnt.speech('aurora'),
text: 'Hello, world!',
language: 'en', // Standardized language parameter
});
Provider Options
The LMNT provider accepts the following options:
-
model 'aurora' | 'blizzard'
The LMNT model to use. Defaults to
'aurora'. -
language 'auto' | 'en' | 'es' | 'pt' | 'fr' | 'de' | 'zh' | 'ko' | 'hi' | 'ja' | 'ru' | 'it' | 'tr'
The language to use for speech synthesis. Defaults to
'auto'. -
format 'aac' | 'mp3' | 'mulaw' | 'raw' | 'wav'
The audio format to return. Defaults to
'mp3'. -
sampleRate number
The sample rate of the audio in Hz. Defaults to
24000. -
speed number
The speed of the speech. Must be between 0.25 and 2. Defaults to
1. -
seed number
An optional seed for deterministic generation.
-
conversational boolean
Whether to use a conversational style. Defaults to
false. -
length number
Maximum length of the audio in seconds. Maximum value is 300.
-
topP number
Top-p sampling parameter. Must be between 0 and 1. Defaults to
1. -
temperature number
Temperature parameter for sampling. Must be at least 0. Defaults to
1.
Model Capabilities
| Model | Instructions |
|---|---|
aurora |
|
blizzard |
title: Google Generative AI description: Learn how to use Google Generative AI Provider.
Google Generative AI Provider
The Google Generative AI provider contains language and embedding model support for the Google Generative AI APIs.
Setup
The Google provider is available in the @ai-sdk/google module. You can install it with
<Tabs items={['pnpm', 'npm', 'yarn', 'bun']}>
Provider Instance
You can import the default provider instance google from @ai-sdk/google:
import { google } from '@ai-sdk/google';
If you need a customized setup, you can import createGoogleGenerativeAI from @ai-sdk/google and create a provider instance with your settings:
import { createGoogleGenerativeAI } from '@ai-sdk/google';
const google = createGoogleGenerativeAI({
// custom settings
});
You can use the following optional settings to customize the Google Generative AI provider instance:
-
baseURL string
Use a different URL prefix for API calls, e.g. to use proxy servers. The default prefix is
https://generativelanguage.googleapis.com/v1beta. -
apiKey string
API key that is being sent using the
x-goog-api-keyheader. It defaults to theGOOGLE_GENERATIVE_AI_API_KEYenvironment variable. -
headers Record<string,string>
Custom headers to include in the requests.
-
fetch (input: RequestInfo, init?: RequestInit) => Promise<Response>
Custom fetch implementation. Defaults to the global
fetchfunction. You can use it as a middleware to intercept requests, or to provide a custom fetch implementation for e.g. testing.
Language Models
You can create models that call the Google Generative AI API using the provider instance.
The first argument is the model id, e.g. gemini-2.5-flash.
The models support tool calls and some have multi-modal capabilities.
const model = google('gemini-2.5-flash');
You can use Google Generative AI language models to generate text with the generateText function:
import { google } from '@ai-sdk/google';
import { generateText } from 'ai';
const { text } = await generateText({
model: google('gemini-2.5-flash'),
prompt: 'Write a vegetarian lasagna recipe for 4 people.',
});
Google Generative AI language models can also be used in the streamText, generateObject, and streamObject functions
(see AI SDK Core).
Google Generative AI also supports some model specific settings that are not part of the standard call settings. You can pass them as an options argument:
const model = google('gemini-2.5-flash');
await generateText({
model,
providerOptions: {
google: {
safetySettings: [
{
category: 'HARM_CATEGORY_UNSPECIFIED',
threshold: 'BLOCK_LOW_AND_ABOVE',
},
],
},
},
});
The following optional provider options are available for Google Generative AI models:
-
cachedContent string
Optional. The name of the cached content used as context to serve the prediction. Format: cachedContents/{cachedContent}
-
structuredOutputs boolean
Optional. Enable structured output. Default is true.
This is useful when the JSON Schema contains elements that are not supported by the OpenAPI schema version that Google Generative AI uses. You can use this to disable structured outputs if you need to.
See Troubleshooting: Schema Limitations for more details.
-
safetySettings Array<{ category: string; threshold: string }>
Optional. Safety settings for the model.
-
category string
The category of the safety setting. Can be one of the following:
HARM_CATEGORY_HATE_SPEECHHARM_CATEGORY_DANGEROUS_CONTENTHARM_CATEGORY_HARASSMENTHARM_CATEGORY_SEXUALLY_EXPLICIT
-
threshold string
The threshold of the safety setting. Can be one of the following:
HARM_BLOCK_THRESHOLD_UNSPECIFIEDBLOCK_LOW_AND_ABOVEBLOCK_MEDIUM_AND_ABOVEBLOCK_ONLY_HIGHBLOCK_NONE
-
-
responseModalities string[] The modalities to use for the response. The following modalities are supported:
TEXT,IMAGE. When not defined or empty, the model defaults to returning only text. -
thinkingConfig { thinkingLevel?: 'minimal' | 'low' | 'medium' | 'high'; thinkingBudget?: number; includeThoughts?: boolean }
Optional. Configuration for the model's thinking process. Only supported by specific Google Generative AI models.
-
thinkingLevel 'minimal' | 'low' | 'medium' | 'high'
Optional. Controls the thinking depth for Gemini 3 models. Gemini 3 Pro supports 'low' and 'high', while Gemini 3 Flash supports all four levels: 'minimal', 'low', 'medium', and 'high'. Only supported by Gemini 3 models (
gemini-3-pro-previewand later). -
thinkingBudget number
Optional. Gives the model guidance on the number of thinking tokens it can use when generating a response. Setting it to 0 disables thinking, if the model supports it. For more information about the possible value ranges for each model see Google Generative AI thinking documentation.
This option is for Gemini 2.5 models. Gemini 3 models should use `thinkingLevel` instead. -
includeThoughts boolean
Optional. If set to true, thought summaries are returned, which are synthisized versions of the model's raw thoughts and offer insights into the model's internal reasoning process.
-
-
imageConfig { aspectRatio: string }
Optional. Configuration for the models image generation. Only supported by specific Google Generative AI models.
- aspectRatio string
Model defaults to generate 1:1 squares, or to matching the output image size to that of your input image. Can be one of the following:
- 1:1
- 2:3
- 3:2
- 3:4
- 4:3
- 4:5
- 5:4
- 9:16
- 16:9
- 21:9
Thinking
The Gemini 2.5 and Gemini 3 series models use an internal "thinking process" that significantly improves their reasoning and multi-step planning abilities, making them highly effective for complex tasks such as coding, advanced mathematics, and data analysis. For more information see Google Generative AI thinking documentation.
Gemini 3 Models
For Gemini 3 models, use the thinkingLevel parameter to control the depth of reasoning:
import { google, GoogleGenerativeAIProviderOptions } from '@ai-sdk/google';
import { generateText } from 'ai';
const model = google('gemini-3-pro-preview');
const { text, reasoning } = await generateText({
model: model,
prompt: 'What is the sum of the first 10 prime numbers?',
providerOptions: {
google: {
thinkingConfig: {
thinkingLevel: 'high',
includeThoughts: true,
},
} satisfies GoogleGenerativeAIProviderOptions,
},
});
console.log(text);
console.log(reasoning); // Reasoning summary
Gemini 2.5 Models
For Gemini 2.5 models, use the thinkingBudget parameter to control the number of thinking tokens:
import { google, GoogleGenerativeAIProviderOptions } from '@ai-sdk/google';
import { generateText } from 'ai';
const model = google('gemini-2.5-flash');
const { text, reasoning } = await generateText({
model: model,
prompt: 'What is the sum of the first 10 prime numbers?',
providerOptions: {
google: {
thinkingConfig: {
thinkingBudget: 8192,
includeThoughts: true,
},
} satisfies GoogleGenerativeAIProviderOptions,
},
});
console.log(text);
console.log(reasoning); // Reasoning summary
File Inputs
The Google Generative AI provider supports file inputs, e.g. PDF files.
import { google } from '@ai-sdk/google';
import { generateText } from 'ai';
const result = await generateText({
model: google('gemini-2.5-flash'),
messages: [
{
role: 'user',
content: [
{
type: 'text',
text: 'What is an embedding model according to this document?',
},
{
type: 'file',
data: fs.readFileSync('./data/ai.pdf'),
mediaType: 'application/pdf',
},
],
},
],
});
You can also use YouTube URLs directly:
import { google } from '@ai-sdk/google';
import { generateText } from 'ai';
const result = await generateText({
model: google('gemini-2.5-flash'),
messages: [
{
role: 'user',
content: [
{
type: 'text',
text: 'Summarize this video',
},
{
type: 'file',
data: 'https://www.youtube.com/watch?v=dQw4w9WgXcQ',
mediaType: 'video/mp4',
},
],
},
],
});
See File Parts for details on how to use files in prompts.
Cached Content
Google Generative AI supports both explicit and implicit caching to help reduce costs on repetitive content.
Implicit Caching
Gemini 2.5 models automatically provide cache cost savings without needing to create an explicit cache. When you send requests that share common prefixes with previous requests, you'll receive a 75% token discount on cached content.
To maximize cache hits with implicit caching:
- Keep content at the beginning of requests consistent
- Add variable content (like user questions) at the end of prompts
- Ensure requests meet minimum token requirements:
- Gemini 2.5 Flash: 1024 tokens minimum
- Gemini 2.5 Pro: 2048 tokens minimum
import { google } from '@ai-sdk/google';
import { generateText } from 'ai';
// Structure prompts with consistent content at the beginning
const baseContext =
'You are a cooking assistant with expertise in Italian cuisine. Here are 1000 lasagna recipes for reference...';
const { text: veggieLasagna } = await generateText({
model: google('gemini-2.5-pro'),
prompt: `${baseContext}\n\nWrite a vegetarian lasagna recipe for 4 people.`,
});
// Second request with same prefix - eligible for cache hit
const { text: meatLasagna, providerMetadata } = await generateText({
model: google('gemini-2.5-pro'),
prompt: `${baseContext}\n\nWrite a meat lasagna recipe for 12 people.`,
});
// Check cached token count in usage metadata
console.log('Cached tokens:', providerMetadata.google?.usageMetadata);
// e.g.
// {
// groundingMetadata: null,
// safetyRatings: null,
// usageMetadata: {
// cachedContentTokenCount: 2027,
// thoughtsTokenCount: 702,
// promptTokenCount: 2152,
// candidatesTokenCount: 710,
// totalTokenCount: 3564
// }
// }
Explicit Caching
For guaranteed cost savings, you can still use explicit caching with Gemini 2.5 and 2.0 models. See the models page to check if caching is supported for the used model:
import { google } from '@ai-sdk/google';
import { GoogleAICacheManager } from '@google/generative-ai/server';
import { generateText } from 'ai';
const cacheManager = new GoogleAICacheManager(
process.env.GOOGLE_GENERATIVE_AI_API_KEY,
);
const model = 'gemini-2.5-pro';
const { name: cachedContent } = await cacheManager.create({
model,
contents: [
{
role: 'user',
parts: [{ text: '1000 Lasagna Recipes...' }],
},
],
ttlSeconds: 60 * 5,
});
const { text: veggieLasangaRecipe } = await generateText({
model: google(model),
prompt: 'Write a vegetarian lasagna recipe for 4 people.',
providerOptions: {
google: {
cachedContent,
},
},
});
const { text: meatLasangaRecipe } = await generateText({
model: google(model),
prompt: 'Write a meat lasagna recipe for 12 people.',
providerOptions: {
google: {
cachedContent,
},
},
});
Code Execution
With Code Execution, certain models can generate and execute Python code to perform calculations, solve problems, or provide more accurate information.
You can enable code execution by adding the code_execution tool to your request.
import { google } from '@ai-sdk/google';
import { googleTools } from '@ai-sdk/google/internal';
import { generateText } from 'ai';
const { text, toolCalls, toolResults } = await generateText({
model: google('gemini-2.5-pro'),
tools: { code_execution: google.tools.codeExecution({}) },
prompt: 'Use python to calculate the 20th fibonacci number.',
});
The response will contain the tool calls and results from the code execution.
Google Search
With search grounding, the model has access to the latest information using Google search. Google search can be used to provide answers around current events:
import { google } from '@ai-sdk/google';
import { GoogleGenerativeAIProviderMetadata } from '@ai-sdk/google';
import { generateText } from 'ai';
const { text, sources, providerMetadata } = await generateText({
model: google('gemini-2.5-flash'),
tools: {
google_search: google.tools.googleSearch({}),
},
prompt:
'List the top 5 San Francisco news from the past week.' +
'You must include the date of each article.',
});
// access the grounding metadata. Casting to the provider metadata type
// is optional but provides autocomplete and type safety.
const metadata = providerMetadata?.google as
| GoogleGenerativeAIProviderMetadata
| undefined;
const groundingMetadata = metadata?.groundingMetadata;
const safetyRatings = metadata?.safetyRatings;
When Search Grounding is enabled, the model will include sources in the response.
Additionally, the grounding metadata includes detailed information about how search results were used to ground the model's response. Here are the available fields:
-
webSearchQueries(string[] | null)- Array of search queries used to retrieve information
- Example:
["What's the weather in Chicago this weekend?"]
-
searchEntryPoint({ renderedContent: string } | null)- Contains the main search result content used as an entry point
- The
renderedContentfield contains the formatted content
-
groundingSupports(Array of support objects | null)- Contains details about how specific response parts are supported by search results
- Each support object includes:
segment: Information about the grounded text segmenttext: The actual text segmentstartIndex: Starting position in the responseendIndex: Ending position in the response
groundingChunkIndices: References to supporting search result chunksconfidenceScores: Confidence scores (0-1) for each supporting chunk
Example response:
{
"groundingMetadata": {
"webSearchQueries": ["What's the weather in Chicago this weekend?"],
"searchEntryPoint": {
"renderedContent": "..."
},
"groundingSupports": [
{
"segment": {
"startIndex": 0,
"endIndex": 65,
"text": "Chicago weather changes rapidly, so layers let you adjust easily."
},
"groundingChunkIndices": [0],
"confidenceScores": [0.99]
}
]
}
}
File Search
The File Search tool lets Gemini retrieve context from your own documents that you have indexed in File Search stores. Only Gemini 2.5 and Gemini 3 models support this feature.
import { google } from '@ai-sdk/google';
import { generateText } from 'ai';
const { text, sources } = await generateText({
model: google('gemini-2.5-pro'),
tools: {
file_search: google.tools.fileSearch({
fileSearchStoreNames: [
'projects/my-project/locations/us/fileSearchStores/my-store',
],
metadataFilter: 'author = "Robert Graves"',
topK: 8,
}),
},
prompt: "Summarise the key themes of 'I, Claudius'.",
});
File Search responses include citations via the normal sources field and expose raw grounding metadata in providerMetadata.google.groundingMetadata.
URL Context
Google provides a provider-defined URL context tool.
The URL context tool allows you to provide specific URLs that you want the model to analyze directly in from the prompt.
import { google } from '@ai-sdk/google';
import { generateText } from 'ai';
const { text, sources, providerMetadata } = await generateText({
model: google('gemini-2.5-flash'),
prompt: `Based on the document: https://ai.google.dev/gemini-api/docs/url-context.
Answer this question: How many links we can consume in one request?`,
tools: {
url_context: google.tools.urlContext({}),
},
});
const metadata = providerMetadata?.google as
| GoogleGenerativeAIProviderMetadata
| undefined;
const groundingMetadata = metadata?.groundingMetadata;
const urlContextMetadata = metadata?.urlContextMetadata;
The URL context metadata includes detailed information about how the model used the URL context to generate the response. Here are the available fields:
-
urlMetadata({ retrievedUrl: string; urlRetrievalStatus: string; }[] | null)- Array of URL context metadata
- Each object includes:
retrievedUrl: The URL of the contexturlRetrievalStatus: The status of the URL retrieval
Example response:
{
"urlMetadata": [
{
"retrievedUrl": "https://ai-sdk.dev/providers/ai-sdk-providers/google-generative-ai",
"urlRetrievalStatus": "URL_RETRIEVAL_STATUS_SUCCESS"
}
]
}
With the URL context tool, you will also get the groundingMetadata.
"groundingMetadata": {
"groundingChunks": [
{
"web": {
"uri": "https://ai-sdk.dev/providers/ai-sdk-providers/google-generative-ai",
"title": "Google Generative AI - AI SDK Providers"
}
}
],
"groundingSupports": [
{
"segment": {
"startIndex": 67,
"endIndex": 157,
"text": "**Installation**: Install the `@ai-sdk/google` module using your preferred package manager"
},
"groundingChunkIndices": [
0
]
},
]
}
You can add up to 20 URLs per request.
The URL context tool is only supported for Gemini 2.0 Flash models and above. Check the [supported models for URL context tool](https://ai.google.dev/gemini-api/docs/url-context#supported-models).Combine URL Context with Search Grounding
You can combine the URL context tool with search grounding to provide the model with the latest information from the web.
import { google } from '@ai-sdk/google';
import { generateText } from 'ai';
const { text, sources, providerMetadata } = await generateText({
model: google('gemini-2.5-flash'),
prompt: `Based on this context: https://ai-sdk.dev/providers/ai-sdk-providers/google-generative-ai, tell me how to use Gemini with AI SDK.
Also, provide the latest news about AI SDK V5.`,
tools: {
google_search: google.tools.googleSearch({}),
url_context: google.tools.urlContext({}),
},
});
const metadata = providerMetadata?.google as
| GoogleGenerativeAIProviderMetadata
| undefined;
const groundingMetadata = metadata?.groundingMetadata;
const urlContextMetadata = metadata?.urlContextMetadata;
Google Maps Grounding
With Google Maps grounding, the model has access to Google Maps data for location-aware responses. This enables providing local data and geospatial context, such as finding nearby restaurants.
import { google } from '@ai-sdk/google';
import { GoogleGenerativeAIProviderMetadata } from '@ai-sdk/google';
import { generateText } from 'ai';
const { text, sources, providerMetadata } = await generateText({
model: google('gemini-2.5-flash'),
tools: {
google_maps: google.tools.googleMaps({}),
},
providerOptions: {
google: {
retrievalConfig: {
latLng: { latitude: 34.090199, longitude: -117.881081 },
},
},
},
prompt:
'What are the best Italian restaurants within a 15-minute walk from here?',
});
const metadata = providerMetadata?.google as
| GoogleGenerativeAIProviderMetadata
| undefined;
const groundingMetadata = metadata?.groundingMetadata;
The optional retrievalConfig.latLng provider option provides location context for queries about nearby places. This configuration applies to any grounding tools that support location context, including Google Maps and Google Search.
When Google Maps grounding is enabled, the model's response will include sources pointing to Google Maps URLs. The grounding metadata includes maps chunks with place information:
{
"groundingMetadata": {
"groundingChunks": [
{
"maps": {
"uri": "https://maps.google.com/?cid=12345",
"title": "Restaurant Name",
"placeId": "places/ChIJ..."
}
}
]
}
}
Google Maps grounding is supported on Gemini 2.0 and newer models.
RAG Engine Grounding
With RAG Engine Grounding, the model has access to your custom knowledge base using the Vertex RAG Engine. This enables the model to provide answers based on your specific data sources and documents.
RAG Engine Grounding is only supported with Vertex Gemini models. You must use the Google Vertex provider (`@ai-sdk/google-vertex`) instead of the standard Google provider (`@ai-sdk/google`) to use this feature.import { createVertex } from '@ai-sdk/google-vertex';
import { GoogleGenerativeAIProviderMetadata } from '@ai-sdk/google';
import { generateText } from 'ai';
const vertex = createVertex({
project: 'my-project',
location: 'us-central1',
});
const { text, sources, providerMetadata } = await generateText({
model: vertex('gemini-2.5-flash'),
tools: {
vertex_rag_store: vertex.tools.vertexRagStore({
ragCorpus:
'projects/my-project/locations/us-central1/ragCorpora/my-rag-corpus',
topK: 5,
}),
},
prompt:
'What are the key features of our product according to our documentation?',
});
// access the grounding metadata. Casting to the provider metadata type
// is optional but provides autocomplete and type safety.
const metadata = providerMetadata?.google as
| GoogleGenerativeAIProviderMetadata
| undefined;
const groundingMetadata = metadata?.groundingMetadata;
const safetyRatings = metadata?.safetyRatings;
When RAG Engine Grounding is enabled, the model will include sources from your RAG corpus in the response.
Additionally, the grounding metadata includes detailed information about how RAG results were used to ground the model's response. Here are the available fields:
-
groundingChunks(Array of chunk objects | null)- Contains the retrieved context chunks from your RAG corpus
- Each chunk includes:
retrievedContext: Information about the retrieved contexturi: The URI or identifier of the source documenttitle: The title of the source document (optional)text: The actual text content of the chunk
-
groundingSupports(Array of support objects | null)- Contains details about how specific response parts are supported by RAG results
- Each support object includes:
segment: Information about the grounded text segmenttext: The actual text segmentstartIndex: Starting position in the responseendIndex: Ending position in the response
groundingChunkIndices: References to supporting RAG result chunksconfidenceScores: Confidence scores (0-1) for each supporting chunk
Example response:
{
"groundingMetadata": {
"groundingChunks": [
{
"retrievedContext": {
"uri": "gs://my-bucket/docs/product-guide.pdf",
"title": "Product User Guide",
"text": "Our product includes advanced AI capabilities, real-time processing, and enterprise-grade security features."
}
}
],
"groundingSupports": [
{
"segment": {
"startIndex": 0,
"endIndex": 45,
"text": "Our product includes advanced AI capabilities and real-time processing."
},
"groundingChunkIndices": [0],
"confidenceScores": [0.95]
}
]
}
}
Configuration Options
The vertexRagStore tool accepts the following configuration options:
-
ragCorpus(string, required)- The RagCorpus resource name in the format:
projects/{project}/locations/{location}/ragCorpora/{rag_corpus} - This identifies your specific RAG corpus to search against
- The RagCorpus resource name in the format:
-
topK(number, optional)- The number of top contexts to retrieve from your RAG corpus
- Defaults to the corpus configuration if not specified
Image Outputs
Gemini models with image generation capabilities (gemini-2.5-flash-image-preview) support image generation. Images are exposed as files in the response.
import { google } from '@ai-sdk/google';
import { generateText } from 'ai';
const result = await generateText({
model: google('gemini-2.5-flash-image-preview'),
prompt:
'Create a picture of a nano banana dish in a fancy restaurant with a Gemini theme',
});
for (const file of result.files) {
if (file.mediaType.startsWith('image/')) {
console.log('Generated image:', file);
}
}
Safety Ratings
The safety ratings provide insight into the safety of the model's response. See Google AI documentation on safety settings.
Example response excerpt:
{
"safetyRatings": [
{
"category": "HARM_CATEGORY_HATE_SPEECH",
"probability": "NEGLIGIBLE",
"probabilityScore": 0.11027937,
"severity": "HARM_SEVERITY_LOW",
"severityScore": 0.28487435
},
{
"category": "HARM_CATEGORY_DANGEROUS_CONTENT",
"probability": "HIGH",
"blocked": true,
"probabilityScore": 0.95422274,
"severity": "HARM_SEVERITY_MEDIUM",
"severityScore": 0.43398145
},
{
"category": "HARM_CATEGORY_HARASSMENT",
"probability": "NEGLIGIBLE",
"probabilityScore": 0.11085559,
"severity": "HARM_SEVERITY_NEGLIGIBLE",
"severityScore": 0.19027223
},
{
"category": "HARM_CATEGORY_SEXUALLY_EXPLICIT",
"probability": "NEGLIGIBLE",
"probabilityScore": 0.22901751,
"severity": "HARM_SEVERITY_NEGLIGIBLE",
"severityScore": 0.09089675
}
]
}
Troubleshooting
Schema Limitations
The Google Generative AI API uses a subset of the OpenAPI 3.0 schema, which does not support features such as unions. The errors that you get in this case look like this:
GenerateContentRequest.generation_config.response_schema.properties[occupation].type: must be specified
By default, structured outputs are enabled (and for tool calling they are required). You can disable structured outputs for object generation as a workaround:
const { object } = await generateObject({
model: google('gemini-2.5-flash'),
providerOptions: {
google: {
structuredOutputs: false,
},
},
schema: z.object({
name: z.string(),
age: z.number(),
contact: z.union([
z.object({
type: z.literal('email'),
value: z.string(),
}),
z.object({
type: z.literal('phone'),
value: z.string(),
}),
]),
}),
prompt: 'Generate an example person for testing.',
});
The following Zod features are known to not work with Google Generative AI:
z.unionz.record
Model Capabilities
| Model | Image Input | Object Generation | Tool Usage | Tool Streaming | Google Search | URL Context |
|---|---|---|---|---|---|---|
gemini-3-pro-preview |
||||||
gemini-2.5-pro |
||||||
gemini-2.5-flash |
||||||
gemini-2.5-flash-lite |
||||||
gemini-2.5-flash-lite-preview-06-17 |
||||||
gemini-2.0-flash |
||||||
gemini-1.5-pro |
||||||
gemini-1.5-pro-latest |
||||||
gemini-1.5-flash |
||||||
gemini-1.5-flash-latest |
||||||
gemini-1.5-flash-8b |
||||||
gemini-1.5-flash-8b-latest |
Gemma Models
You can use Gemma models with the Google Generative AI API.
Gemma models don't natively support the systemInstruction parameter, but the provider automatically handles system instructions by prepending them to the first user message. This allows you to use system instructions with Gemma models seamlessly:
import { google } from '@ai-sdk/google';
import { generateText } from 'ai';
const { text } = await generateText({
model: google('gemma-3-27b-it'),
system: 'You are a helpful assistant that responds concisely.',
prompt: 'What is machine learning?',
});
The system instruction is automatically formatted and included in the conversation, so Gemma models can follow the guidance without any additional configuration.
Embedding Models
You can create models that call the Google Generative AI embeddings API
using the .embedding() factory method.
const model = google.embedding('gemini-embedding-001');
The Google Generative AI provider sends API calls to the right endpoint based on the type of embedding:
- Single embeddings: When embedding a single value with
embed(), the provider uses the single:embedContentendpoint, which typically has higher rate limits compared to the batch endpoint. - Batch embeddings: When embedding multiple values with
embedMany()or multiple values inembed(), the provider uses the:batchEmbedContentsendpoint.
Google Generative AI embedding models support aditional settings. You can pass them as an options argument:
import { google } from '@ai-sdk/google';
import { embed } from 'ai';
const model = google.embedding('gemini-embedding-001');
const { embedding } = await embed({
model,
value: 'sunny day at the beach',
providerOptions: {
google: {
outputDimensionality: 512, // optional, number of dimensions for the embedding
taskType: 'SEMANTIC_SIMILARITY', // optional, specifies the task type for generating embeddings
},
},
});
The following optional provider options are available for Google Generative AI embedding models:
-
outputDimensionality: number
Optional reduced dimension for the output embedding. If set, excessive values in the output embedding are truncated from the end.
-
taskType: string
Optional. Specifies the task type for generating embeddings. Supported task types include:
SEMANTIC_SIMILARITY: Optimized for text similarity.CLASSIFICATION: Optimized for text classification.CLUSTERING: Optimized for clustering texts based on similarity.RETRIEVAL_DOCUMENT: Optimized for document retrieval.RETRIEVAL_QUERY: Optimized for query-based retrieval.QUESTION_ANSWERING: Optimized for answering questions.FACT_VERIFICATION: Optimized for verifying factual information.CODE_RETRIEVAL_QUERY: Optimized for retrieving code blocks based on natural language queries.
Model Capabilities
| Model | Default Dimensions | Custom Dimensions |
|---|---|---|
gemini-embedding-001 |
3072 | |
text-embedding-004 |
768 |
Image Models
You can create Imagen models that call the Google Generative AI API using the .image() factory method.
For more on image generation with the AI SDK see generateImage().
import { google } from '@ai-sdk/google';
import { generateImage } from 'ai';
const { image } = await generateImage({
model: google.image('imagen-4.0-generate-001'),
prompt: 'A futuristic cityscape at sunset',
aspectRatio: '16:9',
});
Further configuration can be done using Google provider options. You can validate the provider options using the GoogleGenerativeAIImageProviderOptions type.
import { google } from '@ai-sdk/google';
import { GoogleGenerativeAIImageProviderOptions } from '@ai-sdk/google';
import { generateImage } from 'ai';
const { image } = await generateImage({
model: google.image('imagen-4.0-generate-001'),
providerOptions: {
google: {
personGeneration: 'dont_allow',
} satisfies GoogleGenerativeAIImageProviderOptions,
},
// ...
});
The following provider options are available:
- personGeneration
allow_adult|allow_all|dont_allowWhether to allow person generation. Defaults toallow_adult.
Model Capabilities
| Model | Aspect Ratios |
|---|---|
imagen-4.0-generate-001 |
1:1, 3:4, 4:3, 9:16, 16:9 |
title: Hume description: Learn how to use the Hume provider for the AI SDK.
Hume Provider
The Hume provider contains language model support for the Hume transcription API.
Setup
The Hume provider is available in the @ai-sdk/hume module. You can install it with
<Tabs items={['pnpm', 'npm', 'yarn', 'bun']}>
Provider Instance
You can import the default provider instance hume from @ai-sdk/hume:
import { hume } from '@ai-sdk/hume';
If you need a customized setup, you can import createHume from @ai-sdk/hume and create a provider instance with your settings:
import { createHume } from '@ai-sdk/hume';
const hume = createHume({
// custom settings, e.g.
fetch: customFetch,
});
You can use the following optional settings to customize the Hume provider instance:
-
apiKey string
API key that is being sent using the
Authorizationheader. It defaults to theHUME_API_KEYenvironment variable. -
headers Record<string,string>
Custom headers to include in the requests.
-
fetch (input: RequestInfo, init?: RequestInit) => Promise<Response>
Custom fetch implementation. Defaults to the global
fetchfunction. You can use it as a middleware to intercept requests, or to provide a custom fetch implementation for e.g. testing.
Speech Models
You can create models that call the Hume speech API
using the .speech() factory method.
const model = hume.speech();
You can also pass additional provider-specific options using the providerOptions argument. For example, supplying a voice to use for the generated audio.
import { experimental_generateSpeech as generateSpeech } from 'ai';
import { hume } from '@ai-sdk/hume';
const result = await generateSpeech({
model: hume.speech(),
text: 'Hello, world!',
voice: 'd8ab67c6-953d-4bd8-9370-8fa53a0f1453',
providerOptions: { hume: {} },
});
The following provider options are available:
-
context object
Either:
{ generationId: string }- A generation ID to use for context.{ utterances: HumeUtterance[] }- An array of utterance objects for context.
Model Capabilities
| Model | Instructions |
|---|---|
default |
title: Google Vertex AI description: Learn how to use the Google Vertex AI provider.
Google Vertex Provider
The Google Vertex provider for the AI SDK contains language model support for the Google Vertex AI APIs. This includes support for Google's Gemini models and Anthropic's Claude partner models.
The Google Vertex provider is compatible with both Node.js and Edge runtimes. The Edge runtime is supported through the `@ai-sdk/google-vertex/edge` sub-module. More details can be found in the [Google Vertex Edge Runtime](#google-vertex-edge-runtime) and [Google Vertex Anthropic Edge Runtime](#google-vertex-anthropic-edge-runtime) sections below.Setup
The Google Vertex and Google Vertex Anthropic providers are both available in the @ai-sdk/google-vertex module. You can install it with
<Tabs items={['pnpm', 'npm', 'yarn', 'bun']}>
Google Vertex Provider Usage
The Google Vertex provider instance is used to create model instances that call the Vertex AI API. The models available with this provider include Google's Gemini models. If you're looking to use Anthropic's Claude models, see the Google Vertex Anthropic Provider section below.
Provider Instance
You can import the default provider instance vertex from @ai-sdk/google-vertex:
import { vertex } from '@ai-sdk/google-vertex';
If you need a customized setup, you can import createVertex from @ai-sdk/google-vertex and create a provider instance with your settings:
import { createVertex } from '@ai-sdk/google-vertex';
const vertex = createVertex({
project: 'my-project', // optional
location: 'us-central1', // optional
});
Google Vertex supports multiple authentication methods depending on your runtime environment and requirements.
Node.js Runtime
The Node.js runtime is the default runtime supported by the AI SDK. It supports all standard Google Cloud authentication options through the google-auth-library. Typical use involves setting a path to a json credentials file in the GOOGLE_APPLICATION_CREDENTIALS environment variable. The credentials file can be obtained from the Google Cloud Console.
If you want to customize the Google authentication options you can pass them as options to the createVertex function, for example:
import { createVertex } from '@ai-sdk/google-vertex';
const vertex = createVertex({
googleAuthOptions: {
credentials: {
client_email: 'my-email',
private_key: 'my-private-key',
},
},
});
Optional Provider Settings
You can use the following optional settings to customize the provider instance:
-
project string
The Google Cloud project ID that you want to use for the API calls. It uses the
GOOGLE_VERTEX_PROJECTenvironment variable by default. -
location string
The Google Cloud location that you want to use for the API calls, e.g.
us-central1. It uses theGOOGLE_VERTEX_LOCATIONenvironment variable by default. -
googleAuthOptions object
Optional. The Authentication options used by the Google Auth Library. See also the GoogleAuthOptions interface.
-
authClient object An
AuthClientto use. -
keyFilename string Path to a .json, .pem, or .p12 key file.
-
keyFile string Path to a .json, .pem, or .p12 key file.
-
credentials object Object containing client_email and private_key properties, or the external account client options.
-
clientOptions object Options object passed to the constructor of the client.
-
scopes string | string[] Required scopes for the desired API request.
-
projectId string Your project ID.
-
universeDomain string The default service domain for a given Cloud universe.
-
-
headers Resolvable<Record<string, string | undefined>>
Headers to include in the requests. Can be provided in multiple formats:
- A record of header key-value pairs:
Record<string, string | undefined> - A function that returns headers:
() => Record<string, string | undefined> - An async function that returns headers:
async () => Record<string, string | undefined> - A promise that resolves to headers:
Promise<Record<string, string | undefined>>
- A record of header key-value pairs:
-
fetch (input: RequestInfo, init?: RequestInit) => Promise<Response>
Custom fetch implementation. Defaults to the global
fetchfunction. You can use it as a middleware to intercept requests, or to provide a custom fetch implementation for e.g. testing. -
baseURL string
Optional. Base URL for the Google Vertex API calls e.g. to use proxy servers. By default, it is constructed using the location and project:
https://${location}-aiplatform.googleapis.com/v1/projects/${project}/locations/${location}/publishers/google
Edge Runtime
Edge runtimes (like Vercel Edge Functions and Cloudflare Workers) are lightweight JavaScript environments that run closer to users at the network edge. They only provide a subset of the standard Node.js APIs. For example, direct file system access is not available, and many Node.js-specific libraries (including the standard Google Auth library) are not compatible.
The Edge runtime version of the Google Vertex provider supports Google's Application Default Credentials through environment variables. The values can be obtained from a json credentials file from the Google Cloud Console.
You can import the default provider instance vertex from @ai-sdk/google-vertex/edge:
import { vertex } from '@ai-sdk/google-vertex/edge';
If you need a customized setup, you can import createVertex from @ai-sdk/google-vertex/edge and create a provider instance with your settings:
import { createVertex } from '@ai-sdk/google-vertex/edge';
const vertex = createVertex({
project: 'my-project', // optional
location: 'us-central1', // optional
});
For Edge runtime authentication, you'll need to set these environment variables from your Google Default Application Credentials JSON file:
GOOGLE_CLIENT_EMAILGOOGLE_PRIVATE_KEYGOOGLE_PRIVATE_KEY_ID(optional)
These values can be obtained from a service account JSON file from the Google Cloud Console.
Optional Provider Settings
You can use the following optional settings to customize the provider instance:
-
project string
The Google Cloud project ID that you want to use for the API calls. It uses the
GOOGLE_VERTEX_PROJECTenvironment variable by default. -
location string
The Google Cloud location that you want to use for the API calls, e.g.
us-central1. It uses theGOOGLE_VERTEX_LOCATIONenvironment variable by default. -
googleCredentials object
Optional. The credentials used by the Edge provider for authentication. These credentials are typically set through environment variables and are derived from a service account JSON file.
-
clientEmail string The client email from the service account JSON file. Defaults to the contents of the
GOOGLE_CLIENT_EMAILenvironment variable. -
privateKey string The private key from the service account JSON file. Defaults to the contents of the
GOOGLE_PRIVATE_KEYenvironment variable. -
privateKeyId string The private key ID from the service account JSON file (optional). Defaults to the contents of the
GOOGLE_PRIVATE_KEY_IDenvironment variable.
-
-
headers Resolvable<Record<string, string | undefined>>
Headers to include in the requests. Can be provided in multiple formats:
- A record of header key-value pairs:
Record<string, string | undefined> - A function that returns headers:
() => Record<string, string | undefined> - An async function that returns headers:
async () => Record<string, string | undefined> - A promise that resolves to headers:
Promise<Record<string, string | undefined>>
- A record of header key-value pairs:
-
fetch (input: RequestInfo, init?: RequestInit) => Promise<Response>
Custom fetch implementation. Defaults to the global
fetchfunction. You can use it as a middleware to intercept requests, or to provide a custom fetch implementation for e.g. testing.
Express Mode
Express mode provides a simplified authentication method using an API key instead of OAuth or service account credentials. When using express mode, the project and location settings are not required.
import { createVertex } from '@ai-sdk/google-vertex';
const vertex = createVertex({
apiKey: process.env.GOOGLE_VERTEX_API_KEY,
});
Optional Provider Settings
-
apiKey string
The API key for Google Vertex AI. When provided, the provider uses express mode with API key authentication instead of OAuth. It uses the
GOOGLE_VERTEX_API_KEYenvironment variable by default.
Language Models
You can create models that call the Vertex API using the provider instance.
The first argument is the model id, e.g. gemini-1.5-pro.
const model = vertex('gemini-1.5-pro');
Google Vertex models support also some model specific settings that are not part of the standard call settings. You can pass them as an options argument:
const model = vertex('gemini-1.5-pro');
await generateText({
model,
providerOptions: {
google: {
safetySettings: [
{
category: 'HARM_CATEGORY_UNSPECIFIED',
threshold: 'BLOCK_LOW_AND_ABOVE',
},
],
},
},
});
The following optional provider options are available for Google Vertex models:
-
structuredOutputs boolean
Optional. Enable structured output. Default is true.
This is useful when the JSON Schema contains elements that are not supported by the OpenAPI schema version that Google Vertex uses. You can use this to disable structured outputs if you need to.
See Troubleshooting: Schema Limitations for more details.
-
safetySettings Array<{ category: string; threshold: string }>
Optional. Safety settings for the model.
-
category string
The category of the safety setting. Can be one of the following:
HARM_CATEGORY_UNSPECIFIEDHARM_CATEGORY_HATE_SPEECHHARM_CATEGORY_DANGEROUS_CONTENTHARM_CATEGORY_HARASSMENTHARM_CATEGORY_SEXUALLY_EXPLICITHARM_CATEGORY_CIVIC_INTEGRITY
-
threshold string
The threshold of the safety setting. Can be one of the following:
HARM_BLOCK_THRESHOLD_UNSPECIFIEDBLOCK_LOW_AND_ABOVEBLOCK_MEDIUM_AND_ABOVEBLOCK_ONLY_HIGHBLOCK_NONE
-
-
audioTimestamp boolean
Optional. Enables timestamp understanding for audio files. Defaults to false.
This is useful for generating transcripts with accurate timestamps. Consult Google's Documentation for usage details.
-
labels object
Optional. Defines labels used in billing reports.
Consult Google's Documentation for usage details.
You can use Google Vertex language models to generate text with the generateText function:
import { vertex } from '@ai-sdk/google-vertex';
import { generateText } from 'ai';
const { text } = await generateText({
model: vertex('gemini-1.5-pro'),
prompt: 'Write a vegetarian lasagna recipe for 4 people.',
});
Google Vertex language models can also be used in the streamText function
(see AI SDK Core).
Code Execution
With Code Execution, certain Gemini models on Vertex AI can generate and execute Python code. This allows the model to perform calculations, data manipulation, and other programmatic tasks to enhance its responses.
You can enable code execution by adding the code_execution tool to your request.
import { vertex } from '@ai-sdk/google-vertex';
import { generateText } from 'ai';
const result = await generateText({
model: vertex('gemini-2.5-pro'),
tools: { code_execution: vertex.tools.codeExecution({}) },
prompt:
'Use python to calculate 20th fibonacci number. Then find the nearest palindrome to it.',
});
The response will contain tool-call and tool-result parts for the executed code.
URL Context
URL Context allows Gemini models to retrieve and analyze content from URLs. Supported models: Gemini 2.5 Flash-Lite, 2.5 Pro, 2.5 Flash, 2.0 Flash.
import { vertex } from '@ai-sdk/google-vertex';
import { generateText } from 'ai';
const result = await generateText({
model: vertex('gemini-2.5-pro'),
tools: { url_context: vertex.tools.urlContext({}) },
prompt: 'What are the key points from https://example.com/article?',
});
Google Search
Google Search enables Gemini models to access real-time web information. Supported models: Gemini 2.5 Flash-Lite, 2.5 Flash, 2.0 Flash, 2.5 Pro.
import { vertex } from '@ai-sdk/google-vertex';
import { generateText } from 'ai';
const result = await generateText({
model: vertex('gemini-2.5-pro'),
tools: { google_search: vertex.tools.googleSearch({}) },
prompt: 'What are the latest developments in AI?',
});
Enterprise Web Search
Enterprise Web Search provides grounding using a compliance-focused web index designed for highly-regulated industries such as finance, healthcare, and the public sector. Unlike standard Google Search grounding, Enterprise Web Search does not log customer data and supports VPC service controls. Supported models: Gemini 2.0 and newer.
import { vertex } from '@ai-sdk/google-vertex';
import { generateText } from 'ai';
const result = await generateText({
model: vertex('gemini-2.5-flash'),
tools: {
enterprise_web_search: vertex.tools.enterpriseWebSearch({}),
},
prompt: 'What are the latest FDA regulations for clinical trials?',
});
Google Maps
Google Maps grounding enables Gemini models to access Google Maps data for location-aware responses. Supported models: Gemini 2.5 Flash-Lite, 2.5 Flash, 2.0 Flash, 2.5 Pro, 3.0 Pro.
import { vertex } from '@ai-sdk/google-vertex';
import { generateText } from 'ai';
const result = await generateText({
model: vertex('gemini-2.5-flash'),
tools: {
google_maps: vertex.tools.googleMaps({}),
},
providerOptions: {
google: {
retrievalConfig: {
latLng: { latitude: 34.090199, longitude: -117.881081 },
},
},
},
prompt: 'What are the best Italian restaurants nearby?',
});
The optional retrievalConfig.latLng provider option provides location context for queries about nearby places. This configuration applies to any grounding tools that support location context.
Reasoning (Thinking Tokens)
Google Vertex AI, through its support for Gemini models, can also emit "thinking" tokens, representing the model's reasoning process. The AI SDK exposes these as reasoning information.
To enable thinking tokens for compatible Gemini models via Vertex, set includeThoughts: true in the thinkingConfig provider option. Since the Vertex provider uses the Google provider's underlying language model, these options are passed through providerOptions.google:
import { vertex } from '@ai-sdk/google-vertex';
import { GoogleGenerativeAIProviderOptions } from '@ai-sdk/google'; // Note: importing from @ai-sdk/google
import { generateText, streamText } from 'ai';
// For generateText:
const { text, reasoningText, reasoning } = await generateText({
model: vertex('gemini-2.0-flash-001'), // Or other supported model via Vertex
providerOptions: {
google: {
// Options are nested under 'google' for Vertex provider
thinkingConfig: {
includeThoughts: true,
// thinkingBudget: 2048, // Optional
},
} satisfies GoogleGenerativeAIProviderOptions,
},
prompt: 'Explain quantum computing in simple terms.',
});
console.log('Reasoning:', reasoningText);
console.log('Reasoning Details:', reasoning);
console.log('Final Text:', text);
// For streamText:
const result = streamText({
model: vertex('gemini-2.0-flash-001'), // Or other supported model via Vertex
providerOptions: {
google: {
// Options are nested under 'google' for Vertex provider
thinkingConfig: {
includeThoughts: true,
// thinkingBudget: 2048, // Optional
},
} satisfies GoogleGenerativeAIProviderOptions,
},
prompt: 'Explain quantum computing in simple terms.',
});
for await (const part of result.fullStream) {
if (part.type === 'reasoning') {
process.stdout.write(`THOUGHT: ${part.textDelta}\n`);
} else if (part.type === 'text-delta') {
process.stdout.write(part.textDelta);
}
}
When includeThoughts is true, parts of the API response marked with thought: true will be processed as reasoning.
- In
generateText, these contribute to thereasoningText(string) andreasoning(array) fields. - In
streamText, these are emitted asreasoningstream parts.
File Inputs
The Google Vertex provider supports file inputs, e.g. PDF files.
import { vertex } from '@ai-sdk/google-vertex';
import { generateText } from 'ai';
const { text } = await generateText({
model: vertex('gemini-1.5-pro'),
messages: [
{
role: 'user',
content: [
{
type: 'text',
text: 'What is an embedding model according to this document?',
},
{
type: 'file',
data: fs.readFileSync('./data/ai.pdf'),
mediaType: 'application/pdf',
},
],
},
],
});
See File Parts for details on how to use files in prompts.
Safety Ratings
The safety ratings provide insight into the safety of the model's response. See Google Vertex AI documentation on configuring safety filters.
Example response excerpt:
{
"safetyRatings": [
{
"category": "HARM_CATEGORY_HATE_SPEECH",
"probability": "NEGLIGIBLE",
"probabilityScore": 0.11027937,
"severity": "HARM_SEVERITY_LOW",
"severityScore": 0.28487435
},
{
"category": "HARM_CATEGORY_DANGEROUS_CONTENT",
"probability": "HIGH",
"blocked": true,
"probabilityScore": 0.95422274,
"severity": "HARM_SEVERITY_MEDIUM",
"severityScore": 0.43398145
},
{
"category": "HARM_CATEGORY_HARASSMENT",
"probability": "NEGLIGIBLE",
"probabilityScore": 0.11085559,
"severity": "HARM_SEVERITY_NEGLIGIBLE",
"severityScore": 0.19027223
},
{
"category": "HARM_CATEGORY_SEXUALLY_EXPLICIT",
"probability": "NEGLIGIBLE",
"probabilityScore": 0.22901751,
"severity": "HARM_SEVERITY_NEGLIGIBLE",
"severityScore": 0.09089675
}
]
}
For more details, see the Google Vertex AI documentation on grounding with Google Search.
Troubleshooting
Schema Limitations
The Google Vertex API uses a subset of the OpenAPI 3.0 schema, which does not support features such as unions. The errors that you get in this case look like this:
GenerateContentRequest.generation_config.response_schema.properties[occupation].type: must be specified
By default, structured outputs are enabled (and for tool calling they are required). You can disable structured outputs for object generation as a workaround:
const result = await generateObject({
model: vertex('gemini-1.5-pro'),
providerOptions: {
google: {
structuredOutputs: false,
},
},
schema: z.object({
name: z.string(),
age: z.number(),
contact: z.union([
z.object({
type: z.literal('email'),
value: z.string(),
}),
z.object({
type: z.literal('phone'),
value: z.string(),
}),
]),
}),
prompt: 'Generate an example person for testing.',
});
The following Zod features are known to not work with Google Vertex:
z.unionz.record
Model Capabilities
| Model | Image Input | Object Generation | Tool Usage | Tool Streaming |
|---|---|---|---|---|
gemini-3-pro-preview |
||||
gemini-2.5-pro |
||||
gemini-2.5-flash |
||||
gemini-2.0-flash-001 |
||||
gemini-1.5-flash |
||||
gemini-1.5-pro |
Embedding Models
You can create models that call the Google Vertex AI embeddings API using the .embeddingModel() factory method:
const model = vertex.embeddingModel('text-embedding-004');
Google Vertex AI embedding models support additional settings. You can pass them as an options argument:
import { vertex } from '@ai-sdk/google-vertex';
import { embed } from 'ai';
const model = vertex.embeddingModel('text-embedding-004');
const { embedding } = await embed({
model,
value: 'sunny day at the beach',
providerOptions: {
google: {
outputDimensionality: 512, // optional, number of dimensions for the embedding
taskType: 'SEMANTIC_SIMILARITY', // optional, specifies the task type for generating embeddings
autoTruncate: false, // optional
},
},
});
The following optional provider options are available for Google Vertex AI embedding models:
-
outputDimensionality: number
Optional reduced dimension for the output embedding. If set, excessive values in the output embedding are truncated from the end.
-
taskType: string
Optional. Specifies the task type for generating embeddings. Supported task types include:
SEMANTIC_SIMILARITY: Optimized for text similarity.CLASSIFICATION: Optimized for text classification.CLUSTERING: Optimized for clustering texts based on similarity.RETRIEVAL_DOCUMENT: Optimized for document retrieval.RETRIEVAL_QUERY: Optimized for query-based retrieval.QUESTION_ANSWERING: Optimized for answering questions.FACT_VERIFICATION: Optimized for verifying factual information.CODE_RETRIEVAL_QUERY: Optimized for retrieving code blocks based on natural language queries.
-
title: string
Optional. The title of the document being embedded. This helps the model produce better embeddings by providing additional context. Only valid when
taskTypeis set to'RETRIEVAL_DOCUMENT'. -
autoTruncate: boolean
Optional. When set to
true, input text will be truncated if it exceeds the maximum length. When set tofalse, an error is returned if the input text is too long. Defaults totrue.
Model Capabilities
| Model | Max Values Per Call | Parallel Calls |
|---|---|---|
text-embedding-004 |
2048 |
Image Models
You can create Imagen models that call the Imagen on Vertex AI API
using the .image() factory method. For more on image generation with the AI SDK see generateImage().
import { vertex } from '@ai-sdk/google-vertex';
import { generateImage } from 'ai';
const { image } = await generateImage({
model: vertex.image('imagen-4.0-generate-001'),
prompt: 'A futuristic cityscape at sunset',
aspectRatio: '16:9',
});
Further configuration can be done using Google Vertex provider options. You can validate the provider options using the GoogleVertexImageProviderOptions type.
import { vertex } from '@ai-sdk/google-vertex';
import { GoogleVertexImageProviderOptions } from '@ai-sdk/google-vertex';
import { generateImage } from 'ai';
const { image } = await generateImage({
model: vertex.image('imagen-4.0-generate-001'),
providerOptions: {
vertex: {
negativePrompt: 'pixelated, blurry, low-quality',
} satisfies GoogleVertexImageProviderOptions,
},
// ...
});
The following provider options are available:
-
negativePrompt string A description of what to discourage in the generated images.
-
personGeneration
allow_adult|allow_all|dont_allowWhether to allow person generation. Defaults toallow_adult. -
safetySetting
block_low_and_above|block_medium_and_above|block_only_high|block_noneWhether to block unsafe content. Defaults toblock_medium_and_above. -
addWatermark boolean Whether to add an invisible watermark to the generated images. Defaults to
true. -
storageUri string Cloud Storage URI to store the generated images.
Additional information about the images can be retrieved using Google Vertex meta data.
import { vertex } from '@ai-sdk/google-vertex';
import { GoogleVertexImageProviderOptions } from '@ai-sdk/google-vertex';
import { generateImage } from 'ai';
const { image, providerMetadata } = await generateImage({
model: vertex.image('imagen-4.0-generate-001'),
prompt: 'A futuristic cityscape at sunset',
aspectRatio: '16:9',
});
console.log(
`Revised prompt: ${providerMetadata.vertex.images[0].revisedPrompt}`,
);
Image Editing
Google Vertex Imagen models support image editing through inpainting, outpainting, and other edit modes. Pass input images via prompt.images and optionally a mask via prompt.mask.
Inpainting (Insert Objects)
Insert or replace objects in specific areas using a mask:
import {
vertex,
GoogleVertexImageProviderOptions,
} from '@ai-sdk/google-vertex';
import { generateImage } from 'ai';
import fs from 'fs';
const image = fs.readFileSync('./input-image.png');
const mask = fs.readFileSync('./mask.png'); // White = edit area
const { images } = await generateImage({
model: vertex.image('imagen-3.0-capability-001'),
prompt: {
text: 'A sunlit indoor lounge area with a pool containing a flamingo',
images: [image],
mask,
},
providerOptions: {
vertex: {
edit: {
baseSteps: 50,
mode: 'EDIT_MODE_INPAINT_INSERTION',
maskMode: 'MASK_MODE_USER_PROVIDED',
maskDilation: 0.01,
},
} satisfies GoogleVertexImageProviderOptions,
},
});
Outpainting (Extend Image)
Extend an image beyond its original boundaries:
import {
vertex,
GoogleVertexImageProviderOptions,
} from '@ai-sdk/google-vertex';
import { generateImage } from 'ai';
import fs from 'fs';
const image = fs.readFileSync('./input-image.png');
const mask = fs.readFileSync('./outpaint-mask.png'); // White = extend area
const { images } = await generateImage({
model: vertex.image('imagen-3.0-capability-001'),
prompt: {
text: 'Extend the scene with more of the forest background',
images: [image],
mask,
},
providerOptions: {
vertex: {
edit: {
baseSteps: 50,
mode: 'EDIT_MODE_OUTPAINT',
maskMode: 'MASK_MODE_USER_PROVIDED',
},
} satisfies GoogleVertexImageProviderOptions,
},
});
Edit Provider Options
The following options are available under providerOptions.vertex.edit:
-
mode - The edit mode to use:
EDIT_MODE_INPAINT_INSERTION- Insert objects into masked areasEDIT_MODE_INPAINT_REMOVAL- Remove objects from masked areasEDIT_MODE_OUTPAINT- Extend image beyond boundariesEDIT_MODE_CONTROLLED_EDITING- Controlled editingEDIT_MODE_PRODUCT_IMAGE- Product image editingEDIT_MODE_BGSWAP- Background swap
-
baseSteps number - Number of sampling steps (35-75). Higher values = better quality but slower.
-
maskMode - How to interpret the mask:
MASK_MODE_USER_PROVIDED- Use the provided mask directlyMASK_MODE_DEFAULT- Default mask modeMASK_MODE_DETECTION_BOX- Mask from detected bounding boxesMASK_MODE_CLOTHING_AREA- Mask from clothing segmentationMASK_MODE_PARSED_PERSON- Mask from person parsing
-
maskDilation number - Percentage (0-1) to grow the mask. Recommended: 0.01.
Model Capabilities
| Model | Aspect Ratios |
|---|---|
imagen-3.0-generate-001 |
1:1, 3:4, 4:3, 9:16, 16:9 |
imagen-3.0-generate-002 |
1:1, 3:4, 4:3, 9:16, 16:9 |
imagen-3.0-fast-generate-001 |
1:1, 3:4, 4:3, 9:16, 16:9 |
imagen-4.0-generate-001 |
1:1, 3:4, 4:3, 9:16, 16:9 |
imagen-4.0-fast-generate-001 |
1:1, 3:4, 4:3, 9:16, 16:9 |
imagen-4.0-ultra-generate-001 |
1:1, 3:4, 4:3, 9:16, 16:9 |
Google Vertex Anthropic Provider Usage
The Google Vertex Anthropic provider for the AI SDK offers support for Anthropic's Claude models through the Google Vertex AI APIs. This section provides details on how to set up and use the Google Vertex Anthropic provider.
Provider Instance
You can import the default provider instance vertexAnthropic from @ai-sdk/google-vertex/anthropic:
import { vertexAnthropic } from '@ai-sdk/google-vertex/anthropic';
If you need a customized setup, you can import createVertexAnthropic from @ai-sdk/google-vertex/anthropic and create a provider instance with your settings:
import { createVertexAnthropic } from '@ai-sdk/google-vertex/anthropic';
const vertexAnthropic = createVertexAnthropic({
project: 'my-project', // optional
location: 'us-central1', // optional
});
Node.js Runtime
For Node.js environments, the Google Vertex Anthropic provider supports all standard Google Cloud authentication options through the google-auth-library. You can customize the authentication options by passing them to the createVertexAnthropic function:
import { createVertexAnthropic } from '@ai-sdk/google-vertex/anthropic';
const vertexAnthropic = createVertexAnthropic({
googleAuthOptions: {
credentials: {
client_email: 'my-email',
private_key: 'my-private-key',
},
},
});
Optional Provider Settings
You can use the following optional settings to customize the Google Vertex Anthropic provider instance:
-
project string
The Google Cloud project ID that you want to use for the API calls. It uses the
GOOGLE_VERTEX_PROJECTenvironment variable by default. -
location string
The Google Cloud location that you want to use for the API calls, e.g.
us-central1. It uses theGOOGLE_VERTEX_LOCATIONenvironment variable by default. -
googleAuthOptions object
Optional. The Authentication options used by the Google Auth Library. See also the GoogleAuthOptions interface.
-
authClient object An
AuthClientto use. -
keyFilename string Path to a .json, .pem, or .p12 key file.
-
keyFile string Path to a .json, .pem, or .p12 key file.
-
credentials object Object containing client_email and private_key properties, or the external account client options.
-
clientOptions object Options object passed to the constructor of the client.
-
scopes string | string[] Required scopes for the desired API request.
-
projectId string Your project ID.
-
universeDomain string The default service domain for a given Cloud universe.
-
-
headers Resolvable<Record<string, string | undefined>>
Headers to include in the requests. Can be provided in multiple formats:
- A record of header key-value pairs:
Record<string, string | undefined> - A function that returns headers:
() => Record<string, string | undefined> - An async function that returns headers:
async () => Record<string, string | undefined> - A promise that resolves to headers:
Promise<Record<string, string | undefined>>
- A record of header key-value pairs:
-
fetch (input: RequestInfo, init?: RequestInit) => Promise<Response>
Custom fetch implementation. Defaults to the global
fetchfunction. You can use it as a middleware to intercept requests, or to provide a custom fetch implementation for e.g. testing.
Edge Runtime
Edge runtimes (like Vercel Edge Functions and Cloudflare Workers) are lightweight JavaScript environments that run closer to users at the network edge. They only provide a subset of the standard Node.js APIs. For example, direct file system access is not available, and many Node.js-specific libraries (including the standard Google Auth library) are not compatible.
The Edge runtime version of the Google Vertex Anthropic provider supports Google's Application Default Credentials through environment variables. The values can be obtained from a json credentials file from the Google Cloud Console.
For Edge runtimes, you can import the provider instance from @ai-sdk/google-vertex/anthropic/edge:
import { vertexAnthropic } from '@ai-sdk/google-vertex/anthropic/edge';
To customize the setup, use createVertexAnthropic from the same module:
import { createVertexAnthropic } from '@ai-sdk/google-vertex/anthropic/edge';
const vertexAnthropic = createVertexAnthropic({
project: 'my-project', // optional
location: 'us-central1', // optional
});
For Edge runtime authentication, set these environment variables from your Google Default Application Credentials JSON file:
GOOGLE_CLIENT_EMAILGOOGLE_PRIVATE_KEYGOOGLE_PRIVATE_KEY_ID(optional)
Optional Provider Settings
You can use the following optional settings to customize the provider instance:
-
project string
The Google Cloud project ID that you want to use for the API calls. It uses the
GOOGLE_VERTEX_PROJECTenvironment variable by default. -
location string
The Google Cloud location that you want to use for the API calls, e.g.
us-central1. It uses theGOOGLE_VERTEX_LOCATIONenvironment variable by default. -
googleCredentials object
Optional. The credentials used by the Edge provider for authentication. These credentials are typically set through environment variables and are derived from a service account JSON file.
-
clientEmail string The client email from the service account JSON file. Defaults to the contents of the
GOOGLE_CLIENT_EMAILenvironment variable. -
privateKey string The private key from the service account JSON file. Defaults to the contents of the
GOOGLE_PRIVATE_KEYenvironment variable. -
privateKeyId string The private key ID from the service account JSON file (optional). Defaults to the contents of the
GOOGLE_PRIVATE_KEY_IDenvironment variable.
-
-
headers Resolvable<Record<string, string | undefined>>
Headers to include in the requests. Can be provided in multiple formats:
- A record of header key-value pairs:
Record<string, string | undefined> - A function that returns headers:
() => Record<string, string | undefined> - An async function that returns headers:
async () => Record<string, string | undefined> - A promise that resolves to headers:
Promise<Record<string, string | undefined>>
- A record of header key-value pairs:
-
fetch (input: RequestInfo, init?: RequestInit) => Promise<Response>
Custom fetch implementation. Defaults to the global
fetchfunction. You can use it as a middleware to intercept requests, or to provide a custom fetch implementation for e.g. testing.
Language Models
You can create models that call the Anthropic Messages API using the provider instance.
The first argument is the model id, e.g. claude-3-haiku-20240307.
Some models have multi-modal capabilities.
const model = anthropic('claude-3-haiku-20240307');
You can use Anthropic language models to generate text with the generateText function:
import { vertexAnthropic } from '@ai-sdk/google-vertex/anthropic';
import { generateText } from 'ai';
const { text } = await generateText({
model: vertexAnthropic('claude-3-haiku-20240307'),
prompt: 'Write a vegetarian lasagna recipe for 4 people.',
});
Anthropic language models can also be used in the streamText, generateObject, and streamObject functions
(see AI SDK Core).
The following optional provider options are available for Anthropic models:
-
sendReasoningbooleanOptional. Include reasoning content in requests sent to the model. Defaults to
true.If you are experiencing issues with the model handling requests involving reasoning content, you can set this to
falseto omit them from the request. -
thinkingobjectOptional. See Reasoning section for more details.
Reasoning
Anthropic has reasoning support for the claude-3-7-sonnet@20250219 model.
You can enable it using the thinking provider option
and specifying a thinking budget in tokens.
import { vertexAnthropic } from '@ai-sdk/google-vertex/anthropic';
import { generateText } from 'ai';
const { text, reasoningText, reasoning } = await generateText({
model: vertexAnthropic('claude-3-7-sonnet@20250219'),
prompt: 'How many people will live in the world in 2040?',
providerOptions: {
anthropic: {
thinking: { type: 'enabled', budgetTokens: 12000 },
},
},
});
console.log(reasoningText); // reasoning text
console.log(reasoning); // reasoning details including redacted reasoning
console.log(text); // text response
See AI SDK UI: Chatbot for more details on how to integrate reasoning into your chatbot.
Cache Control
Anthropic cache control is in a Pre-Generally Available (GA) state on Google Vertex. For more see [Google Vertex Anthropic cache control documentation](https://cloud.google.com/vertex-ai/generative-ai/docs/partner-models/claude-prompt-caching).In the messages and message parts, you can use the providerOptions property to set cache control breakpoints.
You need to set the anthropic property in the providerOptions object to { cacheControl: { type: 'ephemeral' } } to set a cache control breakpoint.
The cache creation input tokens are then returned in the providerMetadata object
for generateText and generateObject, again under the anthropic property.
When you use streamText or streamObject, the response contains a promise
that resolves to the metadata. Alternatively you can receive it in the
onFinish callback.
import { vertexAnthropic } from '@ai-sdk/google-vertex/anthropic';
import { generateText } from 'ai';
const errorMessage = '... long error message ...';
const result = await generateText({
model: vertexAnthropic('claude-3-5-sonnet-20240620'),
messages: [
{
role: 'user',
content: [
{ type: 'text', text: 'You are a JavaScript expert.' },
{
type: 'text',
text: `Error message: ${errorMessage}`,
providerOptions: {
anthropic: { cacheControl: { type: 'ephemeral' } },
},
},
{ type: 'text', text: 'Explain the error message.' },
],
},
],
});
console.log(result.text);
console.log(result.providerMetadata?.anthropic);
// e.g. { cacheCreationInputTokens: 2118, cacheReadInputTokens: 0 }
You can also use cache control on system messages by providing multiple system messages at the head of your messages array:
const result = await generateText({
model: vertexAnthropic('claude-3-5-sonnet-20240620'),
messages: [
{
role: 'system',
content: 'Cached system message part',
providerOptions: {
anthropic: { cacheControl: { type: 'ephemeral' } },
},
},
{
role: 'system',
content: 'Uncached system message part',
},
{
role: 'user',
content: 'User prompt',
},
],
});
For more on prompt caching with Anthropic, see Google Vertex AI's Claude prompt caching documentation and Anthropic's Cache Control documentation.
Tools
Google Vertex Anthropic supports a subset of Anthropic's built-in tools. The following tools are available via the tools property of the provider instance:
- Bash Tool: Allows running bash commands.
- Text Editor Tool: Provides functionality for viewing and editing text files.
- Computer Tool: Enables control of keyboard and mouse actions on a computer.
- Web Search Tool: Provides access to real-time web content.
For more background on Anthropic tools, see Anthropic's documentation.
Bash Tool
The Bash Tool allows running bash commands. Here's how to create and use it:
const bashTool = vertexAnthropic.tools.bash_20250124({
execute: async ({ command, restart }) => {
// Implement your bash command execution logic here
// Return the result of the command execution
},
});
Parameters:
command(string): The bash command to run. Required unless the tool is being restarted.restart(boolean, optional): Specifying true will restart this tool.
Text Editor Tool
The Text Editor Tool provides functionality for viewing and editing text files:
const textEditorTool = vertexAnthropic.tools.textEditor_20250124({
execute: async ({
command,
path,
file_text,
insert_line,
new_str,
old_str,
view_range,
}) => {
// Implement your text editing logic here
// Return the result of the text editing operation
},
});
Parameters:
command('view' | 'create' | 'str_replace' | 'insert' | 'undo_edit'): The command to run. Note:undo_editis not supported intextEditor_20250429andtextEditor_20250728.path(string): Absolute path to file or directory, e.g./repo/file.pyor/repo.file_text(string, optional): Required forcreatecommand, with the content of the file to be created.insert_line(number, optional): Required forinsertcommand. The line number after which to insert the new string.new_str(string, optional): New string forstr_replaceorinsertcommands.old_str(string, optional): Required forstr_replacecommand, containing the string to replace.view_range(number[], optional): Optional forviewcommand to specify line range to show.max_characters(number, optional): Optional maximum number of characters to view in the file (only available intextEditor_20250728).
Computer Tool
The Computer Tool enables control of keyboard and mouse actions on a computer:
const computerTool = vertexAnthropic.tools.computer_20241022({
displayWidthPx: 1920,
displayHeightPx: 1080,
displayNumber: 0, // Optional, for X11 environments
execute: async ({ action, coordinate, text }) => {
// Implement your computer control logic here
// Return the result of the action
// Example code:
switch (action) {
case 'screenshot': {
// multipart result:
return {
type: 'image',
data: fs
.readFileSync('./data/screenshot-editor.png')
.toString('base64'),
};
}
default: {
console.log('Action:', action);
console.log('Coordinate:', coordinate);
console.log('Text:', text);
return `executed ${action}`;
}
}
},
// map to tool result content for LLM consumption:
toModelOutput({ output }) {
return typeof output === 'string'
? [{ type: 'text', text: output }]
: [{ type: 'image', data: output.data, mediaType: 'image/png' }];
},
});
Parameters:
action('key' | 'type' | 'mouse_move' | 'left_click' | 'left_click_drag' | 'right_click' | 'middle_click' | 'double_click' | 'screenshot' | 'cursor_position'): The action to perform.coordinate(number[], optional): Required formouse_moveandleft_click_dragactions. Specifies the (x, y) coordinates.text(string, optional): Required fortypeandkeyactions.
Web Search Tool
The Web Search Tool provides Claude with direct access to real-time web content:
const webSearchTool = vertexAnthropic.tools.webSearch_20250305({
maxUses: 5, // Optional: Maximum number of web searches Claude can perform
allowedDomains: ['example.com'], // Optional: Only search these domains
blockedDomains: ['spam.com'], // Optional: Never search these domains
userLocation: {
// Optional: Provide location for geographically relevant results
type: 'approximate',
city: 'San Francisco',
region: 'CA',
country: 'US',
timezone: 'America/Los_Angeles',
},
});
Parameters:
maxUses(number, optional): Maximum number of web searches Claude can perform during the conversation.allowedDomains(string[], optional): Optional list of domains that Claude is allowed to search.blockedDomains(string[], optional): Optional list of domains that Claude should avoid when searching.userLocation(object, optional): Optional user location information to provide geographically relevant search results.type('approximate'): The type of location (must be approximate).city(string, optional): The city name.region(string, optional): The region or state.country(string, optional): The country.timezone(string, optional): The IANA timezone ID.
These tools can be used in conjunction with supported Claude models to enable more complex interactions and tasks.
Model Capabilities
The latest Anthropic model list on Vertex AI is available here. See also Anthropic Model Comparison.
| Model | Image Input | Object Generation | Tool Usage | Tool Streaming | Computer Use |
|---|---|---|---|---|---|
claude-3-7-sonnet@20250219 |
|||||
claude-3-5-sonnet-v2@20241022 |
|||||
claude-3-5-sonnet@20240620 |
|||||
claude-3-5-haiku@20241022 |
|||||
claude-3-sonnet@20240229 |
|||||
claude-3-haiku@20240307 |
|||||
claude-3-opus@20240229 |
title: Rev.ai description: Learn how to use the Rev.ai provider for the AI SDK.
Rev.ai Provider
The Rev.ai provider contains language model support for the Rev.ai transcription API.
Setup
The Rev.ai provider is available in the @ai-sdk/revai module. You can install it with
<Tabs items={['pnpm', 'npm', 'yarn', 'bun']}>
Provider Instance
You can import the default provider instance revai from @ai-sdk/revai:
import { revai } from '@ai-sdk/revai';
If you need a customized setup, you can import createRevai from @ai-sdk/revai and create a provider instance with your settings:
import { createRevai } from '@ai-sdk/revai';
const revai = createRevai({
// custom settings, e.g.
fetch: customFetch,
});
You can use the following optional settings to customize the Rev.ai provider instance:
-
apiKey string
API key that is being sent using the
Authorizationheader. It defaults to theREVAI_API_KEYenvironment variable. -
headers Record<string,string>
Custom headers to include in the requests.
-
fetch (input: RequestInfo, init?: RequestInit) => Promise<Response>
Custom fetch implementation. Defaults to the global
fetchfunction. You can use it as a middleware to intercept requests, or to provide a custom fetch implementation for e.g. testing.
Transcription Models
You can create models that call the Rev.ai transcription API
using the .transcription() factory method.
The first argument is the model id e.g. machine.
const model = revai.transcription('machine');
You can also pass additional provider-specific options using the providerOptions argument. For example, supplying the input language in ISO-639-1 (e.g. en) format can sometimes improve transcription performance if known beforehand.
import { experimental_transcribe as transcribe } from 'ai';
import { revai } from '@ai-sdk/revai';
import { readFile } from 'fs/promises';
const result = await transcribe({
model: revai.transcription('machine'),
audio: await readFile('audio.mp3'),
providerOptions: { revai: { language: 'en' } },
});
The following provider options are available:
-
metadata string
Optional metadata that was provided during job submission.
-
notification_config object
Optional configuration for a callback url to invoke when processing is complete.
- url string - Callback url to invoke when processing is complete.
- auth_headers object - Optional authorization headers, if needed to invoke the callback.
- Authorization string - Authorization header value.
-
delete_after_seconds integer
Amount of time after job completion when job is auto-deleted.
-
verbatim boolean
Configures the transcriber to transcribe every syllable, including all false starts and disfluencies.
-
rush boolean
[HIPAA Unsupported] Only available for human transcriber option. When set to true, your job is given higher priority.
-
skip_diarization boolean
Specify if speaker diarization will be skipped by the speech engine.
-
skip_postprocessing boolean
Only available for English and Spanish languages. User-supplied preference on whether to skip post-processing operations.
-
skip_punctuation boolean
Specify if "punct" type elements will be skipped by the speech engine.
-
remove_disfluencies boolean
When set to true, disfluencies (like 'ums' and 'uhs') will not appear in the transcript.
-
remove_atmospherics boolean
When set to true, atmospherics (like
<laugh>,<affirmative>) will not appear in the transcript. -
filter_profanity boolean
When enabled, profanities will be filtered by replacing characters with asterisks except for the first and last.
-
speaker_channels_count integer
Only available for English, Spanish and French languages. Specify the total number of unique speaker channels in the audio.
-
speakers_count integer
Only available for English, Spanish and French languages. Specify the total number of unique speakers in the audio.
-
diarization_type string
Specify diarization type. Possible values: "standard" (default), "premium".
-
custom_vocabulary_id string
Supply the id of a pre-completed custom vocabulary submitted through the Custom Vocabularies API.
-
custom_vocabularies Array
Specify a collection of custom vocabulary to be used for this job.
-
strict_custom_vocabulary boolean
If true, only exact phrases will be used as custom vocabulary.
-
summarization_config object
Specify summarization options.
- model string - Model type for summarization. Possible values: "standard" (default), "premium".
- type string - Summarization formatting type. Possible values: "paragraph" (default), "bullets".
- prompt string - Custom prompt for flexible summaries (mutually exclusive with type).
-
translation_config object
Specify translation options.
- target_languages Array - Array of target languages for translation.
- model string - Model type for translation. Possible values: "standard" (default), "premium".
-
language string
Language is provided as a ISO 639-1 language code. Default is "en".
-
forced_alignment boolean
When enabled, provides improved accuracy for per-word timestamps for a transcript. Default is
false.Currently supported languages:
- English (en, en-us, en-gb)
- French (fr)
- Italian (it)
- German (de)
- Spanish (es)
Note: This option is not available in low-cost environment.
Model Capabilities
| Model | Transcription | Duration | Segments | Language |
|---|---|---|---|---|
machine |
||||
low_cost |
||||
fusion |
title: Baseten description: Learn how to use Baseten models with the AI SDK.
Baseten Provider
Baseten is an inference platform for serving frontier, enterprise-grade opensource AI models via their API.
Setup
The Baseten provider is available via the @ai-sdk/baseten module. You can install it with
<Tabs items={['pnpm', 'npm', 'yarn']}>
Provider Instance
You can import the default provider instance baseten from @ai-sdk/baseten:
import { baseten } from '@ai-sdk/baseten';
If you need a customized setup, you can import createBaseten from @ai-sdk/baseten
and create a provider instance with your settings:
import { createBaseten } from '@ai-sdk/baseten';
const baseten = createBaseten({
apiKey: process.env.BASETEN_API_KEY ?? '',
});
You can use the following optional settings to customize the Baseten provider instance:
-
baseURL string
Use a different URL prefix for API calls, e.g. to use proxy servers. The default prefix is
https://inference.baseten.co/v1. -
apiKey string
API key that is being sent using the
Authorizationheader. It defaults to theBASETEN_API_KEYenvironment variable. It is recommended you set the environment variable usingexportso you do not need to include the field everytime. You can grab your Baseten API Key here -
modelURL string
Custom model URL for specific models (chat or embeddings). If not provided, the default Model APIs will be used.
-
headers Record<string,string>
Custom headers to include in the requests.
-
fetch (input: RequestInfo, init?: RequestInit) => Promise<Response>
Custom fetch implementation.
Model APIs
You can select Baseten models using a provider instance.
The first argument is the model id, e.g. 'moonshotai/Kimi-K2-Instruct-0905': The complete supported models under Model APIs can be found here.
const model = baseten('moonshotai/Kimi-K2-Instruct-0905');
Example
You can use Baseten language models to generate text with the generateText function:
import { baseten } from '@ai-sdk/baseten';
import { generateText } from 'ai';
const { text } = await generateText({
model: baseten('moonshotai/Kimi-K2-Instruct-0905'),
prompt: 'What is the meaning of life? Answer in one sentence.',
});
Baseten language models can also be used in the streamText function
(see AI SDK Core).
Dedicated Models
Baseten supports dedicated model URLs for both chat and embedding models. You have to specify a modelURL when creating the provider:
OpenAI-Compatible Endpoints (/sync/v1)
For models deployed with Baseten's OpenAI-compatible endpoints:
import { createBaseten } from '@ai-sdk/baseten';
const baseten = createBaseten({
modelURL: 'https://model-{MODEL_ID}.api.baseten.co/sync/v1',
});
// No modelId is needed because we specified modelURL
const model = baseten();
const { text } = await generateText({
model: model,
prompt: 'Say hello from a Baseten chat model!',
});
/predict Endpoints
/predict endpoints are currently NOT supported for chat models. You must use /sync/v1 endpoints for chat functionality.
Embedding Models
You can create models that call the Baseten embeddings API using the .embeddingModel() factory method. The Baseten provider uses the high-performance @basetenlabs/performance-client for optimal embedding performance.
import { createBaseten } from '@ai-sdk/baseten';
import { embed, embedMany } from 'ai';
const baseten = createBaseten({
modelURL: 'https://model-{MODEL_ID}.api.baseten.co/sync',
});
const embeddingModel = baseten.embeddingModel();
// Single embedding
const { embedding } = await embed({
model: embeddingModel,
value: 'sunny day at the beach',
});
// Batch embeddings
const { embeddings } = await embedMany({
model: embeddingModel,
values: [
'sunny day at the beach',
'rainy afternoon in the city',
'snowy mountain peak',
],
});
Endpoint Support for Embeddings
Supported:
/syncendpoints (Performance Client automatically adds/v1/embeddings)/sync/v1endpoints (automatically strips/v1before passing to Performance Client)
Not Supported:
/predictendpoints (not compatible with Performance Client)
Performance Features
The embedding implementation includes:
- High-performance client: Uses
@basetenlabs/performance-clientfor optimal performance - Automatic batching: Efficiently handles multiple texts in a single request
- Connection reuse: Performance Client is created once and reused for all requests
- Built-in retries: Automatic retry logic for failed requests
Error Handling
The Baseten provider includes built-in error handling for common API errors:
import { baseten } from '@ai-sdk/baseten';
import { generateText } from 'ai';
try {
const { text } = await generateText({
model: baseten('moonshotai/Kimi-K2-Instruct-0905'),
prompt: 'Hello, world!',
});
} catch (error) {
console.error('Baseten API error:', error.message);
}
Common Error Scenarios
// Embeddings require a modelURL
try {
baseten.embeddingModel();
} catch (error) {
// Error: "No model URL provided for embeddings. Please set modelURL option for embeddings."
}
// /predict endpoints are not supported for chat models
try {
const baseten = createBaseten({
modelURL:
'https://model-{MODEL_ID}.api.baseten.co/environments/production/predict',
});
baseten(); // This will throw an error
} catch (error) {
// Error: "Not supported. You must use a /sync/v1 endpoint for chat models."
}
// /sync/v1 endpoints are now supported for embeddings
const baseten = createBaseten({
modelURL:
'https://model-{MODEL_ID}.api.baseten.co/environments/production/sync/v1',
});
const embeddingModel = baseten.embeddingModel(); // This works fine!
// /predict endpoints are not supported for embeddings
try {
const baseten = createBaseten({
modelURL:
'https://model-{MODEL_ID}.api.baseten.co/environments/production/predict',
});
baseten.embeddingModel(); // This will throw an error
} catch (error) {
// Error: "Not supported. You must use a /sync or /sync/v1 endpoint for embeddings."
}
// Image models are not supported
try {
baseten.imageModel('test-model');
} catch (error) {
// Error: NoSuchModelError for imageModel
}
title: Hugging Face description: Learn how to use Hugging Face Provider.
Hugging Face Provider
The Hugging Face provider offers access to thousands of language models through Hugging Face Inference Providers, including models from Meta, DeepSeek, Qwen, and more.
API keys can be obtained from Hugging Face Settings.
Setup
The Hugging Face provider is available via the @ai-sdk/huggingface module. You can install it with:
<Tabs items={['pnpm', 'npm', 'yarn', 'bun']}>
Provider Instance
You can import the default provider instance huggingface from @ai-sdk/huggingface:
import { huggingface } from '@ai-sdk/huggingface';
For custom configuration, you can import createHuggingFace and create a provider instance with your settings:
import { createHuggingFace } from '@ai-sdk/huggingface';
const huggingface = createHuggingFace({
apiKey: process.env.HUGGINGFACE_API_KEY ?? '',
});
You can use the following optional settings to customize the Hugging Face provider instance:
-
baseURL string
Use a different URL prefix for API calls, e.g. to use proxy servers. The default prefix is
https://router.huggingface.co/v1. -
apiKey string
API key that is being sent using the
Authorizationheader. It defaults to theHUGGINGFACE_API_KEYenvironment variable. You can get your API key from Hugging Face Settings. -
headers Record<string,string>
Custom headers to include in the requests.
-
fetch (input: RequestInfo, init?: RequestInit) => Promise<Response>
Custom fetch implementation.
Language Models
You can create language models using a provider instance:
import { huggingface } from '@ai-sdk/huggingface';
import { generateText } from 'ai';
const { text } = await generateText({
model: huggingface('deepseek-ai/DeepSeek-V3-0324'),
prompt: 'Write a vegetarian lasagna recipe for 4 people.',
});
You can also use the .responses() or .languageModel() factory methods:
const model = huggingface.responses('deepseek-ai/DeepSeek-V3-0324');
// or
const model = huggingface.languageModel('moonshotai/Kimi-K2-Instruct');
Hugging Face language models can be used in the streamText function
(see AI SDK Core).
You can explore the latest and trending models with their capabilities, context size, throughput and pricing on the Hugging Face Inference Models page.
Model Capabilities
| Model | Image Input | Object Generation | Tool Usage | Tool Streaming |
|---|---|---|---|---|
meta-llama/Llama-3.1-8B-Instruct |
||||
meta-llama/Llama-3.1-70B-Instruct |
||||
meta-llama/Llama-3.3-70B-Instruct |
||||
meta-llama/Llama-4-Scout-17B-16E-Instruct |
||||
deepseek-ai/DeepSeek-V3-0324 |
||||
deepseek-ai/DeepSeek-R1 |
||||
deepseek-ai/DeepSeek-R1-Distill-Llama-70B |
||||
Qwen/Qwen3-235B-A22B-Instruct-2507 |
||||
Qwen/Qwen3-Coder-480B-A35B-Instruct |
||||
Qwen/Qwen2.5-VL-7B-Instruct |
||||
google/gemma-3-27b-it |
||||
moonshotai/Kimi-K2-Instruct |
title: Mistral AI description: Learn how to use Mistral.
Mistral AI Provider
The Mistral AI provider contains language model support for the Mistral chat API.
Setup
The Mistral provider is available in the @ai-sdk/mistral module. You can install it with
<Tabs items={['pnpm', 'npm', 'yarn', 'bun']}>
Provider Instance
You can import the default provider instance mistral from @ai-sdk/mistral:
import { mistral } from '@ai-sdk/mistral';
If you need a customized setup, you can import createMistral from @ai-sdk/mistral
and create a provider instance with your settings:
import { createMistral } from '@ai-sdk/mistral';
const mistral = createMistral({
// custom settings
});
You can use the following optional settings to customize the Mistral provider instance:
-
baseURL string
Use a different URL prefix for API calls, e.g. to use proxy servers. The default prefix is
https://api.mistral.ai/v1. -
apiKey string
API key that is being sent using the
Authorizationheader. It defaults to theMISTRAL_API_KEYenvironment variable. -
headers Record<string,string>
Custom headers to include in the requests.
-
fetch (input: RequestInfo, init?: RequestInit) => Promise<Response>
Custom fetch implementation. Defaults to the global
fetchfunction. You can use it as a middleware to intercept requests, or to provide a custom fetch implementation for e.g. testing.
Language Models
You can create models that call the Mistral chat API using a provider instance.
The first argument is the model id, e.g. mistral-large-latest.
Some Mistral chat models support tool calls.
const model = mistral('mistral-large-latest');
Mistral chat models also support additional model settings that are not part of the standard call settings.
You can pass them as an options argument and utilize MistralLanguageModelOptions for typing:
import { mistral, type MistralLanguageModelOptions } from '@ai-sdk/mistral';
const model = mistral('mistral-large-latest');
await generateText({
model,
providerOptions: {
mistral: {
safePrompt: true, // optional safety prompt injection
parallelToolCalls: false, // disable parallel tool calls (one tool per response)
} satisfies MistralLanguageModelOptions,
},
});
The following optional provider options are available for Mistral models:
-
safePrompt boolean
Whether to inject a safety prompt before all conversations.
Defaults to
false. -
documentImageLimit number
Maximum number of images to process in a document.
-
documentPageLimit number
Maximum number of pages to process in a document.
-
strictJsonSchema boolean
Whether to use strict JSON schema validation for structured outputs. Only applies when a schema is provided and only sets the
strictflag in addition to using Custom Structured Outputs, which is used by default if a schema is provided.Defaults to
false. -
structuredOutputs boolean
Whether to use structured outputs. When enabled, tool calls and object generation will be strict and follow the provided schema.
Defaults to
true. -
parallelToolCalls boolean
Whether to enable parallel function calling during tool use. When set to false, the model will use at most one tool per response.
Defaults to
true.
Document OCR
Mistral chat models support document OCR for PDF files. You can optionally set image and page limits using the provider options.
const result = await generateText({
model: mistral('mistral-small-latest'),
messages: [
{
role: 'user',
content: [
{
type: 'text',
text: 'What is an embedding model according to this document?',
},
{
type: 'file',
data: new URL(
'https://github.com/vercel/ai/blob/main/examples/ai-functions/data/ai.pdf?raw=true',
),
mediaType: 'application/pdf',
},
],
},
],
// optional settings:
providerOptions: {
mistral: {
documentImageLimit: 8,
documentPageLimit: 64,
},
},
});
Reasoning Models
Mistral offers reasoning models that provide step-by-step thinking capabilities:
- magistral-small-2506: Smaller reasoning model for efficient step-by-step thinking
- magistral-medium-2506: More powerful reasoning model balancing performance and cost
These models return content that includes <think>...</think> tags containing the reasoning process. To properly extract and separate the reasoning from the final answer, use the extract reasoning middleware:
import { mistral } from '@ai-sdk/mistral';
import {
extractReasoningMiddleware,
generateText,
wrapLanguageModel,
} from 'ai';
const result = await generateText({
model: wrapLanguageModel({
model: mistral('magistral-small-2506'),
middleware: extractReasoningMiddleware({
tagName: 'think',
}),
}),
prompt: 'What is 15 * 24?',
});
console.log('REASONING:', result.reasoningText);
// Output: "Let me calculate this step by step..."
console.log('ANSWER:', result.text);
// Output: "360"
The middleware automatically parses the <think> tags and provides separate reasoningText and text properties in the result.
Example
You can use Mistral language models to generate text with the generateText function:
import { mistral } from '@ai-sdk/mistral';
import { generateText } from 'ai';
const { text } = await generateText({
model: mistral('mistral-large-latest'),
prompt: 'Write a vegetarian lasagna recipe for 4 people.',
});
Mistral language models can also be used in the streamText, generateObject, and streamObject functions
(see AI SDK Core).
Structured Outputs
Mistral chat models support structured outputs using JSON Schema. You can use generateObject or streamObject
with Zod, Valibot, or raw JSON Schema. The SDK sends your schema via Mistral's response_format: { type: 'json_schema' }.
import { mistral } from '@ai-sdk/mistral';
import { generateObject } from 'ai';
import { z } from 'zod';
const result = await generateObject({
model: mistral('mistral-large-latest'),
schema: z.object({
recipe: z.object({
name: z.string(),
ingredients: z.array(z.string()),
instructions: z.array(z.string()),
}),
}),
prompt: 'Generate a simple pasta recipe.',
});
console.log(JSON.stringify(result.object, null, 2));
You can enable strict JSON Schema validation using a provider option:
import { mistral } from '@ai-sdk/mistral';
import { generateObject } from 'ai';
import { z } from 'zod';
const result = await generateObject({
model: mistral('mistral-large-latest'),
providerOptions: {
mistral: {
strictJsonSchema: true, // reject outputs that don't strictly match the schema
},
},
schema: z.object({
title: z.string(),
items: z.array(z.object({ id: z.string(), qty: z.number().int().min(1) })),
}),
prompt: 'Generate a small shopping list.',
});
Model Capabilities
| Model | Image Input | Object Generation | Tool Usage | Tool Streaming |
|---|---|---|---|---|
pixtral-large-latest |
||||
mistral-large-latest |
||||
mistral-medium-latest |
||||
mistral-medium-2505 |
||||
mistral-small-latest |
||||
magistral-small-2506 |
||||
magistral-medium-2506 |
||||
ministral-3b-latest |
||||
ministral-8b-latest |
||||
pixtral-12b-2409 |
||||
open-mistral-7b |
||||
open-mixtral-8x7b |
||||
open-mixtral-8x22b |
Embedding Models
You can create models that call the Mistral embeddings API
using the .embedding() factory method.
const model = mistral.embedding('mistral-embed');
You can use Mistral embedding models to generate embeddings with the embed function:
import { mistral } from '@ai-sdk/mistral';
import { embed } from 'ai';
const { embedding } = await embed({
model: mistral.embedding('mistral-embed'),
value: 'sunny day at the beach',
});
Model Capabilities
| Model | Default Dimensions |
|---|---|
mistral-embed |
1024 |
title: Together.ai description: Learn how to use Together.ai's models with the AI SDK.
Together.ai Provider
The Together.ai provider contains support for 200+ open-source models through the Together.ai API.
Setup
The Together.ai provider is available via the @ai-sdk/togetherai module. You can
install it with
<Tabs items={['pnpm', 'npm', 'yarn', 'bun']}>
Provider Instance
You can import the default provider instance togetherai from @ai-sdk/togetherai:
import { togetherai } from '@ai-sdk/togetherai';
If you need a customized setup, you can import createTogetherAI from @ai-sdk/togetherai
and create a provider instance with your settings:
import { createTogetherAI } from '@ai-sdk/togetherai';
const togetherai = createTogetherAI({
apiKey: process.env.TOGETHER_AI_API_KEY ?? '',
});
You can use the following optional settings to customize the Together.ai provider instance:
-
baseURL string
Use a different URL prefix for API calls, e.g. to use proxy servers. The default prefix is
https://api.together.xyz/v1. -
apiKey string
API key that is being sent using the
Authorizationheader. It defaults to theTOGETHER_AI_API_KEYenvironment variable. -
headers Record<string,string>
Custom headers to include in the requests.
-
fetch (input: RequestInfo, init?: RequestInit) => Promise<Response>
Custom fetch implementation. Defaults to the global
fetchfunction. You can use it as a middleware to intercept requests, or to provide a custom fetch implementation for e.g. testing.
Language Models
You can create Together.ai models using a provider instance. The first argument is the model id, e.g. google/gemma-2-9b-it.
const model = togetherai('google/gemma-2-9b-it');
Reasoning Models
Together.ai exposes the thinking of deepseek-ai/DeepSeek-R1 in the generated text using the <think> tag.
You can use the extractReasoningMiddleware to extract this reasoning and expose it as a reasoning property on the result:
import { togetherai } from '@ai-sdk/togetherai';
import { wrapLanguageModel, extractReasoningMiddleware } from 'ai';
const enhancedModel = wrapLanguageModel({
model: togetherai('deepseek-ai/DeepSeek-R1'),
middleware: extractReasoningMiddleware({ tagName: 'think' }),
});
You can then use that enhanced model in functions like generateText and streamText.
Example
You can use Together.ai language models to generate text with the generateText function:
import { togetherai } from '@ai-sdk/togetherai';
import { generateText } from 'ai';
const { text } = await generateText({
model: togetherai('meta-llama/Meta-Llama-3.1-8B-Instruct-Turbo'),
prompt: 'Write a vegetarian lasagna recipe for 4 people.',
});
Together.ai language models can also be used in the streamText function
(see AI SDK Core).
The Together.ai provider also supports completion models via (following the above example code) togetherai.completion() and embedding models via togetherai.embedding().
Model Capabilities
| Model | Image Input | Object Generation | Tool Usage | Tool Streaming |
|---|---|---|---|---|
meta-llama/Meta-Llama-3.3-70B-Instruct-Turbo |
||||
meta-llama/Meta-Llama-3.1-8B-Instruct-Turbo |
||||
mistralai/Mixtral-8x22B-Instruct-v0.1 |
||||
mistralai/Mistral-7B-Instruct-v0.3 |
||||
deepseek-ai/DeepSeek-V3 |
||||
google/gemma-2b-it |
||||
Qwen/Qwen2.5-72B-Instruct-Turbo |
||||
databricks/dbrx-instruct |
Image Models
You can create Together.ai image models using the .image() factory method.
For more on image generation with the AI SDK see generateImage().
import { togetherai } from '@ai-sdk/togetherai';
import { generateImage } from 'ai';
const { images } = await generateImage({
model: togetherai.image('black-forest-labs/FLUX.1-dev'),
prompt: 'A delighted resplendent quetzal mid flight amidst raindrops',
});
You can pass optional provider-specific request parameters using the providerOptions argument.
import { togetherai } from '@ai-sdk/togetherai';
import { generateImage } from 'ai';
const { images } = await generateImage({
model: togetherai.image('black-forest-labs/FLUX.1-dev'),
prompt: 'A delighted resplendent quetzal mid flight amidst raindrops',
size: '512x512',
// Optional additional provider-specific request parameters
providerOptions: {
togetherai: {
steps: 40,
},
},
});
For a complete list of available provider-specific options, see the Together.ai Image Generation API Reference.
Image Editing
Together AI supports image editing through FLUX Kontext models. Pass input images via prompt.images to transform or edit existing images.
Basic Image Editing
Transform an existing image using text prompts:
const imageBuffer = readFileSync('./input-image.png');
const { images } = await generateImage({
model: togetherai.image('black-forest-labs/FLUX.1-kontext-pro'),
prompt: {
text: 'Turn the cat into a golden retriever dog',
images: [imageBuffer],
},
size: '1024x1024',
providerOptions: {
togetherai: {
steps: 28,
},
},
});
Editing with URL Reference
You can also pass image URLs directly:
const { images } = await generateImage({
model: togetherai.image('black-forest-labs/FLUX.1-kontext-pro'),
prompt: {
text: 'Make the background a lush rainforest',
images: ['https://example.com/photo.png'],
},
size: '1024x1024',
providerOptions: {
togetherai: {
steps: 28,
},
},
});
Supported Image Editing Models
| Model | Description |
|---|---|
black-forest-labs/FLUX.1-kontext-pro |
Production quality, balanced speed |
black-forest-labs/FLUX.1-kontext-max |
Maximum image fidelity |
black-forest-labs/FLUX.1-kontext-dev |
Development and experimentation |
Model Capabilities
Together.ai image models support various image dimensions that vary by model. Common sizes include 512x512, 768x768, and 1024x1024, with some models supporting up to 1792x1792. The default size is 1024x1024.
| Available Models |
|---|
stabilityai/stable-diffusion-xl-base-1.0 |
black-forest-labs/FLUX.1-dev |
black-forest-labs/FLUX.1-dev-lora |
black-forest-labs/FLUX.1-schnell |
black-forest-labs/FLUX.1-canny |
black-forest-labs/FLUX.1-depth |
black-forest-labs/FLUX.1-redux |
black-forest-labs/FLUX.1.1-pro |
black-forest-labs/FLUX.1-pro |
black-forest-labs/FLUX.1-schnell-Free |
Embedding Models
You can create Together.ai embedding models using the .embedding() factory method.
For more on embedding models with the AI SDK see embed().
import { togetherai } from '@ai-sdk/togetherai';
import { embed } from 'ai';
const { embedding } = await embed({
model: togetherai.embedding('togethercomputer/m2-bert-80M-2k-retrieval'),
value: 'sunny day at the beach',
});
Model Capabilities
| Model | Dimensions | Max Tokens |
|---|---|---|
togethercomputer/m2-bert-80M-2k-retrieval |
768 | 2048 |
togethercomputer/m2-bert-80M-8k-retrieval |
768 | 8192 |
togethercomputer/m2-bert-80M-32k-retrieval |
768 | 32768 |
WhereIsAI/UAE-Large-V1 |
1024 | 512 |
BAAI/bge-large-en-v1.5 |
1024 | 512 |
BAAI/bge-base-en-v1.5 |
768 | 512 |
sentence-transformers/msmarco-bert-base-dot-v5 |
768 | 512 |
bert-base-uncased |
768 | 512 |
Reranking Models
You can create Together.ai reranking models using the .reranking() factory method.
For more on reranking with the AI SDK see rerank().
import { togetherai } from '@ai-sdk/togetherai';
import { rerank } from 'ai';
const documents = [
'sunny day at the beach',
'rainy afternoon in the city',
'snowy night in the mountains',
];
const { ranking } = await rerank({
model: togetherai.reranking('Salesforce/Llama-Rank-v1'),
documents,
query: 'talk about rain',
topN: 2,
});
console.log(ranking);
// [
// { originalIndex: 1, score: 0.9, document: 'rainy afternoon in the city' },
// { originalIndex: 0, score: 0.3, document: 'sunny day at the beach' }
// ]
Together.ai reranking models support additional provider options for object documents. You can specify which fields to use for ranking:
import { togetherai } from '@ai-sdk/togetherai';
import { rerank } from 'ai';
const documents = [
{
from: 'Paul Doe',
subject: 'Follow-up',
text: 'We are happy to give you a discount of 20%.',
},
{
from: 'John McGill',
subject: 'Missing Info',
text: 'Here is the pricing from Oracle: $5000/month',
},
];
const { ranking } = await rerank({
model: togetherai.reranking('Salesforce/Llama-Rank-v1'),
documents,
query: 'Which pricing did we get from Oracle?',
providerOptions: {
togetherai: {
rankFields: ['from', 'subject', 'text'], // Specify which fields to rank by
},
},
});
The following provider options are available:
-
rankFields string[]
Array of field names to use for ranking when documents are JSON objects. If not specified, all fields are used.
Model Capabilities
| Model |
|---|
Salesforce/Llama-Rank-v1 |
mixedbread-ai/Mxbai-Rerank-Large-V2 |
title: Cohere description: Learn how to use the Cohere provider for the AI SDK.
Cohere Provider
The Cohere provider contains language and embedding model support for the Cohere chat API.
Setup
The Cohere provider is available in the @ai-sdk/cohere module. You can install it with
<Tabs items={['pnpm', 'npm', 'yarn', 'bun']}>
Provider Instance
You can import the default provider instance cohere from @ai-sdk/cohere:
import { cohere } from '@ai-sdk/cohere';
If you need a customized setup, you can import createCohere from @ai-sdk/cohere
and create a provider instance with your settings:
import { createCohere } from '@ai-sdk/cohere';
const cohere = createCohere({
// custom settings
});
You can use the following optional settings to customize the Cohere provider instance:
-
baseURL string
Use a different URL prefix for API calls, e.g. to use proxy servers. The default prefix is
https://api.cohere.com/v2. -
apiKey string
API key that is being sent using the
Authorizationheader. It defaults to theCOHERE_API_KEYenvironment variable. -
headers Record<string,string>
Custom headers to include in the requests.
-
fetch (input: RequestInfo, init?: RequestInit) => Promise<Response>
Custom fetch implementation. Defaults to the global
fetchfunction. You can use it as a middleware to intercept requests, or to provide a custom fetch implementation for e.g. testing.
Language Models
You can create models that call the Cohere chat API using a provider instance.
The first argument is the model id, e.g. command-r-plus.
Some Cohere chat models support tool calls.
const model = cohere('command-r-plus');
Example
You can use Cohere language models to generate text with the generateText function:
import { cohere } from '@ai-sdk/cohere';
import { generateText } from 'ai';
const { text } = await generateText({
model: cohere('command-r-plus'),
prompt: 'Write a vegetarian lasagna recipe for 4 people.',
});
Cohere language models can also be used in the streamText, generateObject, and streamObject functions
(see AI SDK Core.
Model Capabilities
| Model | Image Input | Object Generation | Tool Usage | Tool Streaming |
|---|---|---|---|---|
command-a-03-2025 |
||||
command-a-reasoning-08-2025 |
||||
command-r7b-12-2024 |
||||
command-r-plus-04-2024 |
||||
command-r-plus |
||||
command-r-08-2024 |
||||
command-r-03-2024 |
||||
command-r |
||||
command |
||||
command-nightly |
||||
command-light |
||||
command-light-nightly |
Reasoning
Cohere has introduced reasoning with the command-a-reasoning-08-2025 model. You can learn more at https://docs.cohere.com/docs/reasoning.
import { cohere } from '@ai-sdk/cohere';
import { generateText } from 'ai';
async function main() {
const { text, reasoning } = await generateText({
model: cohere('command-a-reasoning-08-2025'),
prompt:
"Alice has 3 brothers and she also has 2 sisters. How many sisters does Alice's brother have?",
// optional: reasoning options
providerOptions: {
cohere: {
thinking: {
type: 'enabled',
tokenBudget: 100,
},
},
},
});
console.log(reasoning);
console.log(text);
}
main().catch(console.error);
Embedding Models
You can create models that call the Cohere embed API
using the .embedding() factory method.
const model = cohere.embedding('embed-english-v3.0');
You can use Cohere embedding models to generate embeddings with the embed function:
import { cohere } from '@ai-sdk/cohere';
import { embed } from 'ai';
const { embedding } = await embed({
model: cohere.embedding('embed-english-v3.0'),
value: 'sunny day at the beach',
providerOptions: {
cohere: {
inputType: 'search_document',
},
},
});
Cohere embedding models support additional provider options that can be passed via providerOptions.cohere:
import { cohere } from '@ai-sdk/cohere';
import { embed } from 'ai';
const { embedding } = await embed({
model: cohere.embedding('embed-english-v3.0'),
value: 'sunny day at the beach',
providerOptions: {
cohere: {
inputType: 'search_document',
truncate: 'END',
},
},
});
The following provider options are available:
-
inputType 'search_document' | 'search_query' | 'classification' | 'clustering'
Specifies the type of input passed to the model. Default is
search_query.search_document: Used for embeddings stored in a vector database for search use-cases.search_query: Used for embeddings of search queries run against a vector DB to find relevant documents.classification: Used for embeddings passed through a text classifier.clustering: Used for embeddings run through a clustering algorithm.
-
truncate 'NONE' | 'START' | 'END'
Specifies how the API will handle inputs longer than the maximum token length. Default is
END.NONE: If selected, when the input exceeds the maximum input token length will return an error.START: Will discard the start of the input until the remaining input is exactly the maximum input token length for the model.END: Will discard the end of the input until the remaining input is exactly the maximum input token length for the model.
Model Capabilities
| Model | Embedding Dimensions |
|---|---|
embed-english-v3.0 |
1024 |
embed-multilingual-v3.0 |
1024 |
embed-english-light-v3.0 |
384 |
embed-multilingual-light-v3.0 |
384 |
embed-english-v2.0 |
4096 |
embed-english-light-v2.0 |
1024 |
embed-multilingual-v2.0 |
768 |
Reranking Models
You can create models that call the Cohere rerank API
using the .reranking() factory method.
const model = cohere.reranking('rerank-v3.5');
You can use Cohere reranking models to rerank documents with the rerank function:
import { cohere } from '@ai-sdk/cohere';
import { rerank } from 'ai';
const documents = [
'sunny day at the beach',
'rainy afternoon in the city',
'snowy night in the mountains',
];
const { ranking } = await rerank({
model: cohere.reranking('rerank-v3.5'),
documents,
query: 'talk about rain',
topN: 2,
});
console.log(ranking);
// [
// { originalIndex: 1, score: 0.9, document: 'rainy afternoon in the city' },
// { originalIndex: 0, score: 0.3, document: 'sunny day at the beach' }
// ]
Cohere reranking models support additional provider options that can be passed via providerOptions.cohere:
import { cohere } from '@ai-sdk/cohere';
import { rerank } from 'ai';
const { ranking } = await rerank({
model: cohere.reranking('rerank-v3.5'),
documents: ['sunny day at the beach', 'rainy afternoon in the city'],
query: 'talk about rain',
providerOptions: {
cohere: {
maxTokensPerDoc: 1000,
priority: 1,
},
},
});
The following provider options are available:
-
maxTokensPerDoc number
Maximum number of tokens per document. Default is
4096. -
priority number
Priority of the request. Default is
0.
Model Capabilities
| Model |
|---|
rerank-v3.5 |
rerank-english-v3.0 |
rerank-multilingual-v3.0 |
title: Fireworks description: Learn how to use Fireworks models with the AI SDK.
Fireworks Provider
Fireworks is a platform for running and testing LLMs through their API.
Setup
The Fireworks provider is available via the @ai-sdk/fireworks module. You can install it with
<Tabs items={['pnpm', 'npm', 'yarn', 'bun']}>
Provider Instance
You can import the default provider instance fireworks from @ai-sdk/fireworks:
import { fireworks } from '@ai-sdk/fireworks';
If you need a customized setup, you can import createFireworks from @ai-sdk/fireworks
and create a provider instance with your settings:
import { createFireworks } from '@ai-sdk/fireworks';
const fireworks = createFireworks({
apiKey: process.env.FIREWORKS_API_KEY ?? '',
});
You can use the following optional settings to customize the Fireworks provider instance:
-
baseURL string
Use a different URL prefix for API calls, e.g. to use proxy servers. The default prefix is
https://api.fireworks.ai/inference/v1. -
apiKey string
API key that is being sent using the
Authorizationheader. It defaults to theFIREWORKS_API_KEYenvironment variable. -
headers Record<string,string>
Custom headers to include in the requests.
-
fetch (input: RequestInfo, init?: RequestInit) => Promise<Response>
Custom fetch implementation.
Language Models
You can create Fireworks models using a provider instance.
The first argument is the model id, e.g. accounts/fireworks/models/firefunction-v1:
const model = fireworks('accounts/fireworks/models/firefunction-v1');
Reasoning Models
Fireworks exposes the thinking of deepseek-r1 in the generated text using the <think> tag.
You can use the extractReasoningMiddleware to extract this reasoning and expose it as a reasoning property on the result:
import { fireworks } from '@ai-sdk/fireworks';
import { wrapLanguageModel, extractReasoningMiddleware } from 'ai';
const enhancedModel = wrapLanguageModel({
model: fireworks('accounts/fireworks/models/deepseek-r1'),
middleware: extractReasoningMiddleware({ tagName: 'think' }),
});
You can then use that enhanced model in functions like generateText and streamText.
Example
You can use Fireworks language models to generate text with the generateText function:
import { fireworks } from '@ai-sdk/fireworks';
import { generateText } from 'ai';
const { text } = await generateText({
model: fireworks('accounts/fireworks/models/firefunction-v1'),
prompt: 'Write a vegetarian lasagna recipe for 4 people.',
});
Fireworks language models can also be used in the streamText function
(see AI SDK Core).
Completion Models
You can create models that call the Fireworks completions API using the .completion() factory method:
const model = fireworks.completion('accounts/fireworks/models/firefunction-v1');
Model Capabilities
| Model | Image Input | Object Generation | Tool Usage | Tool Streaming |
|---|---|---|---|---|
accounts/fireworks/models/firefunction-v1 |
||||
accounts/fireworks/models/deepseek-r1 |
||||
accounts/fireworks/models/deepseek-v3 |
||||
accounts/fireworks/models/llama-v3p1-405b-instruct |
||||
accounts/fireworks/models/llama-v3p1-8b-instruct |
||||
accounts/fireworks/models/llama-v3p2-3b-instruct |
||||
accounts/fireworks/models/llama-v3p3-70b-instruct |
||||
accounts/fireworks/models/mixtral-8x7b-instruct |
||||
accounts/fireworks/models/mixtral-8x7b-instruct-hf |
||||
accounts/fireworks/models/mixtral-8x22b-instruct |
||||
accounts/fireworks/models/qwen2p5-coder-32b-instruct |
||||
accounts/fireworks/models/qwen2p5-72b-instruct |
||||
accounts/fireworks/models/qwen-qwq-32b-preview |
||||
accounts/fireworks/models/qwen2-vl-72b-instruct |
||||
accounts/fireworks/models/llama-v3p2-11b-vision-instruct |
||||
accounts/fireworks/models/qwq-32b |
||||
accounts/fireworks/models/yi-large |
||||
accounts/fireworks/models/kimi-k2-instruct |
Embedding Models
You can create models that call the Fireworks embeddings API using the .embedding() factory method:
const model = fireworks.embedding('nomic-ai/nomic-embed-text-v1.5');
You can use Fireworks embedding models to generate embeddings with the embed function:
import { fireworks } from '@ai-sdk/fireworks';
import { embed } from 'ai';
const { embedding } = await embed({
model: fireworks.embedding('nomic-ai/nomic-embed-text-v1.5'),
value: 'sunny day at the beach',
});
Model Capabilities
| Model | Dimensions | Max Tokens |
|---|---|---|
nomic-ai/nomic-embed-text-v1.5 |
768 | 8192 |
Image Models
You can create Fireworks image models using the .image() factory method.
For more on image generation with the AI SDK see generateImage().
import { fireworks } from '@ai-sdk/fireworks';
import { generateImage } from 'ai';
const { image } = await generateImage({
model: fireworks.image('accounts/fireworks/models/flux-1-dev-fp8'),
prompt: 'A futuristic cityscape at sunset',
aspectRatio: '16:9',
});
Image Editing
Fireworks supports image editing through FLUX Kontext models (flux-kontext-pro and flux-kontext-max). Pass input images via prompt.images to transform or edit existing images.
Basic Image Editing
Transform an existing image using text prompts:
const imageBuffer = readFileSync('./input-image.png');
const { images } = await generateImage({
model: fireworks.image('accounts/fireworks/models/flux-kontext-pro'),
prompt: {
text: 'Turn the cat into a golden retriever dog',
images: [imageBuffer],
},
providerOptions: {
fireworks: {
output_format: 'jpeg',
},
},
});
Style Transfer
Apply artistic styles to an image:
const imageBuffer = readFileSync('./input-image.png');
const { images } = await generateImage({
model: fireworks.image('accounts/fireworks/models/flux-kontext-pro'),
prompt: {
text: 'Transform this into a watercolor painting style',
images: [imageBuffer],
},
aspectRatio: '1:1',
});
Model Capabilities
For all models supporting aspect ratios, the following aspect ratios are supported:
1:1 (default), 2:3, 3:2, 4:5, 5:4, 16:9, 9:16, 9:21, 21:9
For all models supporting size, the following sizes are supported:
640 x 1536, 768 x 1344, 832 x 1216, 896 x 1152, 1024x1024 (default), 1152 x 896, 1216 x 832, 1344 x 768, 1536 x 640
| Model | Dimensions Specification | Image Editing |
|---|---|---|
accounts/fireworks/models/flux-kontext-pro |
Aspect Ratio | |
accounts/fireworks/models/flux-kontext-max |
Aspect Ratio | |
accounts/fireworks/models/flux-1-dev-fp8 |
Aspect Ratio | |
accounts/fireworks/models/flux-1-schnell-fp8 |
Aspect Ratio | |
accounts/fireworks/models/playground-v2-5-1024px-aesthetic |
Size | |
accounts/fireworks/models/japanese-stable-diffusion-xl |
Size | |
accounts/fireworks/models/playground-v2-1024px-aesthetic |
Size | |
accounts/fireworks/models/SSD-1B |
Size | |
accounts/fireworks/models/stable-diffusion-xl-1024-v1-0 |
Size |
For more details, see the Fireworks models page.
Stability AI Models
Fireworks also presents several Stability AI models backed by Stability AI API keys and endpoint. The AI SDK Fireworks provider does not currently include support for these models:
| Model ID |
|---|
accounts/stability/models/sd3-turbo |
accounts/stability/models/sd3-medium |
accounts/stability/models/sd3 |
title: DeepSeek description: Learn how to use DeepSeek's models with the AI SDK.
DeepSeek Provider
The DeepSeek provider offers access to powerful language models through the DeepSeek API.
API keys can be obtained from the DeepSeek Platform.
Setup
The DeepSeek provider is available via the @ai-sdk/deepseek module. You can install it with:
<Tabs items={['pnpm', 'npm', 'yarn', 'bun']}>
Provider Instance
You can import the default provider instance deepseek from @ai-sdk/deepseek:
import { deepseek } from '@ai-sdk/deepseek';
For custom configuration, you can import createDeepSeek and create a provider instance with your settings:
import { createDeepSeek } from '@ai-sdk/deepseek';
const deepseek = createDeepSeek({
apiKey: process.env.DEEPSEEK_API_KEY ?? '',
});
You can use the following optional settings to customize the DeepSeek provider instance:
-
baseURL string
Use a different URL prefix for API calls. The default prefix is
https://api.deepseek.com/v1. -
apiKey string
API key that is being sent using the
Authorizationheader. It defaults to theDEEPSEEK_API_KEYenvironment variable. -
headers Record<string,string>
Custom headers to include in the requests.
-
fetch (input: RequestInfo, init?: RequestInit) => Promise<Response>
Custom fetch implementation.
Language Models
You can create language models using a provider instance:
import { deepseek } from '@ai-sdk/deepseek';
import { generateText } from 'ai';
const { text } = await generateText({
model: deepseek('deepseek-chat'),
prompt: 'Write a vegetarian lasagna recipe for 4 people.',
});
You can also use the .chat() or .languageModel() factory methods:
const model = deepseek.chat('deepseek-chat');
// or
const model = deepseek.languageModel('deepseek-chat');
DeepSeek language models can be used in the streamText function
(see AI SDK Core).
Reasoning
DeepSeek has reasoning support for the deepseek-reasoner model. The reasoning is exposed through streaming:
import { deepseek } from '@ai-sdk/deepseek';
import { streamText } from 'ai';
const result = streamText({
model: deepseek('deepseek-reasoner'),
prompt: 'How many "r"s are in the word "strawberry"?',
});
for await (const part of result.fullStream) {
if (part.type === 'reasoning') {
// This is the reasoning text
console.log('Reasoning:', part.text);
} else if (part.type === 'text') {
// This is the final answer
console.log('Answer:', part.text);
}
}
See AI SDK UI: Chatbot for more details on how to integrate reasoning into your chatbot.
Cache Token Usage
DeepSeek provides context caching on disk technology that can significantly reduce token costs for repeated content. You can access the cache hit/miss metrics through the providerMetadata property in the response:
import { deepseek } from '@ai-sdk/deepseek';
import { generateText } from 'ai';
const result = await generateText({
model: deepseek('deepseek-chat'),
prompt: 'Your prompt here',
});
console.log(result.providerMetadata);
// Example output: { deepseek: { promptCacheHitTokens: 1856, promptCacheMissTokens: 5 } }
The metrics include:
promptCacheHitTokens: Number of input tokens that were cachedpromptCacheMissTokens: Number of input tokens that were not cached
Model Capabilities
| Model | Text Generation | Object Generation | Image Input | Tool Usage | Tool Streaming |
|---|---|---|---|---|---|
deepseek-chat |
|||||
deepseek-reasoner |
title: Cerebras description: Learn how to use Cerebras's models with the AI SDK.
Cerebras Provider
The Cerebras provider offers access to powerful language models through the Cerebras API, including their high-speed inference capabilities powered by Wafer-Scale Engines and CS-3 systems.
API keys can be obtained from the Cerebras Platform.
Setup
The Cerebras provider is available via the @ai-sdk/cerebras module. You can install it with:
<Tabs items={['pnpm', 'npm', 'yarn', 'bun']}>
Provider Instance
You can import the default provider instance cerebras from @ai-sdk/cerebras:
import { cerebras } from '@ai-sdk/cerebras';
For custom configuration, you can import createCerebras and create a provider instance with your settings:
import { createCerebras } from '@ai-sdk/cerebras';
const cerebras = createCerebras({
apiKey: process.env.CEREBRAS_API_KEY ?? '',
});
You can use the following optional settings to customize the Cerebras provider instance:
-
baseURL string
Use a different URL prefix for API calls. The default prefix is
https://api.cerebras.ai/v1. -
apiKey string
API key that is being sent using the
Authorizationheader. It defaults to theCEREBRAS_API_KEYenvironment variable. -
headers Record<string,string>
Custom headers to include in the requests.
-
fetch (input: RequestInfo, init?: RequestInit) => Promise<Response>
Custom fetch implementation.
Language Models
You can create language models using a provider instance:
import { cerebras } from '@ai-sdk/cerebras';
import { generateText } from 'ai';
const { text } = await generateText({
model: cerebras('llama3.1-8b'),
prompt: 'Write a vegetarian lasagna recipe for 4 people.',
});
Cerebras language models can be used in the streamText function
(see AI SDK Core).
You can create Cerebras language models using a provider instance. The first argument is the model ID, e.g. llama-3.3-70b:
const model = cerebras('llama-3.3-70b');
You can also use the .languageModel() and .chat() methods:
const model = cerebras.languageModel('llama-3.3-70b');
const model = cerebras.chat('llama-3.3-70b');
Model Capabilities
| Model | Image Input | Object Generation | Tool Usage | Tool Streaming |
|---|---|---|---|---|
llama3.1-8b |
||||
llama-3.3-70b |
||||
gpt-oss-120b |
||||
qwen-3-32b |
||||
qwen-3-235b-a22b-instruct-2507 |
||||
qwen-3-235b-a22b-thinking-2507 |
||||
zai-glm-4.6 |
||||
zai-glm-4.7 |
title: Replicate description: Learn how to use Replicate models with the AI SDK.
Replicate Provider
Replicate is a platform for running open-source AI models. It is a popular choice for running image generation models.
Setup
The Replicate provider is available via the @ai-sdk/replicate module. You can install it with
<Tabs items={['pnpm', 'npm', 'yarn', 'bun']}>
Provider Instance
You can import the default provider instance replicate from @ai-sdk/replicate:
import { replicate } from '@ai-sdk/replicate';
If you need a customized setup, you can import createReplicate from @ai-sdk/replicate
and create a provider instance with your settings:
import { createReplicate } from '@ai-sdk/replicate';
const replicate = createReplicate({
apiToken: process.env.REPLICATE_API_TOKEN ?? '',
});
You can use the following optional settings to customize the Replicate provider instance:
-
baseURL string
Use a different URL prefix for API calls, e.g. to use proxy servers. The default prefix is
https://api.replicate.com/v1. -
apiToken string
API token that is being sent using the
Authorizationheader. It defaults to theREPLICATE_API_TOKENenvironment variable. -
headers Record<string,string>
Custom headers to include in the requests.
-
fetch (input: RequestInfo, init?: RequestInit) => Promise<Response>
Custom fetch implementation.
Image Models
You can create Replicate image models using the .image() factory method.
For more on image generation with the AI SDK see generateImage().
Supported Image Models
The following image models are currently supported by the Replicate provider:
- black-forest-labs/flux-1.1-pro-ultra
- black-forest-labs/flux-1.1-pro
- black-forest-labs/flux-dev
- black-forest-labs/flux-pro
- black-forest-labs/flux-schnell
- bytedance/sdxl-lightning-4step
- fofr/aura-flow
- fofr/latent-consistency-model
- fofr/realvisxl-v3-multi-controlnet-lora
- fofr/sdxl-emoji
- fofr/sdxl-multi-controlnet-lora
- ideogram-ai/ideogram-v2-turbo
- ideogram-ai/ideogram-v2
- lucataco/dreamshaper-xl-turbo
- lucataco/open-dalle-v1.1
- lucataco/realvisxl-v2.0
- lucataco/realvisxl2-lcm
- luma/photon-flash
- luma/photon
- nvidia/sana
- playgroundai/playground-v2.5-1024px-aesthetic
- recraft-ai/recraft-v3-svg
- recraft-ai/recraft-v3
- stability-ai/stable-diffusion-3.5-large-turbo
- stability-ai/stable-diffusion-3.5-large
- stability-ai/stable-diffusion-3.5-medium
- tstramer/material-diffusion
You can also use versioned models.
The id for versioned models is the Replicate model id followed by a colon and the version ID ($modelId:$versionId), e.g.
bytedance/sdxl-lightning-4step:5599ed30703defd1d160a25a63321b4dec97101d98b4674bcc56e41f62f35637.
Basic Usage
import { replicate } from '@ai-sdk/replicate';
import { generateImage } from 'ai';
import { writeFile } from 'node:fs/promises';
const { image } = await generateImage({
model: replicate.image('black-forest-labs/flux-schnell'),
prompt: 'The Loch Ness Monster getting a manicure',
aspectRatio: '16:9',
});
await writeFile('image.webp', image.uint8Array);
console.log('Image saved as image.webp');
Model-specific options
import { replicate } from '@ai-sdk/replicate';
import { generateImage } from 'ai';
const { image } = await generateImage({
model: replicate.image('recraft-ai/recraft-v3'),
prompt: 'The Loch Ness Monster getting a manicure',
size: '1365x1024',
providerOptions: {
replicate: {
style: 'realistic_image',
},
},
});
Versioned Models
import { replicate } from '@ai-sdk/replicate';
import { generateImage } from 'ai';
const { image } = await generateImage({
model: replicate.image(
'bytedance/sdxl-lightning-4step:5599ed30703defd1d160a25a63321b4dec97101d98b4674bcc56e41f62f35637',
),
prompt: 'The Loch Ness Monster getting a manicure',
});
Image Editing
Replicate supports image editing through various models. Pass input images via prompt.images to transform or edit existing images.
Basic Image Editing
Transform an existing image using text prompts:
const imageBuffer = readFileSync('./input-image.png');
const { images } = await generateImage({
model: replicate.image('black-forest-labs/flux-kontext-dev'),
prompt: {
text: 'Turn the cat into a golden retriever dog',
images: [imageBuffer],
},
providerOptions: {
replicate: {
guidance_scale: 7.5,
num_inference_steps: 30,
},
},
});
Inpainting with Mask
Edit specific parts of an image using a mask. For FLUX Fill models, white areas in the mask indicate where the image should be edited:
const image = readFileSync('./input-image.png');
const mask = readFileSync('./mask.png'); // White = inpaint, black = keep
const { images } = await generateImage({
model: replicate.image('black-forest-labs/flux-fill-pro'),
prompt: {
text: 'A sunlit indoor lounge area with a pool containing a flamingo',
images: [image],
mask: mask,
},
providerOptions: {
replicate: {
guidance_scale: 7.5,
num_inference_steps: 30,
},
},
});
Provider Options
Common provider options for image generation:
- maxWaitTimeInSeconds number - Maximum time in seconds to wait for the prediction to complete in sync mode. By default, Replicate uses sync mode with a 60-second timeout. Set to a positive number to use a custom duration (e.g.,
120for 2 minutes). When not specified, uses the default 60-second wait. - guidance_scale number - Guidance scale for classifier-free guidance. Higher values make the output more closely match the prompt.
- num_inference_steps number - Number of denoising steps. More steps = higher quality but slower.
- negative_prompt string - Negative prompt to guide what to avoid in the generation.
- output_format 'png' | 'jpg' | 'webp' - Output image format.
- output_quality number (1-100) - Output image quality. Only applies to jpg and webp.
- strength number (0-1) - Strength of the transformation for img2img. Lower values keep more of the original image.
For more details, see the Replicate models page.
title: Perplexity description: Learn how to use Perplexity's Sonar API with the AI SDK.
Perplexity Provider
The Perplexity provider offers access to Sonar API - a language model that uniquely combines real-time web search with natural language processing. Each response is grounded in current web data and includes detailed citations, making it ideal for research, fact-checking, and obtaining up-to-date information.
API keys can be obtained from the Perplexity Platform.
Setup
The Perplexity provider is available via the @ai-sdk/perplexity module. You can install it with:
<Tabs items={['pnpm', 'npm', 'yarn', 'bun']}>
Provider Instance
You can import the default provider instance perplexity from @ai-sdk/perplexity:
import { perplexity } from '@ai-sdk/perplexity';
For custom configuration, you can import createPerplexity and create a provider instance with your settings:
import { createPerplexity } from '@ai-sdk/perplexity';
const perplexity = createPerplexity({
apiKey: process.env.PERPLEXITY_API_KEY ?? '',
});
You can use the following optional settings to customize the Perplexity provider instance:
-
baseURL string
Use a different URL prefix for API calls. The default prefix is
https://api.perplexity.ai. -
apiKey string
API key that is being sent using the
Authorizationheader. It defaults to thePERPLEXITY_API_KEYenvironment variable. -
headers Record<string,string>
Custom headers to include in the requests.
-
fetch (input: RequestInfo, init?: RequestInit) => Promise<Response>
Custom fetch implementation.
Language Models
You can create Perplexity models using a provider instance:
import { perplexity } from '@ai-sdk/perplexity';
import { generateText } from 'ai';
const { text } = await generateText({
model: perplexity('sonar-pro'),
prompt: 'What are the latest developments in quantum computing?',
});
Sources
Websites that have been used to generate the response are included in the sources property of the result:
import { perplexity } from '@ai-sdk/perplexity';
import { generateText } from 'ai';
const { text, sources } = await generateText({
model: perplexity('sonar-pro'),
prompt: 'What are the latest developments in quantum computing?',
});
console.log(sources);
Provider Options & Metadata
The Perplexity provider includes additional metadata in the response through providerMetadata.
Additional configuration options are available through providerOptions.
const result = await generateText({
model: perplexity('sonar-pro'),
prompt: 'What are the latest developments in quantum computing?',
providerOptions: {
perplexity: {
return_images: true, // Enable image responses (Tier-2 Perplexity users only)
},
},
});
console.log(result.providerMetadata);
// Example output:
// {
// perplexity: {
// usage: { citationTokens: 5286, numSearchQueries: 1 },
// images: [
// { imageUrl: "https://example.com/image1.jpg", originUrl: "https://elsewhere.com/page1", height: 1280, width: 720 },
// { imageUrl: "https://example.com/image2.jpg", originUrl: "https://elsewhere.com/page2", height: 1280, width: 720 }
// ]
// },
// }
The metadata includes:
usage: Object containingcitationTokensandnumSearchQueriesmetricsimages: Array of image URLs whenreturn_imagesis enabled (Tier-2 users only)
You can enable image responses by setting return_images: true in the provider options. This feature is only available to Perplexity Tier-2 users and above.
PDF Support
The Perplexity provider supports reading PDF files.
You can pass PDF files as part of the message content using the file type:
const result = await generateText({
model: perplexity('sonar-pro'),
messages: [
{
role: 'user',
content: [
{
type: 'text',
text: 'What is this document about?',
},
{
type: 'file',
data: fs.readFileSync('./data/ai.pdf'),
mediaType: 'application/pdf',
filename: 'ai.pdf', // optional
},
],
},
],
});
You can also pass the URL of a PDF:
{
type: 'file',
data: new URL('https://example.com/document.pdf'),
mediaType: 'application/pdf',
filename: 'document.pdf', // optional
}
The model will have access to the contents of the PDF file and respond to questions about it.
For more details about Perplexity's capabilities, see the [Perplexity chat completion docs](https://docs.perplexity.ai/api-reference/chat-completions).Model Capabilities
| Model | Image Input | Object Generation | Tool Usage | Tool Streaming |
|---|---|---|---|---|
sonar-deep-research |
||||
sonar-reasoning-pro |
||||
sonar-reasoning |
||||
sonar-pro |
||||
sonar |
title: Luma description: Learn how to use Luma AI models with the AI SDK.
Luma Provider
Luma AI provides state-of-the-art image generation models through their Dream Machine platform. Their models offer ultra-high quality image generation with superior prompt understanding and unique capabilities like character consistency and multi-image reference support.
Setup
The Luma provider is available via the @ai-sdk/luma module. You can install it with
<Tabs items={['pnpm', 'npm', 'yarn', 'bun']}>
Provider Instance
You can import the default provider instance luma from @ai-sdk/luma:
import { luma } from '@ai-sdk/luma';
If you need a customized setup, you can import createLuma and create a provider instance with your settings:
import { createLuma } from '@ai-sdk/luma';
const luma = createLuma({
apiKey: 'your-api-key', // optional, defaults to LUMA_API_KEY environment variable
baseURL: 'custom-url', // optional
headers: {
/* custom headers */
}, // optional
});
You can use the following optional settings to customize the Luma provider instance:
-
baseURL string
Use a different URL prefix for API calls, e.g. to use proxy servers. The default prefix is
https://api.lumalabs.ai. -
apiKey string
API key that is being sent using the
Authorizationheader. It defaults to theLUMA_API_KEYenvironment variable. -
headers Record<string,string>
Custom headers to include in the requests.
-
fetch (input: RequestInfo, init?: RequestInit) => Promise<Response>
Custom fetch implementation. You can use it as a middleware to intercept requests, or to provide a custom fetch implementation for e.g. testing.
Image Models
You can create Luma image models using the .image() factory method.
For more on image generation with the AI SDK see generateImage().
Basic Usage
import { luma, type LumaImageProviderOptions } from '@ai-sdk/luma';
import { generateImage } from 'ai';
import fs from 'fs';
const { image } = await generateImage({
model: luma.image('photon-1'),
prompt: 'A serene mountain landscape at sunset',
aspectRatio: '16:9',
});
const filename = `image-${Date.now()}.png`;
fs.writeFileSync(filename, image.uint8Array);
console.log(`Image saved to ${filename}`);
Image Model Settings
You can customize the generation behavior with optional settings:
const { image } = await generateImage({
model: luma.image('photon-1'),
prompt: 'A serene mountain landscape at sunset',
aspectRatio: '16:9',
maxImagesPerCall: 1, // Maximum number of images to generate per API call
providerOptions: {
luma: {
pollIntervalMillis: 5000, // How often to check for completed images (in ms)
maxPollAttempts: 10, // Maximum number of polling attempts before timeout
},
} satisfies LumaImageProviderOptions,
});
Since Luma processes images through an asynchronous queue system, these settings allow you to tune the polling behavior:
-
maxImagesPerCall number
Override the maximum number of images generated per API call. Defaults to 1.
-
pollIntervalMillis number
Control how frequently the API is checked for completed images while they are being processed. Defaults to 500ms.
-
maxPollAttempts number
Limit how long to wait for results before timing out, since image generation is queued asynchronously. Defaults to 120 attempts.
Model Capabilities
Luma offers two main models:
| Model | Description |
|---|---|
photon-1 |
High-quality image generation with superior prompt understanding |
photon-flash-1 |
Faster generation optimized for speed while maintaining quality |
Both models support the following aspect ratios:
- 1:1
- 3:4
- 4:3
- 9:16
- 16:9 (default)
- 9:21
- 21:9
For more details about supported aspect ratios, see the Luma Image Generation documentation.
Key features of Luma models include:
- Ultra-high quality image generation
- 10x higher cost efficiency compared to similar models
- Superior prompt understanding and adherence
- Unique character consistency capabilities from single reference images
- Multi-image reference support for precise style matching
Image editing
Luma supports different modes of generating images that reference other images.
Modify an image
Images have to be passed as URLs. weight can be configured for each image in the providerOPtions.luma.images array.
await generateImage({
model: luma.image('photon-flash-1'),
prompt: {
text: 'transform the bike to a boat',
images: [
'https://hebbkx1anhila5yf.public.blob.vercel-storage.com/future-me-8hcBWcZOkbE53q3gshhEm16S87qDpF.jpeg',
],
},
providerOptions: {
luma: {
images: [{ weight: 1.0 }],
} satisfies LumaImageProviderOptions,
},
});
Learn more at https://docs.lumalabs.ai/docs/image-generation#modify-image.
Referen an image
Use up to 4 reference images to guide your generation. Useful for creating variations or visualizing complex concepts. Adjust the weight for each image (0-1) to control the influence of reference images.
await generateImage({
model: luma.image('photon-flash-1'),
prompt: {
text: 'A salamander at dusk in a forest pond, in the style of ukiyo-e',
images: [
'https://hebbkx1anhila5yf.public.blob.vercel-storage.com/future-me-8hcBWcZOkbE53q3gshhEm16S87qDpF.jpeg',
],
},
aspectRatio: '1:1',
providerOptions: {
luma: {
referenceType: 'image',
images: [{ weight: 0.8 }],
} satisfies LumaImageProviderOptions,
},
});
Learn more at https://docs.lumalabs.ai/docs/image-generation#image-reference
Style Reference
Apply specific visual styles to your generations using reference images. Control the style influence using the weight parameter.
await generateImage({
model: luma.image('photon-flash-1'),
prompt: 'A blue cream Persian cat launching its website on Vercel',
aspectRatio: '1:1',
providerOptions: {
luma: {
referenceType: 'style',
images: [{ weight: 0.8 }],
} satisfies LumaImageProviderOptions,
},
});
Learn more at https://docs.lumalabs.ai/docs/image-generation#style-reference
Character Reference
Create consistent and personalized characters using up to 4 reference images of the same subject. More reference images improve character representation.
await generateImage({
model: luma.image('photon-flash-1'),
prompt: {
text: 'A woman with a cat riding a broomstick in a forest',
images: [
'https://hebbkx1anhila5yf.public.blob.vercel-storage.com/future-me-8hcBWcZOkbE53q3gshhEm16S87qDpF.jpeg',
],
},
aspectRatio: '1:1',
providerOptions: {
luma: {
referenceType: 'character',
images: [
{
id: 'identity0',
},
],
} satisfies LumaImageProviderOptions,
},
});
Learn more at https://docs.lumalabs.ai/docs/image-generation#character-reference
title: ElevenLabs description: Learn how to use the ElevenLabs provider for the AI SDK.
ElevenLabs Provider
The ElevenLabs provider contains language model support for the ElevenLabs transcription and speech generation APIs.
Setup
The ElevenLabs provider is available in the @ai-sdk/elevenlabs module. You can install it with
<Tabs items={['pnpm', 'npm', 'yarn', 'bun']}>
Provider Instance
You can import the default provider instance elevenlabs from @ai-sdk/elevenlabs:
import { elevenlabs } from '@ai-sdk/elevenlabs';
If you need a customized setup, you can import createElevenLabs from @ai-sdk/elevenlabs and create a provider instance with your settings:
import { createElevenLabs } from '@ai-sdk/elevenlabs';
const elevenlabs = createElevenLabs({
// custom settings, e.g.
fetch: customFetch,
});
You can use the following optional settings to customize the ElevenLabs provider instance:
-
apiKey string
API key that is being sent using the
Authorizationheader. It defaults to theELEVENLABS_API_KEYenvironment variable. -
headers Record<string,string>
Custom headers to include in the requests.
-
fetch (input: RequestInfo, init?: RequestInit) => Promise<Response>
Custom fetch implementation. Defaults to the global
fetchfunction. You can use it as a middleware to intercept requests, or to provide a custom fetch implementation for e.g. testing.
Speech Models
You can create models that call the ElevenLabs speech API
using the .speech() factory method.
The first argument is the model id e.g. eleven_multilingual_v2.
const model = elevenlabs.speech('eleven_multilingual_v2');
The voice argument can be set to a voice ID from the ElevenLabs Voice Library.
You can find voice IDs by selecting a voice in the library and copying its ID.
import { experimental_generateSpeech as generateSpeech } from 'ai';
import { elevenlabs } from '@ai-sdk/elevenlabs';
const result = await generateSpeech({
model: elevenlabs.speech('eleven_multilingual_v2'),
text: 'Hello, world!',
voice: '21m00Tcm4TlvDq8ikWAM', // Rachel voice
});
You can also pass additional provider-specific options using the providerOptions argument:
import { experimental_generateSpeech as generateSpeech } from 'ai';
import { elevenlabs } from '@ai-sdk/elevenlabs';
const result = await generateSpeech({
model: elevenlabs.speech('eleven_multilingual_v2'),
text: 'Hello, world!',
voice: '21m00Tcm4TlvDq8ikWAM',
providerOptions: {
elevenlabs: {
voiceSettings: {
stability: 0.5,
similarityBoost: 0.75,
},
},
},
});
-
language_code string or null
Optional. Language code (ISO 639-1) used to enforce a language for the model. Currently, only Turbo v2.5 and Flash v2.5 support language enforcement. For other models, providing a language code will result in an error. -
voice_settings object or null
Optional. Voice settings that override stored settings for the given voice. These are applied only to the current request.- stability double or null
Optional. Determines how stable the voice is and the randomness between each generation. Lower values introduce broader emotional range; higher values result in a more monotonous voice. - use_speaker_boost boolean or null
Optional. Boosts similarity to the original speaker. Increases computational load and latency. - similarity_boost double or null
Optional. Controls how closely the AI should adhere to the original voice. - style double or null
Optional. Amplifies the style of the original speaker. May increase latency if set above 0.
- stability double or null
-
pronunciation_dictionary_locators array of objects or null
Optional. A list of pronunciation dictionary locators to apply to the text, in order. Up to 3 locators per request.
Each locator object:- pronunciation_dictionary_id string (required)
The ID of the pronunciation dictionary. - version_id string or null (optional)
The version ID of the dictionary. If not provided, the latest version is used.
- pronunciation_dictionary_id string (required)
-
seed integer or null
Optional. If specified, the system will attempt to sample deterministically. Must be between 0 and 4294967295. Determinism is not guaranteed. -
previous_text string or null
Optional. The text that came before the current request's text. Can improve continuity when concatenating generations or influence current generation continuity. -
next_text string or null
Optional. The text that comes after the current request's text. Can improve continuity when concatenating generations or influence current generation continuity. -
previous_request_ids array of strings or null
Optional. List of request IDs for samples generated before this one. Improves continuity when splitting large tasks. Max 3 IDs. If bothprevious_textandprevious_request_idsare sent,previous_textis ignored. -
next_request_ids array of strings or null
Optional. List of request IDs for samples generated after this one. Useful for maintaining continuity when regenerating a sample. Max 3 IDs. If bothnext_textandnext_request_idsare sent,next_textis ignored. -
apply_text_normalization enum
Optional. Controls text normalization.
Allowed values:'auto'(default),'on','off'.'auto': System decides whether to apply normalization (e.g., spelling out numbers).'on': Always apply normalization.'off': Never apply normalization.
Foreleven_turbo_v2_5andeleven_flash_v2_5, can only be enabled with Enterprise plans.
-
apply_language_text_normalization boolean
Optional. Defaults tofalse. Controls language text normalization, which helps with proper pronunciation in some supported languages (currently only Japanese). May significantly increase latency.
Model Capabilities
| Model | Instructions |
|---|---|
eleven_v3 |
|
eleven_multilingual_v2 |
|
eleven_flash_v2_5 |
|
eleven_flash_v2 |
|
eleven_turbo_v2_5 |
|
eleven_turbo_v2 |
|
eleven_monolingual_v1 |
|
eleven_multilingual_v1 |
Transcription Models
You can create models that call the ElevenLabs transcription API
using the .transcription() factory method.
The first argument is the model id e.g. scribe_v1.
const model = elevenlabs.transcription('scribe_v1');
You can also pass additional provider-specific options using the providerOptions argument. For example, supplying the input language in ISO-639-1 (e.g. en) format can sometimes improve transcription performance if known beforehand.
import { experimental_transcribe as transcribe } from 'ai';
import { elevenlabs } from '@ai-sdk/elevenlabs';
const result = await transcribe({
model: elevenlabs.transcription('scribe_v1'),
audio: new Uint8Array([1, 2, 3, 4]),
providerOptions: { elevenlabs: { languageCode: 'en' } },
});
The following provider options are available:
-
languageCode string
An ISO-639-1 or ISO-639-3 language code corresponding to the language of the audio file. Can sometimes improve transcription performance if known beforehand. Defaults to
null, in which case the language is predicted automatically. -
tagAudioEvents boolean
Whether to tag audio events like (laughter), (footsteps), etc. in the transcription. Defaults to
true. -
numSpeakers integer
The maximum amount of speakers talking in the uploaded file. Can help with predicting who speaks when. The maximum amount of speakers that can be predicted is 32. Defaults to
null, in which case the amount of speakers is set to the maximum value the model supports. -
timestampsGranularity enum
The granularity of the timestamps in the transcription. Defaults to
'word'. Allowed values:'none','word','character'. -
diarize boolean
Whether to annotate which speaker is currently talking in the uploaded file. Defaults to
true. -
fileFormat enum
The format of input audio. Defaults to
'other'. Allowed values:'pcm_s16le_16','other'. For'pcm_s16le_16', the input audio must be 16-bit PCM at a 16kHz sample rate, single channel (mono), and little-endian byte order. Latency will be lower than with passing an encoded waveform.
Model Capabilities
| Model | Transcription | Duration | Segments | Language |
|---|---|---|---|---|
scribe_v1 |
||||
scribe_v1_experimental |
title: LM Studio description: Use the LM Studio OpenAI compatible API with the AI SDK.
LM Studio Provider
LM Studio is a user interface for running local models.
It contains an OpenAI compatible API server that you can use with the AI SDK. You can start the local server under the Local Server tab in the LM Studio UI ("Start Server" button).
Setup
The LM Studio provider is available via the @ai-sdk/openai-compatible module as it is compatible with the OpenAI API.
You can install it with
<Tabs items={['pnpm', 'npm', 'yarn', 'bun']}>
Provider Instance
To use LM Studio, you can create a custom provider instance with the createOpenAICompatible function from @ai-sdk/openai-compatible:
import { createOpenAICompatible } from '@ai-sdk/openai-compatible';
const lmstudio = createOpenAICompatible({
name: 'lmstudio',
baseURL: 'http://localhost:1234/v1',
});
Language Models
You can interact with local LLMs in LM Studio using a provider instance.
The first argument is the model id, e.g. llama-3.2-1b.
const model = lmstudio('llama-3.2-1b');
To be able to use a model, you need to download it first.
Example
You can use LM Studio language models to generate text with the generateText function:
import { createOpenAICompatible } from '@ai-sdk/openai-compatible';
import { generateText } from 'ai';
const lmstudio = createOpenAICompatible({
name: 'lmstudio',
baseURL: 'https://localhost:1234/v1',
});
const { text } = await generateText({
model: lmstudio('llama-3.2-1b'),
prompt: 'Write a vegetarian lasagna recipe for 4 people.',
maxRetries: 1, // immediately error if the server is not running
});
LM Studio language models can also be used with streamText.
Embedding Models
You can create models that call the LM Studio embeddings API
using the .embeddingModel() factory method.
const model = lmstudio.embeddingModel('text-embedding-nomic-embed-text-v1.5');
Example - Embedding a Single Value
import { createOpenAICompatible } from '@ai-sdk/openai-compatible';
import { embed } from 'ai';
const lmstudio = createOpenAICompatible({
name: 'lmstudio',
baseURL: 'https://localhost:1234/v1',
});
// 'embedding' is a single embedding object (number[])
const { embedding } = await embed({
model: lmstudio.embeddingModel('text-embedding-nomic-embed-text-v1.5'),
value: 'sunny day at the beach',
});
Example - Embedding Many Values
When loading data, e.g. when preparing a data store for retrieval-augmented generation (RAG), it is often useful to embed many values at once (batch embedding).
The AI SDK provides the embedMany function for this purpose.
Similar to embed, you can use it with embeddings models,
e.g. lmstudio.embeddingModel('text-embedding-nomic-embed-text-v1.5') or lmstudio.embeddingModel('text-embedding-bge-small-en-v1.5').
import { createOpenAICompatible } from '@ai-sdk/openai-compatible';
import { embedMany } from 'ai';
const lmstudio = createOpenAICompatible({
name: 'lmstudio',
baseURL: 'https://localhost:1234/v1',
});
// 'embeddings' is an array of embedding objects (number[][]).
// It is sorted in the same order as the input values.
const { embeddings } = await embedMany({
model: lmstudio.embeddingModel('text-embedding-nomic-embed-text-v1.5'),
values: [
'sunny day at the beach',
'rainy afternoon in the city',
'snowy night in the mountains',
],
});
title: NVIDIA NIM description: Use NVIDIA NIM OpenAI compatible API with the AI SDK.
NVIDIA NIM Provider
NVIDIA NIM provides optimized inference microservices for deploying foundation models. It offers an OpenAI-compatible API that you can use with the AI SDK.
Setup
The NVIDIA NIM provider is available via the @ai-sdk/openai-compatible module as it is compatible with the OpenAI API.
You can install it with:
<Tabs items={['pnpm', 'npm', 'yarn', 'bun']}>
Provider Instance
To use NVIDIA NIM, you can create a custom provider instance with the createOpenAICompatible function from @ai-sdk/openai-compatible:
import { createOpenAICompatible } from '@ai-sdk/openai-compatible';
const nim = createOpenAICompatible({
name: 'nim',
baseURL: 'https://integrate.api.nvidia.com/v1',
headers: {
Authorization: `Bearer ${process.env.NIM_API_KEY}`,
},
});
Language Models
You can interact with NIM models using a provider instance. For example, to use DeepSeek-R1, a powerful open-source language model:
const model = nim.chatModel('deepseek-ai/deepseek-r1');
Example - Generate Text
You can use NIM language models to generate text with the generateText function:
import { createOpenAICompatible } from '@ai-sdk/openai-compatible';
import { generateText } from 'ai';
const nim = createOpenAICompatible({
name: 'nim',
baseURL: 'https://integrate.api.nvidia.com/v1',
headers: {
Authorization: `Bearer ${process.env.NIM_API_KEY}`,
},
});
const { text, usage, finishReason } = await generateText({
model: nim.chatModel('deepseek-ai/deepseek-r1'),
prompt: 'Tell me the history of the San Francisco Mission-style burrito.',
});
console.log(text);
console.log('Token usage:', usage);
console.log('Finish reason:', finishReason);
Example - Stream Text
NIM language models can also generate text in a streaming fashion with the streamText function:
import { createOpenAICompatible } from '@ai-sdk/openai-compatible';
import { streamText } from 'ai';
const nim = createOpenAICompatible({
name: 'nim',
baseURL: 'https://integrate.api.nvidia.com/v1',
headers: {
Authorization: `Bearer ${process.env.NIM_API_KEY}`,
},
});
const result = streamText({
model: nim.chatModel('deepseek-ai/deepseek-r1'),
prompt: 'Tell me the history of the Northern White Rhino.',
});
for await (const textPart of result.textStream) {
process.stdout.write(textPart);
}
console.log();
console.log('Token usage:', await result.usage);
console.log('Finish reason:', await result.finishReason);
NIM language models can also be used with other AI SDK functions like generateObject and streamObject.
title: Clarifai description: Use Clarifai OpenAI compatible API with the AI SDK.
Clarifai Provider
Clarifai is a platform for building, deploying, and scaling AI-powered applications. It provides a suite of tools and APIs for computer vision, natural language processing, and generative AI. Clarifai offers an OpenAI-compatible API through its full-stack AI development platform, making it easy to integrate powerful AI capabilities using the AI SDK.
Setup
The Clarifai provider is available via the @ai-sdk/openai-compatible module as it is compatible with the OpenAI API. You can install it with:
<Tabs items={['pnpm', 'npm', 'yarn']}>
Provider Instance
To use Clarifai, you can create a custom provider instance with the createOpenAICompatible function from @ai-sdk/openai-compatible:
import { createOpenAICompatible } from '@ai-sdk/openai-compatible';
const clarifai = createOpenAICompatible({
name: 'clarifai',
baseURL: 'https://api.clarifai.com/v2/ext/openai/v1',
apiKey: process.env.CLARIFAI_PAT,
});
New users can sign up for a free account on Clarifai to get started.
Language Models
You can interact with various large language models (LLMs) available on Clarifai using the provider instance. For example, to use DeepSeek-R1, a powerful open-source language model:
const model = clarifai.chatModel(
'https://clarifai.com/deepseek-ai/deepseek-chat/models/DeepSeek-R1-0528-Qwen3-8B',
);
Example - Generate Text
You can use Clarifai language models to generate text with the generateText function:
import { createOpenAICompatible } from '@ai-sdk/openai-compatible';
import { generateText } from 'ai';
const clarifai = createOpenAICompatible({
name: 'clarifai',
baseURL: 'https://api.clarifai.com/v2/ext/openai/v1',
apiKey: process.env.CLARIFAI_PAT,
});
const model = clarifai.chatModel(
'https://clarifai.com/deepseek-ai/deepseek-chat/models/DeepSeek-R1-0528-Qwen3-8B',
);
const { text, usage, finishReason } = await generateText({
model,
prompt: 'What is photosynthesis?',
});
console.log(text);
console.log('Token usage:', usage);
console.log('Finish reason:', finishReason);
Example - Streaming Text
You can also stream text responses from Clarifai models using the streamText function:
import { createOpenAICompatible } from '@ai-sdk/openai-compatible';
import { streamText } from 'ai';
const clarifai = createOpenAICompatible({
name: 'clarifai',
baseURL: 'https://api.clarifai.com/v2/ext/openai/v1',
apiKey: process.env.CLARIFAI_PAT,
});
const model = clarifai.chatModel(
'https://clarifai.com/deepseek-ai/deepseek-chat/models/DeepSeek-R1-0528-Qwen3-8B',
);
const result = streamText({
model,
prompt: 'What is photosynthesis?',
});
for await (const message of result.textStream) {
console.log(message);
}
For full list of available models, you can refer to the Clarifai Model Gallery.
title: Heroku description: Use a Heroku OpenAI compatible API with the AI SDK.
Heroku Provider
Heroku is a cloud platform that allows you to deploy and run applications, including AI models with OpenAI API compatibility. You can deploy models that are OpenAI API compatible and use them with the AI SDK.
Setup
The Heroku provider is available via the @ai-sdk/openai-compatible module as it is compatible with the OpenAI API.
You can install it with
<Tabs items={['pnpm', 'npm', 'yarn']}>
Heroku Setup
- Create a test app in Heroku:
heroku create
- Inference using claude-3-5-haiku:
heroku ai:models:create -a $APP_NAME claude-3-5-haiku
- Export Variables:
export INFERENCE_KEY=$(heroku config:get INFERENCE_KEY -a $APP_NAME)
export INFERENCE_MODEL_ID=$(heroku config:get INFERENCE_MODEL_ID -a $APP_NAME)
export INFERENCE_URL=$(heroku config:get INFERENCE_URL -a $APP_NAME)
Provider Instance
To use Heroku, you can create a custom provider instance with the createOpenAICompatible function from @ai-sdk/openai-compatible:
import { createOpenAICompatible } from '@ai-sdk/openai-compatible';
const heroku = createOpenAICompatible({
name: 'heroku',
baseURL: process.env.INFERENCE_URL + '/v1',
apiKey: process.env.INFERENCE_KEY,
});
Be sure to have your INFERENCE_KEY, INFERENCE_MODEL_ID, and INFERENCE_URL set in your environment variables.
Language Models
You can create Heroku models using a provider instance.
The first argument is the served model name, e.g. claude-3-5-haiku.
const model = heroku('claude-3-5-haiku');
Example
You can use Heroku language models to generate text with the generateText function:
import { createOpenAICompatible } from '@ai-sdk/openai-compatible';
import { generateText } from 'ai';
const heroku = createOpenAICompatible({
name: 'heroku',
baseURL: process.env.INFERENCE_URL + '/v1',
apiKey: process.env.INFERENCE_KEY,
});
const { text } = await generateText({
model: heroku('claude-3-5-haiku'),
prompt: 'Tell me about yourself in one sentence',
});
console.log(text);
Heroku language models are also able to generate text in a streaming fashion with the streamText function:
import { createOpenAICompatible } from '@ai-sdk/openai-compatible';
import { streamText } from 'ai';
const heroku = createOpenAICompatible({
name: 'heroku',
baseURL: process.env.INFERENCE_URL + '/v1',
apiKey: process.env.INFERENCE_KEY,
});
const result = streamText({
model: heroku('claude-3-5-haiku'),
prompt: 'Tell me about yourself in one sentence',
});
for await (const message of result.textStream) {
console.log(message);
}
Heroku language models can also be used in the generateObject, and streamObject functions.
title: OpenAI Compatible Providers description: Use OpenAI compatible providers with the AI SDK.
OpenAI Compatible Providers
You can use the OpenAI Compatible Provider package to use language model providers that implement the OpenAI API.
Below we focus on the general setup and provider instance creation. You can also write a custom provider package leveraging the OpenAI Compatible package.
We provide detailed documentation for the following OpenAI compatible providers:
The general setup and provider instance creation is the same for all of these providers.
Setup
The OpenAI Compatible provider is available via the @ai-sdk/openai-compatible module. You can install it with:
<Tabs items={['pnpm', 'npm', 'yarn', 'bun']}>
Provider Instance
To use an OpenAI compatible provider, you can create a custom provider instance with the createOpenAICompatible function from @ai-sdk/openai-compatible:
import { createOpenAICompatible } from '@ai-sdk/openai-compatible';
const provider = createOpenAICompatible({
name: 'providerName',
apiKey: process.env.PROVIDER_API_KEY,
baseURL: 'https://api.provider.com/v1',
includeUsage: true, // Include usage information in streaming responses
});
You can use the following optional settings to customize the provider instance:
-
baseURL string
Set the URL prefix for API calls.
-
apiKey string
API key for authenticating requests. If specified, adds an
Authorizationheader to request headers with the valueBearer <apiKey>. This will be added before any headers potentially specified in theheadersoption. -
headers Record<string,string>
Optional custom headers to include in requests. These will be added to request headers after any headers potentially added by use of the
apiKeyoption. -
queryParams Record<string,string>
Optional custom url query parameters to include in request urls.
-
fetch (input: RequestInfo, init?: RequestInit) => Promise<Response>
Custom fetch implementation. Defaults to the global
fetchfunction. You can use it as a middleware to intercept requests, or to provide a custom fetch implementation for e.g. testing. -
includeUsage boolean
Include usage information in streaming responses. When enabled, usage data will be included in the response metadata for streaming requests. Defaults to
undefined(false). -
supportsStructuredOutputs boolean
Set to true if the provider supports structured outputs. Only relevant for
provider(),provider.chatModel(), andprovider.languageModel().
Language Models
You can create provider models using a provider instance.
The first argument is the model id, e.g. model-id.
const model = provider('model-id');
Example
You can use provider language models to generate text with the generateText function:
import { createOpenAICompatible } from '@ai-sdk/openai-compatible';
import { generateText } from 'ai';
const provider = createOpenAICompatible({
name: 'providerName',
apiKey: process.env.PROVIDER_API_KEY,
baseURL: 'https://api.provider.com/v1',
});
const { text } = await generateText({
model: provider('model-id'),
prompt: 'Write a vegetarian lasagna recipe for 4 people.',
});
Including model ids for auto-completion
import { createOpenAICompatible } from '@ai-sdk/openai-compatible';
import { generateText } from 'ai';
type ExampleChatModelIds =
| 'meta-llama/Llama-3-70b-chat-hf'
| 'meta-llama/Meta-Llama-3.1-8B-Instruct-Turbo'
| (string & {});
type ExampleCompletionModelIds =
| 'codellama/CodeLlama-34b-Instruct-hf'
| 'Qwen/Qwen2.5-Coder-32B-Instruct'
| (string & {});
type ExampleEmbeddingModelIds =
| 'BAAI/bge-large-en-v1.5'
| 'bert-base-uncased'
| (string & {});
const model = createOpenAICompatible<
ExampleChatModelIds,
ExampleCompletionModelIds,
ExampleEmbeddingModelIds
>({
name: 'example',
apiKey: process.env.PROVIDER_API_KEY,
baseURL: 'https://api.example.com/v1',
});
// Subsequent calls to e.g. `model.chatModel` will auto-complete the model id
// from the list of `ExampleChatModelIds` while still allowing free-form
// strings as well.
const { text } = await generateText({
model: model.chatModel('meta-llama/Llama-3-70b-chat-hf'),
prompt: 'Write a vegetarian lasagna recipe for 4 people.',
});
Custom query parameters
Some providers may require custom query parameters. An example is the Azure AI
Model Inference
API
which requires an api-version query parameter.
You can set these via the optional queryParams provider setting. These will be
added to all requests made by the provider.
import { createOpenAICompatible } from '@ai-sdk/openai-compatible';
const provider = createOpenAICompatible({
name: 'providerName',
apiKey: process.env.PROVIDER_API_KEY,
baseURL: 'https://api.provider.com/v1',
queryParams: {
'api-version': '1.0.0',
},
});
For example, with the above configuration, API requests would include the query parameter in the URL like:
https://api.provider.com/v1/chat/completions?api-version=1.0.0.
Image Models
You can create image models using the .imageModel() factory method:
const model = provider.imageModel('model-id');
Basic Image Generation
import { createOpenAICompatible } from '@ai-sdk/openai-compatible';
import { generateImage } from 'ai';
const provider = createOpenAICompatible({
name: 'providerName',
apiKey: process.env.PROVIDER_API_KEY,
baseURL: 'https://api.provider.com/v1',
});
const { images } = await generateImage({
model: provider.imageModel('model-id'),
prompt: 'A futuristic cityscape at sunset',
size: '1024x1024',
});
Image Editing
The OpenAI Compatible provider supports image editing through the /images/edits endpoint. Pass input images via prompt.images to transform or edit existing images.
Basic Image Editing
import { createOpenAICompatible } from '@ai-sdk/openai-compatible';
import { generateImage } from 'ai';
import fs from 'fs';
const provider = createOpenAICompatible({
name: 'providerName',
apiKey: process.env.PROVIDER_API_KEY,
baseURL: 'https://api.provider.com/v1',
});
const imageBuffer = fs.readFileSync('./input-image.png');
const { images } = await generateImage({
model: provider.imageModel('model-id'),
prompt: {
text: 'Turn the cat into a dog but retain the style of the original image',
images: [imageBuffer],
},
});
Inpainting with Mask
Edit specific parts of an image using a mask:
import { createOpenAICompatible } from '@ai-sdk/openai-compatible';
import { generateImage } from 'ai';
import fs from 'fs';
const provider = createOpenAICompatible({
name: 'providerName',
apiKey: process.env.PROVIDER_API_KEY,
baseURL: 'https://api.provider.com/v1',
});
const image = fs.readFileSync('./input-image.png');
const mask = fs.readFileSync('./mask.png');
const { images } = await generateImage({
model: provider.imageModel('model-id'),
prompt: {
text: 'A sunlit indoor lounge area with a pool containing a flamingo',
images: [image],
mask,
},
});
Provider-specific options
The OpenAI Compatible provider supports adding provider-specific options to the request body. These are specified with the providerOptions field in the request body.
For example, if you create a provider instance with the name providerName, you can add a customOption field to the request body like this:
const provider = createOpenAICompatible({
name: 'providerName',
apiKey: process.env.PROVIDER_API_KEY,
baseURL: 'https://api.provider.com/v1',
});
const { text } = await generateText({
model: provider('model-id'),
prompt: 'Hello',
providerOptions: {
providerName: { customOption: 'magic-value' },
},
});
Note that the providerOptions key will be in camelCase. If you set the provider name to provider-name, the options still need to be set on providerOptions.providerName.
The request body sent to the provider will include the customOption field with the value magic-value. This gives you an easy way to add provider-specific options to requests without having to modify the provider or AI SDK code.
Custom Metadata Extraction
The OpenAI Compatible provider supports extracting provider-specific metadata from API responses through metadata extractors. These extractors allow you to capture additional information returned by the provider beyond the standard response format.
Metadata extractors receive the raw, unprocessed response data from the provider, giving you complete flexibility to extract any custom fields or experimental features that the provider may include. This is particularly useful when:
- Working with providers that include non-standard response fields
- Experimenting with beta or preview features
- Capturing provider-specific metrics or debugging information
- Supporting rapid provider API evolution without SDK changes
Metadata extractors work with both streaming and non-streaming chat completions and consist of two main components:
- A function to extract metadata from complete responses
- A streaming extractor that can accumulate metadata across chunks in a streaming response
Here's an example metadata extractor that captures both standard and custom provider data:
const myMetadataExtractor: MetadataExtractor = {
// Process complete, non-streaming responses
extractMetadata: ({ parsedBody }) => {
// You have access to the complete raw response
// Extract any fields the provider includes
return {
myProvider: {
standardUsage: parsedBody.usage,
experimentalFeatures: parsedBody.beta_features,
customMetrics: {
processingTime: parsedBody.server_timing?.total_ms,
modelVersion: parsedBody.model_version,
// ... any other provider-specific data
},
},
};
},
// Process streaming responses
createStreamExtractor: () => {
let accumulatedData = {
timing: [],
customFields: {},
};
return {
// Process each chunk's raw data
processChunk: parsedChunk => {
if (parsedChunk.server_timing) {
accumulatedData.timing.push(parsedChunk.server_timing);
}
if (parsedChunk.custom_data) {
Object.assign(accumulatedData.customFields, parsedChunk.custom_data);
}
},
// Build final metadata from accumulated data
buildMetadata: () => ({
myProvider: {
streamTiming: accumulatedData.timing,
customData: accumulatedData.customFields,
},
}),
};
},
};
You can provide a metadata extractor when creating your provider instance:
const provider = createOpenAICompatible({
name: 'my-provider',
apiKey: process.env.PROVIDER_API_KEY,
baseURL: 'https://api.provider.com/v1',
metadataExtractor: myMetadataExtractor,
});
The extracted metadata will be included in the response under the providerMetadata field:
const { text, providerMetadata } = await generateText({
model: provider('model-id'),
prompt: 'Hello',
});
console.log(providerMetadata.myProvider.customMetric);
This allows you to access provider-specific information while maintaining a consistent interface across different providers.
// CONTRIBUTING GUIDE // https://github.com/vercel/ai/blob/main/contributing/add-new-tool-to-registry.md
export interface Tool { slug: string; name: string; description: string; packageName: string; tags?: string[]; apiKeyEnvName?: string; installCommand: { pnpm: string; npm: string; yarn: string; bun: string; }; codeExample: string; docsUrl?: string; apiKeyUrl?: string; websiteUrl?: string; npmUrl?: string; }
export const tools: Tool[] = [ { slug: 'code-execution', name: 'Code Execution', description: 'Execute Python code in a sandboxed environment using Vercel Sandbox. Run calculations, data processing, and other computational tasks safely in an isolated environment with Python 3.13.', packageName: 'ai-sdk-tool-code-execution', tags: ['code-execution', 'sandbox'], apiKeyEnvName: 'VERCEL_OIDC_TOKEN', installCommand: { pnpm: 'pnpm add ai-sdk-tool-code-execution', npm: 'npm install ai-sdk-tool-code-execution', yarn: 'yarn add ai-sdk-tool-code-execution', bun: 'bun add ai-sdk-tool-code-execution', }, codeExample: `import { generateText, stepCountIs } from 'ai'; import { executeCode } from 'ai-sdk-tool-code-execution';
const { text } = await generateText({ model: 'openai/gpt-5.1-codex', prompt: 'What is 5 + 5 minus 84 cubed?', tools: { executeCode: executeCode(), }, stopWhen: stepCountIs(5), });
console.log(text);, docsUrl: 'https://vercel.com/docs/vercel-sandbox', apiKeyUrl: 'https://vercel.com/docs/vercel-sandbox#authentication', websiteUrl: 'https://vercel.com/docs/vercel-sandbox', npmUrl: 'https://www.npmjs.com/package/ai-sdk-tool-code-execution', }, { slug: 'exa', name: 'Exa', description: 'Exa is a web search API that adds web search capabilities to your LLMs. Exa can search the web for code docs, current information, news, articles, and a lot more. Exa performs real-time web searches and can get page content from specific URLs. Add Exa web search tool to your LLMs in just a few lines of code.', packageName: '@exalabs/ai-sdk', tags: ['search', 'web', 'extraction'], apiKeyEnvName: 'EXA_API_KEY', installCommand: { pnpm: 'pnpm add @exalabs/ai-sdk', npm: 'npm install @exalabs/ai-sdk', yarn: 'yarn add @exalabs/ai-sdk', bun: 'bun add @exalabs/ai-sdk', }, codeExample: import { generateText, stepCountIs } from 'ai';
import { webSearch } from '@exalabs/ai-sdk';
const { text } = await generateText({ model: 'google/gemini-3-pro-preview', prompt: 'Tell me the latest developments in AI', tools: { webSearch: webSearch(), }, stopWhen: stepCountIs(3), });
console.log(text);, docsUrl: 'https://docs.exa.ai/reference/vercel', apiKeyUrl: 'https://dashboard.exa.ai/api-keys', websiteUrl: 'https://exa.ai', npmUrl: 'https://www.npmjs.com/package/@exalabs/ai-sdk', }, { slug: 'parallel', name: 'Parallel', description: 'Parallel gives AI agents best-in-class tools to search and extract context from the web. Web results returned by Parallel are compressed for optimal token efficiency at inference time.', packageName: '@parallel-web/ai-sdk-tools', tags: ['search', 'web', 'extraction'], apiKeyEnvName: 'PARALLEL_API_KEY', installCommand: { pnpm: 'pnpm add @parallel-web/ai-sdk-tools', npm: 'npm install @parallel-web/ai-sdk-tools', yarn: 'yarn add @parallel-web/ai-sdk-tools', bun: 'bun add @parallel-web/ai-sdk-tools', }, codeExample: import { generateText, stepCountIs } from 'ai';
import { searchTool, extractTool } from '@parallel-web/ai-sdk-tools';
const { text } = await generateText({ model: 'google/gemini-3-pro-preview', prompt: 'When was Vercel Ship AI?', tools: { webSearch: searchTool, webExtract: extractTool, }, stopWhen: stepCountIs(3), });
console.log(text);, apiKeyUrl: 'https://platform.parallel.ai', websiteUrl: 'https://parallel.ai', npmUrl: 'https://www.npmjs.com/package/@parallel-web/ai-sdk-tools', }, { slug: 'ctx-zip', name: 'ctx-zip', description: 'Transform MCP tools and AI SDK tools into code, write it to a Vercel sandbox file system and have the agent import the tools, write code, and execute it.', packageName: 'ctx-zip', tags: ['code-execution', 'sandbox', 'mcp', 'code-mode'], apiKeyEnvName: 'VERCEL_OIDC_TOKEN', installCommand: { pnpm: 'pnpm add ctx-zip', npm: 'npm install ctx-zip', yarn: 'yarn add ctx-zip', bun: 'bun add ctx-zip', }, codeExample: import { generateText, stepCountIs } from 'ai';
import { createVercelSandboxCodeMode, SANDBOX_SYSTEM_PROMPT } from 'ctx-zip';
const { tools } = await createVercelSandboxCodeMode({ servers: [ { name: 'vercel', url: 'https://mcp.vercel.com', useSSE: false, headers: { Authorization: `Bearer ${process.env.VERCEL_API_KEY}`, }, }, ], standardTools: { weather: weatherTool, }, });
const { text } = await generateText({ model: 'openai/gpt-5.2', tools, stopWhen: stepCountIs(20), system: SANDBOX_SYSTEM_PROMPT, messages: [ { role: 'user', content: 'What tools are available from the Vercel MCP server?', }, ], });
console.log(text);
, docsUrl: 'https://github.com/karthikscale3/ctx-zip/blob/main/README.md', apiKeyUrl: 'https://vercel.com/docs/vercel-sandbox#authentication', websiteUrl: 'https://github.com/karthikscale3/ctx-zip/blob/main/README.md', npmUrl: 'https://www.npmjs.com/package/ctx-zip', }, { slug: 'perplexity-search', name: 'Perplexity Search', description: "Search the web with real-time results and advanced filtering powered by Perplexity's Search API. Provides ranked search results with domain, language, date range, and recency filters. Supports multi-query searches and regional search results.", packageName: '@perplexity-ai/ai-sdk', tags: ['search', 'web'], apiKeyEnvName: 'PERPLEXITY_API_KEY', installCommand: { pnpm: 'pnpm add @perplexity-ai/ai-sdk', npm: 'npm install @perplexity-ai/ai-sdk', yarn: 'yarn add @perplexity-ai/ai-sdk', bun: 'bun add @perplexity-ai/ai-sdk', }, codeExample: import { generateText, stepCountIs } from 'ai';
import { perplexitySearch } from '@perplexity-ai/ai-sdk';
const { text } = await generateText({ model: 'openai/gpt-5.2', prompt: 'What are the latest AI developments? Use search to find current information.', tools: { search: perplexitySearch(), }, stopWhen: stepCountIs(3), });
console.log(text);, docsUrl: 'https://docs.perplexity.ai/guides/search-quickstart', apiKeyUrl: 'https://www.perplexity.ai/account/api/keys', websiteUrl: 'https://www.perplexity.ai', npmUrl: 'https://www.npmjs.com/package/@perplexity-ai/ai-sdk', }, { slug: 'tavily', name: 'Tavily', description: 'Tavily is a web intelligence platform offering real-time web search optimized for AI applications. Tavily provides comprehensive web research capabilities including search, content extraction, website crawling, and site mapping to power AI agents with current information.', packageName: '@tavily/ai-sdk', tags: ['search', 'extract', 'crawl'], apiKeyEnvName: 'TAVILY_API_KEY', installCommand: { pnpm: 'pnpm add @tavily/ai-sdk', npm: 'npm install @tavily/ai-sdk', yarn: 'yarn add @tavily/ai-sdk', bun: 'bun add @tavily/ai-sdk', }, codeExample: import { generateText, stepCountIs } from 'ai';
import { tavilySearch } from '@tavily/ai-sdk';
const { text } = await generateText({ model: 'google/gemini-3-pro-preview', prompt: 'What are the latest developments in agentic search?', tools: { webSearch: tavilySearch, }, stopWhen: stepCountIs(3), });
console.log(text);, docsUrl: 'https://docs.tavily.com/documentation/integrations/vercel', apiKeyUrl: 'https://app.tavily.com/home', websiteUrl: 'https://tavily.com', npmUrl: 'https://www.npmjs.com/package/@tavily/ai-sdk', }, { slug: 'firecrawl', name: 'Firecrawl', description: 'Firecrawl tools for the AI SDK. Web scraping, search, crawling, and data extraction for AI applications. Scrape any website into clean markdown, search the web, crawl entire sites, and extract structured data.', packageName: 'firecrawl-aisdk', tags: ['scraping', 'search', 'crawling', 'extraction', 'web'], apiKeyEnvName: 'FIRECRAWL_API_KEY', installCommand: { pnpm: 'pnpm add firecrawl-aisdk', npm: 'npm install firecrawl-aisdk', yarn: 'yarn add firecrawl-aisdk', bun: 'bun add firecrawl-aisdk', }, codeExample: import { generateText, stepCountIs } from 'ai';
import { scrapeTool } from 'firecrawl-aisdk';
const { text } = await generateText({ model: 'openai/gpt-5-mini', prompt: 'Scrape https://firecrawl.dev and summarize what it does', tools: { scrape: scrapeTool, }, stopWhen: stepCountIs(3), });
console.log(text);, docsUrl: 'https://docs.firecrawl.dev/integrations/ai-sdk', apiKeyUrl: 'https://firecrawl.dev/app/api-keys', websiteUrl: 'https://firecrawl.dev', npmUrl: 'https://www.npmjs.com/package/firecrawl-aisdk', }, { slug: 'bedrock-agentcore', name: 'Amazon Bedrock AgentCore', description: 'Fully managed Browser and Code Interpreter tools for AI agents. Browser is a fast and secure cloud-based runtime for interacting with web applications, filling forms, navigating websites, and extracting information. Code Interpreter provides an isolated sandbox for executing Python, JavaScript, and TypeScript code to solve complex tasks.', packageName: 'bedrock-agentcore', tags: ['code-execution', 'browser-automation', 'sandbox'], apiKeyEnvName: 'AWS_ROLE_ARN', installCommand: { pnpm: 'pnpm add bedrock-agentcore', npm: 'npm install bedrock-agentcore', yarn: 'yarn add bedrock-agentcore', bun: 'bun add bedrock-agentcore', }, codeExample: import { generateText, stepCountIs } from 'ai';
import { bedrock } from '@ai-sdk/amazon-bedrock';
import { awsCredentialsProvider } from '@vercel/oidc-aws-credentials-provider';
import { CodeInterpreterTools } from 'bedrock-agentcore/code-interpreter/vercel-ai';
import { BrowserTools } from 'bedrock-agentcore/browser/vercel-ai';
const credentialsProvider = awsCredentialsProvider({ roleArn: process.env.AWS_ROLE_ARN!, });
const codeInterpreter = new CodeInterpreterTools({ credentialsProvider }); const browser = new BrowserTools({ credentialsProvider });
try { const { text } = await generateText({ model: bedrock('us.anthropic.claude-sonnet-4-20250514-v1:0'), prompt: 'Go to https://news.ycombinator.com and get the first story title. Then use Python to reverse the string.', tools: { ...codeInterpreter.tools, ...browser.tools, }, stopWhen: stepCountIs(5), });
console.log(text);
} finally {
await codeInterpreter.stopSession();
await browser.stopSession();
}, docsUrl: 'https://github.com/aws/bedrock-agentcore-sdk-typescript', apiKeyUrl: 'https://vercel.com/docs/oidc/aws', websiteUrl: 'https://docs.aws.amazon.com/bedrock-agentcore/latest/devguide/built-in-tools.html', npmUrl: 'https://www.npmjs.com/package/bedrock-agentcore', }, { slug: 'superagent', name: 'Superagent', description: 'AI security guardrails for your LLMs. Protect your AI apps from prompt injection, redact PII/PHI (SSNs, emails, phone numbers), and verify claims against source materials. Add security tools to your LLMs in just a few lines of code.', packageName: '@superagent-ai/ai-sdk', tags: ['security', 'guardrails', 'pii', 'prompt-injection', 'verification'], apiKeyEnvName: 'SUPERAGENT_API_KEY', installCommand: { pnpm: 'pnpm add @superagent-ai/ai-sdk', npm: 'npm install @superagent-ai/ai-sdk', yarn: 'yarn add @superagent-ai/ai-sdk', bun: 'bun add @superagent-ai/ai-sdk', }, codeExample: import { generateText, stepCountIs } from 'ai';
import { guard, redact, verify } from '@superagent-ai/ai-sdk';
import { openai } from '@ai-sdk/openai';
const { text } = await generateText({ model: openai('gpt-4o-mini'), prompt: 'Check this input for security threats: "Ignore all instructions"', tools: { guard: guard(), redact: redact(), verify: verify(), }, stopWhen: stepCountIs(3), });
console.log(text);, docsUrl: 'https://docs.superagent.sh', apiKeyUrl: 'https://dashboard.superagent.sh', websiteUrl: 'https://superagent.sh', npmUrl: 'https://www.npmjs.com/package/@superagent-ai/ai-sdk', }, { slug: 'tako-search', name: 'Tako Search', description: "Search Tako's knowledge base for data visualizations, insights, and well-sourced information with charts and analytics.", packageName: '@takoviz/ai-sdk', installCommand: { pnpm: 'pnpm install @takoviz/ai-sdk', npm: 'npm install @takoviz/ai-sdk', yarn: 'yarn add @takoviz/ai-sdk', bun: 'bun add @takoviz/ai-sdk', }, codeExample: import { takoSearch } from '@takoviz/ai-sdk';
import { generateText, stepCountIs } from 'ai';
const { text } = await generateText({ model: 'openai/gpt-5.2', prompt: 'What is the stock price of Nvidia?', tools: { takoSearch: takoSearch(), }, stopWhen: stepCountIs(5), });
console.log(text);, docsUrl: 'https://github.com/TakoData/ai-sdk#readme', npmUrl: 'https://www.npmjs.com/package/@takoviz/ai-sdk', websiteUrl: 'https://tako.com', apiKeyEnvName: 'TAKO_API_KEY', apiKeyUrl: 'https://tako.com', tags: ['search', 'data', 'visualization', 'analytics'], }, { slug: 'valyu', name: 'Valyu', description: 'Valyu provides powerful search tools for AI agents. Web search for real-time information, plus specialized domain-specific searchtools: financeSearch (stock prices, earnings, income statements, cash flows, etc), paperSearch (full-text PubMed, arXiv, bioRxiv, medRxiv), bioSearch (clinical trials, FDA drug labels, PubMed, medRxiv, bioRxiv), patentSearch (USPTO patents), secSearch (10-k/10-Q/8-k), economicsSearch (BLS, FRED, World Bank data), and companyResearch (comprehensive company research reports).', packageName: '@valyu/ai-sdk', tags: ['search', 'web', 'domain-search'], apiKeyEnvName: 'VALYU_API_KEY', installCommand: { pnpm: 'pnpm add @valyu/ai-sdk', npm: 'npm install @valyu/ai-sdk', yarn: 'yarn add @valyu/ai-sdk', bun: 'bun add @valyu/ai-sdk', }, codeExample: import { generateText, stepCountIs } from 'ai';
import { webSearch } from '@valyu/ai-sdk';
// Available specialised search tools: financeSearch, paperSearch,
// bioSearch, patentSearch, secSearch, economicsSearch, companyResearch
const { text } = await generateText({ model: 'google/gemini-3-pro-preview', prompt: 'Latest data center projects for AI inference?', tools: { webSearch: webSearch(), }, stopWhen: stepCountIs(3), });
console.log(text);, docsUrl: 'https://docs.valyu.ai/integrations/vercel-ai-sdk', apiKeyUrl: 'https://platform.valyu.ai', websiteUrl: 'https://valyu.ai', npmUrl: 'https://www.npmjs.com/package/@valyu/ai-sdk', }, { slug: 'airweave', name: 'Airweave', description: 'Airweave is an open-source platform that makes any app searchable for your agent. Sync and search across 35+ data sources (Notion, Slack, Google Drive, databases, and more) with semantic search. Add unified search across all your connected data to your AI applications in just a few lines of code.', packageName: '@airweave/vercel-ai-sdk', tags: ['search', 'rag', 'data-sources', 'semantic-search'], apiKeyEnvName: 'AIRWEAVE_API_KEY', installCommand: { pnpm: 'pnpm install @airweave/vercel-ai-sdk', npm: 'npm install @airweave/vercel-ai-sdk', yarn: 'yarn add @airweave/vercel-ai-sdk', bun: 'bun add @airweave/vercel-ai-sdk', }, codeExample: import { generateText, stepCountIs } from 'ai';
import { airweaveSearch } from '@airweave/vercel-ai-sdk';
const { text } = await generateText({ model: 'anthropic/claude-sonnet-4.5', prompt: 'What were the key decisions from last week?', tools: { search: airweaveSearch({ defaultCollection: 'my-knowledge-base', }), }, stopWhen: stepCountIs(3), });
console.log(text);, docsUrl: 'https://docs.airweave.ai', apiKeyUrl: 'https://app.airweave.ai/settings/api-keys', websiteUrl: 'https://airweave.ai', npmUrl: 'https://www.npmjs.com/package/@airweave/vercel-ai-sdk', }, { slug: 'bash-tool', name: 'bash-tool', description: 'Provides bash, readFile, and writeFile tools for AI agents. Supports @vercel/sandbox for full VM isolation.', packageName: 'bash-tool', tags: ['bash', 'file-system', 'sandbox', 'code-execution'], installCommand: { pnpm: 'pnpm install bash-tool', npm: 'npm install bash-tool', yarn: 'yarn add bash-tool', bun: 'bun add bash-tool', }, codeExample: import { generateText, stepCountIs } from 'ai';
import { createBashTool } from 'bash-tool';
const { tools } = await createBashTool({ files: { 'src/index.ts': "export const hello = 'world';" }, });
const { text } = await generateText({ model: 'anthropic/claude-sonnet-4', prompt: 'List the files in src/ and show me the contents of index.ts', tools, stopWhen: stepCountIs(5), });
console.log(text);`, docsUrl: 'https://github.com/vercel/bash-tool', websiteUrl: 'https://github.com/vercel/bash-tool', npmUrl: 'https://www.npmjs.com/package/bash-tool', }, ];